https://www.onnit.com/blogs/the-edge.atomOnnit - The Edge2025-07-15T17:22:41-05:00Onnithttps://www.onnit.com/blogs/the-edge/7-great-serratus-anterior-posterior-exercises2025-07-10T10:55:27-05:002025-08-14T14:16:59-05:007 Great Serratus Anterior & Posterior ExercisesJeremy GottliebWe all have one muscle that we think is the true mark of a great physique. Many will say it’s six-packabs, while others will argue it’s a big set oftraps. There’s another muscle group, however, that’s not often called out by name or brought up in conversation, but, when you point to it, everyone seems to agree that it’s common to the best bodies in the world. It also happens to be the key to shoulder health and upper-body power¦ Give up? It’s the serratus anterior.
To the untrained eye, the serratus anterior muscle may appear to be an extension of the obliques, but it’s a muscle all its own, and its function is very different. Together with its twin on the back side of your body, the serratus posterior,the serratus musclesanchorthe shoulders, allow you to breathe, and, when well-developed on a lean physique, show the world you’re a finely-tuned athlete.
We broke out our anatomy books and talked to an expert to bring you the definitive guide to training the serratus muscles for aesthetics, performance, and injury prevention.
What Are Your Serratus Muscles and Why Train Them?
There are three sets of serratus muscles. The best known of the group is the serratus anterior (SA)—it’s those finger-like muscles under your pec that pop out when you raise yourarmoverhead (that is, if you’re lean enough to see them). The other, lesser-known two are the serratus posterior (SP) superior and inferior. As the name implies, they lie on the back of your torso.
Serratus Anterior (SA)
The SA muscle originates at the first to ninth ribs and inserts on the inner side of the front of the scapula (shoulder blade), close to the spine. It has a fan shape with serrated, sawtooth-like attachments on the ribs, which gives it its name.The SA works to protract the shoulder blade—that is, roll your shoulder forward when you reach your arm in front of you—as well as rotate the shoulder blade upward when you raise your arm overhead, stabilize the scapula, and lift the ribs during inhalation. Since it works to pull the shoulder forward when you’re throwing a punch, the SA has been nicknamed the boxer’s muscle.
Serratus Posterior (SP)
The SP consists of two distinct wing-shaped muscles that mirror each other on the back of your torso. The SP superior lies between your shoulder blades, under your trapezius, on the upper back. It originates on the ligaments of the upper spine, and the cervical and thoracic vertebrae, and it inserts on ribs two through five. Meanwhile, the SP inferior rests on your lower back, under your lats. It starts on the ligaments of the lower spine and the lumbar and thoracic vertebrae and reaches upward to insert on ribs nine through 12.
Scientists aren’t certain they know all the actions the SP can perform, but it’s pretty clear that the superior portion helps raise the upper ribs when you breathe in, while the inferior draws the lower ribs downward and backward when you breathe out.
Training the SA and SP
The serratus anterior plays a crucial role in the shoulder’s health and durability. Because it helps control movement of the shoulder blade, and even anchors the scapula to the rib cage,it’s vital for performing any kind of press, push, throwing action, or upper-body martial arts strike.“Think of your body as a sailboat and your upper arm as the sail,” says Alexander Friel, DC, a care provider atAirrosticlinic in Dallas, TX. “In order to get the boat moving, you have to hoist the sail. Your serratus anterior is the rope that lifts the sail.”
When someone’s SA is not functioning properly, it is very easy to see. The shoulder blade will not slide smoothly forward around the ribs. It will actually flare off the back, separating from the rib cage—a condition called scapular winging, which can result in shoulder injury.
The serratus anterior can be trained with a number of pushing and pressing exercises—basically, anything that involves the shoulder blades, says Friel.The serratus posterior muscles, on the other hand, really can’t be isolated and trained directly.Since they work when you breathe—particularly when you inhale and exhale forcefully—you can rest assured that they’re getting trained when you perform other exercises and activities that make you breathe hard. Furthermore, unlike the SA, the SP are invisible from the outside, so they don’t contribute to the aesthetics of your physique.
How To Stretch The Serratus Muscles
Activities that involve repetitive overhead shoulder motions can bring tightness and injury to the serratus anterior. These include swimming and tennis, as well as weight training—particularly, lifting heavy on bench and overhead presses. Poor posture (slouching) can also lead to tight muscles around the shoulders and ribs. The following stretches may provide some relief.
Serratus Anterior
SA Stretch On Bench
[See 0:28 in the video above]
Friel recommends this stretch, which you’ll also likely feel in your lats and triceps.
Step 1.Hold a yoga block or light dumbbell with both hands, and kneel on the floor perpendicular to a bench. Bend your elbows 90 degrees and rest them on the bench; bend your hips and knees 90 degrees, and brace yourcore.
Step 2.Gently press your chest toward the floor while you bend your elbows back toward you, stretching your serratus. Hold the stretch 15–30 seconds.
That’s one set. Perform 3 sets.
The late Chris Jarmey, D.S., author ofThe Concise Book of Muscles, a comprehensive guide to anatomy, now in its fourth edition, also suggests stretching one side of the serratus at a time.
Chair Stretch
[See 0:57 in the video]
Step 1.Sit in a chair with a back support and turn your body to the right 90 degrees. Let your arm hang over the back of the chair, and grasp the bottom of the chair for stability.
Step 2.Gently turn away from the back of the chair until you feel a stretch in your rib cage. Hold 30 seconds.
Alternate sides until you’ve stretched both for 3 rounds.
In addition to the above, stretches that target the pec and deltoid may stretch the SA involuntarily as well, so include them in any program with the goal of lengthening the serratus anterior.
Serratus Posterior
Dr. Friel calls the serratus posterior a “small, controversial muscle,” because its full purpose isn’t certain, and it can’t be targeted and isolated like other muscles. However, the following stretch will help to lengthen it, as well as the muscles in your hips and the back side of your body.
Step 1.Place two heavykettlebellson the floor, shoulder-width distance apart. (Or, elevate some dumbbells on a mat or blocks so they’re a few inches above the floor.)
Step 2.Stand behind the kettlebells with feet hip-width apart and hinge at the hips, driving your butt back, as if doing aRomanian deadliftor bent-over row. Continue until your torso is nearly parallel to the floor, or as close as is needed for you to be able to reach the kettlebells. Keep a long spine so that your lower back is flat.
Step 3.When you can reach the kettlebells, grasp the handles and hold the position. You should feel a stretch on your back between your shoulder blades—the serratus posterior will be stretching along with your other upper back muscles. Hold the position for 30 seconds, breathing slowly and deeply to increase the stretch. That’s one set.
Perform 3 sets.
3 Serratus Anterior Exercises
Friel suggests the following to build up your SA.
1. Pushup Plus
[See 2:12 in the video]
Step 1.Get into a pushup position on the floor with hands slightly wider than shoulder width. Think “long spine,” so your body forms a straight line from your head to your heels. Draw your ribs down, and tuck your pelvis slightly so that it’s perpendicular to the floor. Brace your core.
Step 2.Keeping your elbows locked, actively lower your upper body toward the floor by squeezing your shoulder blades together. The range of motion is small.
Step 3.Drive your hands into the floor like you’re doing a pushup, but keep yourarmsstraight, and move only at the shoulders. Think about spreading your shoulder blades apart so your upper back moves toward the ceiling. Another cue is to think about pushing the floor away from you, rather than the other way around. Go as high as you can without losing your straight body position, and hold the top position for a second. That’s one rep.
Perform sets of 8–15 reps.
If the basic pushup plus is too easy, wrap an elastic exercise band around your upper back for extra resistance. If it’s too hard, you can perform the same movement on your knees, or on an elevated surface, such as a countertop.
2. Pullup Plus
[See 3:15 in the video]
Step 1.Hang from a pullup bar with hands just outside shoulder width and palms facing forward. Draw your ribs down and tuck your tailbone so that your pelvis is level with the floor. Brace your core.
Step 2.Drive your shoulder blades down and together, so that your body lifts higher toward the bar, but keep your arms straight so that the movement is only at the shoulders.
Step 3.Lower your body back down, allowing your serratus to stretch at the bottom, but don’trelaxcompletely. Perform as many reps as possible.
3. Farmer’s Walk
[See 3:46 in the video]
Step 1.Pick up a pair of heavy dumbbells and draw your shoulder blades back and down. Walk briskly for as far as you can while Keep good posture—chest proud, standing tall and straight.
1 Serratus Posterior Exercise
[See 4:00 in the video]
The best way to work the SP is simply by maintaining perfect posture and breathing. “Keep your pelvis tucked under you,” says Friel, which means it will be level with the floor. “Stand up and squeeze your glutes and abs—you’ll feel your pelvis stabilize underneath you.” At the same time, pretend you have a fishing line attached to your sternum (your breastbone) that’s pulling straight upward. Standing tall with a level pelvis is perfect posture.
Practice breathing in this position. Do a set of 20–25 deep breaths, drawing the air into your abdomen. This means expanding your belly 360 degrees, rather than letting your shoulders rise and fall. Take 8–10 seconds for each inhale and 6–8 seconds on every exhale.
Great Complementary Exercises For Your Workout
Remember that any exercise that has the shoulder blades moving is going to activate your serratus anterior to a large degree. The following moves not only hit the SA hard but they train many other muscles as well, and are particularly popular for physique development. The ab rollout doubles as a core/six-pack exercise, the pullover as achest and backhit, and the overhead press as a shoulder, tricep, and overall strength-builder.
Ab Rollout
[See 4:35 in the video]
Step 1.Kneel on the floor and hold an ab wheel beneath your shoulders. Draw your ribs down, tuck your tailbone, and brace your core, so that your head, spine, and pelvis form a straight line.
Step 2.Roll the wheel forward until you feel you’re about to lose tension in your core and your hips might sag. Roll yourself back to the starting position.
Dumbbell Pullover
[See 4:56 in the video]
Step 1.Hold a dumbbell by one of its bell ends and lie back flat on a bench. Press the dumbbell up and hold it directly over your chest with your elbows pointing out to the sides. Tuck your pelvis under so that your lower back is flat on the bench and brace your core.
Step 2.Keeping your elbows as straight as possible, lower your arms back and behind you until you feel a strong stretch in your chest.
Step 3.Pull the weight back up and over your chest.
Performing the movement with bands or a cable would be even more effective than using a dumbbell or barbell, as the band/cable tension would force the pecs to work harder as they get closer to the chest (which is where the resistance drops off with free weights).
Kettlebell One-Arm Overhead Press
[See 5:22 in the video]
Step 1.Stand tall, holding the kettlebell in one hand at shoulder level. Root your feet into the floor as if you were preparing for someone to push you. Draw your shoulder blades down and back—think, “proud chest”— pull your ribs down, and brace your core. Take a deep breath into your belly.
Step 2.Exhale as you press the weight overhead with your forearm vertical. Your elbow will naturally move away from your side and the press will feel like an “around the world” motion—that’s OK. Note that your chin should be pulled back so that weight has no trouble clearing it.
Step 3.To lower the kettlebell, pull it back down into position—as if you were performing a pullup. Complete all your reps on that side, and then repeat on the other side.
]]> https://www.onnit.com/blogs/the-edge/how-to-do-b-stance-romanian-deadlifts-rdls-like-a-pro2025-07-10T10:55:27-05:002025-08-14T14:53:41-05:00How To Do B-Stance Romanian Deadlifts (RDLs) Like A ProJeremy GottliebThe B-stance Romanian deadlift is a way to make both the Romanian deadlift (RDL) and the single-leg deadlift a little easier to manage, while still giving you a great workout for the glutes and hamstrings.
What Are B-Stance RDLs and What Are Their Benefits?
First, let’s make sure we’re on the same page about what regular oldRomanian deadliftsare. The RDL is very similar to a conventional deadlift, but rather than picking the bar up off the floor, you start from a standing position with your hips locked out, and then bend your hips back as far as you can while keeping a little bend in your knees.
The RDL trains the glutes, hamstrings, and lower back, making it a great exercise for building muscle in those areas, as well as a good supplemental lift for the deadlift itself.Many lifters like to progress from the RDL to a single-leg RDL, where you perform the same basic movement but on one leg. Being able to do a single-leg RDL, or single-leg deadlift, demonstrates great balance and stability, so it’s arguably a good exercise for athletes to work on, but it takes a lot of practice for most people to achieve. It’s also not really a great choice for building muscle in your glutes and hamstrings, because you expend most of your energy trying to stabilize the movement—that is, keep from losing your balance and falling over. Single-leg deadlifts can’t really be loaded heavy, so there’s a diminishing return as far as gaining muscle and strength from them.
Now here’s where the B-stance RDL comes in.By taking your normal RDL stance and sliding one foot back and using it as a sort of kickstand, you can shift the load to your front leg, making the RDL more of a unilateral movement like the single-leg deadlift, but keeping most of the stability that makes the RDL such an effective muscle and strength exercise.
Therefore the B-stance RDL is a good progression from the bilateral RDL as well as a prerequisite or alternate for single-leg deadlifts.
Also, if you suffer from lower-back pain and find that regular two-legged RDLs are uncomfortable, the B-stance RDL may be a good alternative. You can’t lift as heavy with a B-stance as you can using a normal, two-legged stance, but in this case, that can be a good thing. Using lighter weight will place less strain on your lower back, but it will still be heavy enough to train one leg at a time effectively. The B-stance will also allow you to improve the mobility in your hips, one side at a time, so it may help to relieve the source of your back pain in the first place.
You can perform B-stance RDLs with a barbell, dumbbells,kettlebells, or a trap bar.We like the trap bar because it allows you to keep the weight very close to your center of gravity, which is easier on the lower back,so that’s the version that is depicted here. But the same mechanics apply to a B-stance RDL with any implement.
Step 1.Take the bar off the floor or a rack—if you’re going off the floor, you have to deadlift the bar up and into position, so be sure to do it with a flat back and lift with your legs. Now stand with your feet hip-width apart and soften your knees. From here,slide one foot back so that your toes are even with the heel of the other foot.Some people like to move the foot a little further backward or keep it more forward, but the toe-to-heel alignment seems to work best for most. Experiment and see what feels right to you.
Step 2.Brace yourcore, and bend your hips back as far as you can while keeping a little bend in your knees. You want your front knee to stay soft and just bend as needed to give your hips the greatest range of motion. The knee on your kickstand leg will bend a little more, but don’t try to bend either leg like you would in asquat.
Keep a long spine from your head to your tailbone as you push your hips back.You’ll feel a strong stretch in your glutes and hamstrings on the front leg. You want that stretch, because that means you’re working the muscles, but it shouldn’t be really uncomfortable. You also shouldn’t go to where you feel your lower back is beginning to round forward.
Step 3.As soon as you feel a strong stretch, and you know your hips are as far back as they can go with that stance, extend your hips to stand back up tall. Watch that you don’t hyperextend your back at the top. You want to be standing tall, not leaning back in an effort to push your hips forward even more.
Complete your reps (sets of anywhere from 5–10 reps are generally fine), rest, and repeat on the other leg.
B-stance RDLs will primarily target the gluteus maximus, your main butt muscle. But they will also hit your hamstrings and spinal erectors (the muscles in your lower back). Your core, of course, has to brace your spine throughout the whole movement, so you could argue that any RDL is an ab workout too.
Finally, if you go heavy on B-stance RDLs, they will demand a lot of work from your upper back and grip as well, just in supporting the load.
How Do B-Stance RDLs Compare To Other Romanian Deadlifts?
We already said that B-stance RDLs are easier on the low back than conventional RDLs. They also offer more range of motion than a bilateral RDL, so you can bend your hips back a little further and put a little bit more stretch on your glutes and hamstrings. Of course, the B-stance RDL is also more stable than a true single-leg deadlift, so you can lift more weight and provide a better stimulus for size and strength gains.
With all that said,the B-stance won’t allow you to go as heavy as conventional RDLs,so they’re not an ideal choice for building up your deadlift like regular RDLs are when done as an assistance lift. It’s good to use B-stance RDLs as an alternate exercise for the sake of variety, or if you’ve been experience low-back problems and want to train around them.
How To Stretch Before Doing B-Stance Romanian Deadlifts
The B-stance RDL is really just a hip hinge—you bend your hips back as far as you can while keeping a straight, flat back. For that reason, any hip hinge motion can serve as a warmup for it. A basic bodyweight hip hinge can do the trick.
Step 1.Stand with feet parallel and bend your knees slightly.
Step 2.Now drive your hips back as far as you can while keeping a long spine from your head to your tailbone. When you feel a stretch in your hamstrings, or you can’t push your hips back any further without losing your spine position, come back up to standing. Do 3 sets of 10 reps.
Another warmup move that will stretch out the muscles you’ll use on the B-stance RDL is the reverse lunge.
The B-stance RDL emphasizes the glutes when they’re at their most lengthened position—a deep hip hinge with your butt pushed all the way back. A nice complement to this kind of exercise is the B-stance hip thrust, another unilateral glute exercise that emphasizes the muscles when they’re in a shortened position—that is, they contract hardest when you’re near the end of the hip hinge and about to lock your hips out.Click HERE for a full tutorial on the B-stance hip thrust.
Another alternative exercise is the braced single-leg deadlift, as recommended by Bret Contreras, PhD, a glute-training expert and author of the bookGlute Lab. Here, you hold onto something sturdy for support and perform a single-leg deadlift motion. The braced single-leg deadlift is a little more challenging than using the B-stance, and a little closer to doing a real, unassisted single-leg deadlift, so consider it a progression from the B-stance once you’ve got that down.
Step 1.Set up a bench or other sturdy object so it’s at aboutarm’s length in front of you when your arm is at your side. You will hold onto it for stability. Now stand with your feet close and a light dumbbell in the opposite hand.
Step 2.You’ll start by working the leg that’s closest to the bench. Keeping a slight bend in that knee, push your hips back and extend your other leg behind you as you bend your torso toward the floor. Try to keep your hips square to the floor and maintain a long spine.
Step 3.Extend your hips to stand up tall again.
As you get more comfortable with the movement, you can reduce the support you get from the bench.
For example, start the single-leg deadlift unassisted and then reach out and touch the bench only if you begin to wobble.
]]> https://www.onnit.com/blogs/the-edge/how-to-do-b-stance-hip-thrusts-like-an-expert2025-07-10T10:55:27-05:002025-08-14T14:22:18-05:00How To Do B-Stance Hip Thrusts Like An ExpertJeremy Gottlieb
The hip thrust is one of the most popular exercises you’ll see in a gym, and possibly the best glute-building exercise you can do, but the two-legged version isn’t the only variation on this movement that you should be practicing. Doing the hip thrust on one leg while using the other as a kickstand to provide some balance—aka a B-stance hip thrust—can provide aneven greater challenge for those who feel they’ve mastered the basic thrust,while at the same time serving as an alternative for people who find that the classic thrust bothers their lower back. The B-stance hip thrust, then, is both a progression of and a substitute for the hip thrust, and one that allows you to work one side of your body at a time.
What Are B-Stance Hip Thrusts and What Are Their Benefits?
The B-stance hip thrust is sometimes called a “hip thrust with a kickstand,” or a “staggered-stance hip thrust,” because you use one leg for balance while the other one thrusts. Like the conventional bilateral hip thrust, you lie back on a bench (your body perpendicular to it), and raise your hips up to lockout, but in the B-stance thrust, you push with one foot while the heel of the other one stays grounded for extra support.
You see, most people start out with the regular bilateral hip thrust, where you work both glutes at the same time. Later, they try to progress to the single-leg hip thrust, which has you holding one leg up in the air while you thrust with the other one.The problem is, going from two-legged hip thrusts to single-leg thrusts is too big a leap for most people.It can be very hard to stabilize your hips and avoid twisting to one side when you’re doing true single-leg hip thrusts, and many people find that even their bodyweight alone is too difficult to control for more than a few reps.
That’s where the B-stance hip thrust comes in.It’s a nice intermediate exercise that’s more challenging than the basic two-legged hip thrust, but more stable than the single-leg hip thrust, so you can work one side at a time and build your balance without having to work too hard to keep your body aligned and on the bench.
In addition, because it’s a unilateral exercise, it allows you to isolate one glute at a time, which helps correct any imbalances you have between sides. Also, focusing on one muscle area at a time recruits more muscle in that area, which can help you add muscle size more easily.So, if you want a big, round butt, the single-leg hip thrust is a very good exercise choice.
Lastly, if you have lower-back pain, and you find that two-legged hip thrusts hurt to perform—maybe because you hyperextend your back at the top of the movement—you may find that the B-stance hip thrust is more comfortable to do. Because you’re essentially working one leg at a time, you can’t thrust as hard or as high, so it’s harder to overextend your range of motion. The single-leg hip thrust keeps the force where you want it—in your glutes—and out of your lower back.
The B-stance hip thrust builds off the conventional two-legged thrust. Once you’ve found a comfortable position for bilateral thrusts, it’s an easy transition to B-stance thrusts.
Step 1.Secure a bench against a wall or rack so it doesn’t slide; you can also weight it down with heavy dumbbells.Lie back on the bench, perpendicular to its length, so that the edge of the bench supports your body right under your shoulder blades.
If you’ve tried hip thrusts in the past and felt them too much in your lower back,you can try sliding your body up a little higher so the bench supports your mid-backrather than the bottom of your shoulder blades.
Now extend your hips to get into the top position of the double-leg hip thrust, so your shoulders, hips, and knees are aligned. Adjust your feet so that they’re directly below your knees. Now when you lower your hips down, your stance should be set so that you can thrust with the greatest range of motion and good form.
Feel free to play around with your foot position, angle, and spacing a little more, and do a few practice reps, until you find a setup that’s the most comfortable and lets you feel your glutes working more than any other muscle. This will be your normal bilateral hip thrust setup.
Step 2.Now you’ll transition from the bilateral hip thrust to the B-stance. Extend one leg forward so the heel lines up with the toes on the planted foot. This partially-extended leg is called your kickstand leg. Keep the toes on your kickstand leg elevated so the weight of your leg is resting on that heel.
Step 3.Tuck your chin to your chest, and make fists with each hand, driving the back of yourarmsinto the bench for stability. Tuck your tailbone under, and brace yourcore.Now drive through the foot of your planted leg to extend your hipsuntil they’re locked out and parallel to the floor. Push both knees out a bit as you extend your hips, and keep your ribs pulled down so you don’t bend at the spine.
Your shoulders, hips, and knees should form a straight line in the top position.
According to Bret Contreras, PhD, author ofGlute Laband arguably the world’s foremost expert on glute training, the kickstand leg should only apply about 30% of the forcein your B-stance thrust. Most of the work should be done by the leg that’s closest to your body. Remember, the kickstand leg is only supposed to provide some stability, so make your other leg’s glutes do the majority of the work.
Use your bodyweight alone until you’ve mastered the B-stance hip thrust technique. But when you think you’ve got it down, you can add a barbell to your lap for resistance, just as you do with the normal two-legged hip thrust. However: “I suspect that as you lift more weight,” Contreras writes in his book, “you will inevitably use your extended leg more to counterbalance the weight, which defeats the purpose of trying to load mostly one leg. So, as with the single-leg hip thrust, it’s better to keep the load light.” If you get to the point where B-stance hip thrusts for higher reps (north of, say, 10) don’t challenge you much anymore, it’s probably time to progress to the true single-leg hip thrust (with the non-working leg up in the air), which we explain in the B-Stance Hip Thrust Alternatives section below.
The B-stance hip thrust really works the gluteus maximus, which is your main butt cheek muscle, responsible for extending your hips. But it also trains the gluteus medius, which is on the side of your butt cheek, and the glute minimus, which lies under the glute medius. Both the medius and minimus work to stabilize the pelvis, so they will get trained by any variation of the hip thrust too.
While all variations of the hip thrust are fairly new exercises in thefitnessworld, research on them is mounting, and pointing to positive benefits both in terms of athleticism and glute muscle gains. A 2019trialfound thathip thrusting with a barbell improved subjects’ sprint performance.Meanwhile, in a landmark 2023study, subjects were divided into two groups, with one team training the hip thrust and the other doing the barbell backsquat—no other lower-body work was performed. After nine weeks, glute growth in both groups was roughly the same,indicating that the hip thrust is at least as good a glute exercise as the much beloved, age old, and tried-and-true squat.
Perhaps even more impressive, however, was another 2023studythat had two groups perform a full-body workout. One group did leg presses and stiff-legged deadlifts for their lower body in the session, while the other group did those two movements and then two sets of hip thrusts at the very end of the workout. Both groups saw gains. The non-thrusting group enjoyed a six percent increase in glute growth,but the ones who ended their workouts with thrusting grew their glutes by more than nine percent.
This gives us a little to think about. On the one hand, the subjects who hip thrusted did end up performing more work for their glutes than the other group did, which may account for their extra gains. However, you have to factor in that their hip thrusts were done dead last in the session, after they had trained both upper and lower body and accumulated a lot of fatigue.The body’s ability to recruit muscle fibers is greatly diminished for exercises that are done late in a workout—i.e., exercises done at the end of your workouts will never be as effective as those that are done at the beginning—so this suggests that the hip thrust may have outperformed the other glute exercises in the session (the leg press and stiff-legged dead), regardless of fatigue.
Note that all of the above research was done on the TWO-legged hip thrust, NOT the B-stance exercise,so it’s hard to say how B-stance thrusting compares to backsquats, single-leg squats, leg presses, deadlifts, or anything else. But, until further research emerges, it’s a good bet that any hip thrust variation is going to be a solid choice for building the glutes.
How Do B-Stance Hip Thrusts Compare To Other Hip Thrusts?
The B-stance hip thrust is essentially the middle man between the bilateral thrust and the single-leg hip thrust, helping you progress from the former to the latter. It won’t allow you to train as heavy as the more stable, two-legged thrust will, but the B-stance will help you to better isolate the glutes on one leg at a time,while providing enough stability for you to train hard and safely. It’s also likely safer for the lower back than the bilateral thrust, because it lessens the risk of hyperextending the spine when you lock your hips out.
Warm up and stretch out your glutes and hips prior to a B-stance hip thrust session with these moves, courtesy of Onnit-certified coach Eric Leija (@primal.swoledier). Do 2–4 sets each.
When you think you’ve got the B-stance hip thrust down, you can move up to the single-leg hip thrust, where you raise one leg in the air and work the other one without any support.
Single-leg Hip Thrust
Step 1. Set up as you did for the B-stance hip thrust but raise one leg off the floor entirely and bend that knee, bringing it toward your chest.
Step 2. Push your working foot into the floor and raise your hips until they’re roughly in line with your working knee and your shoulders. Remember to keep your ribs down and core braced.
If you want to isolate the glutes a little bit more, you can do a single-leg hip thrust motion on the floor, without a bench. This is known as a glute bridge. Bridging your hips up from the floor will decrease the range of motion some, but it will ensure that only your glutes do the work to move your hips (as opposed to thehamstrings, which do contribute a little bit to the hip thrust, while the quads kick in a little as well to extend the knee).
Luckily, we have a whole video tutorial on how to do thesingle-leg glute bridgein a separate article.
]]> https://www.onnit.com/blogs/the-edge/the-expert-s-guide-to-the-landmine-row-exercise2025-07-10T10:55:27-05:002025-08-14T14:14:32-05:00The Expert’s Guide To The Landmine Row ExerciseJeremy Gottlieb
CrossFitters call it a landmine row. Bodybuilders call it a T-bar row. But this row, by any other name, would still build back muscle and strength as sweet. Use this guide to learn all the different ways to row with a landmine to build complete back and latmassand strength.
What Is The Landmine Row and What Are Its Benefits?
The landmine row is a barbell rowing movement where one end of the barbell rests on the floor, or is anchored using a landmine apparatus, allowing you to row the bar in an arcing motion rather than straight up and down. There are many ways to row with this setup, and we’ll go over all of them in this article, but the most basic and popular version is tostraddle the bar and row it with both hands using a V-grip handle (the kind you see on cable machines).To bodybuilders, this is called a T-bar row, and it’s a great, old-school exercise for the back, and thelats specifically. (Some landmine machines provide barbells that have a handle fixed perpendicular to the bar, forming a T-shape, hence the name.)
While it’s very similar to the classic bent-over barbell row, the landmine row has some big advantages.“The arc that the bar travelsallows you to keep a more upright torso, which is easier on your lower back,”says Jonny Catanzano, an IFBB pro bodybuilder and physique coach (@jonnyelgato_ifbbpro). It also means that the weight will be closer to your center of gravity at the top of each rep, and that allows you to control it better, and even hold the top position longer than you could with a bent-over row, if you choose to. That can give you a better muscle contraction in your back, and makes the landmine row a good choice for hypertrophy (muscle-gain) training.
With one end of the bar fixed on the floor, the landmine—aka T-bar row—is also a more stable movement than a conventional barbell or dumbbell row, and thatallows you to liftheavier weights.Flip through old bodybuilding magazines or books and you’ll see many lifters hoisting hundreds of pounds on T-bar rows, butsuper heavy bent-over rows are less common. The landmine setup simply allows for heavier weights to be lifted in a safer, more user-friendly movement, so it’s arguably the better choice between the two barbell rowing movements for physique development.
Ideally, you’ll perform the landmine row using a landmine unit. They usually look like home plate (baseball) with a metal sleeve attached that swivels, but some have feet (like furniture) or are simply a sleeve that can attach to the base of a power rack or even fit inside the donut hole of a weight plate (this is shown above). You can see a number of landmine options onamazon.com.
Using a landmine will keep the end of the bar secure and stable, but it isn’t absolutely necessary to perform landmine training.A second option is to cut a hole in a tennis ball and ram the end of the bar in so that you have a cushion, and then wedge the bar into the corner of a room. At the very least, you can wrap a towel around the bar and push it into a corner (the towel will help protect the walls).
Now let’s discuss how to perform the classic landmine row/T-bar row.
Step 1.Grasp a V-grip handle—the kind you often see people do cable rows with. If you don’t have a V-grip, you can improvise one by attaching gymnastics rings or any other adjustable handles you can access. The point is only to have a comfortable, firm grip that allows your palms to face each other when you row (a neutral grip). Place the handle on the floor next to the front of the bar.
Straddle the bar with feet about shoulder width, facing away from the landmine, and hinge your hips back. Allow your knees to bend, and keep a long line from your head to your tailbone, until your torso is 30–45 degrees to the floor and you can reach the handle. Hook the handle underneath the barbell, close to end of the bar where you’ll load the plates. Pick the bar up off the floor and play around with your stance, torso height, and the distance between your feet and the front end of the bar until you feel balanced and stable with yourarmsfully extended.
Step 2.Keeping your back straight and flat, and yourcorebraced, row the bar until your back is fully contracted. Your elbows should come up close to your sides and your shoulder blades should squeeze together at the top. If the bar hits you in the groin, adjust your stance!
Step 3.Lower the bar until your arms are fully extended again, but don’t let the weight rest on the floor. Allow your shoulder blades to spread as you go down.
*Use 25-pound plates, or smaller.While it may be less efficient than loading the big 45s, smaller plates will allow you the greatest range of motion on the exercise. Bigger plates, on the other hand, will tend to bump into your chest and/or the floor, reducing the range you can train your muscles, and thereby making the exercise less effective.
“Think about driving with your elbows, rather than your hands,” says Catanzano. That will help you get the proper range of motion. “And be careful to keep a tight core.”As with a bent-over row, deadlift, or any other exercise that has you bending forward at the hips, you need toprotect your lower back at all times.Bracing your absand thinking “long spine” are essential. Catanzano also cautions against “ego lifting,” where you bounce the weight up and round your back on the way down for the sake of lifting heavier or getting more reps. Your hip and back position should remain the same the entire set; only your arms move.
Incidentally, if you’re in a gym that has a proper T-bar row (a handle that forms a T-shape), you can use that for your landmine rows too. The wider, palms-down grip will recruit more of your upper back and rear deltoids, while the landmine row with palms facing each other and elbows tight to your sides emphasizes the lat muscles.
It should be noted that holding the bent-over position tenses yourhamstringsisometrically as well. Probably not to the degree that it will buildhamstringsize, but don’t be surprised if you feel stronger and more stable on deadlifts, RDLs, or other hip hinge exercises after a few weeks of landmine rowing.
Single-ArmLandmine Row Vs. T-Bar Landmine Row Vs. Barbell Landmine Row
Just to reiterate (or, if you’ve been skimming the page and missed it), the T-bar row and landmine row are essentially the same exercise. If you use a T-bar, which allows you to raise your arms out wider so your palms are turned down,you’ll work a little more upper/middle back and rear deltoids than if you use a V-grip handle and row with your elbows close in(the latter emphasizes the lats). There are several other variations of the landmine row, including single-arm versions, which we’ll explore in the next section. Single-arm landmine rows allow you to isolate one side of the back at a time and can increase the range of motion you get, making them a good option for physique training. They also allow you to use your free hand to help brace your hips, which can add stability. You’ll have to use less overall weight when doing a single-arm row of any kind, but this can be an advantage if your lower back is recovering from injury and you don’t want to load it with a heavy bent-over exercise.
Landmine Row Alternatives
The landmine row can be done in different ways to suit your changing goals.
By stepping off to one side of the barbell, you can easily turn the landmine row into a unilateral exercise for the lats, similar to a dumbbell row.
Step 1.Set up as you did for the regular landmine row, but stand to one side of the bar and narrow your stance to between hip and shoulder width. Hinge your hips and grasp the bar with the hand nearest to it (grip it close to the end of the bar). Stand up with the bar, and reset your hinge so your torso is angled forward and your back is straight and flat.
Step 2.Row the bar, retracting your shoulder blade, and then lower it back, allowing your shoulders to spread. Avoid twisting your torso to either side. Keep your core braced and your shoulders square to the floor.
“You can adjust your position to affect the muscles in different ways,” says Catanzano. If you stand with your feet a little further forward so that you get into an even deeper hip hinge, and then lift the bar with your elbow out a little wider,you will shift the emphasis from the lats to your upper back.“If you set up to where your legs are straighter and your chest is a little lower, you can hit a little more lower lat.”
Standing perpendicular to the bar and rowing it with your elbow flared out really shifts the work from the lats to the upper back and rear delts. This version was popularized by the late bodybuilding coach John Meadows, and has therefore come to bear his name.
Step 1.Stand so that the end of the barbell points to your side and spread your feet shoulder-width apart, or stagger them—whichever feels more balanced and comfortable. Hinge at the hips and grasp the end of the bar with one hand. Since the sleeve where you load the plates is thick in diameter, it can be hard to hold onto—especially with sweaty hands—so considerusing lifting straps to reinforce your grip. Brace the elbow of your free arm against your leg for some extra stability.
Step 2.Row the bar, driving your elbow as high as you can. Again, avoid twisting and keep your shoulders square. Your upper arm should end up about 60 degrees from your side—much farther away than the landmine rows we’ve shown up to this point.
If the landmine row (any variation) has a weak link, it’s that it requires a lot of stability to perform. Bracing your core and torso in the bent-over position takes a lot of energy and spreads the muscle tension over your whole body.That’s cool if your goal is to build total-body strength with a movement that works a lot of muscle at once, but it’s a bit limiting if you want to make your back muscles workto the max and get the best stimulus for growth. In the latter case, Catanzano recommends pulling a bench over to rest your free hand and knee on while you perform the Meadows row. “The stability the bench provides will allow you to lift heavier loads,” says Catanzano, “and that will recruit more muscle fibers in your back.”
Catanzano has one other minor gripe with the landmine row, arguing that, as you row the bar closer to your body, your mechanical advantage increases and the weight gets easier to lift. This reduces the tension on the muscles. “In a muscle-building scenario,” he says, “we ideally want the resistance to stay the same or get even heavier throughout the range.” The fix is as simple as adding a resistance band to the bar.
Step 1.Set up a bench as shown for the bench-supported landmine row, and place a heavy dumbbell on the floor next to it. Wrap a mini band around the dumbbell a few times so there’s only a foot or two of slack end. Loop the end of the band over the sleeve of the barbell.
Step 2.Row the bar in the Meadows row style explained above. Because the band will be pulling the bar back down, and the tension increases the higher you row it, you’ll have to row faster and more powerfully. This will ensure that your back is giving its all throughout the exercise.
]]> https://www.onnit.com/blogs/the-edge/master-this-move-the-straight-arm-pulldown-exercise2025-07-10T10:55:27-05:002025-08-14T17:13:22-05:00Master This Move: The Straight-Arm Pulldown ExerciseJeremy Gottlieb
The straight-arm pulldown exercise is a variation of the classic lat-pulldown. In this case, you perform the movement standing and keep your elbows locked out the entire time. The straight-arm pulldown trains the latissimus dorsi through a long range of motion, and is helpful for people who have trouble feeling their backs work on conventionalpulldown exercises. As a result, it’s a great movement for focusing on lat development.
How To Do The Straight-Arm Pulldown
Step 1:Attach a rope handle to the high pulley of a cable station. Grasp an end in each hand and face the cable station.
Step 2:Draw your shoulder blades back together and down, as if you were trying to stuff them into your back pockets. Think: “proud chest.”
Step 3:Draw your ribs down, tuck your tailbone under, and brace yourcoremuscles. Your torso should feel like one tight, solid column. Bend your hips back until your torso is at a 30–45-degree angle.
Step 4:Step back from the station a bit so that you feel tension on the cable and yourarmsare fully extended overhead. You should feel a stretch on your lats (the muscles along the sides of your back). Set your feet at shoulder width.
Step 5:Slowly drive your arms down to your sides in an arcing motion with elbows locked out, so your hands end up in line with your hips, or just behind them.
Step 6:Reverse the motion slowly to extend your arms again.
The straight-arm pulldown may also be done with a lat-bar or straight-bar attachment, butthe rope allows for better shoulder positioning and a slightly greater range of motion.As a result, you’ll get greater muscle activation. If possible, use two rope attachments on the same cable so that you can use a wider grip and get an even greater contraction in the end position. Another option is to use a band, which will increase tension in the end range of motion, helping you get a greater contraction at the bottom of the movement. You can also do this exercise as a single arm lat pulldown to further work the muscles involved.
In any case, it’s important to keep the elbows extended, as any bending will cause the triceps to get involved and reduce the involvement of the lats.
Muscles Worked in the Straight-Arm Pulldown
Lats
Upper back
Rear deltoid
Triceps
Chest
Core
Straight-Arm Pulldown Benefits
Enhanced mind-muscle connection. The straight-arm pulldown is ideal for lifters who can’t feel their lats working on traditional pulldown exercises.Keeping the arms straight prevents the mid-back andbicepsfrom taking over the movement,so you canfocuson the lat muscles you’re trying to work more directly.
Greater range of motion than standard pulldowns.
Improved stability ondeadlifts.The straight-arm pulldown strengthens the lats in the same way that they’re used when deadlifting—pulling the bar tight to your body (“bending” it around the shins at the bottom of the lift/around the hips at the top). The ability to keep the bar in contact with your body throughout adeadlift creates a stronger, more stable movementand reduces the risk of injury.
When to Use The Straight-Arm Pulldown
Perform the straight-arm pulldown before deadlifts orother back exercisesto prepare your lats for the effort and enhance their muscle recruitment. Because it provides an intenselat stretchat the top (starting) position, the straight-arm pulldown is also useful at the beginning of a workout to improve back and shoulder mobility.
Try it at the end of a workout for 2–3 sets of10–15 reps. This will pump an enormous amount of blood into the area, which by itself may be a mechanism for muscle growth.
Use it in place of rows or pulldowns if you have a lower-back injury. The movement is isolated to flexion and extension of the shoulders, so it prevents unwanted motion or stress in the lower back.
How To Stretch Before The Straight-Arm Pulldown
While the straight-arm pulldown can stretch your lats and increase mobility on its own, you should warm up your upper body before you perform it. The following video, courtesy of Onnit-certified Durability Coach, Cristian Plascencia, is a sample routine you can use before anupper-body or back workout. (Follow Cristian on Instagram,@cristiangplascencia).
Regression
If you feel like back muscles other than your lats are taking over the straight-arm pulldown, reduce the load you’re using, or try them with a band instead of a cable. You can also perform the movement while standing up more vertically, which will place less of a stretch on your lats but will make the movement easier to control.
Progression
To make the straight-arm pulldown harder, use a longer rope or two rope handles at once to increase your range of motion.
What Alternatives Are There To The Straight-Arm Pulldown?
If you don’t have a cable station or band at your disposal, you can use the following substitutes to get a similar training effect to the straight-arm pulldown.
Dumbbell orkettlebell pullover. Lying on a bench and pulling the weight from behind your head to over your chest stretches the lats, but will also involve the chest and triceps to a degree, which isn’t ideal if your goal is ultimate lat development.
Gironda Pulldown.This pulldown/row combination works the back hard, but doesn’t provide the same lat isolation that the straight-arm pulldown does.
]]> https://www.onnit.com/blogs/the-edge/the-steel-club-benefits-and-uses2025-07-10T10:55:26-05:002025-08-14T17:21:47-05:00The Steel Club: Benefits and UsesJeremy GottliebIf you grew up in the 80s, your introduction to theclubas an exercise tool was via pro wrestling’s Iron Sheik. The bald, mustached Iranian would cut promos in which he’d heave two heavy wooden bludgeons overhead and swing them, challenging any pitiful American jabroni to match his reps. While it was good entertainment, the Sheik’s feat of strength was also legit. Prior to his run as one of sports entertainment’s most memorable heels, “Sheiky” was an elite amateur wrestler who did in fact train with clubs—and he wasn’t alone. The club has been helping athletes improve strength and mobility for centuries.
Thesteel club—the ultimate evolution of the age-old club tool—may be the best training implement you haven’t tried. Here’s what you need to know to start implementing it in your workouts.
What Is A Steel Club?
The club is an offset-loaded weight-training tool, often called a leverage-challenge tool, that works similarly to akettlebellorsteel mace. The bulk of the club’s weight is set at a distance from its handle, making it difficult to stabilize and control. Because of this design, the club lends itself to rotational movements better than perhaps any other piece of equipment (which we’ll discuss in depth further down). Clubs range in length from about one foot to a little more than two feet, and generally come in weight increments ranging between five and 45 pounds.
“The club was our first tool and our first weapon, going back to pre-historic times—think, caveman,” says Shane Heins, Onnit’s Director ofFitnessEducation, and a steel club coach. “It helped us hunt and fight.People figured out that swinging a club increased the torque on it, and that increased the force it could strike withand the damage it could inflict. So armies learned to swing clubs in battle.”
Over time, warriors realized that swinging clubs—and maces, which developed the same way—strengthened their bodies, and they began formalizing club and mace use for sports training and fitness purposes. Every continent had its own version of the club. To this day, some still call the tool anIndian club, or Persian club (sometimes referred to as a “meel”), as the Indians and Iranians (not least of all the Iron Sheik) did so much to popularize it. In modern times, martial arts fitness expert Scott Sonnon has perhaps been the club’s most vocal champion, helping to spread awareness of club training in the Western world with the popularity of his Clubbell® line over the past 20 years.
Traditionally, clubs were made of wood, but that made progressing to heavier weights problematic.To get a heavier club, you had to upgrade to a bigger piece of wood, making the club cumbersome and difficultto travel with. Due to their greater density, modern-daysteel clubsoffer heavier weight in a more compact size.
What are the Benefits of Steel Club Training?
As with the kettlebell, steel mace, or any other tool where the weight is offset from the handle, the club presents a number of challenges that you can’t get to the same degree with more conventional equipment. It also has a few features that make it unlike any other implement you can use.
Kettlebellsare praised for promoting core strength due to their offset load. The weight is positioned at a distance from the handle, so it’s harder to stabilize, and your body must call on numerous muscles to keep you in alignment. The club takes this to the next level, as the weight is displaced even further at the end of a long lever.
Imagine holding a heavy weight right in front of your chest. It’s close to your center ofmass, so you have about as much control over it as you possibly can. Extend the weight away from you, however, and you’ve reduced your leverage advantage. Now it’s harder to lift the load, especially in different planes (say, in a circular fashion as opposed to straight up and down). All club exercises put you at a significant leverage disadvantage, which is bad for making workouts feel easy, but great for activating muscle—especially in yourabsand throughout your back.
2. Build Rotational Strength
The leverage disadvantage and shape of the club really feed into its greatest feature—allowing you to train rotational movements.
“Our body works in rotation all the time,” says Heins. For example, swinging a bat, throwing a ball, lifting heavy groceries out of your car, or wrestling with your kids.Some of the best steel club exercises are swinging and spiral patterns that force you to stabilize your body over a long range of motion,and develop power in the rotary plane.
“We also need to be able to resist rotation when it isn’t wanted,” says Heins. “When you’re walking, and you pick one foot up, forces act on it to try to twist it in one direction or the other. When you’re squatting with a barbell, you think you’re going up and down, but there’s rotational force acting on your shoulders, spine, hips, knees, and feet. The club highlights this resistance, and it helps you create greater stability.” Because of its dimensions, doing something as simple as asquatwhile holding a club is difficult to accomplish without bending or twisting to one side (rotation). But, over time, you’ll learn to move in exactly the planes you want, and the resulting stability will translate to other exercises and athletic movements.
Similar to unilateral exercises, “the club also shows you which of your sides is stronger,” says Heins, “so you can begin to correct the imbalance between the left and right halves of the body.”
3. Build Grip Strength
When you train rotation, you create centrifugal force. As a lever moves around an axis, it wants to pull away from that axis and move outward. In addition to having a thick handle and an offset load, the club is tough to grip because it wants to fly out of your hands when you swing it.“The steel club is great for building a grip that’s really alive,”says Heins. “You can’t just clamp down on it like you do a barbell before a 500-pound deadlift. Wherever you’re holding or moving it, the club is always pushing down or pulling away from you, so you need the dexterity and articulation and sensitivity, in combination with appropriately applied tension, to hold on and control it.” With this in mind, imagine howclub training could help a grappler who needs to hang on to an opponent’s gi,a construction worker who hauls heavy materials up a scaffold with a rope, or a fisherman trying to reel in a fighting marlin.
“When you use a club, you have to feel the load transition from between your thumb and forefinger to the pinky and palm of your hand,” says Heins. “The information it sends to your central nervous system is constantly changing.”
The steel mace works the grip in a similar fashion, but the club is harder to hold on to. The handle is shorter, giving you less surface area to grasp. It’s easy to regress the challenge on a steel mace exercise by holding the handle nearer to the ball on the end, or widening your grip, which increases your control. But the load on the club is elongated, and more offset. You have a lot less handle to spread your hands apart on, and gripping the fat end totally changes the nature of the load. It can sometimes feel like your only option is to hold on for dear life. Sound scary? Take it slow, and it’s not as hazardous as you may think. (See Steel Club Safety below.)
4. Decompress Your Joints and Tissues
Most weight-training exercises tighten your body up, literally. Think of what happens to your spine when you do a back squat: the bar rests on your back, shoving your vertebrae closer together. When you press heavy weights, your shoulders and elbows get squeezed.Continually compressing your joints and shortening the muscles that act on them can lead to pain and loss of flexibility,but the steel club can help to alleviate both.
“You have to pull back on the club a bit as it swings,” says Heins, lest you want the centrifugal force to rip it out of your hands. “That creates some traction in your wrists, elbows, and shoulders, which allows fluid to pass through them, helping recovery.You can strengthen a joint with traction just like you can with compression. Pulling it apart makes the muscles and connective tissues work to hold the joint together,and it’s a nice counterbalance to compressive forces you get in your other training.”
Heins says to think of club training like an accordion. “If you squeeze it, you’re only getting half the music. You have to pull the ends apart again to play a song.”
Traction and rotation also have the effect of helping your muscles into new ranges of motion they wouldn’t otherwise explore. Look at a pullover exercise (see the workout below) with the club, in which you hold it vertically and lift it over your shoulder and behind your back in an arcing motion. The weight of the club will help to stretch your triceps, lats, and shoulders as it moves downward behind you. At the same time, holding your ribs down with your core tight to maintain good spine and hip alignment trains your core.You get stretching and strengthening in one movement.How’s that for training economy?
Big weightlifters and powerlifters often report that working the club into their routines helps to open up their shoulders and backs, adding longevity to their competitive careers and easing aches and pains.
5. Get More Out of Light Weight
The handle, the offset load, and the rotational nature of club training make it virtually impossible to use heavy weight, and that’s perfectly alright. If you’re expecting a 10-pound club to feel like a 10-pound dumbbell, get that thought out of your head right now.
“The top-end weights we work with are 35 pounds,” says Heins. “That’s super heavy for club training, but it’s still only 35 pounds of overall load, so even when you get strong on the club, it isn’t hard to recover from. It’s certainly not like recovering after a one-rep max squat with 400 pounds.”Heins notes that doing a long session of club training might leave you mentally zonked, similar to how you’d feel after taking a final exam,because the club requires so much nervous system activation. But it’s too light to leave you physically wrecked for days. For athletes who need to compete frequently, it’s helpful to have a tool that lets them train hard and bounce back fast.
Light weight also makes clubs highly portable. If you’re planning a road trip that will take you away from your gym, clubs can fit easily into the car, providing you with a workout you can do anywhere from a hotel room to an empty parking lot.
6. Make Training Fun!
“I’ve taught training certifications for the club all over the country,” says Heins, “and every time people walk in and pick up a club for the first time, it’s always funny. They think it’s going to feel like a baseball bat or a bowling pin, and then you watch them have to put it down right away because they realize they can’t control it. They take a step back, and then try again.”
To say club training provides a novel workout experience is a given, but it also taps into a primal instinct in us all that’s inherently fun. Clubs can even be used for creative expression.As you master club exercises, you can begin to transition from one to the next seamlessly, creating what’s known as a flow.There’s no wrong order or movement, per se, you just move gracefully from one position to the next, working your whole body in the process. Workouts then become more like warrior dances than weight training.
What Club Should I Buy?
As mentioned above, steel clubs are denser than wood, so they offer easier handling for a wider array of loads (plus, they take up less space). We recommend starting with steel that has a powder-coated handle. Some club handles have knurling (rough texture, same as you see on barbells), which makes for an easier grip, but they can tear up your hands over time—especially if you do a lot of swinging, where the club is pulling away from you with centrifugal force.
Other clubs have handles that are completely smooth, which Heins says presents an even worse problem. “When you sweat, the handle becomes slick,” he says, “which can turn the club into a missile.” The powder coat on Onnit’s clubs provides just enough friction for the club to change positions in your hand without you losing control of it, and it won’t chafe your palms in the process. Additionally, a club should have a knob on the end of its handle—where the pinky end of your grip gets firm purchase—to help stop your hand from sliding back off it.
Heins recommends men start with a pair of 15-pounders and a single 20 or 25-pound club, and says most women will do well with one pair of 10 pounders and a single 15 or 20-pound club.Most of your club training will be done using both hands on one club to start, as this provides the greatest stability. As you progress, you’ll find that exercises done above the waist (such as presses and pullovers) are hardest when utilizing a club in each hand. Those that are done below the waist (swings and leg drivers) are easier when done with a club in each hand versus two hands on one.
How To Warm Up For a Steel Club Workout
Use the following warmup drills to increase mobility and prepare your body for training. Perform 5 reps for each exercise in sequence, and repeat for 3 total rounds.
Kneeling Spinal Wave (See00:42in the video below.) 2. KneelingArmThread (02:17) 3. Kneeling Hip Flexor Twist (03:43) 4. Clasped-Hand Elbow Rotation (04:45) 5. Pullover Spiral Down (06:35)
3 Steel Club Exercises You Have to Try
Experiment with steel club training by incorporating the following exercises into your workouts wherever you see fit. The spiral lift around is great for improving shoulder mobility, and can help to stretch the wrist flexor muscles, which can cause elbow pain when tight. That makes it a good choice before an upper-body training session as part of your warmup, or after a workout to help you lengthen the muscles again.
The side pullover opens up your shoulder and lat, and helps you maintain a tight core position, making it a natural for inclusion in any kind of ab training you do. Lastly, the front swing can be used anywhere you would normally do akettlebell swingor other deadlift/hinge movement. Suggestion: try it as a finisher at the end of a session, combining short rest periods and high reps to get your heart rate soaring (once you’re experienced and familiar with the movement, that is).
Directions:In your first session, take it slow, andfocuson your technique so that you learn the exercises correctly. Perform each for time rather than reps, starting with 30 seconds. So you’ll do reps for 30 seconds straight and then rest. On the spiral lift around and side pullover, work for 30 seconds on one side, and then switch sides and repeat. Perform 3 to 5 sets for each movement.
Spiral Lift-Around
Step 1.Stand with feet between hip and shoulder-width apart, and hold a club at your side in your left hand. It should point vertically to the floor below. Tuck your tailbone so that your pelvis is parallel to the floor, brace your core, and squeeze your glutes. Draw your shoulders down and back—think “proud chest.” Maintain this body position throughout the exercise.
Step 2.Begin raising the club straight up in front of your body, pulling from your elbow and allowing the weight of the club to bend your wrist and stretch your forearm. Let the weight of the club pull down as you continue moving the club around the back of your head, and lower the club back to your side, extending your elbow as it comes down. The end of the club should point to the floor throughout the movement.
Try to keep the club as close to your body as you can during the exercise without bumping into it. Heins says to visualize the club as a candle that’s floating around your body—keep it vertical and control its path.
Side Pullover
Step 1. Hold the club with the end pointing upward, and your elbow bent 90 degrees. Turn your arm so that your knuckles point out 90 degrees from your torso with your elbow by your ribs. Maintain the tight core, pelvis position, and proud chest described above.
Step 2.Reach the club over and behind your head, as if you were raising it to deliver a blow. Turn your head so that your eyes can focus on your arm. Swing the club back down to the start position by driving your elbow next to your ribs until the club is pointing vertically again.
As you raise the club on each rep, allow the weight of it to pull your elbow back and stretch your triceps and shoulder, but don’trelaxanything. You may find that your range of motion increases over the course of a set. Bring the club down with force, but not so fast that you can’t control its descent and lose alignment.
Front Swing
Step 1.Hold a club in each hand and, keeping your head, spine, and pelvis in a straight line, swing the clubs down and back behind you at a 45-degree angle as you hinge at the hips.
Step 2.Drive your hips back as far as you can without losing alignment, and then explosively extend your hips to stand tall. Use the momentum to swing the clubs up to eye level. Control the downswing to go back into the hinge and repeat for reps.
Beginner Steel Club Workout
The following routine works well on its own as a fat loss-focused conditioning workout, or (if done for only 3 rounds only) a finisher at the end of a heavy training session. If doing the former, perform it three times per week on non-consecutive days (Monday, Wednesday, Friday, for instance).
Directions:Perform the exercises as a circuit, so you’ll complete one set of each movement in turn. (For unilateral exercises, work one side and then the other before going on to the next exercise). At the end of the circuit, rest 45 seconds. Repeat for 3–5 total rounds.
Instead of aiming for a specific number of reps, you’ll perform your sets for time. Complete as many reps as you can in 30 seconds, and aim to perform one more in the same amount of time each time you repeat the workout, or perform the set with better form and greater control. Don’t rush to get as many reps as possible; focus on perfect execution.
Step 1. Hold the club in front of you with the end pointing upward, and your elbow bent 90 degrees. Tuck your tailbone so that your pelvis is parallel to the floor, brace your core, and squeeze your glutes. Draw your shoulders down and back—think “proud chest.” Maintain this body position throughout the exercise.
Step 2.Reach the club over your shoulder and behind your head, as if you were raising it to deliver a blow. Swing the club down to its starting position by driving your elbow forward again and down next to your hip, so the club is pointing vertically again.
As you raise the club on each rep, allow the weight of it to pull your elbow back and stretch your triceps and shoulder (but don’t relax anything). You may find that your range of motion increases over the course of a set. Bring the club down with force, but not so fast that you can’t control its descent and lose alignment.
Step 1.Stand two clubs on the floor so they sit vertically, a little outside shoulder width. Stand just behind them with a hip to shoulder-width stance, and, keeping your head, spine, and pelvis in a long line, hinge your hips back and bend your knees so you can reach down and grasp the clubs by their handles.
Step 2.Tip the clubs back toward you and extend your hips and knees enough to pick the clubs off the floor and allow them to swing back behind your body.
Step 3.Reverse the momentum and swing the clubs in front of your legs, bending your knees to decelerate them. The range of motion is fairly short. Continue swinging the clubs in this pendulum motion, bending your hips and knees to power the movement. Do not allow your hips and knees to lock out at any time, and maintain a proud chest position and alignment from your head to your pelvis.
Reps:Work for 15 seconds with right hand on top, then 15 seconds left on top
Step 1.Stand with feet between hip and shoulder width and hold one club with both hands to the right side of your torso. Your right hand should be on top of the left, and your left should be at the bottom of the handle.
Step 2.Keeping a proud chest, level pelvis, and shoulders square with your hips, press the club straight in front of your chest until your hands are at eye level and your elbows are locked out.
Step 1.Get on all fours on the floor. Your hands should be directly under your shoulders and your knees under your hips. Your toes should also dig into the floor. Tuck your tailbone so that your pelvis is perpendicular to the floor, and brace your core. Draw your shoulder blades down and together (“proud chest”).
Step 2.Try to maintain your shoulder and hip position as you step your left leg forward and place your foot on the floor to the outside of your left hand. Take a second to retract your shoulders and extend your hips after the rep. Return your leg to the all-fours position, and repeat on the opposite side.
Step 3.When you’ve done the mountain climber on both legs and returned to the all-fours position, push your hands into the floor, extend your knees, and drive your hips back into downward dog. Your head, spine, and tailbone should form a straight line as you balance on the balls of your feet. From there, you can pedal your feet, extending one knee at a time to help loosen yourhamstrings. Afterward, return to all fours to begin the next round of mountain climbers.
Steel Club Safety
There’s no denying that the club was originally created to bash things over the head, so we understand if you’re a little reluctant to start swinging it around your living room near your spouse or children. But with a little practice, you’ll see that the club poses no more danger than any other piece of exercise equipment—and maybe even less. Consider this:you’ll never get trapped under a 400-pound squat with it and have to call spotters to pull it off of you.
Heins offers the following safety tips: “Keep your eyes on the club at all times. Turn your head and follow it wherever it goes. When you feel your hands get sweaty, or you’re losing your grip, or you notice your form is starting to break down, end the set and put the club down. There’s no ’just one more rep!’ with club training. Also, be aware of your surroundings and make sure you give yourself space.”
]]> https://www.onnit.com/blogs/the-edge/the-pro-s-guide-to-box-jump-exercises-and-workouts2025-07-10T10:55:26-05:002025-08-15T06:37:19-05:00The Pro’s Guide to Box Jump Exercises and WorkoutsJeremy GottliebThe box jump is an exercise seen frequently among athletes, and even more often in YouTube gym fail compilation videos. It’s a great movement for developing power and a fun way to add a more athletic component to any strength workout, but most people misapply it in their training. There’s no denying that box jumps can spike the heart rate, but they were never intended to be done for conditioning, utilizing high reps and short rest periods. Let’s take a comprehensive walk-through of the box jump exercise, including the proper way to perform it, the training you need to improve it, and how to incorporate it effectively—and safely—to build total-body explosiveness.
What Is A Box Jump?
While the exercise does clearly involve jumping from the floor onto a box, it’s not quite as simple as it seems. Not any box will do, and the object isn’t just to get up on top of the surface by any means necessary.
The box jump is a low-level plyometric exercise.That is, it trains the muscles’ stretch reflex to develop explosive power.You quickly lower your body into a half-squatto stretch the glutes andhamstrings, and then use the resulting release of elastic energy to help power you up in the air. So as not to come down too hard, the box is there to break your fall, but it also teaches you to land like a cat—decelerating your bodymassand absorbing the force of your jump. These skills are highly valuable to athletes who jump and sprint, so the box jump is a staple in many sports training programs.
At the same time, because it’s not particularly complex or dangerous to perform (if done as intended), the box jump can be done by recreational gym rats who want to add a bit of power training to their routines.
The boxes used can vary in height from a few inches to a few feet, and can be constructed of hard wood, rubber, firm padding, and even steel. Whichever kind you have access to, make sure you start with one that’s not too high (more about this below) and offers a stable surface for your feet to land on—and an even base that doesn’t wobble. Some boxes have fairly small foot surfaces, so, in general, the wider or larger the platform you have to jump on to, the better. (You’ll have less chance of missing it!)
How To Do The Box Jump
Before we get into how to execute the jump correctly, let’s go over a few ground rules for safe box jumping. You’ll also want to check out the five progressions for building up to a box jump from Onnit Director ofFitnessEducationShane Heins,beginning at 1:03 in the video above.
Use A Moderate-Sized Box
First of all, be conservative with the height you choose. You should warm up on boxes that are very low to the ground—just a few inches to a foot or so high—and do your work sets with a box that’s only around knee height.Twenty-four to 30 inches high is plenty for all but the most experienced jumpers.Yes, we know you see people jumping onto 50-inch boxes and higher on YouTube and Instagram, but believe it or not, most of them are just trying to impress you, and they aren’t using good form.
The depth you squat to in your takeoff and your landing should be almost the same. That is, you should be landing in approximately a half-squat position, orwhere your knees are bent about 45 degrees.If you land so deep that your knees are practically to your chest and your lower back is rounded, the box is much too high!
Think about it like this: the point is to build athletic power. If you’re a football player exploding off the line of scrimmage, would you start in the bottom of a squat? Do you bend your knees 90 degrees to take a jump shot in basketball? Do sprinters curl up into a ball before they take off down the track at the sound of a starter’s pistol? Of course not. The goal of a box jump isn’t to leap as high as possible—it’s to train the mechanics that let you develop power when it counts.
Stand Far Enough Back
It matters how far away from the box you set up.Stand back a few feet and extend yourarmsso that your fingertips touch the boxwhen you reach forward with both hands. That represents the distance that should exist between you and the box when you’re about to perform your first rep, so make a note of it and stand in that spot when you begin your set. Respecting this space ensures you won’t catch your fingers on the box during your upswing when you propel yourself upward into the air. It’s also a good distance to prevent you from overjumping your target and tipping the box forward when you land.
Swing Your Arms Up
Speaking of upswing, understand how much your arms contribute to your jumping momentum. Your arms should swing down by your sides as you descend into the half-squat—the mechanics are somewhat like compressing a spring—and then swing upward with force as you jump. Many people do the opposite, driving their arms down toward the floor as they extend their hips and legs.While this may make you look like a human rocket ship, it’s utterly pointless in jump training,as it does not transfer forces from the floor and through your body to facilitate height.
Land With Control
You know the old saying, “What goes up must come down,” so we have to talk about how to land. Your landing should be quiet and soft. Coming down like a ton of bricks puts a lot of stress on the joints of the lower body and can cause injury. Also, as mentioned above, one of the benefits of a good box jump is learning to slow the force of your movement down,so try to stick your landings like a gymnast.If you find that you’re landing hard and loudly, guess what? The box is probably too high.
Step Down From The Box
Lastly, don’t jump off the box to return to the floor between reps. STEP down off it. Jumping down is the most common box jump technique mistake, and it’s a dangerous one. There’s no benefit to jumping backward off a box, and even at fairly low heights, it can injure your Achilles tendons. (Yes, advanced athletes sometimes jump backward to dismount the box, but we don’t recommend it for folks reading this article.) Set a smaller box, bench, or step next to the box you’re jumping onto and use it as a staircase to get down (if the box you’re jumping on is too high to comfortably step down from directly).
With all these caveats and details out of the way,here’s a step-by-step guide to performing the box jump movement.
Step 1.Set a box on the floor that’s roughly knee height. It should be high enough to provide some challenge but not so high that you can’t land safely. Twenty-four to 30 inches should do it. Extend your arms straight in front of you and stand at a distance that allows your fingertips to touch the edge of the box.
Step 2.Stand with your feet about hip-width apart. (If you deadlift, your deadlifting stance should be about right.) Quickly dip your hips, bend your knees, and swing your arms back to gather power.
Step 3.As soon as you feel your body drop into a half-squat position, explode upward, extending your hips and knees and throwing your arms up and forward to jump off the floor.
Step 4.Land softly in the middle of the box with both feet at the same time. Step down from the box carefully and take a moment to set up for the next jump.
What Muscles Are Used In A Box Jump?
The box jump is a major compound movement that requires a transfer of energy through the entire body, so you can pretty much point to an anatomy chart at random and land on a muscle that’s involved in the exercise in some way. Of course,the quads, hamstrings, and glutes are the prime movers, creating the hip and knee extension that lifts you off the floor,and your shoulders work to drive the upswing of your arms, which helps to propel you upward.
However, because you don’t load the body like you do in a squat, deadlift, or other resistance exercise, you probably won’t feel sore in these muscles the next day, and you won’t see size gains in them from jumping alone. The box jump doesn’t create a great deal of muscular tension, or maintain that tension for a length of time, so it’s not going to build bigger muscles. Using it in place of a leg exercise for muscle mass is not a good idea.
You may be surprised, however, to find that your deep abdominal and oblique muscles are in fact sore a day or so later. That’s indicative of how involved yourcoreis in transmitting forces to your arms for the takeoff. Remember that the goal of box jumping is power, and the result is a highly trained chain of faster, more explosive muscles that work together as a unit.
Best Box Jumping Exercises
Most of the time, you should practice box jumps with a 24–30-inch high box, using the technique described above.Three to five sets of three to five reps is a good general prescription for power gains,but end each set the moment you feel yourself slowing down or losing control of your landing.
Occasionally, to test yourself, you can use a higher box and attempt bigger jumps that might cause you to land deeper than a half-squat. In this case, you can work up to sets of three, two, or just one all-out jump. But for safety’s sake, do this sparingly, and have a spotter handy in case you stumble on the box.One to three times a week is enough frequency for box jumps.
Please be cautious. Unlike with strength training, where you need to add weight or reps on a semi-regular basis to keep making gains, progressing jump training isn’t so linear. Most athletes don’t need more than a moderate-height box, so don’t think that because you leapt up onto a 24-inch box last week, you need to use a 25-inch one this week.If you get to the point where box jumps feel easy at a certain height, work on jumping higher and landing on the same-size box before you bother to increase the elevation.Then, as explained, you can sporadically test your training by attempting higher boxes.
If you’ve done CrossFit WODs or attended aHIIT(high-intensity interval training) exercise class, you might have been instructed to do box jumps as part of a circuit or conditioning drill, using high reps and short rest periods.We suggest that you don’t train like this with box jumps. Explosive exercises and high repetitions don’t mix. That is, power movements like the box jump must be done for lower reps to prevent your form from breaking down due to fatigue. And you simply can’t generate the same explosiveness on a 10th jump as you can on the first three of a set, so high reps don’t suit the goal. Box jumps should also be done with longer rest periods for this same reason—two minutes or more between sets.
If you want to get anenduranceboost from your training, you can get it with any number of other, safer exercises. That said, if you’re determined to mix power and conditioning in the same session,we have a safe plan to do so below under HIIT Box Jump Workout.
The earlier in your workout that you do box jumps, the more power and height you’ll be capable of getting. But realize that the box jump does cause some impact on your joints. You also shouldn’t do any kind of fast movement without thoroughly warming up your muscles first, and even a great mobility routine done at the start of your workout may not be enough. Therefore,we suggest placing box jumps toward the beginning of your session, so you’re fairly fresh when you do them, but not cold.For instance, you might do them as your second or third exercise, after a few sets ofhamstringand glute work. Leg curls, hip thrusts, or glute-ham raises will pump blood into the posterior chain (the muscles on the back side of the body) and lubricate the hips and knees.
There are other exercises you can do to that sometimes don’t require a box, or even a jump, but will support your box jump training and improve your overall jumping ability. By choosing movements that train the upper body to generate upward force, or that strengthen the posterior chain, you can tighten up the component mechanics that make for gravity-defying leaps.
Step 1.Place a kettlebell on the floor and stand with feet hip-width apart. Get into a half-squat, as if you were winding up for the box jump—you should be able to reach the kettlebell handle from that position. If the weight is too low, elevate it by resting it on a weight plate or mat. Now deadlift the kettlebell so you’re standing tall.
Step 2.Quickly dip your hips and knees as if jumping, lowering the kettlebell to just above the floor (don’t let it smack into the platform you created), and then explode up. Don’t worry about jumping high, justfocuson the power of your explosion. Your feet may rise off the floor, but it’s OK if they don’t. Land softly, reset, and repeat. Do 3 sets of 3–6 reps.
Weighted Stepup
See the video at 1:22
The stepup can help familiarize you with the use of a box while building the glutes, hams, and quads. You can do it with dumbbells,kettlebells, a barbell across the back of the shoulders, or a weighted vest.
Step 1. Hold onto your weight and place your foot on a box or bench. It should be high enough so that your thigh is about parallel to the floor when the foot is resting on it.
Step 2. Drive through your heel to step up onto the bench without letting your rear leg rest on it—let it dangle behind you. Step back down, starting with the trailing leg. Do 3 sets of 8–12 reps.
Push Press
See the video at 1:45
Doable with a barbell, kettlebells, or dumbbells, a push press is just an overhead press that uses the legs for assistance. By dipping the knees, similar to how you move in a jump, and then driving up explosively, you can press more weight overhead, which makes the exercise effective for upper-body strength as well as generating power from the ground up. Push pressing is also a great way to learn to keep your body tight and braced. If any muscles are relaxed, you won’t be able to move the weight effectively.
Step 1.Hold the weight at shoulder level and stand with feet about hip width. Brace your core.
Step 2. Drop into a quarter-squat, initiating the descent by bending your knees. Keep your head, spine, and pelvis in line so your back is flat and your eyes and head are forward. You don’t want to turn this leg drive portion of the lift into a squat, so only bend your knees enough to get some momentum, and don’t hinge your hips too much. Imagine yourself doing the move against a wall and sliding your torso up and down it—you should be that upright.
Step 3. As soon as you’ve dipped, extend your hips and knees explosively to stand up straight, driving through your heels, and simultaneously press the weight straight overhead. You’ll need to push from your shoulders and triceps, but with a strong and quick leg drive, most of the power for the press should be provided by your lower body. Keep your core tight throughout the move so your spine is stable and safe. Lower the weight back to your shoulders, take a moment to reset, and then begin the next rep. Do 3 sets of 5–10 reps.
HIIT Box Jump Workout
We’ve established that box jumps should be used conservatively and for athletic performance, but we can’t deny that they spike the heart rate and involve almost every muscle in the body, so we understand if you’re tempted to use them in a conditioning workout that burns calories and boosts endurance.
A way to do this safely is to perform a low-rep EMOM,meaning that you set a timer and perform a set of jumps every minute on the minute. Find a fairly low box—low enough that you know you won’t have trouble landing on it even if you’re tired—and start the clock. Do three jumps, and then rest for the remainder of that minute. When the timer reaches 1:00, do another set. So let’s say the three jumps takes you 15 seconds to do; you’ll get 45 seconds to recover.
Continue this for 20 minutes. It may seem easy for the first five minutes or so, but those short rest periods will catch up with you. This kind of workout probably won’t do much for speed and power, but it can serve as cardio.
If you’re a recreational gym-goer who mainly trains for a better physique and functional strength, but you’d like to add another athletic component to your workouts, incorporating box jumps before your biggest lift of the day can help to prime your nervous system. This can improve your performance on lower-body compound exercises like the squat and deadlift by supporting the recruitment of your fast-twitch muscle fibers. A few sets of box jumps done prior to a big barbell lift won’t fatigue you for the heavy training, but it may allow you to lift heavier and with better form.
Another option is to combine box jumps with a barbell movement, doing the two back to back. This is called contrast training, and it’s a methodresearchhas shown can maximize power development in athletes.
In a contrast set, you might do deadlifts with 80% of your max for a set of five (you should have at least a rep or two left in you; don’t go to failure), and then take about 30 seconds rest—during which you can walk over to the box. Now do a set of three jumps at a challenging height. Rest three to five minutes, and repeat for three to four total sets. This is stressful training, so it should be your only exercise for the session, and you should only do contrast training for three weeks at a time.
]]> https://www.onnit.com/blogs/the-edge/what-to-know-about-pepsin-benefits-uses2025-07-10T10:55:25-05:002025-08-15T07:02:41-05:00What to Know About Pepsin: Benefits & UsesJeremy Gottlieb
Before we go any further: if you’re here because of a typo in your Google search, and you really wanted to read about a fizzy soft drink, click the back button and try again.
However, if in fact you want to read about thedigestiveenzyme pepsin, you’re in the right place. And while it’s perhaps not quite as exciting as Pepsi, pepsin is pretty important—especially if you eat a lot of protein in hopes of building muscle and/or losing fat.
What Is Pepsin?
Pepsin is an enzyme in the stomach that helps break down the protein in your food fordigestion.Specifically, it acts on the proteins in meat, eggs, dairy products, nuts, and seeds.It is the first enzyme to attack protein in a group of enzymes known as proteases (you’ll often see this term on digestion supplement labels). Pepsin was the first enzyme to be discovered, and was named by the German physiologist Theodor Schwann—the man who recognized the cell as the most basic unit of animal structure.
Here’s how pepsin works¦
Glands in your stomach lining make a protein called pepsinogen. If there is a sufficiently acidic environment (between 1.5 and 3 on the pH scale), the vagus nerve, along with hormone secretions, stimulate the release of pepsinogen into the stomach. Pepsinogen then mixes with hydrochloric acid (stomach acid) and converts to pepsin.Pepsin breaks down the proteins in whatever foods are in your stomach into smaller units called peptides, which are then absorbed by the small intestine.In the intestine, other proteases continue to break the peptides down further into amino acids that your body can use to build new proteins for itself, or to burn for fuel.
Sometimes pepsin can flow backward from the stomach to the esophagus, resulting in acid reflux conditions. For this reason, traces of pepsin in the esophagus canhelp doctors diagnose reflux events. Drug companies sell products that are intended to inhibit gastric secretion to provide relief; one such product, Pepcid AC®, derives its name from pepsin.
Pepsin can be taken as a supplement to help with digestion. Commercial pepsin is derived from the stomachs of pigs. Due to its acidic nature, pepsin is also used to remove hair and other tissues from animal hides before they are tanned, as well as shells and scales from seafood.
What are the Benefits of Pepsin?
Pepsin does to protein in your food what a six year-old child does to a LEGO building—it dismantles it into smaller pieces. Those pieces can then be absorbed easily by the small intestine.
Pepsin is alsoresponsible forkilling bacteriain the stomach andseparating vitamin B12from protein so that the vitamin can be properly utilized.In 2015,Chinese researchersproposed that pepsin may help us digest nucleic acids—components of DNA and RNA that are essential to virtually every aspect of health, from theimmunesystem to muscle growth. This finding suggests that pepsin’s role in nutrient breakdown is greater than previously thought.
Why Take a Pepsin Supplement?
Digestive enzymes can become diluted for a number of reasons, and, as astudyinOncotargetnoted, they tend to diminish further as we get older.If the pH of your gut rises, your stomach won’t be able to release sufficient pepsin.Without the enzyme that breaks it down, the body can’t process protein optimally. Therefore, taking a supplement that contains pepsin may be helpful.
Pepsin can be taken alone, paired with an HCl supplement (betaine hydrochloride), or as part of a digestive enzyme blend. Some protein powders are also blended with pepsin and other enzymes to aid the protein’s absorption.
Pepsin For Bodybuilding
If you’re eating extra protein in an effort to put on musclemass, or to retain muscle while you diet off fat, pepsin can help ensure that the protein you consume gets utilized properly. “While there is no clinical evidence linking pepsin supplementation tomuscle building,clients with [digestive problems] often report good results when they start taking a digestive enzyme,”says Marc Bubbs, ND, CISSN, performance nutritionist for the Canadian men’s basketball team and author of the book Peak. “It may lead to restoration of appetite and consumption of the required amount of protein and calories to achieve hypertrophy.”
Another way to boost protein assimilation is to watch what you’re eating.Researchpublished inCritical Reviews in Food Science and Nutritionnotes that, “Legumes, cereals, potatoes and tomatoes contain inhibitors that reduce protein digestibility by blocking trypsin, pepsin and other gut proteases.” So,if you want to ensure that one component of your meal isn’t sabotaging another, you may need to limit your consumption of these foods when eating protein sourceslike meat, dairy, and fish. (Thorough cooking can also reduce the inhibitors in foods like beans and potatoes.)
While pepsin doesn’t exist in food, you may be able to boost your body’s own production of it by eating more protein- and fat-rich foods.Researchin theAmerican Journal of Clinical Nutritionsuggests that high-fat/keto diets may produce greater amounts of pepsin.
]]> https://www.onnit.com/blogs/the-edge/5-resistance-band-knee-exercises-for-knee-pain2025-07-10T10:55:25-05:002025-08-15T06:30:43-05:005 Resistance Band Knee Exercises for Knee PainJeremy Gottlieb
Do you have a bad knee or knees? You can become your own physical therapist by using these 5 resistance band knee exercises to help reduce knee pain.
These movements are great for alleviating any knee pain due to a torn meniscus or ligament, jumper’s knee, osteoarthritis, tendonitis, or other common knee ailment.
With the use of resistance bands, perform these knee strengthening exercises to improve the strength of the specific muscles of the knee.
Please note that if you are coming off of an injury, they should only be performed if they do not cause or increase pain.
Begin with these basic resistance band knee strengthening exercises. Once these become too easy, you can increase the resistance band tension.
5 Resistance Band Knee Exercises for Knee Pain
Resistance Band Knee Exercise #1: Terminal Knee Extension
The Terminal Knee Extension (TKE) exercise moves the knee through the end stage of the range of motion, or from a partially bent position as opposed to fully bent. Fix a band to a stationary object and the other end around the back of your knee.
From there you step backwards creating tension in the band and letting your knee translate forward. Now, flex your quad hard and drive your heel downward, straightening your leg.
Resistance Band Knee Exercise #2: Stork Stance TKE
erminal knee extension exercises strengthen the quadriceps muscles in your thighs as well as your shin muscles. The Stork Stance TKE variation exemplifies this even more so than the standard TKE.
Set up exactly how you would for the standard TKE, but this time you will perform the exercise with 1 foot off the ground.
Resistance Band Knee Exercise #3: Lying Knee Extension
The Lying Knee Extension is the first of three ground-based resistance band movements in this series. Begin this exercise lying on your back with a resistance band wrapped around your ankle with your knee to your chest.
Slowly extend your knee, until your leg is fully extended, then return to the start. It should mimic the movement of a hamstringcurl.
Resistance Band Knee Exercise #4: Lying Hip Extension
Weak glutes and tight hip flexors cause your pelvis to tilt forward, which may further knee pain. The Lying Hip Extension is an excellent resistance band exercise for increasing the range of motion in the hip flexors, which will reduce knee pain.
Begin this exercise lying on your back with a resistance band wrapped around your ankle with your knee to your chest. Slowly extend your knee until your leg is fully extended, then return to the start.
This is very similar to the lying knee extension, but you are pressing your leg out, not up.
Resistance Band Knee Exercise #5: Lying Glute Extension
The Lying Glute Extension is our primary glute stretch of this resistance band series. Tight glutes can cause tighthamstrings, which can pull against the quads causing knee pain. Begin, by lying faceup on the floor with your left leg bent.
Using a resistance band, pull your left leg as far over your right as your range of motion will allow.
]]> https://www.onnit.com/blogs/the-edge/what-to-know-about-saccharomyces-boulardii-benefits-uses2025-07-10T10:55:25-05:002025-08-14T16:07:45-05:00What to Know about Saccharomyces Boulardii: Benefits & UsesJeremy GottliebWe often hear the phrase “go with your gut” when talking about abiding by one’s internal instinct. However, when it comes to your health, going with your actual gut is something you should do as well.
Having a healthy gut is not only important for optimaldigestionand nutrient absorption, but there is also growing evidence that a balanced gut can support the body’simmunesystem too.
Enter your new best friend: Saccharomyces boulardii.
What to Know about Saccharomyces Boulardii: Benefits & Uses
What Is Saccharomyces Boulardii?
While its name may be intimidating, don’t worry—Saccharomyces boulardii (pronounced “sack-car-oh-my-sees boo-lard-dee”) is not a new type of dinosaur. Rather, it’s a gut-friendly yeast that functions as a probiotic. Also known commercially as Florastor (as in gut flora), this yeast acts similarly to how the good bacteria in our body does; it neutralizes bad bacteria—pathogens that can wreak havoc in the gastrointestinal tract.
“Probioticsin general are the friendly organisms, usually belonging to various bacterial strains,” says Shannon Ehrhardt, R.D., an EXOS Performance Dietician. “Saccharomyces Boulardii is a probiotic, but, unlike its bacterial counterparts, it’s actually a yeast. S. boulardii can be very beneficial for overallgut health, helping to maintain a healthy balanceof good and bad microorganisms.”
Problems with the intestinal barrier can be linked to health issues within the GI tract. Thedigestivesystem is the first line of defense for the immune system, so having healthy gut flora helps keep harmful bacteria from getting into our bloodstream.
What Are The Benefits of Saccharomyces Boulardii?
Much like your best friend that hates your boyfriend but supports you anyway, S. boulardii can help you put up with a lot of shit. No, really, S. boulardii has been used for the last 30 years to support the gastrointestinal tract by helping protect the gastrointestinal barrier, which has the effect of making you more, er, regular.
For example, when taking antibiotics, digestive complications such as loose, watery stool can occur as the antibodies work to rid the body of bad bacteria. Unfortunately, this takes the good bacteria along with it. S. Boulardii has been shown to aid the body’s ability to control its normal eliminations.
Similarly, uncomfortable and irregular bowel complications can occur when traveling, especially to foreign countries.When consumption of strange or unusual foods or drinks that your body is not used to occurs during travel, S. boulardii administration has shown positive results.
S. boulardii supports the protection of the intestinal lining from harmful bacteria. It promotes a healthy immune system and the continued function of the gastrointestinal barrier, as well as aids digestive enzymes for nutrient absorption and digestion.
What Foods Have S. Boulardii?
When initially discovered, S. boulardii was found to be in the fruits mangosteen and lychee. In 1920, French scientist Henry Boulard noticed that natives of IndoChina were using these plants by drinking the tea made from the fruit skins. He was later able to isolate S. boulardii (named for Boulard, if you hadn’t figured it out already) from these fruits, giving rise to its use in supplementation.
Outside of these foods, S. boulardii is hard to find in natural substances and is therefore most commonly consumed through over-the counter supplements (it’s included in Onnit’s Total GUT HEALTH™).
“With Total GUT HEALTH™, you not only have probiotics, butprebioticsas well, and betaine HCL—which promotes an optimal acidity level in the stomach,” says Ehrhardt.“It’s kind of a one-stop shop for everything your gut might need.”
It’s a good idea to actively include other probiotics in your diet alongside S. boulardii. You can get probiotic bacteria from kefir, sauerkraut, yogurt, miso, kombucha, and kimchi.
Some users have reported an increase of gas and bloating after taking S. boulardii. Otherwise, it is known to be safe for use in healthy individuals. Those with compromised immune systems should take caution and consult with a doctor before taking S. boulardii because, being a yeast, it comes from the fungus species and can lead to the presence of yeast in the blood.
How long does S. Boulardii take to work?
When taking S. Boulardii via capsule, the release of the yeast cells will occur within 30 minutes. The cells settle in the gut over about three days but will be absent from the system within roughly five days, according to the Denver Naturopathic Clinic. As S. boulardii is nonsystemic, it does not travel outside of the GI tract to the rest of the body.
]]> https://www.onnit.com/blogs/the-edge/why-you-should-start-eating-coconut-oil-and-these-4-superfoods2025-07-10T10:55:25-05:002025-08-15T07:39:03-05:00Why You Should Start Eating Coconut Oil and These 4 SuperfoodsJeremy Gottlieb
Coconut oiluse has skyrocketed over the past few years in the United States! For good reason, this fruit has many uses, is shelf-stable and can assist in metabolism, fat-burning and brain function.
A few key benefits:
Coconut oil contains an average of 60%MCT(Medium Chain Triglyceride). This type of fat is like rocket fuel for the brain and body.
The MCT can bypass most of thedigestionprocess and is quickly used for fueling the brain and body.
Coconut oil aids digestion and increases the absorption of other nutrients and amino acids. Think of coconut oil as a transportation shuttle sending your other nutrients around the body.
Coconut oil is an antimicrobial and may be beneficial against infections, yeast and bacterial overgrowth and even athlete’s foot.
Did you know human breast milk naturally contains MCT’s? It is a crucial component of the diet for even the tiniest developing brain and body. Get your coconut oil for yourself and breast milk for your newborns!
4 More Super Foods
When people hear the word Superfood, they immediately think of some exotic fruit only found in the heart of the Amazon rainforest.
While the Amazon rainforest, also known as the “Lungs of the Earth” provides ingredients for 1 out of every 4 medicines, the foods we are discussing today can come from a source much closer than you may think.
Superfood #1: Grass-Fed Beef
Conventional ideologies and negative connotations about red meat have remained in the consciousness of Americans and many other modern cultures for way too long.
A few key benefits:
Vitamin E content is 4 times higher inGrass-fed beefthan grain-fed beef, as well as being an important antioxidant for preventative health care.
According to Nutrition Data, Grass-fed beef can contain similar amounts of Omega-3 as Salmon and Tuna.
CLA (Conjugated Linoleic Acid) a type of fatty acid found naturally in Grass-fed beef, helps the body burn fat, reduce sugar cravings and provide supportcardiovascularhealth. CLA content is much higher in grass-fed beef than conventional grain-fed beef.
Grass-fed Beef contains 2 to 4 times more Omega-3 Fatty Acids than conventional, grain-fed beef. Omega-3 deficiencies have been linked to cognitive dysfunction and othermentalmalaise.
Superfood #2: Spinach
Popeye wasn’t joking when he said to eat your spinach. This is one of the most versatile, inexpensive, nutrient-dense and easy to grow foods.
Need more reasons to get your greens?
Spinach aids digestion and can ease the intestinal damage caused by toxic, inflammatory compounds such as gluten, high-fructose corn syrup and canola oil.
Lutein is an important component of animal fats, egg yolks and plants. High levels of lutein in the eyes have been shown to enhance vision and reduce the chances of losing your eyesight with age.
Spinach is pretty minimal in taste and can be disguised by throwing a handful into a smoothie with the addition of kale, a few berries and a source of quality protein. Talk about a power, digestion and energy boost!
Superfood #3: Blueberries
Have you seen blueberries flourishing in sunlight in the garden? How can such a precious fruit not shrivel up in the sun? Blueberries contain an antioxidant named anthocyanin which protects them from the sun!
Here’s some reasons you should have blueberries in your Superfood food stash:
The protection against the sun that blueberries have can provide the same effect for us. Eating blueberries can provide a natural UV protecting effect for our skin.
Blueberries are naturally low in sugar, providing a minimal insulin response and can act as a treat in someone’s diet who is missing the sweet taste from the soda or candy they used to consume.
Usually, the darker the fruit, the more nutrients and vitamins it contains. Blueberries are no exception and rate near the top of the charts for overall best fruits to consume.
Superfood #4: Eggs
Just like your grandmother gathered fresh from the coop not long ago,eggsplay a beneficial part of your diet if you’re looking to achieve health, strength and energy.
Most people raising livestock for eggs have ducks and chickens. If you aren’t able to raise your own, chicken eggs are the most widely available and affordable.
Egg allergy is the second most common food allergy in the Western World. Some people may have an allergy to chicken eggs and can havedigestiveproblems. In this case, I recommend switching to duck eggs as some may find relief from their distress.
Before we get into the benefits, a quick reminder is to NOT throw out the yolks! Somehow the health industry has convinced the population that egg yolks are unhealthy. More than a few restaurants and cafes offer an egg white sandwich or meal.
Often times these establishments even charge extra to have egg whites. After all, willingly throwing out beneficial compounds and nutrients should cost you!
Now, here are some of the reasons eggs should be in your fridge:
Meats and proteins are made up of amino acids. Eggs happen to contain L-Tryptophan and Tyrosine. These two amino acids directly create our energy and happiness brain chemicals.
The neurotransmitters, serotonin and dopamine which allow us to have a stable, happy and energeticmoodare created from these amino acids. Next time you encounter a grumpy person, feed them an egg or two.
Raw egg yolks provide more antioxidants than an apple.
Estosterone, an important hormone for both men and women, is created from cholesterol. Just like coconut oil, eggs are a dense and high quality source of cholesterol.
As you can see, we didn’t have to venture in to the Amazon to find these Superfoods.
Browseeatwild.comorlocalharvest.organd get ahold of a local farmer and supplier for your meat and produce. This helps support the grassroots movement of healthy, organic and local food for your city!
What Do Healthy Labels Mean?
There is a lot of deceptive marketing in the food industry that we may save for a more in-depth discussion. However, if something is not labeled “Organic” it’s probably not. “All-natural” means nothing when it comes to your eggs and meats.
Look for a seal specifying it’s organic nature or seek out the source for yourself. It can be an empowering experience to shake the person’s hand who raised your food. You can always grow it yourself too.
Organic foods are always best, but non-organic meats and eggs will always be healthier than twinkies and ho-ho’s. Purchase what your budget allows and evaluate your other expenses. Food comes first, after rent, right?
]]> https://www.onnit.com/blogs/the-edge/so-you-want-to-do-a-human-flag2025-07-10T10:55:25-05:002025-08-14T17:41:46-05:00So You Want To Do a Human Flag?Jeremy GottliebIt’s a showstopper for sure! Pull one of these puppies out on a busy city corner intersection and watch all the whistles and atta boys you get! Perhaps not as hard as front or back levers, but it’s an exercise that requires enormous strength where the shoulder girdle meets the torso and a rock solid controlledcorethat has the tensile strength of an I-beam.
It’s convenient as well, because any medium diameter street sign or piece of playground equipment will do!
What benefits do you get from performing the flag? Great grip strength, shoulders lats, obliques and quadratus lumborum all get an outstanding work out.
The only problem is the taller you get, the harder it is! Longer legs? Harder! Longerarms? Harder!
I am 51 years young, 6’ 1” 164 pounds. It took me 3 months from being in good condition to pull off the flag using this program. I have seen a 6’3” 215 lb. man do it. If you are taller than that, don’t let this dissuade you from doing the flag. Remember it’s about the journey and not the destination. You will be the better for it!
OK, let’s get down to the nuts and bolts of the process. This will be a 3-part series in taking a rank beginner inbodyweight training to create the endurance and strengthto pull off the human flag in 3-6 months depending on what kind of shape you are in when you start. Some may take longer, some shorter.
I would also like to add that this aspect of training helped me to heal my back pain after years of over emphasizing my lower back muscles deadlifting. What a nice side effect!
Prerequisites to Start Human Flag Training
A.Singlearmhang for 30 seconds B. 10 pullups for 4 sets C. Side plank 45 seconds
Let’s get started!
Human Flag Training Phase 1: 5 Basic Core and Shoulder Strength Exercises
1. Basic Side Plank on Elbow
Hold as long as possible then switch sides. 45 seconds rest. Repeat for 5 sets.
2. Side Plank With a Reach
Hold as long as possible, then switch sides. Rest for 45 seconds. Repeat for 5 sets.
3. Inclined Side Plank
Hold as long as possible, then switch sides. Rest for 45 seconds. Repeat for 5 sets.
4. Hanging Hip Hiker
Hang from a bar and fire your lower back so your legs come out to either side. 5×5 each side hold for about 4 seconds each side.
Strong lats and shoulders are also necessary, so you need to be able to do perfect, chin above bar, strict pull ups (do not kip, cross your legs, or swing. In other words, do not cheat.) You need to be able to pull off 5 sets of 15-20 reps. Take a 1-minute break between efforts.
5. Piked Shoulder Push Ups
15-20 reps. 30 seconds rest between sets.
You will be ready to move on to the next phase when you can do this workout 2 to 3 times a week and hold all the planks for 2 minutes and complete all the sets of pull ups and piked push ups for 15-20 reps.
Good luck on your progress. I look forward to you joining the eliteclubof folks who can pull off the human flag. This one will take time. Patience will be rewarded with diligent training.
]]> https://www.onnit.com/blogs/the-edge/the-ingredients-of-total-human-optimization-a-guide-to-vitamins2025-07-10T10:55:24-05:002025-08-11T13:33:06-05:00The Ingredients of Total Human Optimization: A Guide To VitaminsShane HeinsWe’ve been taught that a multivitamin will fill in the gaps in our diets since mom handed us our first Flintstones™ chewable. The trouble is, like the Flintstones themselves, most vitamin and mineral supplements remain in the proverbial Stone Age. They don’t contain all the nutrients we really need to be optimized, or in the amounts that are necessary to feel a positive difference. That’s why Onnit created Total Human®: an all-in-one pack that combines the most vital components of several of our other products (Alpha BRAIN®, New MOOD®, and more) to offer one mega-supplement for supporting health and performance.
The Ingredients of Total Human Optimization: A Guide To Vitamins
While TPC was an instant success and has been embraced by many professional athletes, we knew we could do even better. We listened to our customers and followed the emerging science on micronutrition. For one thing, we discovered that the spirulina tablets we included in the TPC day pack had a tendency to get crushed in transit, showing up as messy crumbs when users opened the packet. For another, the research showing how widespread vitamin D deficiency is, and how detrimental that can be, was a wake-up call that we needed to pump up the dosage. The CDCreports that 23 million Americans have a “severe” vitamin D deficiency, with African-Americans and Mexican-Americans carrying the highest risk.
In response, we replaced the spirulina tablets with capsules (and changed to a certified organic source). We also upped the vitamin D content by almost four times and, recognizing the importance of getting moreB vitaminsin the diet, added an entire B complex for its energy- and cognitive-supporting power.†
With all these changes, it was clear thatTotal PrimateCare had evolved into something greater, so we’re now reintroducing it as a new, improved product we callTotal Human®(available now).It covers all the micronutrition bases that made TPC a staple in our athletes’ diets, plus the aforementioned additions.
If you haven’t tried our formulas yet, or you’re skeptical about how they can help optimize you, let this guide answer all your questions about vitamins andmineralsand other little-known nutrients that can make a huge difference in how you feel, think, and perform.
The Easiest Way To Get Optimized
There’s no shortage of options for vitamins and supplements, but which ones do you need?
Not simply one pill,Total Human®is a dense, rich dose of a myriad of Earth-grown nutrients and clinically-studied ingredients specifically balanced to support the brain, mood, energy, bones,immunesystem, joint health, and more.†
These formulas come in convenient day and night packs, each aimed at building you up while you work, and working while yousleep.†
What’s The Difference Between Vitamins and Minerals?
Vitamins are the micronutrients you get from animal and plant sources. These include A, C, D, E, K, and the various B vitamins. Minerals come from soil and water and includecalcium, iron,magnesium, potassium, and many others. Both vitamins and minerals are essential to good health and athletic performance.
There are two types of vitamins: fat-soluble and water-soluble. Fat-soluble vitamins, including A, D, E, and K, dissolve in fat. That means that they’ll be soaked up by your fat cells and stored when you consume them. Water-soluble vitamins (the B vitamins and vitamin C) need to dissolve in water before your body can absorb them. They can’t be stored, and, as a result, you need to consume more of them. In a similar way, your body needs more of some types of minerals than it does others. Its demand for calcium is high, while copper,iodine,selenium, andzinc, for example, are known as trace minerals because you only need small amounts daily.
What Do Vitamins and Minerals Do?
Both types of nutrients play multiple roles in supporting growth and development and helping the body’s cells function properly. Here’s a quick (and only partial) rundown of what the most popular vitamins and minerals do.
Vitamin A. An essential component of a protein that absorbs light in the retina, it’s crucial for vision.
B vitamins.There are eight of them in all, including thiamine, riboflavin, niacin, and folate.B vitamins promote energy and help support memory, skin health, and a positive mood. Astudy in Human Psychopharmacology found that taking B vitamins significantly decreased subjects’ feelings of stress in the workplace after 90 days, causing the researchers to suggest Bs as a cost-effective treatment for job-related strain.
Vitamin C. Necessary for protein metabolism and the creation of collagen, C is a major factor in healing wounds. An antioxidant, it fights free radicals and helps regenerate other antioxidants within the body.
Vitamin D. Helps promote immune and heart health as well as regulate mood. D also increases the body’s ability to utilize other minerals, such as calcium.
Vitamin E.A powerful antioxidant, it helps with immune function and metabolism.
Vitamin K. Helps regulate blood clotting, so wounds stop bleeding and can begin to heal.
Calcium. You already know it helps fortify bones and teeth, but calcium also lets your muscles contract and aids in the secretion of hormones like insulin.
Iron. Helps red blood cells carry oxygen around the body, supporting energy levels.
Magnesium.More than 300 different metabolic reactions depend on magnesium, including the body’s ability to burn carbs and fat for energy. Similar to calcium, it can promote bone mineral density.
Phosphorus. Every cell in the body needs phosphorus to function. It helps filter waste out of the kidneys and manages energy.
Potassium. Helps maintain fluid balance in the blood and muscles; supports muscle, heart, and nervous system functions.
Zinc. Your sense of taste and smell rely on it.
Can’t I Get The Nutrients I Need Through Food?
Eating a balanced diet with animal foods, vegetables, fruits, and whole grains will supply the lion’s share of vitamins and minerals you need. For this reason, some pundits have argued that multivitamins are a waste of money. Eat well, they say, and your micronutrient requirements are covered.
The trouble is, however, that most people don’t eat well. Especially kids, and their poor eating habits can not only make them perform worse in school but also be more disruptive. A California State Universitystudy supplied a group of schoolchildren with a multivitamin supplement and tracked their behavior for four months. Ultimately, the kids’ whose diets were bolstered by the extra vitamins and minerals exhibited less “antisocial behavior”—that is, less fighting, cursing, vandalism, and other offensive conduct.†
And how about multivitamins helping them think better too?The Journal of Alternative and Complementary Medicinerevealed that supplementation could dramatically raise “the non-verbal intelligence” of some school kids, “presumably because they were too poorly nourished before supplementation for optimal brain function.”†
While it’s true that major vitamin and mineral deficiencies (to the point where diseases result) are hard to come by in developed nations like the U.S., recent research indicates that the vast majority of us still aren’t getting enough of what we need. A 2016articlein the Journal of Family Practice states that more than90% of Americans don’t get adequate amounts of at least one vitamin or mineral in their diets. This can be due to lack of access to certain foods or avoidance of such foods for cultural reasons. As a result, the U.S. Departments of Health and Human Services and of Agriculture note that dietary supplements “may be useful in providing one or more nutrients that otherwise may be consumed in less than recommended amounts or that are of particular concern for specific population groups.”
Furthermore, astudyin the Journal of theAmerican College of Nutritionshowed that, when subjects combined a good diet with a multivitamin, they were more likely to meet their minimum vitamin and mineral requirements.
Nevertheless, there’s a persistent myth that multivitamins don’t get absorbed—you just pee them right out. First of all, this could only be true of water-soluble vitamins, not those that are stored in fat. Secondly, pissing out good nutrition will only happen when your body senses an excess of vitamins and minerals. Unless you have some seriousgut healthissues that prevent absorption, your body will take in most of what you consume if you need it—food or supplement. “Multi-vitamins work as a great catch-all,” says Carla Nowicki, R.D., an Austin, Texas-based dietitian and owner of Pursuit Nutrition. “It is hard to track all the trace amounts that each individual needs, so a multi-vitamin will make sure you are covered.”
Which vitamins and minerals am I not getting enough of?
Research consistently shows that Americans have trouble meeting their requirements for the following.
B vitamins. According to theCenters for Disease Control(CDC), 30 million Americans have a B6 deficiency, and African Americans are at a particularly high risk. Furthermore, data from Tufts University shows that 40% of people aged 26 to 83 have B12 levels that are on the low end of normal—bad enough that they may exhibit lack offocus. Aside from assisting with feelings of alertness, B12 is thought to protect the sheaths that cover nerves.† So failing to maintain B12 levels is likeneglecting to maintain electrical wires—they’ll fray, and the signals they carry won’t get relayed efficiently.
If you follow a plant-based diet, you’ll almost certainly need to supplement with B vitamins, as they’re not available outside of animal foods. Areviewof 40 studies in theEuropean Journal of Clinical Nutritionfound that as much as 86.5% of vegetarians—and even more vegans—were at risk for B vitamin deficiency.
Calcium.Studiesshow that teenagers tend to replace milk in their diets with soda, leading to a lower calcium intake that can hinder their overall development. As for grownups, the National Health and Nutrition Examination Survey(NHANES)indicates that the average dietary calcium intake for both men and women is likely several hundred milligrams below the Recommended Dietary Allowance (RDA).
Vitamin D. Yes, your body can make its own when you’re exposed to sunlight, but it’s not as easy as a day at the beach. Atmospheric conditions (like cloudy days) and geographical location can filter out much of the sun’s rays—not to mention any clothing or sunblock you wear. This is one vitamin where it seems better to err on the side of more rather than less. A 2014study from the University of Alberta concluded that the current Recommended Dietary Allowance (RDA) for vitamin D, 600IUs daily, was not enough to support bone and immune health. Researchers go on to suggest that more than 10 times that amount may be necessary to provide the benefits that D is touted for.
Iodine. In 2012, thejournalPaediatric and Perinatal Epidemiologyreported that iodine requirements increase 50% during pregnancy. Failure to take in more can actually cause a woman’s baby to be born dumber. Say the paper’s authors: “Two meta-analyses have estimated that iodine-deficient populations experience a mean reduction in IQ of 12–13.5 points.” Meanwhile, the CDC says that one-third of pregnant women in the U.S. are borderline iodine deficient. In addition, according to theLinus Pauling Institute, a non-profit research center at Oregon State University, iodine intake has been decreasing in recent years.
Iron. Females are again at the greatest risk. The CDC claims 7.5 million women ages 12 to 49 have low iron (African- and Mexican-Americans are again the most susceptible among them).
Magnesium. In developed nations, deficiency of magnesium is more common than a deficiency of any other vitamin or mineral, with the exception of vitamin D. Thoughthe RDA is 400–420mg/day for men and 310–320mg/day for women,NHANES found that Americans’ average magnesium intake is much lower—350mg for men and 260mg for women. Older people (age 50+) exhibited even worse numbers.
The problem is how Americans eat. The National Institutes of Health (NIH) states that “The diets of most people in the United States provide less than the recommended amounts of magnesium.” People fill up on grains, and while bran flakes and other cereals come up on lists of foods that are magnesium-rich, the magnesium they offer is poorly absorbedby the body.
According to the NIH, other health factors can drain your magnesium levels as well, such as gastrointestinal problems or being very overweight. Low magnesium can exacerbate these troubles further, as too little magnesium is bad for blood pressure and insulin sensitivity.
One of the main reasons otherwise healthy people can come up short on certain vitamins and minerals is because of activity levels. People who weight train and play sports burn through nutrition more quickly than sedentary people do, so if that sounds like you, it’s likely that your micronutrition needs aren’t being completely met, even by your healthy diet. The government’s 2015Dietary Guidelines for Americans suggest that dairy, fruit, and vegetable intake is suboptimal among the populace, and that athletes in particular may be under-consuming vitamins A and C, along with calcium, iron, and zinc.
Is It Dangerous to Take Vitamins and Minerals?
Scientists have established upper limits for micronutrients, and consuming greater amounts has been shown to have adverse effects, but mainly in special populations. According to theNational Institutes of Health, smokers should avoid multivitamins that provide a large amount of vitamin A or beta-carotene, as they may increase the risk of lung cancer (remember, this is in people who already smoke cigarettes). Additionally, pregnant adult women who exceed the 10,000 IU/day upper limit for vitamin A may put their babies at increased risk for birth defects.
In 2017, there was a scare over B vitamins and lung cancer whenOhio State Universityclaimed a link between B6 and B12 and an increased risk for the disease. Again, as with the vitamin A report, the subjects were smokers, between the ages of 50 and 76, and taking huge amounts—20mg of B6 and 55 micrograms of B12 (the RDA is only 1.3mg and 2.4 micrograms, respectively). Interestingly, the risk of cancer was not found to increase among the women studied.
The study’s head researcher, Theodore Brasky, summed up the findings by saying, “If they are men and they are smoking and taking B vitamin supplements, they really need to quit smoking. Smoking is the number one cause of lung cancer.” It’s also worth noting that astudyby the International Agency for Research on Cancer (IARC) found that people—including smokers—who had high levels of B6 and the amino acid methionine in their blood for five years were at a60% less risk of getting lung cancer. Methionine is common in lean meats such as chicken breast.
Finally, excessive iron (greater than 20mg per kilogram of body weight) has proved to be problematic, leading to stomach trouble, especially if taken without food. It can also interfere with zinc absorption.
Taking medication can also change your tolerance for certain vitamins and minerals, so if you’re on drugs, speak with your doctor before adding any supplements to your diet.
But a greater health concern than getting too much of a micronutrient (or even too little) may be where that micronutrient came from. To save on costs, many multivitamin sellers source their products from China, where pollution is a major public health problem. AsThe Epoch Timesreported in 2014, “Vitamins and nutritional supplements usually use agricultural products as key raw materials. The top vitamin exporting province, Zhejiang, has an alarming level of soil pollution from heavy metal. As matter of fact,one-sixth of China’s farmlands are heavily polluted.”To make matters worse, only two percent of imported vitamin supplements are inspected.
The best way to ensure that you get a safe, quality multivitamin is to choose one that has been third-party tested.“That’s the only guarantee that what the label says is in the bottle is actually what you’re getting,”and that the ingredients are pure, says Shannon Ehrhardt, R.D., a performance dietitian with EXOS (Onnit’s partner in performance nutrition).
Products that bear the NSF or USP seal have been manufactured in a GMP (Good Manufacturing Practices) facility. If you’re a college or pro athlete, you should supplement with products that have also been deemed free of any banned substances—the type that can ruin a career if they turn up on a drug test. “NSF Certified for Sport, Banned Substance Control Group (BSCG), and Informed Choiceare three companies that have a respected reputation in this part of the supplement world,” says Ehrhardt. “I won’t even give something as simple as B vitamins or vitamin C to my athletes unless it has one of those three stamps of approval.”
Does the Type of Vitamin Matter?
Not all vitamins are created equal. Your body will absorb some forms better than others. Astudyin theInternational Journal of Clinical Pharmacologyfound that benfotiamine—a type of B1—assimilated best inside the body, peaking B1 levels five times more than other B derivatives, and itsbioavailability was more than 3.5 times greater.† In general, you’ll also want your multi to include B vitamins that are methylated. A 2013reviewshowed that methylated folate (B9), which is how folate appears in nature, is more readily absorbed. And when it comes to vitamin D, the D3 vitamin is the best choice, as it’s the same kind your skin synthesizes with sunlight.
The delivery mechanism you choose for your multivitamin also affects its potency. These days the options range from capsules and tablets that you swallow to tabs you can chew and liquid shots that you drink. Capsules typically absorb well, have a long shelf life, and contain the greatest amounts of the nutrition they purport to. Tablets are usually a good option too, but they can break during travel, leaving a messy powder that makes consumption more difficult. According to Carla Nowicki, there’s a simple at-home test you can put your tablets through to see if they work well: drop them in water. They should dissolve in eight hours. “If they don’t dissolve and they sink to the bottom of your glass,” says Nowicki, “they probably won’t be absorbed as easily.”
Chewable tablets and liquid vitamin cocktails may taste good, but theextra ingredients manufacturers need to add to make them palatable (sugar, artificial flavorings) dilutes the amount of micronutritionthat can go into them. These products typically won’t include chromium, magnesium, selenium, or zinc either, as their flavors are hard to mask.
Gummy vitamins can be alluring because they seem like candy, and they basically are. (Nature Made Gummy Vitamin C contains two grams of sugar per serving.) But according toConsumerLab.com, a group that conducts independent testing of consumer health products, most gummies simply can’t be trusted. In tests conducted on 50 different multivitamins,80% of the gummies did not meet dietary supplement standards.Furthermore, 12 of the products contained as little as 24% of the micronutrients that were advertised, and, simultaneously, a frightening 157% more than promised.
When Should I Take a Multivitamin?
Some vitamins and minerals benefit you more at one time than at another. For instance, you should take calcium before bed. TheJournal of the Medical Association of Thailandshowed that supplementation withcalcium before bed helped reduce markers of bone loss compared to supplementation at breakfast.†To help with sleep itself, magnesium can be helpful. A 2012studyshowed that, taken before bed, it helped increase sleep time and efficiency.†
B vitamins, on the other hand, will be most beneficial during the day. “They help convert the carbs and fat you eat into energy,” says Shannon Ehrhardt, so take them before or with a meal. In general, because vitamins A, D, E, and K are fat-soluble, you’ll get better absorption of them if you take them with a fat-rich meal.
There are also less than ideal times to take certain micronutrients. Calcium can compete for absorption with strontium—another bone-friendly mineral—so it’s best to take those separately. The same goes for calcium and iron, says Ehrhardt.
What Else Do I Need To Be Optimized?
A good multivitamin will cover the most essential micronutrients you need to feel and perform at your best, but there are a handful of compounds that most brands don’t include that we like to take along with multis for extra credit. Below are our favorites.
Ashwagandha. Areviewin theJournal of Biological Sciencesconcluded that this diverse Indian herb may assist withendurance, immune function, mood, memory, and stress relief.†
Astralagus. This Chinese herb, popular in traditional therapies,supportsimmune health and regulating inflammatory responses.†
Chaga. A 2015studyindicates that this mushroom may help support a strong immune system.†
Cordyceps.Another mushroom, cordyceps was shown in a 2016studyto increase time to exhaustion in cyclists (by about 28 seconds).† It also seems to promote normalimmune function.†
Krill oil.Virtually everyone is aware that fish oil is beneficial, but krill oil may be the better investment. The journalLipidsfound that considerably smaller doses of krill oil had the same positive effect on cellular health, while a 2013trialdiscovered that it boosted omega-3 fats to a greater degree.†
Strontium.Calcium gets all the glory for bone health but strontium deserves credit too. Though it’s a mineral like calcium, most multis don’t include it. If you’re an older individual, or you participate in high-impact sports, you may want to make a point of including strontium.The New England Journal of Medicineshowed that strontium supplementation demonstrated a remarkable decrease in bone damage risk—41% after three years.†
The Better Than a Multivitamin
Most “all-in-one” supplements just don’t cut it. They aren’t targeting specific systems, and the inclusion of vitamins and minerals are often at bare minimum levels. There is not one single “magic pill” you can take that could possibly provide your body with optimum support, and if recommended daily allowances were all you needed, most everyone would be thriving. That is part of why recent reports have come out saying “multivitamins don’t work.”
That’s also why Total Human®was created to be a rich collection of high-quality nutrients, each purpose-driven to provide a tide of benefits to support your body, mind, joint health, immune system, energy, mood, and other aspects of your well-being.†
]]> https://www.onnit.com/blogs/the-edge/5-barbell-exercises-for-full-body-explosive-power2025-07-10T10:55:24-05:002025-08-15T07:29:31-05:005 Barbell Exercises for Full Body Explosive PowerJeremy Gottlieb
Summary
If your are looking to build or improve explosiveness, try one or all of these 5 barbell exercises. These full body movements will develop explosive power and have you ready for any athletic challenge. Power is the combination of strength and speed. The ability to generate high levels of power output is dependent on how well you can recruit fast twitch muscle fibers. In doing so, the end result is better performance in the gym in the form of both increased speed and strength. Grab a barbell and get to work!
Barbell Exercise #1: Power Clean
The Power Clean is a powerful exercise that builds explosive power and strength throughout your entire body. Performing the Power Clean will help you build a powerful grip. You will also develop a powerful hip snapping motion that will transfer into any sport or physical activity you choose.
Barbell Exercise #2: Thruster
The Barbell Thruster hits your whole body, burns fat, and increases strength. The Barbell Thruster is really a combination of two exercises, thefront squatand the overhead press, and is a very effective exercise. The Barbell Thruster works both the upper and lower body in a compound movement for a complete body workout.
Barbell Exercise #3: Power Snatch
The Barbell Snatch will strengthen you from head to toe. The Barbell Snatch is used in many instances as a test because it is one the best exercises to demonstrate ones strength. This exercise not only has a strengthening effect, but will also cut body fat very fast. Building an iron grip is not a problem since any ballistic exercise performed repeatedly will do so. Try the Power Snatch to add a ton of power and muscle to your frame.
The 1-Arm Fighter Stance Axle Press works nearly every muscle on one side of your body at a time, but specifically hits the glutes, deltoids, and quads. This exercise is great for lifters who lack the shoulder integrity to perform overhead presses with barbells due to the fact that the lift puts less load on the joints than if you were using a barbell sans landmine.
Barbell Exercise #5: Alternating Axle Squat Toss
The Alternating Axle Squat Toss is another barbell landmine variation that will strengthen movements in all planes of motion and build power and explosiveness in the fast-twitch muscle fibers. The lift also integrates muscle groups putting heavy emphasis on the core as well as training the body through the vertical load.
]]> https://www.onnit.com/blogs/the-edge/maltodextrin-the-time-and-place-for-high-glycemic-carbohydrates2025-07-10T10:55:24-05:002025-08-15T07:01:58-05:00Maltodextrin: The Time and Place for High Glycemic CarbohydratesJeremy GottliebMaltodextrin is a type of carbohydrate synthesized from grain starch, corn, potatoes orricethat is commonly added to food to enhance sweetness and texture. As one of the main components of ’weight gainer’ used by bodybuilders, maltodextrin has a thick, sweet taste that matches its dense caloric content.
Despite its classification as a complex carbohydrate, maltodextrin is quickly absorbed by the gut and can elevate blood sugar faster than glucose. On the glycemic index, a relative scale of how quickly a ingested carbohydrate affects blood sugar, maltodextrin ranges between 85-105, where the standard glucose is set at 100.
Sugars that induce a rapid rise in blood glucose content are typically considered poor sources of energy and nutritionally deficient. Though it is generally true that a diet comprised of mostly high glycemic carbohydrates would be unsatisfactory, they do have an important role in athletic performance and recovery.
Why You Need Carbs
During intense exercise, active muscle tissue relies heavily upon stored sugars in the form of glycogen for energy. Depending on the muscle type, exercise intensity and duration, the ability for glycogen stores to maintain the metabolic demand diminishes over time.
Manyenduranceathletes utilize energy gels whose main ingredient is maltodextrin. One study supplemented marathon runners with 60 grams of maltodextrin spaced throughout a race and compared it to runners who were free to consume their desired amount.
The runners who took 60 grams of maltodextrin averaged significantly shorter marathon completion times by more than 10 minutes compared to runners assigned to freely consume the carbohydrate supplement [1].
Maltodextrin & High Glycemic Carbs for Post-Workout Recovery
The post-workout period is a crucial time to refuel. Consuming high glycemic carbs will increase the release of insulin, an anabolic and glucose-regulating hormone that facilitates the influx of sugars and amino acids into muscle cells.
In an often cited study by Borsheim, post-workout supplementation with 100 grams of maltodextrin significantly improved the net protein balance by reducing muscle breakdown[2].
Further studies have shown that 30 grams of carbohydrates were comparable to 100 grams. The post exercise period has been studied using multi-ingredient post-workout formulas that contain various ratios of carbohydrates, protein and fat.
A 4:1 ratio of carbohydrates to protein has been shown to benefit muscle recovery through a similar mechanism. Other studies using variations of carbohydrates to protein have proven beneficial, yet It is challenging to discern a single best ratio for recovery given the lack of direct comparison studies.
The bottom line is that large amounts of high glycemic carbohydrates like maltodextrin are appropriate in the post-workout phase to reduce muscle breakdown and aid recovery.
Consuming small quantities, such as 1-10 grams, of high GI carbohydrates that are added to food are unlikely to cause large changes in blood glucose and are essentially equivalent to other added sugars.
Low glycemic carbs, such those present in most fruits and vegetables, are better for long term energy storage and tend not to spike and crash blood sugar levels. Furthermore, despite its origin from grain, maltodextrin is synthesized using enzymes making it gluten free and safe for nearly all to consume.
References:
[1] Improved marathon performance by in-race nutritional strategy intervention Hansen EA1, Emanuelsen A, Gertsen RM, Sørensen S SR. Int J Sport Nutr Exerc Metab. 2014 Dec [2] Effect of carbohydrate intake on net muscle protein synthesis during recovery from resistance exercise Børsheim E1, Cree MG, Tipton KD, Elliott TA, Aarsland A, Wolfe RR. J Appl Physiol. 1985 Carbohydrate supplementation increases intramyocellular lipid stores in elite runners. Sousa M1, Simões HG, Castro CC, Otaduy MC, Negrão CE, Pereira RM, Madsen K, Silva ME. Metabolism. 2012 Aug
]]> https://www.onnit.com/blogs/the-edge/alpha-gpc-benefits-uses-and-side-effects2025-07-10T10:55:24-05:002025-08-15T07:48:36-05:00Alpha GPC Benefits, Uses, and Side EffectsJeremy Gottlieb What Is Alpha GPC?
Alpha GPC or Alpha-glycerophosphocholine (aGPC), as the name implies, is a choline-containing phospholipid isolated from soy. A wealth of research on this compound supports a role forhelping cognitive functionand strength, and stimulating the release of growth hormone.
Alpha GPC contains a lipid tail that permits the uptake and incorporation into neuronal cell membranes. The membrane-bound choline molecule supplies the necessary and rate limiting compound for acetylcholine neurotransmitter synthesis.
Though found both within the central and peripheral nervous system, cholinergic neurotransmission is the cornerstone for memory formation that takes place in a specialized brain region known as thehippocampus.
The Benefits Of Regular Alpha GPC Intake
Studies in animal models and humans taking place since the 1990’s have shown administration of aGPC improves memory performance [1]. One of the early human studies on aGPC attempted to replicate trials performed previously in animals.
The study gave subjects ten days of aGPC or placebo before inducing temporary amnesia with a potent drug called scopolamine [2]. AGPC supplementation reduced the scopolamine-induced memory impairments as measured by subjects performed on memory and attention tasks.
Since this study, aGPC has become afocusof research age-related memory decline as well as other causes of memory dysfunction [3]. An interesting study that added aGPC to commonly prescribed memory drug most similar in effect to huperzine A (anAlpha BRAIN® ingredient) showed the additional benefit wasn’t with the drug alone [4].
Recent studies on aGPC have shown a potential benefit to athletic performance. A Japanese study investigated the effects of a single dose of aGCP on hormone release in healthy young males. Surprisingly a single dose of aGCP resulted in a substantial change in growth hormone release within one hour.
At 60 minutes, growth hormone levels acute increased by 290% from the baseline hormone level and returned to baseline by the second hour [5]. Also observed, was the growth hormone’s actions of increasingfatty acid oxidation, as indicated by rises in free fatty acids and ketone bodies. The authors proposed that the increase in circulating choline may briefly block the negative feedback mechanism governing GH release.
Short supplementation periods of 6 days have been shown toimprove strengthin college-aged athletes directly. A study conducted at the University of Louisianna used a crossover design that measured the force generated in deadlift and bench press style movements.
The study found a significant increase of 3% improvement in lower body strength with aGPC supplementation [6]. The study cited the previous research of cholinergic transmission at neural-muscular as a potential mechanism, however, did not have direct evidence for the mechanism leading toimproved strength.
The cumulative evidence from animal model and human studies support the role of aGPC as a well tolerated cognitive enhancing compound with ergogenic properties [7]. The soy lecithin isolate contains a phospholipid that permits incorporation into neuronal cell membranes and utilization as a cholinergic neurotransmitter precursor.
Associated with the increase in circulating choline levels was a transient elevation in growth hormone. Even a short period of supplementation with aGPC proved to be beneficial to muscle strength
Recommended Usage & Natural Sources Of Alpha GPC
Alpha GPC is approximately 40% choline by weight, and as such 1,000 mg alpha-GPC confers about 400 mg of dietary choline. A standard dosage of alpha-GPC is 300-600 mg, according to the most common label doses.
This dose is following the study using alpha-GPC to enhance power output (600 mg) and the two studies noting an increase in growth hormone secretion and is likely a good dose to take for athletes.
For the usage of alpha-GPC in attenuating symptoms of cognitive decline, almost all studies use a dosage of 1,200 mg daily, divided into three doses of 400 mg. It is unsure how lower doses would benefit cognition, but the dose which is consistently associatedwith benefit .appears to be 1,200 mg.
Rat studies suggest that the effects of Alpha-GPC oral ingestion peak at 300-600 mg/kg, which is an estimated human dose of 48-96 mg/kg (and for a 150lb human, 3,272-6,545 mg daily).
For nootropic stack use, we recommend a dose of 300-600 mg to start out and then to increase from there if you decide you would benefit from more.
When taken at recommended dosages Alpha GPC is well tolerated. For most adults the range of acceptable dosage is relatively broad; a cumulative daily dosage of 300-1200 mg, when taken in one or two doses, is safe and efficient.
As is the case with all supplements, it is wise to start with the lowest possible effective dose and build gradually as needed.
Side Effects of Alpha GPC
Although, Alpha GPC is both safe and well tolerated in healthy adults, side effects have been reported.
Users have occasionally experienced headaches, fatigue, nervousness, nausea, diarrhea and gastrointestinal distress; also, this supplement can result in dizziness and low blood pressure in some individuals.
If you know, you are prone to hypotension you should consult a medical professional before taking Alpha GPC.
Adverse side effects may occur more commonly among users taking high dosages.
Little research has been done on Alpha GPC’s effects on pregnant women, so those who are pregnant or nursing are advised to refrain from use.
Conclusion & Summary on GPC
Alpha GPC is a safe, well-tolerated, and highly effective source of choline. It has been the subject of decades of research and is recognized worldwide as a powerful memory enhancer, prescribed by physicians throughout Europe for a variety of memory disorders.
In addition to being a potent nootropic in its right, Alpha GPC is also a perfect addition to many other supplements, particularly those like the racetams which depend on a sufficiency of choline in order to achieve optimal results.
It also stimulates the production of HGH, which can improve strength,andshorten recovery time following exertion, and encourage thebuilding of lean muscle mass, making it an invaluable supplement for athletes or anyone with anactive lifestyle.
For anyone who is interested in improving their memory, physical strength and vitality, or achieving the best results possible with nootropic supplements, Alpha GPC is an excellent choice.
References
1.Klein J, Gonzalez R, Köppen A, Löffelholz K. Free choline and choline metabolites in rat brain and body fluids: sensitive determination and implications for choline supply to the brain. Neurochem Int. 1993;22(3):293-300.
2.Canal N, Franceschi M, Alberoni M, Castiglioni C, De moliner P, Longoni A. Effect of L-alpha-glyceryl-phosphorylcholine on amnesia caused by scopolamine. Int J Clin Pharmacol Ther Toxicol. 1991;29(3):103-7.
3.Parnetti L, Amenta F, Gallai V. Choline alphoscerate in cognitive decline and in acute cerebrovascular disease: an analysis of published clinical data. Mech Ageing Dev. 2001;122(16):2041-55.
4.Amenta F, Carotenuto A, Fasanaro AM, Rea R, Traini E. The ASCOMALVA trial: association between the cholinesterase inhibitor donepezil and the cholinergic precursor choline alphoscerate in Alzheimer’s disease with cerebrovascular injury: interim results. J Neurol Sci. 2012;322(1-2):96-101.
5.Kawamura T, Okubo T, Sato K, et al. Glycerophosphocholine enhances growth hormone secretion and fat oxidation in young adults. Nutrition. 2012;28(11-12):1122-6.
6.Kawamura T, Okubo T, Sato K, et al. Glycerophosphocholine enhances growth hormone secretion and fat oxidation in young adults. Nutrition. 2012;28(11-12):1122-6.
7.Traini E, Bramanti V, Amenta F. Choline alphoscerate (alpha-glyceryl-phosphoryl-choline) an old choline- containing phospholipid with a still interesting profile as cognition enhancing agent. Curr Alzheimer Res. 2013;10(10):1070-9.
]]> https://www.onnit.com/blogs/the-edge/how-to-develop-power-with-sledgehammer-workouts2025-07-10T10:55:23-05:002025-08-15T08:32:55-05:00How to Develop Power with Sledgehammer WorkoutsJeremy Gottlieb Who would have thought that training with sledgehammers would be one of the best ways forfunctional strength and conditioning?
One of the oldest forms of training around is becoming a staple of building fantastic results for athletes and everyone else looking to become a force to be reckoned with.
I can remember many years ago using sledgehammers for destruction; tearing down walls and breaking up concrete when I worked in construction.
When I was done with a long day’s work with the sledgehammer, I felt like a badass, even though I was tired as hell.
My forearms would be the size of grapefruits, and mycore, shoulders, back, and grip would be sore for days.
An Introduction To Sledgehammer Workouts
When you think of old school training methods, the sledgehammer is one of the first things that probably comes to mind. In regards to building and developing raw strength and explosive power, nothing beats it.
Of course, the primary recipient of your “destructive” sledgehammer swings is a large tractortire.
Sledgehammers come in many weights: from 4 pounds, all the way up to 30+ lbs, and some are even bigger.
Along with many of the physical benefits that come with sledgehammer training, you also feel damn good just swinging and slamming it down.
It brings out your innate raw power and leaves you feeling like a superhero (or villain, depending on yourmood).
You just can’t get this feeling from any piece of equipment that a fancy gym might provide.
The Benefits Of Sledgehammer Exercises
For fighters and athletes, sledgehammer exercises are great tools to use from time to time, whether it’s included in your circuit training program or as the primary tool you use forstrength and power development.
Along with developing strength and power, you can also look to enhance wrist stability as well as strengthen the forearms and grip.
Grip strengthis key for both strikers and grapplers along with the other major sports athletes.
Sledgehammer workouts are some of the meanest tools that you can train with, improving your strength,endurance, flexibility and explosive power.
When using a sledgehammer for strength training, it causes you to use the full range, multiple-joint movements focusing on acceleration, agility, coordination, speed, andmentaltoughness.
You can use it as afull-body workout with or without a tire. You can also use the sledgehammer as a warm up exercise before starting your workout with another tool.
Sledgehammers will strengthen muscles, tendons, and ligaments in the wrist, elbow and shoulder girdle.
This is the perfect tool for fighters looking to strengthen those areas and increase explosive power.
It allows for circular weight training exercises not possible with other traditional equipment. Your hand-eye coordination even improves!
Selecting A Sledgehammer For Your Workouts
Buying the right size hammer is key, if you are starting off, don’t go out and get a 16-pound hammer; this will only get you injured.
Start off light and work your way up; a good weight for first timers is the eight pounder.
You can learn the technique and form with this weight and master the main exercises while increasing your endurance levels.
Even a small handle sledgehammer that weighs only 4 pounds with a 12-inch handle are great to use for Donkey Kongs, short range slams while kneeling, and double slams (one small hammer in each hand).
Sledgehammer Exercises
When training with sledgehammers, emphasize repetitive slams into the program; this can develop endurance in a lot of key areas like your back, shoulders,traps, core, andarms.
You can also use one-handed slams (also known as Tomahawks) which will cause you to use balance andcore strength.
Footwork is key: you have to pivot one foot in some exercises and then make sure that your feet are set firmly every time (the last thing you want is the hammer coming back at you and hitting your shin).
You can also square your feet up with the tire and do overhead slams, keeping your body straight and aligned.
Slams require major muscle groups and stabilizer muscles to work together during the movement, causing an awesome exercise for raw power and endurance.
If you are a beginner, this is the first exercise to start with before progressing into singlearmslams and so on.
As you get comfortable with the sledgehammer and doing slams and other exercises become easy, you can try juggling them. This is a true skill and takes time to develop, so start off using a very light weight and progress up.
With juggling sledgehammers, you start to develop a whole new level of strength and reflex along with hand-eye coordination. I would recommend starting off practicing on sand, grass, or other soft surface; you don’t want the sledgehammer to bounce if you drop it.
Sledgehammer Workouts
Beginner Sledgehammer Workout
A1: Right Side Slams – 4 x 15 A2: Left Side Slams – 4 x 15 A3: Overhead Slams – 4 x 15
Perform as a non-stop circuit, resting 15 seconds in between rounds.
Advanced Sledgehammer Workout
A1: Tomahawks (Right Hand) – 15 to 1 A2: Tomahawks (Right Hand) – 15 to 1 A3: Double Arm Slams – 15 to 1
After each circuit round, rest 15 seconds. Start with 15 reps for the first circuit and decrease reps for each progressive circuit until you are only performing one rep per exercise.
Check Out Some Killer Sledgehammer Workouts In This Video
]]> https://www.onnit.com/blogs/the-edge/skill-of-the-week-sandbag-shouldering2025-07-10T10:55:23-05:002025-08-15T08:03:12-05:00Skill of the Week: Sandbag ShoulderingJeremy GottliebThe skill of the week at the Onnit Academy Gym is the SandbagShouldering exercise. In this specific case, Sandbag Shouldering will teach you how to build explosive power using the hips.
Sandbag Shouldering is a relatively simple exercise. You lift the sandbag to your shoulder, then repeat. But don’t be fooled by its simplicity, if youfocuson the work as opposed to the skill, you will run into problems.
Sandbag Shouldering is a full body movement that works strength and conditioning simultaneously. Ideally, this exercise variation should be more efficient than breaking down the movement into different parts.
It extremely important to work this sandbag exercise as a skill. If you think about shouldering a sandbag as a conditioning exercise before you work it as a skill, then you will get caught in the trap of “hard work,” meaning that you will only think about getting the sandbag into the shouldered position through whatever means necessary (this is wrong).
There are certain aspects of the Sandbag Shouldering exercise that are important to focus on. You want to break up the different components of movement and make sure alignments are sound before you insert it into a conditioning workout. Here are three steps to achieving a perfect execution of the Sandbag Shouldering exercise.
Sandbag Shouldering Step #1: The Set Up
Place the sandbag length ways, forward and back, located between your feet and the middle of the bag.
Make sure the sandbag is lined up somewhere around the middle of your big toes.
As you hinge back maintaining a neutral spine position, you are going to need to drop your hips to keep your back flat.
This positioning will make sure alignment of the hinge stays true.
Make sure the shin angle is as vertical as possible keeping your hips as far back and relatively high as possible
Keep a neutral, to slighlty extended spine with your shoulders at least slightly higher then your hips.
What that means is your hips are going to have to drop as you reach down towards the floor. You need to find out the give and take of how high can you keep your hips, while keeping them lower then your shoulders.
Keep your hips higher then the knees while maintaining neutral to slightly extended spine.
Sandbag Shouldering Step #2: The Pull
Reach down and grab under the middle of the sandbag.
While grabbing the bag, you want to continue tracking the shoulders to avoid any roundness in the upper back. It is an important focal point to prevent the shoulders from collapsing forward.
Maintain a proud chest, extended in the thoracic spine, and keeping the shoulders from any internal rotation.
Pinch the shoulder blades back so it amplifies the load on the posterior chain. This will create an intensified load into theHamstringsand Glutes.
Sandbag Shouldering Step #3: The Catch
Forcefully drive your feet downward into the floor to extend the hips into a tall standing position.
Accelerate the bag along the front line of your body. As it passes the hips you are going to pull the elbows back and in, keeping the bag close to your body.
You want the bag to land on the shoulder softly, stabilizing your standing tall position with your hips and shoulders square.
Always keeping a proud posture, I want you to finish the exercise and sell that finished position.
From there, pitch the hips back as you follow the bag back down into that original hinge position for one repetition.
Tips for the Sandbag Shouldering Exercise
Make sure there is no rotation of the hips or shoulders.
Stand tall with the sandbag shouldered squarely on one shoulder or the other, with no excessive amount of rotation at the torso, hips, or knees.
Ideally you will, alternate shoulders from one side to the other.
When you accelerate the bag up towards the shouldering portion, keep the elbows and sandbag as close to the body as possible during the entire range of motion.
Do not let the bag swing away from your body
Do not lock out yourarms, this will create a long arc. You want to keep the bag as close to the body as possible, while avoid any rotation of any body parts.
]]> https://www.onnit.com/blogs/the-edge/how-to-jump-higher-5-exercises-to-improve-your-vertical2025-07-10T10:55:23-05:002025-08-08T17:28:46-05:00How To Jump Higher: 5 Exercises To Improve Your VerticalShane HeinsAn impressive verticaljumpis the ultimate standard of lower-body power and explosiveness—an attribute that pays as many dividends in high-impact sports like basketball, football, and soccer as it gets you wide-eyed looks in the gym. Increase your hops, and chances are you’ll also be able to run faster, lift more weight, and maybe even throw down a dunk at your next pickup basketball game.
But if you think your standard gym rat training sessions are going to lift you to new heights, you’re mistaken. To jump like an elite athlete, you need to train like one, starting with the five exercises we’ll outline here.
How To Jump Higher: 5 Exercises To Improve Your Vertical
This list of movements was compiled by a pair of trainers who know a thing or two about making athletes more explosive: Jason Benguche, former assistant strength and conditioning coach for the Carolina Panthers and Director of Performance for Jet Movement Labs (@movement_mogulon Instagram), has worked one-on-one with NFL quarterback Cam Newton. And Firdose Khan (@dose_9), head trainer at Nine Innovations athlete training facility in Houston, has worked with such athletes as former NBA MVP Derrick Rose and NFLers Arian Foster, Braxton Miller, and Brian Cushing.
Follow their advice, as demonstrated in the video above by the talented Hannah Eden (@hannaheden_fitness), a distinguished coach in her own right, and you’ll be jumping out of the gym in no time.
Muscles Used for Jumping
A jump is the result of triple extension: the simultaneous and explosive extension of the hips, knees, and ankles. Whether you’re watching an Olympic weightlifter perform a clean, a sprinter take off down the track, or a basketball player go up for a dunk, triple extension is the driver. Below are the muscles that make it possible.
–Glutes(gluteus maximus, gluteus medius), for hip extension
–Quadriceps(vastus lateralis, intermedius, and medialis; rectus femoris), for knee extension
–Hamstrings(bicepsfemoris, semimembranosis, semitendonosis), for hip extension, knee flexion, and absorbing landings
–Calves(gastrocnemius, soleus), for ankle extension (plantarflexion)
–Abdominals andcore(transverse abdominis, rectus abdominis, internal and external obliques, multifidi, erector spinae), for trunk stability
How To Test Your Vertical
Before we explain how to build your jump, let’s make sure you know how to jump properly in the first place and can get a baseline measurement for it. See00:25in the video above for Eden’s demonstration and a walk-through of all the steps.
How To Jump
Step 1.Stand with your feet directly under your hips. If they’re wider than that, you won’t be able to translate as much power from your legs directly into the ground. Drive your knees outward without moving your feet, so you feel tension in your hips. This will turn the hips on for better jumping power.
Step 2.Quickly dip your hips and knees, throwing yourarmsbehind you to gather momentum. Picture a half-squatposition or slightly shallower—your hips must be behind your knees. The hip action in a jump is the same as the hinge pattern you perform with your hips during a deadlift or clean—bend them back while keeping a long spine.
Step 3.Jump as high as you can while flinging your arms forward and overhead. When you leave your feet, only reach up with onearm; you’ll be able to reach a higher point this way versus reaching with both arms. Land softly with a slight knee bend, being careful not to let your knees cave inward. Drive them outward as you did when preparing to jump in the first place.
How To Measure Your Jump
At the competitive level (i.e., the NFL and NBA combines), vertical leap is measured using a “jump tester”—a tripod with a series of thin plastic sticks one inch apart. If you have access to this equipment, it’s your best bet for getting an accurate measurement. A cheaper, more feasible option is to do your jump next to a wall and mark the highest point you touch with a piece of chalk.
Whichever equipment you use, the first thing you’ll need to do is measure your reach standing flat-footed on the floor with one arm fully extended straight overhead. (You can measure your reach up against a wall for the chalk option.) Then, when you mark the highest point you touched, you’ll subtract your reach from that number. For example, if your reach is 90 inches and you touched 115 inches up on the wall with your chalk, your vertical leap is 25 inches.
After warming up, make anywhere from3 to 5 jump attempts.
Most official vertical jump tests do NOT permit any steps to be taken leading into the jump. No running start or even a power step allowed. Stand on both feet in one spot and jump from that spot.
How To Stretch Before A Jump Workout
Before we get into the exercises that will build your jump height, warm up with these moves from Onnit’s Director ofFitnessEducation, Shane Heins (@shaneheins). They will help to improve mobility in your hips as well as durability in your knees and ankles, improving performance and reducing the risk of injury.
Jump Higher with These 5 Exercises
1) Depth Jump
(See01:26in the 5 Exercises To Improve Your Vertical video)
The defining characteristic of the depth jump is that the jump is preceded with the strong eccentric (negative) muscle action caused by dropping down from a raised surface, as opposed to a standard box jump where you start on the floor. This makes the depth jump a true plyometric movement, where the muscles are stretched suddenly (by the impact of the landing), producing a powerful shortening of the muscle fibers.
“The depth jump utilizes the stretch-shortening cycle to improve CNS activation and rate of firing,” says Benguche. “The shock of rapidly absorbing, and then producing, force trains the body to respond with greater levels of reactive force to improve the elastic components of the lower body.”
Step 1.Stand on a plyo box that is 10–30 inches high (start with a lower one if you’re brand new to depth jumps). Your body should be fully upright and your feet hip-width apart, hands at your sides.
Step 2.Step off the box, leading with one foot and then following with the other, to drop yourself down to the floor. You’re not hopping or jumping off the box; your body should simply fall to the floor.
Step 3.Land squarely on the floor on both feet (again, around hip-width apart) and immediately jump as high as you can, straight up in the air. It’s important that you spend as little time as possible with your feet on the floor before the jump—it should be a split-second reaction. Don’t lower down into a squat before leaving your feet. Just let your hips and knees dip naturally, then extend them explosively to launch upward. Drive your arms straight up as you do so.
Step 4.Land back down on the floor with soft knees, settle yourself, then step back onto the box and repeat the sequence for reps. Don’t be in a rush between reps; the objective of this exercise is explosive power, not conditioning.
Technique Tip:Be mindful of your body position as you land on the floor and go into the explosive jump. Your hips should be over your heels, and your weight over the center of your feet. You want to jump straight up (vertical), not out in front of you.
How to Use the Depth Jump
Timing:Do depth jumps early in your workout, after you’ve warmed up thoroughly and before lower-body strength exercises likesquats.
Sets/Reps:Benguche recommends keeping the total volume of reps very low on depth jumps:2–4 sets of 2–5 reps.
“No additional load is necessary,” he says. “However, the height of the box for the depth jump can be progressed over time to increase the challenge and stimulus.”
Regression
In the absence of a plyo box, depth jumps can be performed using a standard weight bench. Since benches are lower to the ground than many boxes, they’re a good option for those new to the exercise.
Progression
Athletes often do depth jumps with two plyo boxes: one to step off of and another to jump onto. Essentially, it’s a depth jump into a box jump. When doing this variation, make sure to leave enough room between the boxes to allow you to land and jump safely (3–5 feet between boxes should work). To advance within this progression, increase the height of the second box gradually as you develop more strength and power.
Adding resistance to jumping exercises (versus using bodyweight only) can help increase strength and power. And it doesn’t take much weight to get the job done—a 10-pound med ball will suffice.
With this exercise, you’re going for maximum distance instead of height, but the benefits will carry over to your ability to jump vertically. “The med-ball broad jump is great for developing hip explosion, due to the power aspect that comes from loading the hips with the hinge-type motion,” says Khan.
Step 1.Stand a few feet back from a wall holding a medicine ball (about 10 pounds) in both hands. You should have plenty of floor space in front of you to jump. Start with the ball overhead, arms extended, and your feet hip-to-shoulder-width apart.
Step 2.Lower your arms toward the floor and bend at the hips and knees to create elastic energy for the jump. (This is technically the eccentric, or negative, phase of the exercise.)
Step 3.Without hesitating, explode out of the “hole,” pressing through the balls of your feet and throwing your arms out ahead of you. Toss the ball into the wall and jump as far out in front of you as possible.
Step 4. Land with bent knees, through your heels, and absorb the eccentric force by going into a squat if necessary. (This finishing squat is not a crucial part of the exercise—just a safe way to land.) Catch the ball as it rebounds if you can, or, if the wall is further away, let the ball fall. Then pick it up and repeat for reps.
Technique Tip:When doing a broad (long) jump for maximum distance, you want to get some height, but not too much. Aim for your trajectory to be under 45 degrees.
How to Use the Medicine-Ball Broad Jump
Timing:Do medicine-ball broad jumps early in your workout, before heavy lower-body strength movements. Khan prescribes glute activation work with his athletes before jumping exercises, such as hip bridges or lateral band walks, to help the glutes “wake up” and fire harder.
Sets/Reps:Khan recommends3 sets of 5 reps,using a 10-pound medicine ball.
Regression
Those new to explosive jump training should start with no added resistance. In this case, simply do the standing broad jump without the med ball.
Progression
Khan often adds an extra layer of resistance to the med-ball broad jump with his athletes: a heavy-duty elastic band attached to the back of the waist with a belt and anchored to a solid structure behind the athlete at floor level. As the athlete jumps and travels through the air, the resistance from the band increases as it stretches.
Strength begets power, which leads to a better vertical, and there’s no better exercise for increasing lower-body strength than the classic barbell back squat.
“The squatting pattern is one of the best ways to train the body for improved strength and power,” says Benguche. “Quads, hamstrings, and glutes will be the primary drivers of the squat, and all have high importance for helping improve the vertical jump.”
Step 1.Set up in a squat rack and grasp the bar with your hands as far apart as is comfortable. Step under the rack and squeeze your shoulder blades together and down, wedging yourself under the bar so that it rests on yourtrapsor the back of your shoulders.
Step 2.Nudge the bar out of the rack and step back, setting your feet at shoulder width, with your toes turned slightly outward. Without letting your feet actually move, try to screw both legs into the floor, as if you were standing on grass and wanted to twist it up—you’ll feel your glutes tighten and the arches in your feet rise. Take a deep breath into your belly and brace your core, pulling your ribs down so your torso forms a solid column.
Step 3.Keep your weight over your mid foot and your eyes facing forward. Bend your hips back and spread your knees apart as you lower your body down. Go as low as you can, while keeping your head, spine, and pelvis aligned.
Step 4:Push through your feet to come back up, extending your hips and knees.
Technique Tip:Keep your heels on the floor while squatting. The bar should remain over your mid foot (not the balls of your feet) throughout both the positive and negative portions of the lift. If your heels come off the floor, it means the weight has shifted too far forward.
How to Use the Back Squat
Timing:For maximum strength gains, do back squats as either the first or second strength exercise in your workout.
Sets/Reps:For general strength and lower-body development, Benguche recommends3–6 sets of 3–8 repswith moderate loading—70%–85% of your one-rep max (1RM). For developing more speed and power, he recommends lighter loads (55%–70% of 1RM) for3–6 sets of 2–5 reps.Squats performed with light weights but done so explosively that your feet leave the floor when you come up are called jump squats (see “Progressions” below).
Regression
Scaling the back squat for beginner-level athletes generally entails sticking to lighter loads (even bodyweight only to start) while learning proper technique. Goblet squats with akettlebellor dumbbell can be used to practice form, but keep in mind that goblets are an anterior (front-loaded) variation and won’t directly mimic the mechanics of the back squat.
Progression
As you gain experience, multiple barbell squat variations should be rotated into your program. Jump squats in particular will help you develop more explosive strength that translates directly to a vertical jump.
In the jump squat, you lower your body only until your thighs are parallel to the floor (you don’t go for maximum depth, as in the conventional back squat). As you come back up, do so explosively so that your feet leave the floor at the top—three to six inches is high enough. Land softly with a slight knee bend, reset, and repeat for reps.
This isn’t just some light-duty assistance exercise. The rear-foot elevated split squat (aka, Bulgarian split squat) is a legitimate movement for increasing pure glute and quad strength, which will in turn enhance power and vertical jumping performance. Even if you’re a two-foot jumper, focusing on one leg at a time like you do here will ensure that your dominant side isn’t compensating for your weaker leg during the movement.
The exercise is also a great option for those with lower-back issues, as the rear-foot elevated position requires a more upright torso than a standard squat. This prevents shearing forces on the lumbar spine, which are a common cause of injury in the classic back squat.
Step 1.Hold a dumbbell in each hand and stand lunge-length in front of a bench that’s 18–24 inches high. Reach back with one leg and rest the top of that foot on the bench.
Step 2.Take a deep breath, brace your core, and lower your body as far as you can, or until your rear knee is just above the floor (you should feel a stretch in the hip of the trailing leg). Keep your front heel grounded—don’t allow it to rise off the floor. Complete your reps on one side and then repeat on the other immediately.
Technique Tip:Determining how far out in front of you to place your front foot may require some trial and error. At the bottom of the motion, your front knee should be somewhere above your heel to mid foot. If your knee is behind your heel, your foot is too far forward; if it’s out over your toes, step out further. One trick to find the right distance is to start in the bottom position and adjust your stance from there.
How to Use the Rear-Foot Elevated Split Squat
Timing:Perform split squats as one of the first two exercises in the strength portion of your workout. If done for low volume with no added resistance, it can also be done as part of a warmup prior to explosive jumps (see below for the isometric hold variation).
Sets/Reps: 3–4 sets of 5–8 reps,using a moderate weight. Because balance will be an issue with the staggered stance and rear foot elevated, you’ll have to go lighter than you would doing a standard split squat or lunge.
One training method Khan utilizes is a 30-second isometric hold in the bottom position of the split squat, followed by 5 reps; this is typically done with no added resistance, pumping the arms in a running motion on each rep. “The time hold createsenduranceand strength in the quads and glutes,” says Khan.
Regression
The rear-foot elevated split squat can be a difficult exercise from a balance standpoint. The first time you try it, use no added resistance (bodyweight only) to practice the technique. If you’re unable to keep your balance, perform a standard split squat with your back foot on the floor (not elevated).
Progression
Holding the resistance in a higher position can increase the difficultly of the exercise and call on more core engagement. Examples of this include holding a kettlebell or dumbbell with both hands in the “goblet” position below your chin, or doing the movement with a barbell across your shoulders (the most advanced version).
A variation on the basickettlebell swing, the hike swing gets you used to exploding from a dead-stop position, so you learn to generate force quickly out of nowhere.
Step 1.Place a kettlebell on the floor and stand behind it with feet shoulder-width apart. Soften your knees.
Step 2.Hinge your hips back until you feel a stretch in your hamstrings. Your head, spine, and pelvis should form a long, straight line.
Step 3.Grasp the kettlebell and try to snap the handle in half. This should cause your shoulder blades to drive downward and your lats to tighten.
Step 4.Hike the kettlebell back between your legs until you feel your forearms contact your inner thighs.
Step 5.As soon as you feel your forearms touch your thighs, extend your hips explosively, as if you were standing up quickly and tall. Squeeze your glutes as you come up. Allow the power to raise the kettlebell up in front of you to shoulder level.
Step 6.Control the kettlebell on the way down and park it back on the floor. That’s one rep.
Technique Tip:This is an explosive lift, where the objective is to get the kettlebell moving upward as fast as possible. That said, keep the exercise safe, particularly for the lower back, by staying tight in the core and having your hips low coming off the floor—do lift the kettlebell with a rounded lower back, and avoid hyperextending your back at the top of each rep (i.e. don’t lean back).
How To Use the Kettlebell Hike Swing
Timing:Do hike swings early in your workout, before lower-body strength exercises.
Sets/Reps: 4 sets of 3–5 reps.
Regression
If starting and stopping each rep feels awkward, just work on the regular kettlebell swing instead, going for fluid reps (and higher reps, like 10 or more). If you’re not familiar with this move, we’ve got theultimate guide to the kettlebell swing.
Progression
When you’ve got your explosive hip hinge mechanics down, a squat clean exercise can be a good next step. See ourguide to the squat clean.
How to Dunk a Basketball
Once you’ve boosted your lower-body strength and power via the aforementioned five movements, it’s time to carry that newfound explosiveness over to the court—because if your goal is to jump higher, chances are dunking a basketball is high on your list of things you’d like to do with that skill.
These expert tips will help you with the finer points of dunking. Combine them with a respectable vertical leap, and you’ll be throwing one down soon enough.
7 Tips for Parlaying Better Hops into Monster Jams
1) Wear the Right Shoes
Remember the Spike Lee (as Mars Blackmon) 1989 Nike commercial? (Yeah, we’re old too.) In reference to Michael Jordan’s epic hops, Lee exclaims, “It’s gotta be the shoes.” The line was a tad hyperbole, but it is worth putting some thought into your footwear.
A pair of relatively new basketball shoes (i.e. not Chuck Taylors) is a good choice for dunking, especially if you have unstable ankles; basketball shoes offer good lateral support, as opposed to running shoes, which can easily lead to a turned ankle.
“It doesn’t matter too much as long as they’re not sandals or boots, but I would say the lighter the shoe the better,” says Bobby Jones, a former NBA player and all-Pac-10 standout in college at the University of Washington, who currently plays professionally in Italy. (Visit Jones atBobbyRayJonesJr.com.)
Tyler Harris, a professional basketball player for the Sendai 89ers in Japan and brother of NBAer Tobias Harris, has one pair of shoes in particular he prefers to dunk in: “Kobe [Bryant] low-top Nikes are one of the best shoes to wear for dunking,” he says.
2) Warm Up Properly
Dunking (or attempting to dunk) is a high-impact, highly intense activity that deserves a sufficient warm-up prior to a throw-down session. Just as you would for a lifting workout, start your warmup with a few minutes of low-intensity cardio, then progress to more dynamic movements—dynamic stretching/mobility drills as well as jumping. Before attempting your first dunk, take a couple dry runs with no ball where you’re touching or grabbing the rim at the top.
“Warming up is very important for preventing injuries,” says Harris. “I would recommend warming up and stretching for at least 30 minutes before any basketball game or just practicing dunking the basketball.”
Harris recommends warmup and stretching drills (both dynamic and static) such as: jumping and touching the rim; high knees; ladder drills; lateral defensive slides, seated and standinghamstring stretches; seated straddle stretch; and Achilles stretches. Hold each stretch 15 seconds.
3) Decide If You’re a One-Foot or Two-Foot Jumper
Should you go off of one foot or two feet when dunking? That depends on what you’re more comfortable with as well as your athletic ability and coordination.
Jumping off one foot means you’ll be taking a running start and launching a few feet in front of the rim (since your momentum will carry you forward as well as up). When going off two feet, you won’t take a running start—more like a few hard steps and a power dribble. You’ll take off right in front of the rim and go straight vertical.
“When most people first start trying to dunk, it’s usually off one leg,” says Jones. “You’re banking on your speed, so this means you want to have a running start to gain momentum. If you want to dunk off two, that requires more athletic ability, more coordination, and using the power dribble to gain momentum. If you have a nice set of calves and a big butt, this might be the way to go.”
4) Dunk One-Handed, if Possible
It takes a higher vertical leap to get both hands up to the rim versus just one (and don’t forget, you’ll be holding a basketball as well), so if you’re cutting it close, try for a one-handed jam. Being able to palm the ball will obviously help, but it’s not totally necessary; just make sure you keep the ball in both hands until you leave the floor so you don’t lose it.
“Dunking with one hand is definitely easier than two,” says Jones. “It’s one less thing to worry about, so you canfocusbetter on the task at hand.” When the time comes that you’re dunking easily, then you can start dunking with two hands for more authority.
5) Approach the Rim from the Baseline
When your goal is simply to throw one down, you want to be as focused as possible on your target: the rim. Because of this, Jones recommends coming in from the side (along the baseline) instead of straight on.
“Starting from the mid baseline or corner to dunk, I think, gives your mind an easier target and is less distracting,” he says. “That way, you can just focus on getting as high as you can, sort of like doing the long jump. When you’re trying to dunk straight on, you visually see the entire basket and might get distracted, scared, and lose focus.”
6) Take Plenty of Rest Between Dunks
Giving yourself the best chance to throw one down requires you to be as fresh and explosive as possible. You want full rest between dunking attempts—just as you would when maxing out on a big lift like a squat, deadlift, or bench press. After each dunk attempt, take at least a minute or two to rest and recover.
7) When Performance Diminishes, Call it a Day
In any power and strength activity, there comes a point of diminishing results. This is why powerlifters typically don’t do more than three heavy sets or one-rep max (1RM) attempts for any lift in a given session.
Dunking isn’t much different. You’ll likely find yourself getting slightly higher with each attempt at first, but before long, fatigue will set in and your vertical leap will decrease. At this point, it’s a good idea to end the session, rather than try to push through and force yourself to jump higher. It’s an indication that your nervous system has mustered all the energy it has to help you jump, and you need to let it rest. Give your legs a couple days’ off, then come back again and try.
]]> https://www.onnit.com/blogs/the-edge/rear-delt-cable-fly-or-dumbbell-rear-delt-fly-which-is-better2025-07-10T10:55:22-05:002025-08-15T07:14:14-05:00Rear-Delt Cable Fly or Dumbbell Rear-Delt Fly: Which Is Better?Jeremy GottliebThe rear-delt fly exercise can be performed with cables or dumbbells, and either version is a solid choice for isolating the posterior head of the shoulder muscle. But our Editor-in-Chief, Sean Hyson, CSCS, breaks down which of the two is the best choice and how to do it for the best gains.
What Is The Rear-Delt Fly and What Are Its Benefits?
The rear-delt fly is the simplest and most direct way to train the rear deltoid—the little muscle on the back of your shoulder. You start with yourarmin front of your body and you extend it out to your side.
Rear-delt flys are important because most people have lopsided shoulders. They sit staring at a computer or their phone all day, rounding their upper back, and that causes the posterior muscles to weaken and lengthen while the anterior muscles get tighter. If you’re afitnessfiend,you probably do too much pressing and chest work in relation to your rowing and rear-delt work, and that contributes to the imbalance.So rear-delt flys help to build up the back of the shoulder, which contributes to the appearance of bigger and more even shoulders overall. Rear-delt flys can help to prevent shoulder injury by restoring muscle balance, as strong rear delts help keep the shoulder joints centered, rather than pulled forward, which wards off shoulder injuries like an impingement.
There are several ways to do a rear-delt fly with cables, but the version that follows is the most straight-forward.
Step 1.Set both pulleys at an adjustable dual cable station to the height of your head. Grasp the cables themselves with your palms facing down, crossing one arm over the other, and stand with your feet between hip and shoulder-width apart. You may want to stagger your stance for extra balance. Step back a bit so you feel tension on the cables and a light stretch in your rear delts before you even begin the set.
Step 2.Brace yourcore. Now drive yourarmsstraight out to your sides while keeping a slight bend in your elbows. You really have to do this as an arcing motion, as if reaching out for the walls around you. Stop when your arms are 90 degrees.
Step 3.Lower the cables under control, and stop just short of where the weights touch down on the stack. You want to keep your rear delts working throughout the entire set, and letting the weight rest for a moment lets your delts rest too.
You can also do the fly using single-grip or D handles attached to the cables and your palms facing each other. This may bring a little more of your lateral delts into the exercise, but that isn’t a terrible thing. Ultimately, choose the setup and hand position that feels most comfortable to you and allows you to train the exercise hard and heavy.
Without the tension of cables, you’ll have to adjust your body position to allow your rear delts to work against gravity. This can be done easily by bending at the hips so your torso faces the floor. Now when you perform the fly motion, your arms will be lifting up from vertical to 90 degrees to the floor, shortening the rear delt muscle completely.
Step 1.Hold a dumbbell in each hand and bend your hips back until your chest faces the floor. Keep a long spine as you do so to protect your lower back. Turn your hands so your palms face your legs.
Step 2.Raise the dumbbells out to your sides 90 degrees while keeping a slight bend in the elbows. Your torso should remain motionless.
Step 3.Control the descent and stop a little short of your arms being vertical. Again, you want to keep tension on the delts.
Note that this same motion can be done with cables as well, if you only have access to a station that has low pulleys, or won’t adjust to shoulder level.
If you have an adjustable bench, it’s a good idea to do the rear delt fly—with both cables or dumbbells—using the bench for support.The bench stabilizes your body for you, and that will allow you tofocusmore on the rear delts and give them a better stimulus. It will also force you to do the movement more strictly, as many people have a tendency to bounce their torso when doing dumbbell rear-delt flys.
No big surprises here. The rear-delt fly works—ta dah!—the rear deltoids. Your upper back muscles, such as the trapezius and rhomboids, will also get involved a little bit, butthat’s why it’s so important to raise your arms out only to 90 degrees, where they’re in line with your sides.While it might seem like extending your arm back further will give you an even better contraction in the deltoid, you’re really just bringing thetrapsinto the movement even more. The rear-delt fly is supposed to isolate the deltoids so you can focus on building up that muscle alone, so do it right and let the target muscles do their thing.
Is One Variation Better Than The Other? Who Should Do Which?
OK, so here’s the big question: should you do the rear-delt fly with cables or dumbbells?Well, the advantage of a cable is that the resistance is constant throughout the whole range of motion.That means that even when your arms are in front of you, your deltoids are still going to be working pretty hard. You’ll notice that when you use dumbbells, this isn’t the case—the tension drops off the delts completely when your arms point toward the floor, and the fly feels the hardest at the end of the range of motion when your arms are extended at your side.
Either version is OK, and if you train at home or only have access to dumbbells, then the dumbbell rear-delt fly is what you’ll have to rely on to build your rear delt muscles. But if you can get your hands on a cable, it’s the better choice for a more complete rear-delt workout. Another good alternative would be exercise bands, which keep tension on the delts throughout the whole range.
How To Stretch Before Doing Rear-Delt Flys
Follow these five steps to better shoulder mobility—courtesy of Dr. Layne Palm (@laynepalmdc)—to warm up and stretch your shoulders before taking on any rear-delt workout.
The rear-delt fly doesn’t always have to be done with your arms traveling to 90 degrees. Some trainers argue that if you perform the fly with a 45-degree arm path, you’ll be able to go a little further into shoulder extension and contract the rear delts even harder without getting the upper back involved. This point is debatable, but the rear-delt cable X fly is a worthy variation to experiment with.
Step 1.Set the pulleys of a cable station up high, at least to shoulder level. Grasp the cables themselves—you don’t need a handle—with a crossover grip, and step back so you feel some tension on the cables. Stagger your stance for balance.
Step 2.Extend your arms in a 45-degree path, as if drawing an X in the air, until your rear delts are fully shortened. (Your arms will be behind your body.) Keep your arms fairly straight, and don’t extend your elbows as you fly—that would turn the movement into more of atriceps exercise.
While a fly motion lets you work your rear delts without assistance from the back andbiceps, it’s not the only way to train the rear delts. Rowing exercises certainly hit the rear delts as well, and you can emphasize them over the back muscles with a rear-delt row variation.
Step 1.Set an adjustable bench to a 45-degree incline and lie down with your chest against the pad. Grasp a dumbbell in each hand.
Step 2.Row the weights up with your elbows pointing 45 degrees out from your sides. Row until your upper back and rear delts are fully contracted, and then lower under control.
FYI, any row variation where the elbows are flared (as opposed to tucked near your sides) will recruit the rear delts significantly.
Rear-delt exercises in general are often left to the end of upper-body workouts, but if your rear delts are lagging, it’s a good idea to do them first in your session when you’re fresh and can give them your best effort. A few sets of rear-delt cable flys before you do any pressing or lateral deltoid work will help to bring your rear delts up fast.
In general, 2–3 sets of 5–10 reps is enough rear-delt training for any one workout. Do it twice a week with two different exercises. For example, one session could feature the rear-delt cable fly and the other the dumbbell rear-delt fly, or the cable X fly.
]]> https://www.onnit.com/blogs/the-edge/4-traps-exercises-and-2-workouts-for-getting-huge2025-07-10T10:55:22-05:002025-08-15T08:17:51-05:004 Traps Exercises and 2 Workouts for Getting HugeJeremy GottliebTom Hardy as Bane. Pro wrestling’s Bill Goldberg. Brock freakin’ Lesnar¦ When you think of the most jacked and brutally Herculean physiques in the world, these are some of the guys who probably come to mind, and the main reason why is a well-developed set of traps. If you have ambitions of competing in a physique contest, or you just want to look like a football lineman, bouncer, or some other tough SOB, building up your traps ought to take priority in your training. We’ve got 4 traps exercises and 2 workouts that will turn your neck and upper back into that of a Brahman bull.
When weightlifters say “traps,” they’re talking about the trapezius muscles on the upper back. There are two of them, one on each side of the spine, and they consist of three parts—each with a different function.
The upper traps start at the top of the neck and attach to the upper and outer edge of the shoulder blade. This part of the muscle shrugs your shoulder, rotates your shoulder blade upward when you raise yourarmabove horizontal, and helps turn your head. The middle traps originate in the center of the spine and spread out to the shoulder blade and acromion joint. The mid traps pull your shoulder blades back and together.
The lower traps start out way down at the bottom of the rib cage and stretch up to the shoulder blade. They do the opposite of what the upper traps do, drawing your shoulder blades downward.
Most guys only train their traps with barbell and dumbbell shrugs, but as we just explained, that shrugging motion really only works the upper traps,so shrugging alone is incomplete training when you want an upper back like a bull. To get trapezius muscles that appear three-dimensional and make you look like you’re wearing an oxen’s yoke—hence the term “yoked”—you need to train the traps’ other two functions. And that’s not just a good idea for building a bad ass physique.Strengthening the middle and lower traps will also help to ward offshoulder injuriesand keep your upper back in balance with your chest.
Ask any physical therapist who’s dealt with clients complaining of shoulder pain from too much pressing or poor posture—they often prescribe scapular retraction and lower-trap exercises to restore balance. Chronic slouchers often experience scapular winging—excessive outward movement of the shoulder blades—which can lead to poor shoulder mechanics in pressing and reaching overhead.Strengthening the lower and middle trap helps offset that, explains Chad Waterbury, DPT,a physical therapist and strength and conditioning coach in Los Angeles (@drchadwaterbury). “You’ll open space in the shoulder joint and avoid pain and impingement when you reach overhead.”
Finally, from a performance perspective, strong traps play a role inweightlifting cleansand deadlifts. “In sports, they help you throw a punch and swing a racquet,” says Andrew Heffernan, CSCS, an award-winningfitnessjournalist andco-author ofThe Exercise CureandYour New Prime. In short, big traps aren’t just a sign of a guy or gal who can rip sh!t up—they actually help you do it.
Four Effective Exercises for Working Out Your Traps
Start integrating the following movements into your training. They can be done toward the end of any upper orfull-body training daysyou do, as well as on back days, if you follow a body-part workout split. (See sample workouts below in the Best Trap Workouts For Getting Huge section for examples of how they can fit in.)
1. Dumbbell Shrug With Forward Lean (Upper and Middle Traps)
Most people do shrugs by shrugging their shoulders straight up. That will certainly hit the upper traps, but you’ll involve more of the muscle—specifically, the middle traps, the meatiest part of the muscle—by angling your body forward a bit. It also allows you to use a greater range of motion.
This kind of shrug was a favorite technique of Dorian Yates, a Mr. Olympia-winning bodybuilder with one of the biggest backs in history.
Step 1.Hold dumbbells at your sides and bend your hips back about 20 degrees. Keep a long straight line from your head to your tailbone, and brace yourcore. You don’t want to round your lower back here. Retract your neck and tuck your chin. Maintain this body position throughout the exercise.
Step 2.Shrug your shoulders up and slightly back. You should feel your whole upper back pinch together. Hold this top position for a second or two to really make the traps work, and then lower the dumbbells back down under control, letting the weight stretch your traps at the bottom of the rep.
As you get stronger, your grip strength will limit the weight you can use, shortchanging your traps of the stimulus. It’s OK to use lifting straps to reinforce your grip so you can shrug heavier weights and challenge your traps even more.
Any rowing movement that has you squeezing your shoulder blades together will involve a lot of middle traps. But supporting your chest on a bench will provide more stability, which allows you to lift heavier weight, and will better isolate the upper back muscles in general. There’s a time and place for bent-over rowing variations, but if you want to zero-in on the traps, it’s better to take your lower back out of the equation and not waste energy stabilizing the entire body.
You can do these on a machine, with a barbell, or with dumbbells, as shown in the video above.
Step 1.Set a bench to about a 45-degree angle. It just needs to be high enough to accommodate the length of yourarmsand prevent the weights you’re using from hitting the floor at the bottom of each rep. Lie on the bench, chest down, and grasp dumbbells.
Step 2.Row the weights with your arms out about 60 degrees. This will target the traps better than if your arms are close to your sides, which is more of a lat exercise. Drive your elbows back as far as you can and squeeze your shoulder blades together at the top. You may want to hold the top for a second or two as you did with the shrugs to make the exercise stricter and emphasize the traps as much as possible.
Step 3.Lower the weights and allow your shoulders to spread at the bottom.
As with the shrugs, it may be helpful to use lifting straps on your rows once you’ve worked up to very heavy weights that your grip can’t hold onto.
Here’s a movement that really isolates the traps. The goal here is to prevent the other back muscles, along with thebiceps, from assisting, and force your traps to retract your shoulder blades alone. You can do these with a barbell or a machine, but dumbbells work fine too, as long as you use a wide enough grip to allow your shoulders to retract all the way.
Step 1.Set up on a bench the way we described for the chest-supported row.
Step 2.Simply retract your shoulders and squeeze them. Hold the top for a second or two. Be careful not to shrug your shoulders up or hyperextend your back. Just pull the weight straight back. Your chest may come off the pad a little, but don’t arch your back hard trying to get the weight up. It’s a short range of motion and a subtle movement, but the point is to isolate the traps, so don’t turn it into another row.
Remember we said that your lower traps pull the shoulder blades down in a reverse shrugging motion, so any pullup or pulldown variation will involve the lower traps to a large degree while it trains the lats. Still, it’s a good idea to really isolate the lower traps to strengthen them, especially if you do a lot of overhead or chest pressing, which can be hard on the shoulder joints. Strong lower traps help to stabilize shoulders, and the Y raise is a great movement for this purpose.
Step 1.Set a bench to a 45-degree angle and lie on it, chest down. Hold a light dumbbell in each hand, and brace your core.
Step 2.Raise your arms out in front of you on an angle so your body forms a Y shape. Hold the top for a second or two. You should feel the tension in the middle of your back, and if you don’t, make sure you’re not going too heavy or arching your back.
“The traps work in concert with other muscles—such as the rhomboids and serratus anterior—to perform a myriad of scapular movements,” says Waterbury. Any time you perform rows, chins, pulldowns, overhead presses, ordeadlifts, you’re also hitting your traps—especially the upper traps. Because the traps are involved in so many of your other back exercises, you don’t need to blast them with a death ray of volume to see gains.
Try adding one or two trap-focused exercises to your routinesfor two sessions a week, and do only two hard sets to start. (This means sets taken to failure, or within one rep of failure.) If you feel your traps are really lagging and you want to emphasize them, prioritize them by doing a trap exercise first in your workout. Here are two examples of back workouts that emphasize the trapezius.
The traps can get tight from a lot of heavy training in combination with sitting in front of a computer or looking down at your phone all day, so it’s helpful to stretch them out a little bit throughout the day and after training. This stretch from Waterbury may help to prevent headaches as well as injury in the gym.
Step 1.Reach your right hand behind your back and place the back of your hand against the back of your left hip. Hold your shoulders down and back.
Step 2.Grasp the back of your head and gently pull it down and across in the direction of your left shoulder. You’ll feel a strong stretch in the back of your neck and traps. Hold for 30 seconds, and then repeat on the opposite side. Repeat for 3 rounds.
]]> https://www.onnit.com/blogs/the-edge/what-are-nootropics-how-you-benefit-using-brain-supplements2025-07-10T10:55:21-05:002025-08-15T09:44:39-05:00What Are Nootropics? How You Benefit Using Brain SupplementsJeremy GottliebThe nootropics are a class of “smart” drugs and supplements that enhance brain performance, and in an increasingly competitive and fast paced, sensory seeking culture, they’re quickly gaining wide popularity. The term nootropic translates to “turning the mind,” and in this sense we’re turning the mind toward improved performance by helping you remember names and places,focuson complex tasks, think more clearly under stress and react more quickly.
In the recent movie “Limitless,” Bradley Cooper’s character is shown rather quickly turning from a cognitively average drug addict into a relative genius and rising politician… all from a little pill that lights his neurochemistry up like Christmas Vacation.
While the movie gives a potential perspective on what’s possible through the massive, growing field of psychopharmacology, a personal vignette is in order.
I was diagnosed with narcolepsy in medical school. That’s where one falls asleep abruptly in inappropriate and potentially dangerous situations, and is neurologically verified by clinical data in an EEG directedsleeplab. Yep, it was official and I was given a cousin of Ritalin called Cylert.
Totally worked and I was hooked. For about four years I was tied to it daily, and it only came after another wake up that I decided to take a different approach.
How I Found Nootropics
The wake up came while in my psychiatric residency in the form of my last major concussion. Up to that point I had four major head traumas, one of which included me landing on my crown while diving and breaking my neck. This latest one happened when I got turned upside down on my snowboard in a terrain park and put a 6 inch crack in the back of my helmet.
Even with the Cylert on board my focus, concentration, and memory were shot, and it gradually dawned on me… am I going to be taking this medication for life, even if it’s not doing the trick? Now, this was all in the setting of watching three out of four of my grandparents die with neurodegenerative conditions. If you’ve ever seen a person with brain issues… it gets your attention. The natural question then arose… Holy crap, is that going to be me?
Thus started my flurry into reparative neurobiology, regenerative medicine and advanced cognitive performance strategies. So, is it really possible to dramatically change the brain for the better, and if so, how does it work and how can I do it? What is the protocol and what are the downsides, if any?
This article is essentially geared to answer these questions, although to be clear, a full discourse in answering the question of how to turn your brain into a racecar engine and drive it as such is another volume of blog posts and multi opinionated examination… we venture forth.
Can Nootropics Really Enhance your Brain
The brief answer is yes, the brain can be driven like a race car in the hands of an Andretti. In fact, it can be driven like a fighter jet on greased lightning!
We’re only scratching the surface of our cognitive potential as there are massively exciting technologies that we’re not even covering here (for example, advanced neuro-feedback, holodynamic cognitive enhancement through sound and light therapies, targeted amino acid therapy specifically tailored to a person’s individual neurochemistry, and accelerated avenues for clearing out the interference in the neural networks). But for now, we’ll settle for the nutrients and practices readily available to the average person.
The ones I’ve included here are all of the ones I’m directly familiar with, both professionally and personally, and by no means is this an exhaustive list. The list provided here can be thought of as a cliff notes version of sorts from clinical research and available experience.
As many of you know from my previous writings, I put myself in the lab in order to understand from a first person perspective the effect, because it’s only then that I can really speak from a place of truth, otherwise I’m just passing on someone else’s perspective.
I also happen to run one of the most effective ortho-molecularly based psychiatric rehabilitation centers in the country, Alternative to Meds in Sedona, Arizona. People of all ages come to detoxify their nervous systems from offending agents (drugs, medications, underlying infections, etc.) and get their Ferrari brains back online. So, I do have a bit of experience from multiple angles.
6 Classes of Nootropics
Nootropics Class #1: Medications
Some pharmaceuticals fall into this arena. Some clinicians in the country even advocate wide and liberal use for the masses in order to boost productivity further.
The downside is the variable frequency of side-effects, especially with the stimulants (think of Ritalin as neurochemically similar to cocaine and Adderall as similar to crystal meth), which for children can be especially significant, including the long term effects on psychological development.
Another class of meds are the eugeroics, which enhance wakefulness. They’re typically used for people with narcolepsy and excessive daytime sleepiness. One such med is Provigil (or Modafinil) that has been getting wider use.
Notably, our culture is ripe with stimulants used daily throughout the workforce, namely nicotine andcaffeine. They’re used because they work! The clinical trials show improved alertness, memory and reaction time. The downside is the acidity, adrenal burnout, and in the case of cigarettes the little C problem.
An upgrade that many are switching over to is the theobromine in dark chocolate. Not only does it just make you feel super good, it’s a potent anti-oxidant profile and mineral booster.
Nootropics Class #2: Neuro-Protective Agents
Common supplements used as “brain food” that protect the brain and help it repair; for example, think of healing from a closed head injury, toxic exposures, central nervous system infections, etc.
These include broad spectrumB vitamins, as well as vitamins C, D, and E as well as Omega 3 fatty acids and alpha lipoic acid.
A few notables here for powering up neurogenesis and stimulating neuronal growth: Lion’s Mane Mushroom, SAM-e, phosphatidylserine, inositol, glutathione (massive benefit here), and cannabidiol.
It just plain helps to get more blood circulating in order to think better. First steps are to get hydrated, which most people aren’t, and remineralize. Then for an added support try CoQ 10.
Nootropics Class #4: Specific Neurotransmitter Targets
Dopamine Boosters:Build the “feel good and reward seeking” neurotransmitter in the brain. These are tyrosine, phenylalanine, and macuna puriens.
Serotonin Support:Build the “moodlifting” pathways via tryptophan and 5-HTP.
Acetyl Choline Strengthening:Boosting the memory enhancing neurotransmitter system. This is with alpha GPC, huperzine, sage, and rosemary.
Nootropics Class #5: Targeted Herbs & Foods
Targeted herbs and foods have been used classically for hundreds of years to get the brain juices flowing again, as well as to modulate certain psychological conditions.
Some people like to engage the plant kingdom directly as it can be seen as being closer to nature. If so, here’s your list, just note that in some cases you may need to take a truck load of a given food or herb to get the distilled benefits in one supplement capsule.
Theanine (green tea), resveratrol (blueberries and red grapes), curcumin (turmeric), and the whole class of cruciferous vegetables; all potent anti-oxidants, anti-inflammatory (unless one has an allergy), and performance enhancers.
Nootropics Class #6: Adaptogens
May be the most appreciated and fastest rising class of herbs in use today. They literally help the body adapt to stress, and given the pace we live in our day and age, who couldn’t use their support?
They are generally considered tonifying herbs as well, i.e. those you are encouraged to use daily for strength and vitality. The ones I have chosen to list here are those that are specifically brain and nervous system supportive as well as being restorative to the adrenal glands.
The ones here are a bit more yang and stimulating. Rhodiola, Ginseng (all of them), Ginkgo biloba, Tulsi (Holy Basil), and He Shou Wu. These are a bit more yin and calming. Lemon Balm, Kava Kava, Passion Flower, Valerian Root, Oat Straw.
A Final Word on Nootropics
Wrapping it up, there’s a lot to take into consideration. While it’s fun and exciting to drive a Ferrari to its limit, it’s also a good idea to know how to slow down and stop when desired. And in the case of brain function, that means finding the resting and recovery period of the para- sympathetic system and nightly reparative sleep.
The downside to high octane brain performance is running a bit hot through overstimulation, symptoms like anxiety, insomnia, teeth grinding, perpetuating the “more, more, more” attitude of the rat race and eventually blowing a fuse.
In order to do it all right takes time, thoughtfulness, experimentation, and ideally support from someone knowledgeable in the field. It’s a craft, an alchemy of sorts; and when in doubt, find someone to point you in the right direction before just throwing a bunch of stuff at your fairly delicate brain matter and psychological makeup.
]]> https://www.onnit.com/blogs/the-edge/the-ultimate-morning-meditation-routine-for-relaxation2025-07-10T10:55:21-05:002025-08-15T09:41:02-05:00The Ultimate Morning Meditation Routine for RelaxationJeremy GottliebWhether you’re talking about celebrities, pro athletes, or millionaire entrepreneurs, successful people tend to have a few things in common. Maybe they get up early in the morning, or they write down short- and long-term goals for themselves, but one commonality that comes up again and again among the most driven and positive people in the world is the practice of meditation.
You may choose to meditate to sharpen your mind for the day ahead, or merely to calm it down, but sneaking in even a short session in the middle of a busy morning can pay more dividends than you imagine.
Why Meditate In the Morning?
Science is beginning to prove what yogis, monks, and Kung Fu masters have known for centuries: that meditation can help to relieve stress and even serious medical conditions.
A 2014 review of 47 trials that observed more than 3,500 people concluded that meditation practicesreduced subjects’ anxiety, depression, and pain.Another study that same year demonstrated benefits for patients with chronic insomnia.
According to Cory Allen, a meditation coach in Austin, TX, and the author of the upcoming book,Now Is The Way, meditation is beneficial at any time of day, but he personally does it in the morning in order to prepare himself for a more productive day. Doing it in the morning, he adds, will also increase the likelihood that you do it at all. Get it out of the way early, and you won’t forget to meditate later, or blow it off.
“People often tell me they want to meditate,” says Allen, “but it never ends up happening because they look at it as a chore.” To establish meditation as a habit, you have to build it into your schedule just as you do showering, drinkingcoffee, and brushing your teeth.
Exactly when you do it is entirely up to you, but Allen suggests treating meditation like an appointment and keeping it. “Make it a non-negotiable,” he says.Aim to meditate at the same time every day.If you think it will be easier to do it first thing upon waking up, before your day starts getting hectic and rushed, simply sit up in bed and do it right away. “The more you do it, the more the benefits will compound,” says Allen. Some meditation is much better than none at all, but if you can, aim for five sessions a week (varying lengths each session is OK). “If you can do it Monday through Friday, by the time Friday rolls around, I bet you’ll feel way different,” says Allen. The more consistently you meditate, the more you’ll get accustomed to it, and the more you’ll want to keep doing it. Meditation will become something you desire to do, and not another task you feel obligated to complete.
“I meditate in the morning because I want to have the most clear-focused and present mind I can have for my day,” says Allen. (See “The Best Morning Meditation Routine for Clearing Your Head” below for step-by-step instructions for a great meditation.)
How Long Do I Need to Meditate For?
According to Allen, any amount of meditation is beneficial. If five minutes is all you can spare, that’s fine. Of course, longer sessions will allow you torelaxmore and get into a deeper meditative state. “When people ask me how long to meditate, I just say, ’Until the peace comes,’” says Allen. If you’re rushed, set a timer for as long as you can spare, but, ideally, you’ll meditate until you feel your body and mind let go.“I like 20 minutes,” says Allen, “which can let you get a really deep meditation,but still doesn’t take that long.”
If 20 minutes seems like a lot, and more time than you can spend “doing nothing,” take a moment to consider how much time you already spend scrolling through pictures on Instagram (of people you don’t even know¦).
The Best Morning Meditation Routine for Clearing Your Head
Allen’s morning routine is as follows: Wake up, drink coffee, run three to four miles, shower, dress, and meditate. Contrary to what you might believe about coffee, Allen says it helps him meditate. “People think you shouldn’t be wide awake when you meditate, but don’t confuse sleeping with meditation,” he says. “You can have a present and energized mind while being relaxed and dialed in—and that’s the state you’ll find you get to with practice. Your mind is very active and present, sharp and clear.”
Allen says that usingcaffeineto aid meditation is a practice that long predates Starbucks. He points to a legend of a bodhisattva whose monk disciples kept falling asleep while meditating.“So he ripped his eyelids off and threw them on the ground, and from them grew green tea leaves,”says Allen. The bodhisattva then brewed tea from the leaves and served it to the monks before they meditated so that they stayed awake and focused.
Of course, it goes without saying that Allen doesn’t advise drinking tea made from eyelids, and cautions that caffeine (er, from any source) may not work for you as well as it does for him, so pre-meditation coffee is optional.
At any rate, when you’re ready to meditate, follow these steps.
1. Get quiet.
Get away from noise, distractions, and electronics. However, particular kinds of music can be helpful, such as binaural beats—music that directs one tone into one ear and a different tone into the other. The difference in the frequency of the two tones stimulates your brain and guides it to the state of mind the music is designed to lead you toward. There are binaural beat tracks for various different goals, such as bettersleeporrelaxation, and Allen sells them on his website. Binaural beat music may seem strange, but it doesn’t sound that way. Tracks are usually packaged as nature sounds, such as falling rain, and are pleasant to listen to.
Allen recommends theOpening Eyebeat on his site for beginning meditators,which is $5 (but you can use the code word “Astral” for a discount).
2. Get comfy.
Find a comfortable position to sit in. You could be in a chair, on your sofa, or on the floor. Allen recommends the half-lotus position—sitting on a pillow with legs crossed in front of you, one foot resting on the opposite thigh and the other foot tucked under (you’ve seen it in yoga class). Keep a long spine and rest your hands on your knees.
If you suffer from lower-back pain, an even more comfortable posture might be seiza, a Japanese style of sitting where you kneel on the floor and sit on your heels (again, place a pillow under your butt for greater comfort).
3. Breathe.
Close your eyes and try to relax. Take slow, deep breaths, and do your best to keep your mind on the rhythm of your breathing. Of course your thoughts will wander, but Allen promises that the more you practice the easier it will become to keep your mind clear. When you catch yourself thinking, “just acknowledge that the thought got your attention and it will go away,” says Allen. Gently refocus on your breathing. Trying hard to think of something else or exploring that train of thought will only make it worse. “There’s a Zen saying,” says Allen, “that you can invite your thoughts in, but don’t serve them tea.”
Most importantly, don’t get frustrated and think you’re wasting your time. Keep breathing and trying to relax, and you’ll improve over time.
4. Let go.
Allen says that you should breathe in meditation the way you do when you sleep—fluidly and softly. You need to relax every muscle, and this goes double if your main goal with meditation in the first place is to reduce stress and promote peace of mind.
“You can gamify it a bit,” says Allen. “With every exhale, try to relax a little bit more. See how much you can let go.” As you relax some muscles, you’ll become aware that others are tight, so direct your attention to them and release them in sequence. “Allow your armor to melt off,” says Allen, and you’ll begin to feel like you’re floating.
Seiza position.
5. Ask questions.
When you feel your mind has quieted down and you’ve relaxed physically, you can start to use meditation for its greatest purpose—to become enlightened. Maybe not to the level of the Buddha, but at least about your own life and things you want to achieve.
“I start to ask my own mind questions,” says Allen. For example, “What do I need to achieve today to fulfill my long-term goal? What are the next steps I need to take to sort out this situation? How do I need to realign myfocusto better achieve my goals?”
Then wait and see what floats to the surface.
The breathing you’ve already done will help to clear away the normal chatter in your head, so it should be much easier, at this point, for you to think about what you want to work on objectively and with focus.“It’s like dialing into a radio station you want to hear instead of just getting static,” says Allen. “The resolutions will come forward.”
While questions are coming up, don’t try to actively answer them or problem-solve. The more you try to “grab” at thoughts and hold them down, the harder it will be to let your subconscious thoughts come out. It may sound a little esoteric, but think of your mind as a mirror (ever notice that thinking is called “reflection?”) When it’s racing and unfocused, the mirror is shattered, and you’re scrambling to pick up fragments of thought that you can never piece together into a whole. You can’t reform the mirror to get a clear image of who you are and what’s in front of you.
“By moving the intellectual mind out of the way,” says Allen, “we allow a unification of elements that eventually becomes conscious thought. Those fragments come together and the mirror becomes unbroken. You’ve been reflecting on pieces of a shattered mirror within you, but when you let those pieces become one, you can see the image.”
]]> https://www.onnit.com/blogs/the-edge/bison-vs-beef-which-red-meat-reigns-supreme2025-07-10T10:55:21-05:002025-08-15T09:17:03-05:00Bison vs Beef – Which Red Meat Reigns Supreme?Jeremy GottliebAfter decades of being maligned for its saturated fat, beef has made a comeback with nutritionists, with recent research showing thatsaturated fat may not increase the risk of heart diseaseas previously thought.
But beef has another opponent to contend with, and it’s been here for centuries: bison.
Similar to beef both nutritionally and in terms of flavor, buffalo meat is an alternative to the cow (incidentally, “bison” is technically the correct term for the animal, but it’s come to be used interchangeably with “buffalo”).
Both bison and beef can be part of a healthy diet. But if you had to pick one big animal to take a bite out of, which one should you choose?
We compared beef and buffalo in every important category to determine the alpha protein on the range.
Is Bison Better than Beef?
BISON
BEEF
Nutrition (4 oz serving)*
130 calories 25g protein 3g fat 0g carbs
140 calories 25g protein 4g fat 0g carbs
Safety
Never administered antibiotics or hormones
Often administered antibiotics and hormones (unless USDA Organic)
Environmental Impact
Low carbon emissions, helps preserve grasslands
High carbon emissions, depletes grasslands
Treatment of animals
Allowed to graze freely most of the time
Usually raised in feedlots (unless marked “free-range” on label)
Taste
Drier and sweeter than beef
Drier and leaner than conventional beef if grass-fed
Cost
More expensive (approx. $9 or more per pound for most cuts)
Less expensive (approx. $6–7 per pound for most cuts)
*There are many cuts of both bison and beef available. To equate them as closely as possible, we chose top sirloin—a very lean cut preferred by athletes—for the macronutrients in the table. Also, as bison is mainly raised on pasture, we went with grass-fed beef in the example to match it. In other words, the table compares buffalo to the very best the beef world has to offer. More commonly found conventional beef would have approximately 230 calories, 23g protein, and 15g fat per four-ounce serving.
WINNER: Bison
Why Bison Wins (By A Horn)
Buffalo Meat is Better Quality
Across all cuts, buffalo meat is lower in calories and fat than beef is, andhigher in protein. A three to four-ounce serving of bison ribeye has 177 calories, 6 grams fat, and 30 grams protein compared to a typical beef ribeye, which contains 265 calories, 17 grams fat, and 27 grams protein. According to the USDA, bison burgers have 152 calories and 7 grams fat, which is less than even a 90% lean beef burger (184 calories and 10 grams fat) and a 93% lean turkey burger (176 calories and 10 grams fat).Bison offers more omega-3 fats than beef, and a better omega-6 to omega-3 ratio.
Bison doesn’t give up any micronutrition to beef either. It’shigher in B vitamins than beef—critical nutrients that support energy levels, memory, andmood—as well as copper, potassium, andzinc.Reader’s Digesteven recommended it as one of the best sources of iron for pregnant women, who tend to be anemic more often than men due to menstruation.
Research supports bison as being heart-healthier too. A study published in Nutrition Research in 2013 compared the effects of consuming bison versus beef. Ten healthy men ate 12 ounces of either beef or bison per day, six days per week, for seven weeks. Then, after a 30-day “washout” to clear their systems, the bison-eaters switched to beef and vice versa for another seven weeks. Researchers concluded that “in terms of vascular health,bison meat appears to provide a healthier alternativeto red meat.” In fact, after a single beef meal, harmful oxidized LDL cholesterol levels were elevated. The same changes did not occur after eating buffalo.
If you’re concerned about how your meat was raised (and you should be), bison is the safer choice every time. “All bison spend the majority of their life grazing on pasture,” says Dave Carter, Executive Director of the National Bison Association, a non-profit organization of bison producers. “Some are finished with grain, sometimes in a feedlot,” meaning that they’ll eat grain feed just as most cows do to fatten them up a bit in the last few months before slaughter so they yield more meat. But Carter says that, even if the bison are forced to spend some time fenced in, they get a lot more space than cows do. Bison aren’t as easily controlled as cattle, so it’s much harder for ranchers to keep them in confined quarters like cows are where they can be mistreated and develop diseases.
In fact, it’s more advantageous for buffalo ranchers to treat their livestock well. “If there’s stress on the animal, it won’t produce good meat,” says Carter. “One thing you can be sure of with all bison is that it’s produced without growth hormones or antibiotics. It’s illegal to use them. And most of the bison producers have independent auditors come in to test them.”
OK, But How Do I Cook Bison?
Buffalo meat is drier than beef due to its leanness, so it cooks faster. Carter recommends salting it and brushing it with olive oil to lock in the natural juices. Then be careful not to cook it past medium or it will be too tough. “The biggest mistake is that people dump on so many seasonings they lose the great bison taste,” says Carter, so keep it simple. “If you’re going to pay a premium for bison meat, you should taste it.”
Raising Buffalo is Better for the Environment
According to Carter, 30–40% of ecosystems around the world are grasslands. These draw in carbon, taking it out of the atmosphere and producing oxygen, thereby fighting climate change. “Whether it’s the high plains of North America or the Sahara in Africa, they evolved with grazing animals. These animals get a black eye for being so-called terrible carbon producers, but if you didn’t have them, the environment would collapse.”
Carter says grasslands overgrow, creating 30% more matter than can decompose every year. Without bison to chew some of it up, “grassland will essentially choke itself out.” To be fair, buffalo do fart out carbon just as cows do, but there are far fewer of them—there are a mere 500,000 in the U.S. versus nearly 100 million head of cattle. And bison consume less. “It takes 35 acres to support one cow,” says Carter. Bison by nature must eat different grasses at different times of the year, so the animals are cycled through grazing lands, which promotes sustainability.
Furthermore, Carter says bison are better designed by nature to care for the earth. “Bison hooves are more pointed than cattle hooves, so they tend to stir the soil and push seeds down further. Their bodies make depressions in the ground that capture moisture and return it to the soil.” Buffalo drink less water than cattle and are more resistant to extreme weather, so they can forage for their own food even in a harsh winter and don’t require the same amount of resources that cows do.
Buying Bison Can Support Native Americans
Bison were the staple food of Native American tribes until the latter half of the 19th century, when their population was decimated by disease (brought over from European cattle, says Carter), reckless over-hunting, and anti-Indian U.S. government policy at the time. As a result, the health, culture, and economy of Native Americans has suffered since. Fortunately, a large contingent of the bison industry supports the restoration of bison on Native American land and the resurgence of their community.
The Tanka Fund, created through a partnership between Native American Natural Foods (NANF) and the Indian Land Tenure Foundation, develops the assets needed to supply land to Native Americans to raise their own bison and bring it to market. Their goal is to convert one million acres of land to Native American buffalo producers in order to benefit tribal nations. You can make a donation at the link foundhere
]]> https://www.onnit.com/blogs/the-edge/7-essential-functional-movement-exercises2025-07-10T10:55:21-05:002025-08-15T08:37:45-05:007 Essential Functional Movement ExercisesJeremy GottliebUnconventional training using unique implements (kettlebells, sandbags, clubs etc.) and methods (gymnastics,calisthenics, strongman, etc.) are often seen as the staple of the super-fit, strong and young.
While these methods and practices are becoming more commonplace, what value do they have for beginners who want to improve their health andfitness? And furthermore, would they need to be modified to ensure applicability and safety in this diverse population?
This article will discuss the rationale for an unconventional approach to training beginners and suggest example exercises and programs. It will also share some of my experiences of working with beginners in both a commercial and rehabilitative capacity.
It should be noted that “training for” any broad population is necessarily very complex and that making specific recommendations is both challenging and complicated.
Conventional Fitness Options
Before tackling the “what” and “how,” we need to examine the “why.” The conventional health and fitness environment and approach typically consist of:
â Machine-based, often seated, resistance exercise. â Afocuson aerobic exercise, over and above strength and functional movement. â An abundance of mobility aids that reduce the physical requirements of the individual.
I would argue that this conventional approach to health and fitness can be largely ineffective in supporting the needs of beginners. My experience has been that improving an individual’s ability to move comfortably has a far greater impact on their daily life and health than anything else. That, in turn, directly improves quality of life.
Of course, any training program can be impacted by other factors such as disease and obesity, but these can be treated both independently and as part of the overall goal of the program.
Having worked extensively in the commercial fitness environment and rehab fields, I can say that the majority of coaches and trainers default to a “better safe than sorry” policy when working with beginners. This typically leads to a disparity between the goal setting process and the practical implementation of any program.
An Unconventional Approach
It is easy to categorize a certain type of training or equipment as being “unconventional” or as leading to a certain type of result. Our industry is guilty of this over and over again.
The important thing to consider when approaching a large, diverse population is that we are examining the probable result of applying the principle rather than a 1+1=2 approach. Therefore, I think it’s important to further qualify the desired results from this unconventional approach.
When we elect to trykettlebelltraining instead of the step class, barbell strength program, or a resistance machine circuit, what are we really trying to achieve? We want to gain the results that are typically associated with those activities.
If you don’t first set out those goals then it becomes increasingly difficult to both implement and adapt your training options to achieve optimal success.
I believe training for beginners should be focused on function above aesthetics; so much of my work has been centered on basic human movement patterns. This approach makes it relatively easy to construct a sound program and monitor progression and regression in each area.
Functional Movement Exercises Programming
As a baseline, a focus on an exercise in each movement pattern is a sensible approach. This may also need to be adapted for certain individuals. You could also substitute any of the exercises below for a comparable exercise with a specific training implement. The following is an example of a basic human movement program with exercises and comparable daily activities:
The bodyweight squat is a simple movement pattern that can be progressed or regressed through altering the level of support, range of motion, or resistance. The squat is comparable to sitting down and standing up.
2. Lunge
The lunge is a vital movement pattern that has good transfer into walking, stair climbing, and picking up things from the floor. Again, it can be progressed or regressed through the level of support, range of motion or resistance.
3. Hinge
A classic deadlift movement is not only an excellent exercise to strengthen the posterior chain but is one of the most functional of daily movements – picking up an object from the floor. The deadlift can also easily be performed in any environment e.g. with a holdall, shopping bag, or suitcase. The range of motion and resistance can easily be adjusted and variations like the suitcase deadlift offer additional flexibility and progression.
4. Push
An exercise like the push-up is the simplest upper body push movement but can offer difficulties for those with reduced mobility. As a baseline exercise, I actually prefer a standing resistance band press as it also helps to develop balance. For those who are unable to stand, the exercise can be regressed to a seated version.
5. Pull
A standing resistance band pull offers a great antagonist to the resistance band push. As with the push version, the resistance band pull can also be performed from a seated position if necessary.
6. Rotate
A standing resistance band rotation is effective in developing both rotational strength and balance. Like the resistance band push and pull, it can be performed from a seated position if necessary.
7. Walk
The ability to walk is such a fundamental part of daily life that it should be a priority in any training program, and specifically one aimed at beginners. This can mean that the training program actually contains walking or that it is constructed to help enable a healthy gait (most likely it will be a combination of both).
It’s Time for You to Start Refining Functional Movement Exercises
For those that have traditionally thought of unconventional training as an unsuitable option, it is time to change that attitude.
The value of unconventional training comes not in the range of implements and methods that can be used, but in the way that the training can be made applicable to diverse populations.
]]> https://www.onnit.com/blogs/the-edge/illumination-what-i-learned-spending-a-week-in-total-darkness2025-07-10T10:55:21-05:002025-08-15T07:37:12-05:00Illumination: What I Learned Spending a Week in Total DarknessJeremy Gottlieb “Every man is two men; one is awake in the darkness, the other asleep in the light.” – Kahlil Gibran
The house is owned by a family whose matriarch studied in the Hindu tradition and learned darkness therapy by staying in isolation in a cave. She is the real deal. In their house, there was a light-proofed room that you can pay to spend up to a month in. Away from your job, your friends and family, your life, and your world. And possibly the most significant aspect is the constant, ever-present pitch darkness.
People who’ve been there say that room breaks you. But what did I have to fear? As I said, I was already pretty fucked up. So I signed up.
No sooner did I tell people about it than they were trying to talk me out of it. I’ve been on the psychedelic medicine path for over two decades, exploring many of the great indigenous traditions and initiations. But the reaction I got to the announcement that I’d simply be sitting alone in a dark room for a week was far harsher than any of the times I said I was going to a jungle in Peru for a month to do ayahuasca.
“That’s crazy!” said pretty much everyone. “You’ll go CRAZY! Aren’t you afraid of what will happen?”
To each of them, I had the same response. “Afraid of what? Being alone with my own mind?” My thinking was this:If the prospect of sitting in the dark with just your own thoughts frightens you, maybe that’s exactly where you need to be.
So, was I scared? Not really. I knew the isolation and removal of sight would test me, but if you’ve followed my work for any length of time, you know I like to test myself. I like to learn what I’m capable of, and who I am inside. And so if the learning process takes me to the brink, so be it!
Besides, the week before I went on the darkness retreat, I was withWim Hof, testing my limits on a mountain in Poland. In the first week of 2020, I dove into a natural pool beneath a freezing waterfall, held my breath under ice for more than two minutes, and climbed four and a half hours up an icy mountain (with no shirt on).
I needed some time to be with myself. Just myself. And sitting in meditation for a week sounded like a powerful way to usher in the New Year. Little did I know how crazy the year 2020 would turn out to be. The world would shut down, and I would get together with my wife Vylana Marcus. But before all that transformation, I was entering the ultimate cocoon.
A House In The Woods
I arrive at the house and meet Bharati, the woman who runs the retreat. She lives there with her husband and two young daughters. They are deeply steeped in the mystic traditions of India, and have a lovely little collection of artifacts from their years spent there.
Bharati shows me to my quarters for the next week. It’s a 20’x10’ rectangular room with a cot, table and chair, couch that seats one person, dresser, yoga mat, and radiator. There’s one window that’s painted black, so I can’t see out of it, but at least I can open it for ventilation as long as I use my blackout blindfold. On the table is a single speaker that plays an “Om” chant continuously on a 15-second loop, in case I need help meditating, or just want a break from the silence. The only other voices I’ll hear (apart from the ones in my own head) will come from out the window when I open it— like birds’ songs or whispers from the wind.
If it sounds like I volunteered to do time in what convicts call The Hole, or The Box, I can assure you it isn’t that severe. First of all, a little bit of light in a jail cell is just torture. Because it’s a tease, and it prevents the psychotropic effects of the black. But beyond that, my bed includes a memory foam neck pillow, for goodness sake! There’s a 24-hour call button on the wall that I can push to alert Bharati if I need something urgently, or I lose my mind.But while the darkness retreat isn’t technically solitary confinement, it is solitary, and it is confining.
In my room is a small bathroom where I can shower and use the toilet. These will be in total darkness too. Bharati will leave food for me in a blacked out corridor outside my room, but I’ll have to find my way there and back. I’ll know it’s time to eat when they ring a bell. This will also help to give me a sense of how time is passing. If I count the meals, I can determine which is breakfast, lunch, and dinner, and then I might have an idea of what time it is, or what day I’m on.
Not that it matters.
The meals will all be rawveganfood. That’s what Bharati’s family eats, but it serves another purpose as well. I’m going to have visions, just as if I’ve been taking plant medicines. This is the darkness “dieta,” to borrow a term from the ayahuasca tradition.If I’m eating food made from animals, I’m liable to imagine how they died to make it onto my plate.That could be quite a significant thing to reconcile, so it’s best to eat things that I won’t empathize with.
The mechanism behind why visions start to occur after a few days in the darkness is still being studied. Leading theories suggest either an increase in endogenous DMT—a hallucinogenic chemical—or an increase in the chemicals that break down endogenous DMT, therefore creating a surplus in the body. For more on the leading edge science of endogenous DMT, you can check out mypodcast with research professor Jon Dean.
I have three other tools at my disposal. One is a Mindfold blindfold. It blocks light while allowing you to keep your eyes open. This will allow me to open the window for some fresh air without accidentally cheating some light in. Even with your eyes closed, light will seep in through your eyelids.
The next tool is a rudraksha necklace, which Bharati’s daughter, Ananda, hands me. The walnut-sized prayer beads are rough to the touch, but I’m grateful to put them on. They’ll be my security blanket when the lights go out, and they make a comforting rattling sound—my only entertainment apart from the sights and sounds that will soon arrive in my head.
And lastly is my tape recorder. I memorized how to turn it off and on in the dark, and it is there to capture my experience. Little did I know that these recordings would eventually turn into themost powerful filmI have ever been a part of.
Day 1
Bharati’s family gathers in my room. It’s already dark, save for a single candle that’s working for all of us. We sing Hindi songs to prepare me for my journey. Then she asks me to blow out the candle, and they’re gone. Everything’s gone.
I start to do the only thing I really can, other thansleep. I meditate. Without any distractions, it’s not difficult to go deep within myself, and quickly. I begin to hear words in my head.One of them is “obsequious”—excessively obedient or attentive.This makes me think of a waiter in a five-star restaurant who has worked his way up over a lifetime of service. The blackness around me is providing everything I need, like an obsequious waiter. It’s giving me everything I came for.
A little later, I have my first meditation vision. It’s an upside-down heart. Then I see landscapes in my mind. Finally, there’s Buddha. He’s a shining golden figure, and he’s smiling at me. I ask him why.
“Why aren’t YOU smiling?” he replies. He’s laughing now.
“Buddha, why are you laughing?”
“Why aren’t YOU laughing?”
It’s a good question, and a reminder that I haven’t been happy for a long time. I’ve been a pretty somber person as of late, not giving in to playfulness or laughter easily. Unless I’m intoxicated, on some substance or another. Which is not the way I want to live—dependent on something outside of myself for happiness.
I take Buddha’s visit as a message to, quite simply, lighten up. And I’m starting to understand thattotal blackness and blinding light are really the same.In either case, you can’t see. Nothing’s all bad or all good. You need both, and you can live in both. You need to appreciate both sides of everything.
Day 2
The roosters outside my window wake me up. That’s how I know it’s morning. I have to take a shit, and when I’m done, I realize I don’t know if I’ve wiped thoroughly enough. I decide to shower after every bathroom trip to be sure. It’s an unexpected inconvenience, and the first of many.
Back in the sunlit world, I was addicted to hand sanitizer. Before putting anything near my mouth, I would wash my hands or use the alcohol. But in this darkness, even if I had sanitizer, it would be useless. I’d have used the bottle up already. I have to touch everything—the walls, the toilet, even the floor—just to get around without smashing into something. I quickly learn not to fear germs.
I also have to trust my food. I can’t see what I’m eating, so I have to believe it’s clean and well prepared and that there isn’t a bug crawling on top of it. And if I spill some on the floor, I accept that I can scrape it up and eat it or go hungry.
Brushing my teeth is another challenge. I can hardly find the bristles of my toothbrush with the hand that holds the toothpaste tube, so to avoid squeezing gobs of it everywhere else, I decide to drop it directly into my mouth and then rub it around with the brush.
These little frustrations add up, and my mind turns faster to deal with them. I’m becoming more aggressive with myself. I have verbal fights with people I care about in my head, arguing both their side and mine, but to no resolution.
At some point, I decide I need to sell everything I own. It’s holding me back. I also think everybody needs to do a public confessional. Now and then, we all need to get up in public and say, “Here’s what I’ve been hiding. This is who I am. These are the sexual thoughts I get off to¦”I imagine how liberated that would make us all feel, and how we’d all be better people as a result.
Annoying as my new daily tasks are, they’re working. I’m starting to let go. I’m not going to die without hand sanitizer. I can eat food off the floor. And I can afford to brush my teeth with some procedural modifications frowned upon by the American Dental Association for a few days.
I’m learning how to just be.
I hear my friendMike Posner’s voice in my head. He says, “Bro, honestly, it’s not that important.”
I sleep well that night.
Day 3
I don’t wake up with the same calm I went to bed with last night.
It’s starting to get hard. I’m questioning why I’m doing this. All I have to do is look out that window, or push the call button that alerts Bharati and tell her I quit, and I can go back to my life. It’s tempting.
I try to remind myself of my why—the reason I wanted to do this in the first place. But I can’t remember it. Did I ever really know what it was?
I put my blindfold on and open the window, but I don’t look out. I just need some air¦ and oh fuck does it smell sweet. I take the rudraksha beads in my hands and I begin a breathing exercise. I take in deep breaths until the oxygen rush has me feeling tingles, and then I hold my breath and let out one small atmosphere of it at a time. I say “I love myself” in my head on every in-breath, and on every exhale, I try to expel anything that isn’t love.
I see I’ve been caught between serving other people—my stated purpose in life—and my own ego. I’m both self-rejecting, and selfish.
Breathe it out.
I am in a constant chase for validation, and nothing I ever do is enough for me.
Breathe it out.
I miss my friends. I miss hearing music. I want out of this fucking room. What the fuck am I doing in here??
Breathe. It. Out.
I see my grandfather Aubrey. My namesake. I never actually met him in life, but here he is in front of me now. My grandmother is with him. They tell me they’re proud of me.
“I don’t know why I’m here,” I say, with tears coming down my face.
“You’re here for the darkness, son.”
And that’s when I stop resisting it.
As the ego softens, my bargaining melts away.
Mike Posner enters my head again and starts talking to me. “You make deals with yourself so you can learn to trust yourself,” he says. “When you break deals, you trust yourself less.”
Day 4
The endogenous DMT visions are really coming on strong now, and some of them are seriously fucked up. I’m seeing demons. Images so gruesome they might not be allowed in theatres if they were part of a horror movie.
A wheat thresher is mowing people over. Heads are being crushed and limbs are spraying blood.
The more I don’t want to see it, the longer the scene lingers. My 22-year journey with plant medicine has taught me that what you resist persists. So I begin to look for beauty in the desecration and destruction. I get the word “aperspectival” stuck in my head—the absence of perspective. I remember that from the perspective of unicity, there is no good or bad. No polarity whatsoever. There is just God, who I define as “the Loving Aperspectival Witness,” or LAW. From God’s perspective, I understand that destruction is as necessary as creation, and that evil is a requisite consequence of a world of free will.
I’m big into coming up with acronyms now. My guide to relationships is LARK—Loving, Aware, Respectful, and Kind.You have to be able to let love in and love others for exactly who they are. You need to be aware of your behavior, and your partner’s. Respect means to respect their boundaries, and your own. And, lastly, be kind.
I am able to see my habit of loving people for their potential, not for who they are in front of me. I love them when I see how great I think they could be.But making people feel that your love is conditional upon some future achievement isn’t Loving. All you’re doing is telling them they’re not enough right now.
I understand now that the best way to support someone is just to love them. I can’t drag them up a mountain to help them climb it. I can’t make them sit in darkness. It doesn’t work that way.
My purpose now is to love people as they are.If someone asks me for help, or an analysis, or a judgment, I’ll give it and let it go.I won’t be attached to it, and I won’t try to force it.
Another acronym that comes to mind is HEB, my new guide to life. In Austin, where I live, it’s a supermarket chain. In this dark room, it means Honesty, Expectation management, and Boundaries. The importance of honesty and boundaries are obvious. But I’ve had a hard time letting go of expectations. I see how stupid that is now.Having expectations is saying I know better than what’s going to happen, and if what I expect to happen doesn’t, it’s wrong.What an ego!
Saying that anything “should be” is hubris. There is only what is. And you deal or dance with it.
With these revelations, I achieve some peace. The greatest calm I’ve felt since I got here. I see more demons, but now they’re throwing confetti in the street. Seriously. Probably some deeper meaning there, but not worth exploring for now.
In the most profound vision of the entire journey, I see my father. He’s in a corner reading a book. Back home in Austin, he’s mentally ill. He hears voices that give him delusions of grandeur.
I ask him what book he’s reading.
“The Book of Lies,” he says. “It tells me things I want to hear.”
“Why are you reading that book, Dad?”
“Because I never loved myself.”
He throws the book over his shoulder and continues speaking to me.
“Remember that you’re worthy of love. You don’t have to be a king or a messiah to be loved.”
Wow. I take a moment to see him, and I understand his plight with deep compassion.
“Thanks, Dad. I want you to know that everything you did was perfect, because look at where I am now. I love you.”
After that vision integrates, I feel like I’m ready to leave the darkness. I got what I came for.
I find the call button and ring for Bharati. I can’t see her when she comes in, but I hear her gently speaking to me. “The mind is tricky,” she says. She asks me to think about it another day and be sure I’ve had enough before I come out. There might still be a clue or two more to find in the dark. And I already committed to two more days. I agree to stay.
Day 5
I see my mom. She tells me she always loved me, and I confront the fact that, in spite of her efforts, I never fully let that love come in.
Why? Because if you let yourself feel loved, you’ll get attached to it. You have to say goodbye to everyone at some point, so in order to avoid the pain of losing them, we hold back the love we feel with them. It’s easier that way.
To be afraid to die is to be afraid to live.
You need to have the courage to love things in spite of the risk of losing them. You WILL lose them. Eventually. We love them BECAUSE they can be taken away. Whether it’s people, a rose, or a sunny day, they won’t last.To not enjoy them protects us from missing them as much when they’re gone, but it also denies us the pleasure of having them in the first place.
I didn’t love Whitney as much as I could because I was afraid she would choose someone else. And sometimes she did. But she always loved me; that never wavered.
I sob for probably 20 minutes. Catharsis.
I’ve spent so much of my life not really letting love in or putting the maximum amount of love out. Not anymore. I’m terrified of going through another day of life not loving it as it is. Not loving people as they are.
Then another horrifying thought enters my consciousness. What if someone I love dies while I’m in the dark? I’m not home. I will have never gotten the chance to really love them like I know I am capable now.
In my new film,Awake In the Darkness, these moments recorded live on my tape recorder and animated for the screenare absolutely devastating for me to watch.
I think back to when I was in high school, living with my mom and sisters in a cramped cabin in Dripping Springs, Texas. We didn’t have much—not even a TV—so we’d sit around the living room, playing music and singing along to the words.
Our family was never happier.
Right now, I don’t miss my house, or my ranch, my companies, or my possessions. I miss the people I’ve shared those things with.Human beings crave intimacy, not items.
The darkness has broken me, as I was warned it would. It’s made me see that I love life.Mylife, yes, and also Life with a capital L.
I’m ready to leave this room and re-enter the world.
I reach out to Bharati again, and we agree that at sunset tomorrow, I’ll take my blindfold off.
Day 6
Bharati opens the door, and I remove the blindfold. Even with my eyes closed it’s like someone is shining a flashlight in my eyes, and it’s several minutes before I can fully open them. When I do, a feeling of grief and gratitude like I have never experienced overwhelms me.
I see the soft rolling hills of the German countryside. I see the forest. The small homes speckling the scene. It’s the most painful and beautiful thing I’ve seen in so long. Until then, I’ve forgotten how incredible my life truly is. This is one of the most powerful moments in my life, and I feel blessed that it is all captured on film. So I’ll remember. So I’ll never forget.
Let There Be Light
Darkness is the most powerful form of therapy I’ve ever experienced. It took me deeper into myself than any type of meditation or even plant medicine I’ve tried. Your trip comes not from taking something but by REMOVING everything. You don’t need drugs when you ARE drugs.
The first thing I did when I got out was listen to music. I didn’t want to look at my phone. I just sat with it on the table in front of me. Eventually, I took a peek at my texts, and eased back into social media, but I loved the feeling of being without it all, and I wanted it to last.
When I got home, I made good on my promise not to tell people I loved them, but to SHOW them. I felt even more vulnerable than I had expected to, but with that vulnerability I was alive. When you are armored to protect from pain, you are armored from beauty as well. Every warm human interaction I saw made me cry, from a guy opening a door for a woman, to the kids inStranger Thingsplaying together. Seeing people be human affected me like never before. It was too much.
It was like the skin of my psyche had all been ripped off. It would grow back, but it needed time. Eventually, I put enough layers back on that I could function as a normal human being again, but I haven’t forgotten the lessons I learned in the dark.
The most important of which is to love the world as it is. You don’t have to change it; you have to change your mind, becauseyou can choose the attitude you take toward any situation.The game of life is here for us to enjoy playing it. If we do, then we’ve played well.
We are all capable of much more than we think we are. We are worthy of love and able to give it in return.
You don’t need to spend a week in darkness to prove it to yourself. You could just put your phone away and sit alone for a little while and be still, or go for a walk in nature. That’s a good start.
Remember that we live at a banquet. There are so many amazing things in our lives we completely take for granted, like daylight, eyesight, music, and fresh air. In the world of polarity, we understand through contrast. If you never deprive yourself of anything, you can never really appreciate what they offer you. If you never fast, you’ll never realize that every meal is a feast.
Sometimes you just have to choose nothing, so you can have everything.
]]> https://www.onnit.com/blogs/the-edge/ceremonial-change-5-ancient-rites-of-passage2025-07-10T10:55:21-05:002025-08-15T08:19:51-05:00Ceremonial Change: 5 Ancient Rites of PassageJeremy Gottlieb Everyone has experienced some “Rites of Passage;” we have all gone through some sort of change or growth in life, whether it was puberty or maybe in athletic competition. There is something ceremonial about growing up and becoming a man or woman.
Some take this rite early and some take it later, but in the end we all go through something extreme to become the man or woman we’re expected to be. But what is a rite of passage really?
What is a Rite of Passage?
Traditionally, a rite of passage is a ritual event that marks a person’s transition between childhood and full inclusion into a tribe or social group. The concept of the rite of passage explores and describes various other milestones in an individual’s life when their social status is forever altered.
Imagine transitions from puberty, year seven to high school, coming of age, marriage and death. Initiation ceremonies such as baptism, akika, upanayana, confirmation and Bar or Bat Mitzvah are considered important rites of passage in their respective religions. Initiation rites are seen as fundamental to human growth and development as well as socialization in many communities.
Again, in today’s society most initiation rites are done through sports, fraternities, or religion. These rites function by ritually marking the transition of someone to full group membership. It also links individuals to the community and the community to the broader and more potent spiritual world.
Initiation rites are a natural and necessary part of a community, just asarmsand legs are an extension of the human body. These rites are paramount to the development of an individual as well as the community.
Most of the ancient rites of passage can be separated and classified into five groups. Rite to Birthright, Rite to Adulthood, Rite to Marriage, Rite to Eldership and Rite to Ancestorship. Although there are five different rites of passage, they can more or less be distilled down to three steps: Separation, Transition, and Reincorporation.
Step 1: SEPARATION
The initial stage of the traditional rite of passage is the separation. During this phase an initiate is separated, either literally or figuratively, from his or her former life. During the separation phase, the individual’s past is expelled as the initiate prepares a new life.
This is much like a young man starting his transition into college football, the trials of entering a fraternity/sorority, or a civilian joining a branch of the military.
Step 2: TRANSITION
The second stage of the traditional rite of passage is the transition. During this phase, the initiate is in a state of transformation, or for the faithful, limbo. The individual is no longer part of his or her old life, but not yet fully inducted into a new one. The transition is usually marked by a series of tests deeming whether the initiate is worthy of this new life.
In ancient times the initiate’s test usually included some form or pain, circumcision, defecation,endurance, and/or hallucinogens. Our modern day equivalent translates to the rigorous selection process of boot camp, the young Jewish boy committing the Torah to memory, or spring training camp and tryouts for the collegiate football player.
Step 3: REINCORPORATION
The third and final chapter for the initiate is reincorporation. After the individual proves himself or herself worthy through a series of tests, the initiate is welcomed back into society and given a grand celebration of their new life.
The football player makes the final cut and is welcomed to the team, the young Jewish boy celebrates his passage into manhood with a Bar Mitzvah, and, for the recruit, the transition from civilian to soldier is complete.
TODAY’S SOCIETY IS LACKING IN TRADITIONAL RITES OF PASSAGE.
During all phases of the process, the elders who have previously gone through the ritual themselves guide the young initiate on his or her journey. By controlling the rite of passage, the community decides when a boy becomes a man, a girl becomes a woman, or a civilian becomes a soldier. Here are 5 Ancient example of Rites of Passage:
Ancient Rite of Passage #1: African Lion Hunt
The lion hunt begins at dawn, while the tribe sleeps. The warriors meet near a local landmark before departing to predetermined hunting areas. The older, experienced warriors filter out the group until only the bravest and strongest warriors remain.
The resulting group is known as the Ilmeluaya, or fearless warriors. Until the return of the limeluaya, the rejected warriors are sworn to secrecy by the elders concerning the details of the hunt.
The older warriors often force the limeluaya to relinquish excess weaponry, considering it insulting to wield more than a spear, a weapon more than sufficient to slay a lion. Following a successful hunt, the tribe holds a weeklong celebration to commemorate the warriors.
The warrior who struck the first blow is courted by the women and receives an Imporro, a doubled-sided beaded shoulder strap, as a token. The warrior dons this ornament during the ceremonies. The community honors the hunter, or Olmurani Lolowuaru, with much respect throughout the remainder of his lifetime.
Ancient Rite of Passage #2: Spartans
Most people are aware of the Spartans and their intense training and child combat trials from the film “300.” One of the most interesting rite of passage for young men was called Helot Killing. At the age of seven, the male child was enrolled in the agoge under the authority of the paidonómos, or “boy-herder,” an elder statesman charged with supervisingeducation.
This began the first of the three stages of the Agoge. If a young child was a standout “student” at Agoge, he was allowed to train with Krypteia; a state security force organized by the rulers of Sparta.
Following his eighteenth birthday, he would be sent off into the country with nothing but a knife and given the task of killing as many state-owned slaves (called helots) as possible. If you were asked to join the Krypteia, at age twenty the boy would join the Spartan Army and enter one of the public messes. If voted into a public mess, service continued until age thirty, where the right to marry and vote were granted, becoming a full member of Spartan society.
This rite of passage follows the three stage process. The first stage is removal from society, happening to a Spartan boy at age seven, leaving to train at the agoge. This stage includes twenty three years of training and combat experience, turning Spartan boys into men.
The next stage, transition, occurs when the young man goes on his quest to kill Helots and return to his krypteia. Following his return, he transitions into the final stage, reincorporation into society. He is now considered a man and a warrior, and is reincorporated into society with the reputation of a true Spartan man.
Ancient Rite of Passage #3: Land Diving
Land Diving is both a harvest ritual and a rite of passage amongst the tribes of the small pacific island of Vanuatu. The origin of land diving reportedly comes from the legend of a woman who was dissatisfied with her husband, Tamaliel.
She fled to the jungle where she climbed a banyan tree after her husband pursued her. Tamaliel began climbing the tree after her and, after tying lianas vines around her ankles, she jumped to escape.
Tamaliel jumped after her but, having failed to tie lianas to his ankles, plummeted to his death. The men of the Pentecost Island in Vanuatu climb a rickety 98-foot-tall tower, tie vines to their ankles, and dive to the ground, falling at speeds reaching up to 45 mph. When a dive goes correctly, the person gets close enough to touch his shoulders or his head to the earth.
However, if a dive goes incorrectly, things can get messy. Unlike bungee jumping, these vines aren’t elastic and a miscalculation in vine length could lead to broken legs, cracked skulls, or even death.
Boys begin participation following circumcision at about age 7 or 8, though they usually are permitted tojumpfrom a shorter tower. When a boy jumps, his mother throws an item from the boy’s childhood off the tower, extinguishing the remnants of his youth and completing the transition to adulthood. Divers also refrain from sex the day before they jump; legend says intercourse will cause the jump to go poorly.
Ancient Rite of Passage #4: Bullet Ant Glove of Brazil
The Satere-Mawe people of the Amazon perform an initiation ritual forcing young men to place their hands into mittens filled with hundreds of bullet ants. The bite is approximately twenty times more painful than being stung by a wasp.
The tribal men gather the ants and submerge them into a solution that temporarily renders them unconscious. The ants are then woven into the mittens.
Upon waking, the men place their hands into the gloves, where they must remain for up to ten minutes. The ant’s sting prevents the body from protecting itself from pain. The body begins to convulse, and the pain can last up to twenty-four hours.
The most unusual aspect of the entire process is the fact that many men choose to repeat this ritual multiple times to prove their manhood.
Ancient Rite of Passage #5: Matis Trial Hunt
For a boy to prove himself worthy to hunt among the men in the Matis Trial deep in Brazil’s Amazon jungle, he must first undergo four trials. The first trial involves temporary self blinding using a concoction of bitter poison directly into their eyes. This cocktail allegedly improves vision and enhances the senses.
The next series of trials includes a series of violent beatings and whippings. The trials conclude with an inoculation from the Phyllomedusa bicolor, a small poisonous frog native to the Brazilian jungle.
But the vaccine alone isn’t enough, before injecting the frog’s toxin with a homemade wooden needle, the elders burn the area of the boy’s skin where the prescription is to be delivered. The Matis believe the poison increases strength and endurance, however, these enhancements are preceded by unbearable light-headedness, vehement vomiting, and violent relieving of the bowels.
Once the boys prove themselves worthy of the hunt, they are given the privilege of performing the very same rituals before every future outing.
]]> https://www.onnit.com/blogs/the-edge/the-steel-mace-benefits-and-uses2025-07-10T10:55:20-05:002025-08-14T17:45:24-05:00The Steel Mace: Benefits and UsesJeremy GottliebThe barbell has been a staple piece of exercise equipment for more than a century. Nobody questions its potential for helping one build muscle, strength, and athleticism, and yet thesteel mace—an even older training tool—remains a mystery to most. If you’ve been curious about steel mace training but don’t know where to begin,or feel intimidated by what seems like a medieval bludgeon, let this guide demystify the mace for you. By the end, you’ll understand why it’s outlasted innumerablefitnessinnovations and gimmicks alike to remain one of the most effective training implements you can use to enhance stability, mobility, power, and rotational strength.
We won’t sugarcoat it: the mace was invented to kill people. But it wasn’t long before folks realized that lifting one could help them get into great shape too.
The use of a mace dates back to the days when fitness was a fortuitous byproduct of training for war. More than 2,000 years ago, Hindu soldiers in India wielded maces that were nothing more than bamboo sticks with stones tied to the ends. One of their deities, Hanuman, was a monkey-man hybrid who carried a mace and, as the legend went, could lift the Himalayas with his hands.Called a “gada,” the mace was primarily used to help condition warriors for their combat training,which included wrestling, archery, and sword fighting.
“If we look back at various martial cultures,” says John Wolf, co-creator of Onnit’s unconventional training curriculum, “they all used some kind of mace.” Historical records indicate that different varieties of maces were present in India, and later Russia and Western Europe during the Middle Ages, as each culture experienced a time when the armor of its warriors became more advanced than the weaponry used against it.
As anyone who’s seenBraveheartorRobin Hoodknows, maces evolved to where they had spikes on the ball end, and they helped turn the tide of many a war. But the gentler, more primitive models were never discarded as a tool used off the battlefield to get a great workout.
When you think about it,a steel mace is really just another barbell, albeit with a weight on only one end.They usually range from around seven pounds to 25 or more, and you can do everything with a steel mace that you ever learned to do with a barbell. And that’s just the beginning.
Performing classic strength exercises such as thesquat, overhead press,Romanian deadlift, and bent-over row with a mace works all the same muscles that the barbell will, but with a bonus. The imbalance created by the load of the mace head (the ball at the top of the mace handle) will make it difficult to lift the mace evenly. It wants to pull you out of position, twisting you in the direction of the heavier end,so you have to work that much harder to keep the path of motion even—calling on yourcore, grip, and various stabilizer muscles to do so.Spend a few weeks doing these exercises with the mace and then see how you feel doing them with a regular barbell again. Don’t be surprised if you feel more stable and strong, and break strength plateaus shortly thereafter.
You don’t even have to work out with the mace, per se, to reap some benefits from it. The long lever that the handle creates makes it fantastic for increasing mobility. If you have tight shoulders and a rounded upper back, for instance, as a result of too much chest training and/or sitting at a desk in front of a computer for too long, try holding the mace behind your head with the mace head pointing to the floor.Swing it gently side to side to feel the mace gradually pull your shoulders into greater flexion, opening up your chest and stretching your thoracic spine.Many people find this helps relieve shoulder pain, and warms them up for an upper-body or pressing workout.
Rotational Strength
Once you’ve gotten a feel for the steel mace, you can begin to unlock its greatest potential—using it as a tool to train rotation. The fact is, most people’s training is limited to the sagittal movement plane. This means exercises where the trunk or limbs move forward and back, as in a bench press, curl, squat, deadlift, and running. Nevertheless, most of the movements we make in sports and everyday life aren’t that simple. They’re combinations of all three planes of motion—moving forward and back, side to side, and in rotation. With that in mind, doesn’t it make sense to train these movements in our workouts?
The steel mace facilitates the body’s ability to rotate—and resist rotation, when needed—more so than thekettlebell,steel club, or any other training implement.
It lends itself perfectly to performing chopping and paddling motions that make your shoulders, torso, and hips twist—something they can’t do as well or as safely with a barbell or other conventional equipment. The length of the mace handle is ultimately designed to be swung. Swinging the mace creates tremendous force—a force that threatens to knock you off balance and out of position unless you learn to control it.As a result, steel mace training is one of the best ways to instill good posture and movement mechanics.It trains you to maintain what trainers refer to as the body’s structural integrity, so that you can stay stable and in control of how you move no matter what storm you find yourself at the center of, be it running and cutting on a field, fighting an opponent in a cage, shoveling snow out of your driveway, or a million other challenges.
Power Development
Of course, with greater rotational movement comes greater power.
Knockout punches and kicks, 90-miles per hour fastballs, and 300-yard drives off the tee all depend on your ability to coil and uncoil your bodyrapidly and efficiently, and steel mace exercises can simulate the movement mechanics involved in all of the above.
When you’re ready, you can advance your training to include an infinite number of more complex moves that are unique to the mace and really take advantage of its rotational potential, such as the 360, barbarian squat, uppercut, and various other techniques you’ve no doubt seen demonstrated on YouTube (some of which we’ll introduce you to in this article).You’re even welcome to make up your own exercises, as one of the mace’s greatest attributes is its ability to help you express yourself,using it to flow through movements that train your body as well as communicate your passion, not unlike a dance, martial art, or other physical art form.
Fun!
If you’re the kind of person that just can’t get excited about going to the gym and lifting weights from point A to point B, the mace might be the thing that finally motivates you to work out. Wolf says there’s a primal rush you get from lifting the mace overhead that has to be experienced to be understood. Because of its origins as a weapon, it makes you feel like a warrior when you use it. Curling a barbell? Not so much.
“I think part of the appeal is that you can feel the applications the steel mace has immediately,” says Wolf. “Whether or not we feel removed from our history as a tribal people who fought wars, there’s an innate knowledge of how to use tools like the mace that’s still in us. The steel mace can help you tap into that, even if it’s just to get in better shape.”
The Science of Steel Mace
It’s a little ironic that the mace is one of the oldest fitness tools on earth and yet remains among the least studied. Fortunately, that may be changing, as researchers at California State University conducted atrialusing Onnit’s steel maces. (Onnit did not suggest or commission the study—the researchers acted entirely on their own.)
“I have a grad student, Christian Ison, who’s a trainer, and he implements the mace in the training he does with his clients,” says Dr. Eddie Jo, Associate Professor of Exercise Physiology at Cal Poly Pomona, and director of its Human Performance Research Lab.“We were talking about the mace one day and realized there haven’t been any studies done on it, to our knowledge, so why not do one ourselves?”
Jo’s team gathered subjects who had recreational training experience—people who were already performing some kind of resistance training at least three days per week and for at least an hour per session. They had no prior experience using the steel mace. Jo had them work out with Onnit steel maces, following the directions provided in the manuals that were packaged with them.
“We wanted to look at muscle activation patterns during common steel mace exercises,” says Jo. The exercises chosen were the overhead squat, 360, reverse lunge, and lap squat. “We put EMG sensors on the dominant sides of the subjects, and we had them do a set of each of those exercises with the mace head positioned on the dominant side as well as the non-dominant side to see how the dominant side muscles reacted.”
Unsurprisingly, the muscles on the dominant side (for instance, the quads,traps, deltoids, pecs, and triceps during the overhead squat) showed greater activity when the lift was done with the mace head on that side (i.e., pointing to the right on a right-handed person). “But what was interesting,” says Jo, “was when we looked at the oblique and core muscles. The activation of those muscles was greatest when the mace head was held on the opposite side.So if you’re doing the switch squat and the mace head is pointing left, the right obliques will fire harder.It shows that the mace gives you a very unique muscle activation pattern compared to normal barbell exercises, so this could introduce a whole new type of stimulus for your muscles to adapt to.”
Jo adds that being able to work one side of the body and then transition to the other side by simply flipping the orientation of the mace makes the training effect unique as well as convenient. “Your ability to shift core activation is very dynamic and fluid with the mace,” he says. “You can also accomplish more than one type of movement in a single set if you want to, going from a lunge into a lap squat and then an overhead squat, for example.”
More studies need to be done to determine what the long-term benefits of steel mace training can be, but Jo speculates that the mace has great application to sports training. “In life and in sports, when you’re jumping, you’re usually turning also. With the steel mace, you can produce those same multi-planar movements, but with increased resistance. That helps athletes develop power, and should carry over to the playing field—as well as have benefits for general fitness.”
Beyond the physical advantages of steel mace training, Jo noticed somementalones too, explaining that the subjects said they “loved using the mace,” and that the offset weight helped them tofocuson their form more. “They reported feeling sore the next day, too,” says Jo, “saying that they felt they had gotten a good workout.”
What To Look For In A Steel Mace
So you’re ready to buy a steel mace. Congratulations! But before you plunk down your hard-earned funds on another piece of exercise equipment—or try to sand the spikes off a medieval antique—make sure you know what kind of mace is best for you. Consider the following.
The Handle
The bigger your hands, the bigger your mace handle should be. The smallest mace Onnit sells is a seven-pounder, which offers a 30.5-inch long handle. Most women find this model to be appropriate to start. On the other end of the spectrum, our 25-pound mace has a 40.5-inch handle, which is really only for advanced mace wielders.
Remember that steel mace training is humbling. Even a big, strong guy won’t be able to start out with a 25-pound mace for most exercises. And (as most women say) longer isn’t necessarily better. A longer mace is harder to control and puts more stress on your body, so start small.
The Feel
A mace that’s too slick can fly right out of your hands when you get sweaty. Meanwhile, one that’s too tacky can pull the skin off your palms. You want a mace that provides some friction but still allows your hands to glide up and down the handle. Onnit maces feature knurling, like a barbell, and a powder coating for a no-slip grip.
The Weight
Onnit makes maces that weigh 7, 10, 15, 20, and 25 pounds. Most women start with the 7 or 10-pounder, and most men can handle the 10 or 15. For some mace exercises, a lighter weight will serve you better, while other moves can be loaded up more, so you should consider buying two weight increments at once.
The following routine strings together some basic but challenging steel mace moves that will not only give you a feel for mace training but help you start building stability and rotational movement skills right away.
DIRECTIONS
Perform the exercises as a circuit, completing one set for each move in sequence without rest. After the last exercise, rest up to 90 seconds, and repeat the circuit for 3–4 total rounds. Perform 8 reps on each exercise (8 reps per side).
Step 1.Hold the mace with an overhand grip, hands about shoulder-width apart. Curl at the elbows and press the mace overhead. Keep your ribs pulled down and your pelvis tucked under so it’s parallel to the floor—don’t allow your back to hyperextend as you reach overhead. Brace your core.
Step 2.Find your balance and begin walking in place, raising one knee at a time up to hip level. The mace will try to pull you toward the side that the weighted end is pointing—don’t let it. If you’re having a hard time controlling the mace, widen your grip a bit. A step on both legs equals one rep; do 8 reps, and then switch the direction the mace is pointing and repeat for another 8 reps.
Step 1.Hold the mace with one hand close to the mace head and palm facing up. The other should be close to the bottom of the handle with the palm down.
Step 2.Extend thearmthat has the palm up so the mace head points down at a 45-degree angle (curl the other arm up and point your elbow out to the side).
Step 3.Now raise the mace head so the mace is level in front of you, and then raise it up to point about 45 degrees (diagonal through your shoulder). Continue raising the steel mace until it points straight up. Now slide the hand on the bottom up the handle to meet the other hand. Your hands will come together for a moment like you’re praying.
Step 4.Slide the hand that was on top down the handle while the one you just moved up grasps the mace head underhand. Go to 45 degrees, level, and then 45 degrees toward the floor again. Continue rotating the mace in this fashion, pausing a moment in each position to make sure you control it. Over time, you can smooth out the motion so you spin the mace more fluidly. Perform 8 reps with the mace head pointing to the right, and then 8 pointing to the left.
Step 1.Hold the mace with hands overhand and shoulder-width apart—one hand should be at the bottom of the handle. Twist your torso so that the mace head points behind you. Stagger your stance so that your front leg is the same side as the direction you’ve turned. Put most of your weight on your front foot. Your back leg should be nearly straight. Drive the ball of your back foot into the floor—the heel can be raised.
Step 2.Row the hand that’s closest to the mace head up. The range of motion will be small, but focus on holding your rotated position.
Step 1.Take a wide grip on the mace so one hand is flush against the mace head. Rotate your body in the direction the mace head points, but keep your hips braced and pointing forward. Keep your elbows locked out.
Step 2.Leading with your elbow, raise the mace up and across your body so it’s angled 45 degrees in front of your chest. Continue raising it until the mace is over your opposite shoulder. Your front arm should look like you’ve just thrown an uppercut punch. Keep the mace close to your body at all times.
Step 1.Grasp the mace with a wide grip and one hand flush against the mace head with your palm facing up. Step laterally with the leg opposite the mace head, bending your knee and lowering into a side lunge as you rotate the mace downward so the head points toward the floor at a 45-degree angle.
Step 2. From there, step back to your starting position while spinning the mace back up to point 45 degrees upward, and then vertical, bringing your hands together in prayer position.
Step 3. Switch your hands, and perform the lunge on the other leg.
When you’re ready for a greater challenge that incorporates even more multi-planar movement, step up to this intermediate mace routine.
DIRECTIONS Perform the exercises as a circuit, completing one set for each move in sequence without rest. After the last exercise, rest 45 seconds, and repeat the circuit for 3–5 total rounds. Set a timer and perform each exercise for 30 seconds straight, switching sides at 15 seconds where applicable.
Step 1.Hold the mace with one hand flush against the mace head and your palm up. Draw your shoulders down and back and tuck your elbows to your sides. Turn your toes out a few degrees.
Step 2.Keeping a long line from your head to your tailbone, squat down until the mace is just above your thighs.
Step 3.As you come back up, slide one hand up the handle and the other down to prayer position, and then continue twirling the mace so the head faces the other direction. Squat again. Inhale as you come up on each rep, and exhale as you squat.
Step 1.Hold the mace with one hand flush against the mace head and your palm up. Begin with the mace head pointing 45 degrees over one shoulder.
Step 2.Push the mace straight out in the direction the mace head is pointing until your trailing arm is raised to shoulder level and the one nearest the mace head is fully extended, or as close as you can comfortably go. It should look like you’re about to fire an arrow from a bow.
Step 3.Draw the mace back in so it faces upward, make a prayer position, and repeat the archer press on the opposite side.
Step 1.Take a wide grip on the mace so one hand is flush against the mace head. Rotate your body in the direction the mace head points, but keep your hips braced and pointing forward. Keep your elbows locked out.
Step 2.Step back into a lunge with the leg that’s opposite the mace. Lower your body until both knees are bent roughly 90 degrees.
Step 3.Step forward to return to the starting position. As you do so, raise the mace up and across your body so it’s angled 45 degrees in front of your chest. Continue raising it until the mace is over your opposite shoulder. Your front arm should look like you’ve just thrown an uppercut punch. Keep the mace close to your body at all times. Perform reps for 15 seconds, and then switch sides and repeat.
Steel Mace Flow Workout
When you’re comfortable with the steel mace basics, move on to this flow routine, which links familiar steel mace exercises into a fluid circuit.
If you enjoy working with the mace, try experimenting with its cousin, the steel club, starting with ourguide to club training.
]]> https://www.onnit.com/blogs/the-edge/how-to-crush-5-5-workouts-for-huge-gains2025-07-10T10:55:20-05:002025-08-14T17:35:20-05:00How To Crush 5×5 Workouts For Huge GainsJeremy GottliebThe default set- and rep-scheme for most gym-goers seems to be three sets of 10. Why? Because it just works. But serious lifters know that five sets of five—abbreviated as 5×5—often works even better. The 5×5 method was popularized in the 1960s by Reg Park, a multiple-time Mr. Universe and idol to a then up-and-coming bodybuilder named Arnold Schwarzenegger, and it’s never been out of style since.
The following is an excerpt adapted from theMen’s Health Encyclopedia of Muscle, written by Onnit’s Editor-In-Chief, Sean Hyson, CSCS.For more workouts and training tips, pick up the book at Amazon.com.
Why Does 5×5 Work?
The beauty of the 5×5 system is that it’s almost impossible to screw up. Virtually any way you choose to interpret how to do five sets of five is sure to yield some progress. The reason why is the combination of load and volume. Low-rep sets imply pretty heavy weights, and five sets’ worth gives you enough exposure to challenging loads to drive muscle and strength gains.
The big question with 5×5 is just how much weight you should use. Honestly, your best guess is probably good enough. But looking at it scientifically, you can come up with a more refined strategy. Lifting a load that allows you only five reps equates to about 87% of your one-rep max (the heaviest load you can lift for one rep—an all-out effort). However, because you have to do five sets, you’ll need to leave a little in the tank on your first set.If you use the heaviest load that allows you ONLY five reps right away, you’ll have a hard time completing the four sets that follow.Therefore, the weight you choose must be lighter.
C. J. Murphy, a competitive powerlifter and strongman, and owner ofTotal Performance Sportsin Malden, MA, recommendschoosing a load that you can get seven or eight reps with.This means about 80% of your max. So, let’s say that you’re pretty sure that you cansquat225 pounds for one rep, if your life depended on it, and you want to do a 5×5 workout. Eighty percent of 225 is 180 pounds, so load 180 for your first set.“Most muscle adaptation occurs with 65 to 85% of your max,” says Murphy.Doing 5×5 this way puts you at the north end of that range, making it an excellent approach for building size, but also intense enough to boost strength.
The next question that comes up is whether to keep the same weight every set or add weight each set. The answer is both. “Form is more important than weight,” says Murphy. So, whether you keep the same load or bump it up by a few pounds on one set or every set, every rep should look crisp and smooth. “Most people’s best set is usually their third, fourth, or fifth one,” says Murphy, when the nervous system has been fully activated by the exercise but before fatigue sets in. “So, I might make a smalljumpin weight on the third set, if it’s going well.” (This could be five or 10 pounds, depending on the exercise.) You’ll have to monitor yourself.
What Exercises Are Used in 5×5 Workouts?
Five by five is typically done on classic multi-joint barbell lifts, such assquats, deadlifts, presses, and rows—exercises that activate great amounts of muscle and work big areas of the body.You shouldn’t attempt 5×5 with isolation movements such as curls, lateral raises, or leg extensions,as those exercises don’t lend themselves to the use of such heavy weights. Trying to curl a load that feels heavy for five reps can easily result in sore elbows or tornbicepsover time, so restrict the 5×5 method to your main lift of the workout. Also, as 5×5 is strenuous and can be time consuming, don’t use it for more than three exercises in any one workout.
How Long Does The 5×5 Workout Take?
The length of any strength workout really depends on how strong you are. It takes longer to work up to 365 pounds for squats than it does 225. It’s also important not to rush your sets. Because you’re working with heavy weights,you should allow yourself to recover fully between sets for the sake of safety as well as performance.This could mean two minutes, or longer, depending on the loads used and the complexity of the exercise you’re doing 5×5 on. With all that said, you can expect a workout with two or three exercises done 5×5 style to last anywhere from 30–60 minutes.
One popular method of employing 5×5 is to do three exercises in a session, using 5×5 to train the whole body. For example, you could squat, then bench press, and then finish with a bent-over barbell row. You could come back two days later and perform three similar exercises for another 5×5 session, and then, after another day off, finish the week with a third 5×5 workout. This is a highly-efficient way to train, which makes it good for beginners and those who are young, injury-free, and need practice with barbell lifts to master them. However,it may be too grueling for people over 35 years old, or those with injuries from years of heavy lifting.Murphy believes most people would probably be successful doing one or two 5×5 lifts in a session, and using the protocol for a month or so, and then switching to some other training method for a while.
Is the 5×5 Workout Effective?
The 5×5 workout has been around for at least a half-century, and probably much longer. It’s widely considered to be a good routine for beginners to follow because it’s simple to implement and provides a balance of heavy weights and increasing volume—two factors that areknown to produce muscle and strengthgains.
A 2016studyinBiology of Sporthad subjects perform workouts that alternated 5×5 and six sets of two reps. After five months, their strength gains on the bench press had increased significantly, but researchers determined thatthe heavier (6×2) regimen was no more effective than the 5×5, and that starting with lighter loads in a progressive long-term program may be the better strategy,as it leads to similar gains with less exertion. This idea fueled the way we prescribe 5×5 in the sample workouts below.
How To Stretch for a 5×5 Workout
Include the following mobility drills in your warmup before performing the sample 5×5 workouts below. Perform each move in sequence, completing 10 reps, and repeat for 3–5 total rounds. See a demonstration for each move in the video.
The following workouts represent our preferred way of performing the 5×5 method.
Do your first set of the 5×5 exercises with a weight that allows you eight reps. If your speed on the first two sets is fast, and your form is good,you may add weight on the third set(and fourth and fifth, if your technique holds up). If your reps move slowly or form breaks down on any set, stop the set there—no matter how many reps you have left—and reduce the weight. Each week, add a little weight to your 5×5 lifts. For upper-body exercises, add 2.5 to 5 pounds, and for lower-body, add 5 to 10.
Murphy recommends using the Rating of Perceived Exertion (RPE) scale to control your intensity. If a 10 represents an all-out effort, do your workouts as follows.
Week 1:7 RPE (you should have about three reps left in you at the end of every set)
Week 2:8 RPE (about two reps left)
Week 3:9 RPE (about one rep)
Week 4:7 RPE (back off this week to gather energy for next week—i.e., reduce the load by a few pounds so it doesn’t feel so difficult)
Week 5:10 RPE (increase the weight and go for it!)
You may perform the exercises as straight sets (complete all sets for one lift before moving on to the next) or, if you want to save a few minutes of workout time, alternate sets of any two 5×5 exercises in the workout. (Note that not every exercise in each workout uses this set and rep scheme.) Rest, as needed, between all sets of every exercise, and at least 90 seconds between sets of the 5×5 exercises.
There are three sample workouts here, and they can be done in sequence(for example, Workout I on Modnday, II on Wednesday, and III on Friday). Rest at least one day between each.
(See02:17in the video How To Crush 5×5 Workouts for Huge Gains above.)
Sets:5Reps:5
Step 1. Grasp the bar with hands shoulder-width apart and point your elbows forward so that you can position the bar over the tips of your fingers (palms face up). As long as you keep your elbows pointing forward, you will be able to balance the bar.
Another way to do it is to cross your arms in front of you, holding the bar on the front of your shoulders (left hand in front of right shoulder, right hand in front of left). To do the classic front squat with the bar on your fingertips, you need a reasonable amount of flexibility through your shoulders and wrists to position the barbell correctly. If you don’t have it, the cross-arm version may be the better option for you at the moment, but another option is to use wrist straps if you have them. Loop the straps around the bar and grasp the open ends with each hand, and then rest the bar on your shoulders (see the “How To Crush 5×5 Workouts For Huge Gains video above).
Step 2. Lift the bar out of the rack and step back, setting your feet between hip- and shoulder-width apart. Turn your toes out slightly. Without letting your feet actually move, try to screw both legs into the floor as if you were standing on grass and wanted to twist it up—you’ll feel your glutes tighten and the arches in your feet rise.
Step 3. Pull your ribs down and take a deep breath into your belly and brace yourcore. Your head, spine, and pelvis should form a long line—your pelvis should also be perpendicular to your spine, and not tilted toward the floor.Focus your eyes on a point straight in front of you.
Step 4. Squat as low as you can while keeping alignment and maintaining your upright torso position. Remember to point your elbows forward, and raise them up if you feel them slipping downward. Ideally, you’ll be able to descend to where the crease of your hips is below the top of your thighs.
Your knees must stay in line with your toes. Trying to push them out and actively root your feet into the ground will all but ensure this.
Step 5. Extend your hips and knees to return to standing, pushing through the middle of your feet and squeezing your glutes.
Step 1.Hang from a bar with your hands shoulder-width apart and your palms facing you. Pull your ribs down and keep your core tight.
Step 2.Draw your shoulder blades back and together and pull yourself up until your chin is over the bar. If your bodyweight isn’t challenging enough, attach extra weight with a belt, or hold a dumbbell between your feet.
Step 1. Hold a barbell with hands shoulder-width apart. You can take the bar off a rack, or, if you don’t have one, simply pick the bar up off the floor and clean it to shoulder level. Stand with feet shoulder-width apart and tuck your tailbone slightly so that your pelvis is parallel to the floor. Draw your ribs down and brace your core.
Step 2. Press the bar overhead, pushing your head forward as the bar clears it so that the bar ends up just behind your head in the lockout position.
Step 1. Stand with feet hip-width apart and tilt your tailbone back. Bend your hips back to reach down and grasp the bar with hands just outside your knees.
Step 2. Keeping a long spine with your head in line with your hips, take a deep breath into your belly, brace yourabs, and drive through your heels. Pull the bar up along your shins until you’re standing with hips fully extended and the bar is in front of your thighs. Keep the bar pulled in tight to your body the whole time with your shoulder blades pulled together and down (think “proud chest”).
If you can’t keep your lower back flat throughout the exercise, it’s OK to elevate the bar on some weight plates or mats.
Step 1: Set an incline bench to a 30- to 45-degree angle and lie back on the bench holding dumbbells at arm’s length above your chest.
Step 2: Lower the dumbbells until they are close to the sides of your chest. In the down position, your elbows should be at a 45-degree angle to your torso—not straight out to the sides.
Step 3: Press the dumbbells back up, flexing your chest as you push.
Step 1.Attach a rope handle to the top pulley of a cable station. Grasp an end in each hand with your palms facing each other. Step back to place tension on the cable.
Step 2.Draw your shoulder blades together and down as you pull the handle to your forehead, so your palms face your ears and your upper back is fully contracted.
Step 1.Lie on the bench and arch your back, pulling your shoulder blades down and together. Grasp the bar just wider than shoulder width, and pull it out of the rack.
Step 2.Take a deep breath, tighten your glutes, and lower the bar to your sternum, tucking your elbows to your sides at 45 degrees on the descent. When the bar touches your body, push your feet into the floor and press the bar up at the same time.
Step 1.Place a barbell on a rack set to hip level, or deadlift it off the floor. Grasp the bar with your hands at shoulder width and set your feet at hip width; hold the bar at arm’s length against your thighs. Take a deep breath, and bend your hips back—keep your head, spine, and pelvis aligned. Bend until your torso is nearly parallel to the floor.
Step 2.Draw your shoulder blades together as you pull the bar up to your belly button.
Step 1.Load a barbell on the floor. Lie with your upper back resting on a bench and your legs flat on the floor in front of you. Roll the bar into the crease of your hips (you may want a pad or towel to cushion it), and hold it on each side. Place your feet flat on the floor, hip-width apart, and turn your toes out slightly.
Step 2.Brace your abs and push your hips up, driving through your heels until your torso and hips are parallel to the floor.
]]> https://www.onnit.com/blogs/the-edge/4-foods-to-help-sleep2025-07-10T10:55:20-05:002025-08-15T09:30:56-05:004 Foods To Help SleepJeremy GottliebNothing can ruin your day before it even begins like not sleeping the night before. You know the feeling: you’re wide awake all night and, just when you’re starting to nod off at 7 a.m., you have to get up and go to work. It’s torture. But before you go running for prescriptionsleeppills, make sure you try all the natural options available to you first. Chances are your diet is missing some simple, healthy foods that can make a big difference. Here are four foods you should add to your menu to help you sleep.
#1 Salmon
This pink-fleshed fish is packed with muscle-building protein and heart-supporting omega-3 fats, but also vitamin D, which has been linked to a host of good things ranging fromimmunehealth to a positivemood—and solid sleep. A 2014studydemonstrated that eating three to four servings of salmon (about three ounces each) three times a week for six months helped people fall asleep more quickly—and feel more alert the next day—than eating poultry, beef, or pork.
#2 Kiwi
In addition to being low in calories and delicious, these little green guys contain serotonin, a chemical that helps regulate your sleep cycle. Astudyin Taiwan found that people who ate two kiwis one hour before bed every night for a month fell asleep more quickly than when they didn’t eat anything beforehand. Their ability to sleep straight through the night also improved, as well as total time spent sleeping.
Unlike brown rice, the white stuff has had most of its nutrients removed, including fiber. As a result, it’s not very nutritious, but, used strategically, it could be your secret weapon for a good night’s sleep—even if you follow a low-carb diet overall.
White rice is a very fast-digesting food. It spikes blood sugar quickly, and then lets it crash. That crash is what makes you tired in the afternoon if you’ve had a big, carb-rich lunch, and that’s a nuisance if you want to be alert at work. But right before bed, it’s perfect for helping induce sleep. A 2014studyfound that high intakes of white rice were associated with good sleep, and longer sleep duration. Anotherstudyfrom the same year showed that eating rice more than an hour before bedtime helped improve sleep in elite athletes.
#4 Cherry Juice
Melatoninis a natural hormone that your body releases at night to promote sleep. “Everything you put in your belly is influencing melatonin production, storage, and utilization,” says Shawn Stevenson, author ofSleep Smarter. He recommends drinking tart cherry juice, which is a natural source of melatonin. Astudyin theEuropean Journal of Nutritionfound that subjects who drank cherry juice had an increase in melatonin levels that helped significantly to promote sleep.


 You can perform B-stance RDLs with a barbell, dumbbells,
 B-stance RDLs will primarily target the gluteus maximus, your main butt muscle. But they will also hit your hamstrings and spinal erectors (the muscles in your lower back). Your core, of course, has to brace your spine throughout the whole movement, so you could argue that any RDL is an ab workout too.


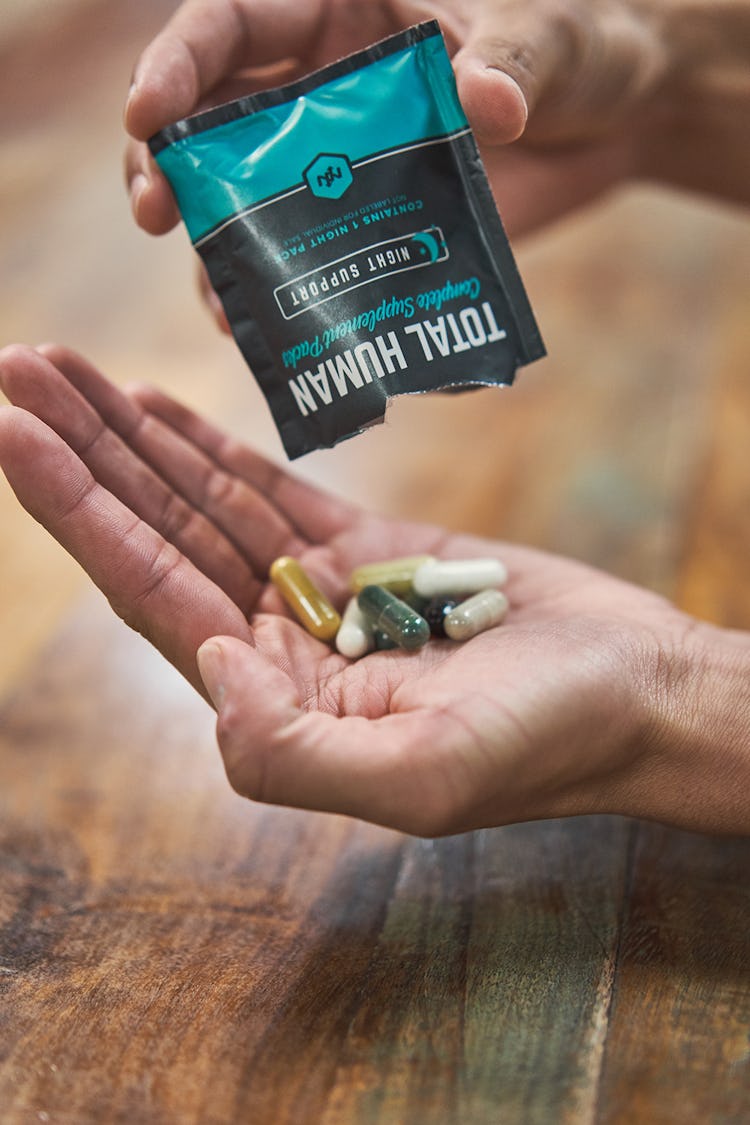


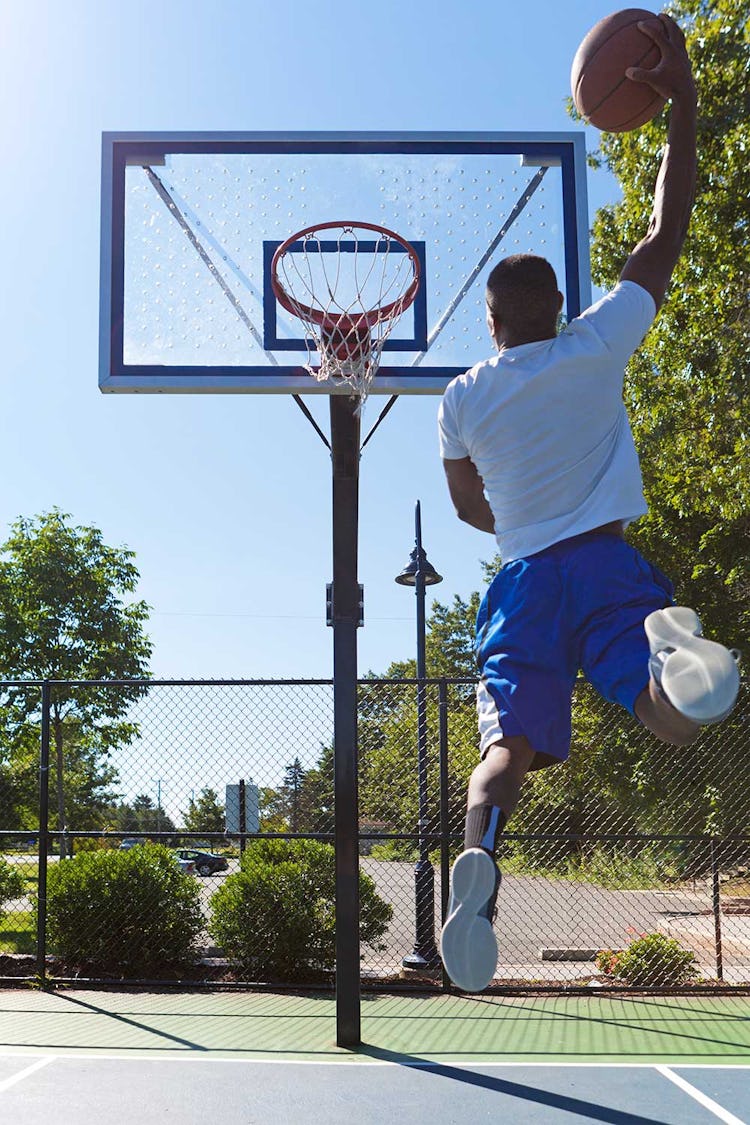


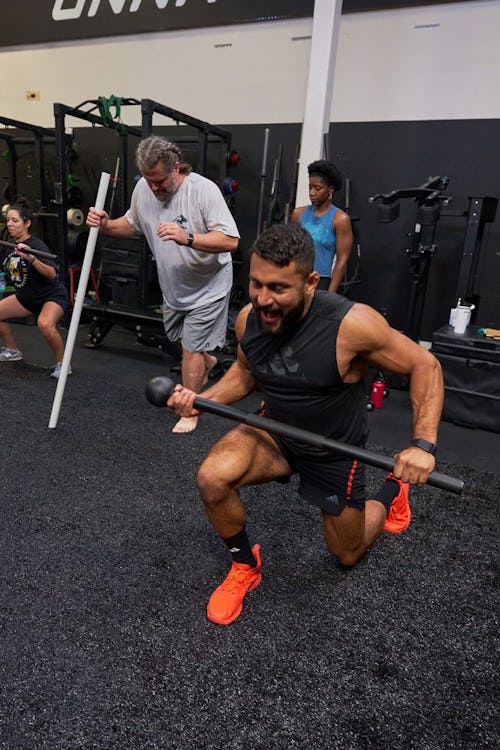
 Five by five is typically done on classic multi-joint barbell lifts, such as
 The 5×5 workout has been around for at least a half-century, and probably much longer. It’s widely considered to be a good routine for beginners to follow because it’s simple to implement and provides a balance of heavy weights and increasing volume—two factors that are


