https://www.onnit.com/blogs/the-edge.atomOnnit - The Edge2025-07-15T17:22:41-05:00Onnithttps://www.onnit.com/blogs/the-edge/3-killer-chest-back-workouts-for-building-muscle2025-07-15T17:08:39-05:002025-08-15T09:50:46-05:003 Killer Chest & Back Workouts For Building MuscleJeremy GottliebIn an effort to be more time-efficient, some athletes like to train two or more muscle groups in a single workout. One of the most popular examples is a session that combineschest and backtraining. The pecs and lats/upper back pair about as well as a protein shake and a cold shower after a tough workout, offering a strategy to train nearly the entire upper body in short order.
We consulted a pro bodybuilder/strength coach to bring you the definitive guide to chest and back workouts—including three sample routines you can try. Whether you have aspirations of competing in a physique contest, you train at home with minimal equipment, or you’re just trying to make the most of a limited amount of workout time, you’re about to find the plan for building up your chest and back that’s right for you.
Can You Train Your Back and Chest Together?
“Chest and back make a great pairing because they’re antagonistic,” says Jonny Catanzano, an IFBB pro bodybuilder and owner of Tailored Health Coaching(@tailoredhealthcoachingon Instagram), “which means that while one is working, the other is resting.” This gives you the opportunity to speed your workout along by alternating sets for each muscle group with little or no time in between them, since there’s almost no fatigue that carries over from one to the other.
Imagine training only chest or only back by itself. You pick an exercise, do a set, rest, do another set, rest, and so on until your sets are complete, and then you go on to another exercise. There’s nothing wrong with this approach, but if you rest for two minutes or longer between sets (as thelatest researchsuggests you should, if you want to maximize muscle gains), your workout time can easily extend to an hour or more—and you’ll have only worked one muscle area.
On the other hand,if you alternate sets of chest and back exercises, you can train both muscle groups at a much brisker pace.Your chest will recover while you work your back, and vice versa, so it’s possible to use shorter rest periods between each set and get your workout done in much less than an hour’s time—without rushing either muscle group’s recovery.
Astudyin theJournal of Strength and Conditioning Researchhad subjects perform three traditional sets of rows followed by three sets of the bench press, and, in another session, do the same routine again but with the back and chest exercises paired off and alternated. Researchers found that, when the lifters went back and forth between the two exercises in the second workout,they didn’t have to reduce the weights they were using as much from set to set.They were able to lift more total weight compared to when they did straight sets in the first workout—probably because each muscle got more rest before it was worked again.
Chest and back pairings are also great if your goal is fat loss. “You’ll burn more calories in a session training two big muscle groups together,” says Catanzano. “You’ll get your heart rate up higher than training one area at a time, and higher still if you decide to superset exercises.” That is, perform a set for chest and then one for back without any rest in between.
Furthermore,merging your chest and back training into one ensures that you’ll balance the work you do for each area.Many people (guys, mostly) will train chest voraciously, and then treat their back workouts as an add-on, doing only a handful of sets of lat pulldowns or rows. But if you plan to train both regions in a single session, you can easily keep track of the sets you do for one and match them with sets of the other.
If you’re interested in building strength, chest and back workouts will help you understand andfocuson the relationship between a big back and a big bench press. “A stronger back lets you press more,” says Catanzano. “The lats help stabilize your torso when the bar is at your chest,” which is why many powerlifters do chinups or rows between sets of bench presses.
What Muscles Are Used?
Generally, when you’re talking about training chest and back together, you’re referring to the pectoralis major and minor (pecs), latissimus dorsi (lats), and upper back—comprising the rhomboids, trapezius, and teres major. The lower back—specifically, the spinal erectors—can certainly be trained as well, but many lifters prefer to work it on a lower-body day, as the lower back contributes automatically tosquatand deadlift variations.
The deltoid muscles of the shoulders can’t help but get involved as well when you do any pushing and pulling, and the triceps assist on pressing exercises while thebicepsand forearm/grip muscles work on your back movements.
Here’s a quick and very general anatomy course on where each of the chest and back muscles are located and what they do. (This isn’t a complete list, but these are the primary muscles you’ll target in a chest and back workout.)
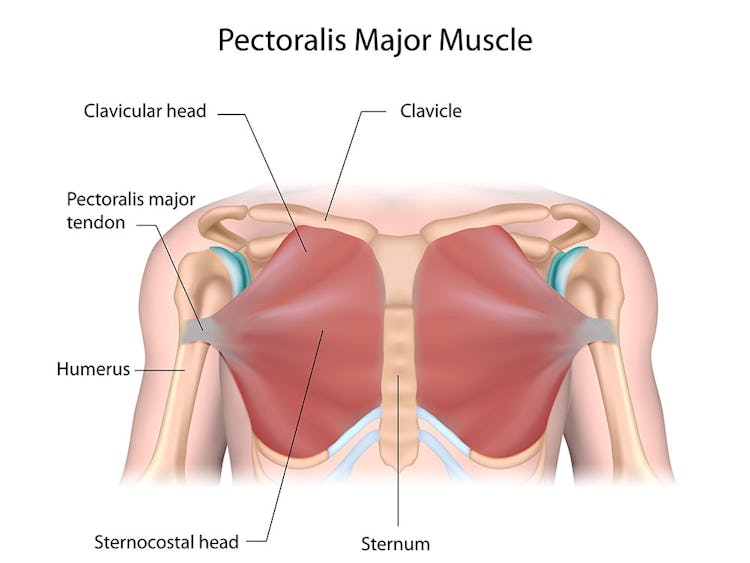
Pectoralis major
This muscle has three heads and thus three different actions. The clavicular head, which runs from the collar bone to the humerus,raises thearmup and across to the other side of the body.The sternal head starts on the breastbone and reaches across to the humerus, so its fibers work tobring the arm around the front of the body.The costal head goes from the cartilage of the ribs and the external oblique muscle to the humerus, allowing the arm topull downward from overhead.
Pectoralis minor
Lying underneath the pec major, the pec minor begins on the third to fifth ribs and attaches to the scapula (shoulder blade).It draws the tip of the shoulder downward, protracts the shoulder blade, and raises the ribsduring inhalation.
Latissimus dorsi
The lat originates on the thoracic spine, lumbar spine, lower ribs, and iliac crest of the pelvis and connects to the humerus, just below the shoulder joint.It extends the shoulders, draws thearmsto the sides,and helps with inhalation.
Rhomboid
A rhombus-shaped muscle (hence the name), the rhomboid runs from the cervical and thoracic spine to the scapula. Itelevates and retracts the shoulder blade.
Trapezius
Like the pecs, thetrapscan work in three different directions. They start at the bottom of the back of the skull and the spine and reach over to the shoulder blade and collarbone in order toraise the scapula, retract it, and depress it.
Teres major
This is a small back muscle that assists the bigger ones. Originating on the back of the scapula, it inserts on the front of the humerus, and works torotate the arm toward the body and draw it behindthe body.
How Do You Set Up A Chest and Back Workout?
The way you combine chest and back exercises in a session is highly dependent on what you want to achieve. During his bodybuilding prime, Arnold Schwarzenegger liked to superset chest and back moves with little or no rest between them. For instance, do a set of incline presses followed immediately by a set of seated cable rows, rest a minute or two, and repeat. As we explained above, this a solid plan for speeding up your workouts and burning more fat, but it sets a pace that may be too intense for many people.
Research suggests thatlonger rest periods help you train with more challenging weights, thereby stimulating more muscle growth,so you could alternate chest and back moves with plenty of time between them—say, 90 seconds to two minutes downtime between your press and row—if muscle gain is your main priority.
There’s also no rule stating that you have to toggle between chest and back exercises. You could do all your chest moves first and then go on to back, or the other way around. “This may be better for less experienced trainees,” says Catanzano. “You won’t gas too early in the workout like you might if you were supersetting.” It’s also a good option if you want to zero in on one area at a time, giving your full attention to each one in turn, but without having to break them into two different workouts.
Finishing off one body part before you do the other may be wise if you see it as a weak point. Most people’s backs are underdeveloped, so doing all your back training when you’re fresh will let you work it with the greatest possible effort and focus.“If you have shoulder problems,” says Catanzano, “you might want to put back first,because it will warm up your shoulders and make your pressing feel smoother when you get to chest.” Yes, doing chest second may mean sacrificing some weight on your chest exercises due to fatigue, but if you’re dealing with cranky shoulders or other pressing-related injuries, learning to stimulate the muscles with lighter weight may be just what the doctor ordered.
How Many Chest Exercises and Back Exercises Should I Do?
The short answer to this question is roughly three to five moves for each muscle group per workout. For example, a typical old-school chest and back session might look like this:
1A Bench press
1B Bent-over row
2A Incline dumbbell press
2B Seated cable row
3A Dip
3B Chinup
(The exercise pairings can be alternated with rest in between sets, or superset without rest.)
But the right number of exercises for you depends on several factors. If you only have 30 minutes or less to train, you may have to cap your workout at two exercises per body part. On the other hand, if you plan on doing shoulder and arm work on a second upper-body day in the week, and therefore won’t be working chest and back again for another week, you may want to do more chest and back exercises to get enough volume in.
Volume is a major consideration when planning out any training program. A bodybuilder looking to fully stimulate every muscle will need to hit the chest and back from all angles, and that means more exercises and more sets. Whereas a busy professional who only wants to maintain strength and some athleticism can get by with much less work.
If you want the best muscle gains possible, research suggests you need a volume of 10–20 hard sets per muscle group, per week, to do the job.“I’d recommend a minimum of 10 sets,” says Catanzano, “and closer to 20 sets for weaker body parts.” All of these sets should be taken to within one to three reps of failure, he says—the point at which your reps slow down and you’re about to break form due to fatigue. As long as you keep these volume parameters in mind, the way you set up your workouts is really up to you.
Let the number of exercises you choose suit the volume of work you’re shooting for. For instance, if you’re aiming to do 10 sets for chest and back in a week, that could break down to five sets for each in two different workouts. This is a moderate and very doable amount of work for most people, and won’t put you at risk for overtraining. See below.
Chest & Back, Day I
1A Incline press, 3 sets
1B Chest-supported row, 3 sets
2A Cable fly, 2 sets
2B Straight-arm pulldown, 2 sets
Chest & Back, Day II
1A Dumbbell bench press, 3 sets
1B Inverted row, 3 sets
2A Dip, 2 sets
2B One-arm dumbbell row, 2 sets
You could finish each session with some shoulder and/or arm work for a complete upper-body workout, or leave the gym after chest and back alone if that’s all you have time for, or you plan to work those other muscles on a different day.
If back is a weak point, you should emphasize it with more volume. In this case, you could do 10 sets for it on Monday, and then another six sets on Friday for 16 total sets that week.
Chest & Back, Monday
1. Machine row, 3 sets
2. One-arm lat-pulldown, 3 sets
3. Seated cable row, 2 sets
4. Chinup, 2 sets
5. Dumbbell bench press, 3 sets
6. Feet-elevated pushup, 2 sets
Chest & Back, Friday
1. One-arm dumbbell row, 2 sets
2. Wide-grip lat pulldown, 2 sets
3. Dumbbell shrug, 2 sets
4. Machine press, 2 sets
5. Cable fly, 3 sets
Chest & Back Workout Tips
Catanzano offers some of the following pointers to help you get the most out of your training.
If muscle size is your main goal, the amount of weight you’re lifting isn’t as important as taking your sets near to failure and using exercises that best recruit the target muscles. Catanzano says the barbell bench press is overrated for pec gains.Let the majority of your chest training come from dumbbell, machine, andcable work,which is easier on the joints and can allow you to work the muscles through greater ranges of motion and with better isolation. The same goes for back training.
If you’re over 40, or trying to work around injuries, the way you sequence your exercises is extra important. Rather than starting with your heaviest lifts, begin sessions with dumbbell or machine work and put moves like the bench press and bent-over row later in the workout when you’re fully warmed up and mobile. “You could do a dumbbell row and dumbbell bench press first,” Catanzano says, “and then go into bent-over rows and barbell bench. Or, you could do flys before bench presses, and chest-supported rows before bent-over rows or rack pulls.” Your joints will thank you.
If strength is a big priority for you, however, and you’re sure your body can handle it, you can sequence your workouts the opposite way. Do your heavy work like bench presses first, when you can give them your best effort, and then move on to lighter dumbbell and bodyweight work afterward.
Cycling your rep ranges can help you avoid plateaus and hit big PR’s on your exercises. Catanzano likes to use three-week cycles, performing sets of 12–15 reps the first week, 8–12 the second, and 6–8 the third. Then he repeats the process. “You need to hit all rep ranges to maximize gains,” he says.
How To Stretch Before Doing Chest & Back
Prepare your chest and back muscles for a workout by first reducing the tension in them with some light rolling on a ball or foam roller—sometimes called a “smash.” This will help you access greater ranges of motion in your exercises; it also drives blood into the muscles to warm them up.
Chest Smash
Place the ball or roller against your pec muscles, right under your collarbone between your shoulder and breastbone. Allow your body to rest on the ball just enough to apply moderate pressure to the muscle—it shouldn’t hurt. Roll an inch or so in each direction, lingering over any positions where you feel the most tenderness, until they release. You can also extend your arm, reaching it overhead with palm facing up, and then taking it down to your hip while rotating your wrist as shown, to increase the stretch on the muscles in different ranges. Perform the smash for about a minute on each side.
Lat Smash
Place the ball or roller under your shoulder and into the meaty muscle on the side of your back (your lat). Lie on your side and apply gentle pressure to the muscle as your reach your arm overhead and out in front of you, rotating your wrist as shown. Perform the smash for about a minute on each side.
After you’ve rolled, perform the following mobility drills to further activate the muscles you’ll train. Do 2–3 sets of 5–10 reps for each exercise. Rolling and mobility drills are courtesy of of Cristian Plascencia and Natalie Higby, owners of The Durable Athlete (@durable.athleteon Instagram).
Cat-Cow
Step 1.Get on all fours with your hands under your shoulders and knees under your hips. Brace yourcore.
Step 2.Press into the floor, spreading your shoulder blades apart as you round your mid back toward the ceiling. Make sure only your mid back moves—the lower back should be neutral and braced.
Step 3.Pinch your shoulder blades together again as you extend your spine back to neutral.
Sky Reach To Arm Thread
Step 1. Get on all fours with your hands under your shoulders and your knees directly beneath your hips. Brace your core.
Step 2. Draw your right arm up and across your chest as you twist your right shoulder toward the ceiling and reach overhead. Be careful to keep your hips facing the floor.
Step 3. Reverse the motion, reaching your arm across your body and behind the support arm. Twist as far as you can, ideally until the back of your right shoulder touches the floor. Complete your reps on that side, and then switch sides and repeat.
Banded Shoulder Circles
Step 1. Stand holding an elastic exercise band (or dowel) with both hands outside shoulder width. Draw your ribs down, tuck your pelvis so it’s parallel to the floor, and brace your core.
Step 2. Keeping your arms straight, raise the band over and behind your head as far as you can. Reverse the motion to bring the band back in front of you.
The Best Chest & Back Workouts
Catanzano wrote up the following workouts, each with a different user in mind. One is ideal for the lifter who has access to a well-stocked gym, complete with free weights and machines. The second one is for the guy or gal training in a bare-bones home gym—a barbell, dumbbells, bands, and your bodyweight are all that’s needed. Lastly, there’s a workout for targeting common physique weak points—the upper chest and lower lats.
Choose the one that suits you best for now, and bookmark this article to refer back to the others. You may need them in the future!
Directions
For each of the workouts, follow the rep prescriptions below for every exercise. They will change weekly. Repeat the workouts for 6–8 weeks.
Week 1:perform 12–15 reps for each exercise.
Week 2:8–12 reps.
Week 3:6–8 reps.
Week 4:Repeat cycle.
Begin with 2–3 working sets for each lift (sets that aren’t warmups), and add volume over time. You can build up to 4–5 sets for some of the exercises, and consider having an additional chest and back day in the week to further increase the volume. If you consider either chest or back a weak point, aim to eventually perform 15–20 sets for it per week.
Remember that when chest and back exercises appear back to back, you can pair them off and alternate sets of each, with or without rest between them.
Step 1. Set up with the bar just over your eyes. Make sure that your feet are flat on the floor and your shoulders, back, and butt maintain contact with the bench. Arch your back, drawing your shoulder blades back and down. Grasp the bar with hands just outside shoulder-width apart (you may have to slide them an inch or two in either direction), so that when you lower the bar to your chest, your elbows make a 90-degree angle.
Step 2. Unrack the bar and hold it over your chest. Lower the weight to your chest, tucking your elbows about 45 degrees to your sides. After touching your chest, press the bar back to the starting position.
2. Incline Dumbbell Press
Step 1. Set an adjustable bench to a 30–45-degree angle, grasp a pair of dumbbells, and lie back on the bench, making sure your entire back is in contact with it—do not arch your back so that it causes your lower back to rise off the pad.Start with the dumbbells just outside your shoulders, elbows bent, and your forearms/wrists angled slightly (a V-shape).
Step 2. Keeping your elbows pointing at about 45 degrees, press the dumbbells straight up. Lower the dumbbells back down under control, until they’re just above and outside your shoulders.
3. Clavicular-Head Fly
Step 1.Attach single-grip handles (D handles) to two facing pulleys at a cable station set at shoulder height. Grasp the handles with hands angled 45 degrees and palms facing each other. Step forward so that your arms are extended at your sides, and there is tension on the cables.
Step 2.Keeping a slight bend in your elbows, bring your arms together in a wide arcing motion. Lower the weight under control until you feel a stretch in your chest.
4. Machine Low Row
Many gyms have a Hammer Strength low row machine, as shown here, but if yours doesn’t, try to mimic the exercise on a similar row machine, or set up an incline bench at a cable station.
Step 1.Adjust the seat of the machine so that, when you sit on it, the middle of your chest rests against the pad. Sit at the machine, brace your core, and bend at the hips—while keeping a long spine—until your chest is against the pad. Don’t let it come off the pad at any point during the exercise. Grasp the handles with a neutral grip (palms facing each other). Place your feet on the floor, and make sure your knees are out of the path of your arms when you row.
Step 2.Draw your shoulder blades down and together as you row the handles past your ribs. Be careful not to shrug your shoulders, and keep your chin tucked (don’t let your neck stretch forward).
5. Mid-Back Cable Row
Step 1.Set an adjustable bench to a 45-degree angle, and place the bench in front of a cable station with two side-by-side pulleys. Set the pulleys on the lowest level, and attach a single-grip handle (D-handle) to them. Rest your chest against the bench and grasp the handles with arms extended. Make sure you’re far enough away from the machine to feel a stretch on your back. Arch your back and brace your core.
Step 2.Drawn your shoulder blades back and down as you row the handles to the outsides of your chest, flaring your elbows about 60 degrees. Lower the weight with control.
6. Block Pull
Step 1.Rest the bar on blocks or mats so that it sits just below knee level. Stand with your feet hip-width apart. Bend your hips back to reach down and grasp the bar, hands just outside your knees. Take a deep breath into your belly and brace your core. Pull your shoulders back and down—think about trying to bend the bar around your legs like a pretzel; this will help you activate the right muscles. You can use straps, as shown, to support your grip.
Step 2.Keeping your head, spine, and hips aligned, drive your heels into the floor and pull the bar up along your shins until you’re standing with hips fully extended and the bar is in front of your thighs. Lower back to the floor under control.
At-Home Chest & Back Workout
1. Landmine Suitcase Row
Step 1.Load a barbell into a landmine unit, or wedge one end into a corner. Load the other end of the bar with weight, and stand behind the plates, both feet on one side of the bar. Keeping a long spine with your core braced, bend your hips back to reach down and grasp the bar. Your torso should be about 45 degrees.
Step 2.Draw your shoulder blade back and down as you row the bar the bar, stopping when your elbow reaches the middle of your torso. Lower back down under control. Complete your reps, and then repeat on the opposite side.
2. Incline Dumbbell Press w/ Neutral Grip
Step 1.Set an adjustable bench to a 30- to 45-degree angle and lie back against it with a dumbbell in each hand at shoulder level. Turn your palms so that they face each other, and your elbows are tucked at about 45 degrees to your sides.
Step 2.Press the weights overhead to lockout, and lower them with control.
3. Chest-Supported Dumbbell Row
Step 1.Set an adjustable bench to about a 60-degree angle and lie down with your chest against it. Your spine should be long and your core braced. Grasp dumbbells with your arms extended, and allow your shoulder blades to spread apart while the weights hang at arm’s length.
Step 2.Row the dumbells to your sides, drawing your shoulder blades back and down. Lower under control.
4. One-Arm Band Press
Step 1.Attach a band to a sturdyanchorpoint at shoulder level behind you, and grasp the free end in one hand. Hold the band at chest level with your arm angled about 45 degrees from your torso. Step away from the anchor point to put tension on the band.
Step 2.Press the band in front of you to face level. Lower under control. Complete your reps, and then repeat on the opposite side.
5. Low-Lat Row w/ Band
Step 1.Attach a band to a sturdy anchor point overhead, and set up an adjustable bench behind it at a roughly 60-degree angle. Grasp the band in one hand and brace yourself on the bench with the opposite hand and knee. The working arm should be angled 120–150 degrees from your torso (i.e., if your arm hanging at your side is at zero degrees, and your arm extended in front of your chest is 90 degrees, the exercise should be done with your arm 30–60 degrees above that).
Step 2.Row the band down to your hip, stopping when your elbow is in line with your torso. Control the motion as you extend your arm again. Complete your reps, and then repeat on the opposite side.
6. Incline Dumbbell Fly
Step 1.Set an adjustable bench to a 30- to 45-degree angle and lie back against it with a dumbbell in each hand at shoulder level. Turn your palms so that they face each other, and your elbows are tucked at about 45 degrees to your sides. Press the weights overhead.
Step 2.Keeping a slight bend in your elbows, lower your arms slowly in a wide arcing motion until you feel a stretch in your pecs. Bring your arms back up in an arc until they’re overhead again.
7. One-Arm Dumbbell Row
Step 1.Place one knee on a flat bench and brace yourself with the hand on the same side. Your spine should be long and your core braced. Grasp a dumbbell at arm’s length.
Step 2.Draw your shoulder blade back and downward as you row the weight to your side with your elbow flared out about 45 degrees. Lower the weight under control. Complete your reps, and then repeat on the opposite side.
8. Deficit Pushup
Step 1.Place blocks or mats on the floor, or pile some weight plates as shown, so you create an elevated surface for your hands to rest on. Get into pushup position. Your body should form a straight line, with your pelvis slightly tucked so that it’s perpendicular to the floor. Brace your core.
Step 2.Lower your body between the blocks or plates until you feel a deep stretch in your chest, but don’t lose your pelvic position. Press back up.
9. T-Bar Row
Step 1.Load a barbell into a landmine unit, or wedge one end into a corner. Load the other end of the bar with weight, and stand behind the plates, feet straddling the bar. Grasp a V-grip handle (as used with cable stations) and, keeping a long spine with your core braced, bend your hips back to reach and hook the handle onto the bar. Allow your knees to bend. Grasp the handle with both hands, palms facing each other. Maintain your long spine and tight core as you pick the bar off the floor.
Step 2.Draw your shoulder blades back and down as you row the bar the bar, stopping when your elbows reach the middle of your torso. Lower back down under control.
Upper-Chest & Lower-Lat Workout
If you’ve been training a while, you’ve surely noticed that some of your muscle groups aren’t developing as well as others. When it comes to the chest and back, the upper portion of the pecs and lower section of the lats are commonly the weakest areas. Filling out the upper pecs will make your chest look bigger overall, and developing the lower lats will make your back appear wider (which makes your waist look smaller by default).
While you can’t isolate these areas completely, you can bias them with certain exercises and technique tweaks. Catanzano says thatany row done with a neutral (palms facing in) grip and bringing the elbows tight to the side of the body—and stopping when the elbows are in line with the torso—will emphasize the lats over the upper back. To zero in on the lower-lat fibers (sometimes called the iliac lats, because they originate on the iliac crest of the pelvis), you need to perform pulling motions with your arm over and a little in front of your head (120–150 degrees of shoulder flexion), and driving your elbow toward your hip.
To attack the upper chest, you need to isolate the clavicular pec fibers as much as possible. The arm path to do this is similar to the one that trains the lower lats, but, of course, the resistance comes from the opposite direction. Incline presses and flys are the typical exercise choices, but make sure you perform them with a neutral grip and elbows tucked, so that your arms travel the same direction that the clavicular fibers run.
1. Incline Dumbbell Press
Step 1. Set an adjustable bench to a 30–45-degree angle, grasp a pair of dumbbells, and lie back on the bench, making sure your entire back is in contact with it—do not arch your back so that it causes your lower back to rise off the pad.Start with the dumbbells just outside your shoulders, elbows bent, and your forearms/wrists angled slightly (a V-shape).
Step 2. Keeping your elbows pointing at about 45 degrees, press the dumbbells straight up. Lower the dumbbells back down under control, until they’re just above and outside your shoulders.
2. Chest-Supported Low-Lat Row
Step 1.Rest your chest on an elevated bench, high enough so that your arms can hang straight down while your body is parallel to the floor. Keep a long spine and your core braced. Grasp a dumbbell in each hand.
Step 2.Draw your shoulder blades down and back as you row the weights to your sides.
3. Clavicular-Head Pec Fly
Step 1.Attach single-grip handles (D handles) to two facing pulleys at a cable station set at shoulder height. Grasp the handles with hands angled 45 degrees and palm facing each other. Step forward so that your arms are extended at your sides, and there is tension on the cables.
Step 2.Keeping a slight bend in your elbows, bring your arms together in a wide arcing motion. Lower the weight under control until you feel a stretch in your chest.
4. Incline Low-Lat Pulldown
Step 1.Set an adjustable bench at about a 60-degree angle in front of a cable station. Attach a bar to the pulley at the highest setting, and then attach single-grip handles to the bar so that you can grasp them with palms facing in. Lie with your chest against the bench and your arms extended overhead. Keep a long spine, and your core braced. There should be tension on the cable to start.
Step 2.Draw your shoulder blades back and together as you row the handles, stopping when your elbows are at your sides. Lower the weight under control.
5. Close-Grip Incline Press
Step 1. Set an adjustable bench to a 30–45-degree angle and lie back on it. The bar should be just over your eyes. Make sure that your feet are flat on the floor and your shoulders, back, and butt maintain contact with the bench. Arch your back, drawing your shoulder blades back and down. Grasp the bar with hands about shoulder-width apart.
Step 2. Unrack the bar and hold it over your chest. Lower the weight to your chest, tucking your elbows about 45 degrees to your sides. The bar should touch the upper portion of your chest, just under the collarbone. Press the bar back to the starting position.
6. Rack Pull
Step 1.Set the bar on blocks or the spotter bars of a power rack, as shown, so that it sits just above knee level. Set up as you did for the block pull above—long spine, shoulders packed down and positioned directly over the bar, and core braced. Actively pull the bar tightly into your body, and maintain this tension throughout the rep. You can use straps, as shown, to support your grip.
Step 2.Extend your hips to lockout, standing up tall, and then lower the bar back under control.
]]> https://www.onnit.com/blogs/the-edge/climbing-the-hill-the-ultimate-calisthenics-workout-transformation2025-07-15T16:45:21-05:002025-08-15T09:50:06-05:00Climbing the Hill: The Ultimate Calisthenics Workout TransformationJeremy GottliebAll my workouts involve one thing:calisthenics, orbodyweight exercises. I do all my workouts on parallel bars, pullup bars, or on the ground.
I used to be into heavy powerlifting, but recently moved to a purelybodyweight trainingregimen.
I noticed a big change in both my physique and strength.
I actually felt a difference in my body; doing my unique exercises opened up a totally new door.
I noticed I was using muscles that I had never even used before.
Believe it or not, all my workouts involve calisthenics circuit routines now. In a circuit, you move from one exercise to the next with little or no rest between moves.
Circuit training doesn’t allow your heart to rest or slow down. It keeps it up consistently throughout your workout allowing you to burn more calories and build conditioning.
I do hundreds of different calisthenics circuits and I never touch the weights. I’ve lost 37 pounds of fat in six months doing my exercises. I went from 202 pounds to a lean 165 pounds.
I get at least 50 messages a day just on my transformation and how I did it.
The best part is, anyone can do it themselves with hard work and dedication.
I’m going to share four of my circuit workouts with you. One is for beginners and can be done at home. Two are for intermediate and advanced exercisers, and one is only for extreme athletes.
Find the workout that’s best for you and, if you stick to it, you will see results in less than two months.
How Long Should You Train For In a Calisthenics Workout?
The At-Home (beginner level), Intermediate, and Extreme Athlete routines shown here should all take 30 minutes or less to complete. The Advanced workout may take as long as 45 minutes. In general, you can save time by trying to move at a brisk pace between exercises and circuits, but give yourself enough rest time so that you can complete your exercises safely and with good form. You can work on reducing rest periods as your conditioning improves over time. Have a timer handy to track the length of your sets and your rest periods; you’ll need one for the Advanced and Extreme Athlete workouts.
How Long Should You Recover After A Calisthenics Workout?
Each of these workouts can be performed up to four times per week on non-consecutive days. Three to four workouts per week is enough. For example, Monday, Wednesday, Friday, and Sunday. You can also combine them, performing the At-Home workout one day, the Intermediate on another, and the Advanced (if you dare!) on a third day. If you feel extra sore or run down on a day you had planned to train, take another day’s rest before your next workout (or perform light exercise or aerobic activity, such as walking/jogging, cycling, yoga, mobility work, etc.).
Calisthenics Vs. Weight Training
The term calisthenics refers to training that uses primarily bodyweight exercises to develop strength,endurance, mobility, and coordination. It’s the kind of exercise that gymnasts and martial artists have done for eons using their own body weight, and while it develops musclemasstoo, that’s more of a byproduct. You can expect to get very strong relative to your bodyweight when you do calisthenics training, and master your control of your body in various positions and movements. I.e., you’ll become stable and athletic.
Weight training uses external loads—free weights, cables, machines—to strengthen the body, and while it can develop the same qualities that calisthenics can, it’s better-suited for those who want to build maximum muscle mass, power, and absolute strength. This makes it a potentially better choice for athletes in sports like football, baseball, and track and field. A gymnast will usually be able to do more pullups and pushups than a bodybuilder or powerlifter, but the one who lifts heavy weights can probably move more overall load and will look bigger and stronger. Neither kind of training is superior to the other— both have their advantages, depending on your goals.
For the best, most well-rounded results, include both calisthenics, cardio and weight training in your regimen. You can alternate the styles, spending a few weeks working on one and then switch to another, or you can combine them in the same workout. For instance, you can start with weight training exercises to peak your power and strength, and then finish your routine with bodyweight training that works more on endurance and movement skills.
How To Stretch For A Calisthenics Circuit Workout
Follow the video below for a routine to warm up your entire body before the calisthenics workouts offered here. For more tips on mobility and stretching, follow Onnit-certified Durability Coach Brian Butz (aka@themobilemammothon Instagram).
Lunge out to your left side and lower your body until your left leg is bent about 90 degrees and your trailing leg is straight. Hold for a moment, and then reverse the motion, twisting your body to get into a lunge position on the right leg, facing that direction.
Plant your left hand on the floor and twist your torso to the right, reaching your right hand overhead.
Get on all fours and extend your right leg to the side. Use your hands to gently push your hips back so your feel a stretch on the inner side of your right thigh. Allow your foot to roll backward and point upward.
Push your hips forward again and twist your torso to the right, reaching your rightarmoverhead. Complete your reps and then repeat on the opposite side.
Get on all fours, and then step your left foot forward, planting your foot outside your left hand. Try to straighten your back so that it’s flat from your head to your pelvis.Relax, and reach back to grasp the top of your right foot.
Gently pull it forward so you feel a stretch on your right thigh and hip. At the same time, extend your back and use your left hand to push on your left knee so you end up in a tall kneeling position.
Hold the stretch for a moment, and then let your right foot go. Repeat the movement on the opposite side. Avoid hyperextending your lower back when you pull on your foot.
Sit on the floor with your left leg bent in front of you and your right leg bent behind you. Press your hands into the floor and push your chest up and out. Now rotate your right leg up off the floor as you rotate your left leg up and to the right, so your body turns and you end up in the same starting position but with your legs opposite. From there, extend your hips so you rise to a tall kneeling position.
Lower your hips back to the floor, plant your hands, and repeat the movement to the other side.
At-Home Calisthenics Circuit Workout
Here’s abodyweight workoutthat’s appropriate whether you’re a total beginner to training or you have a little experience with lifting weights but you want to get back to basics with calisthenics training. You can do this routine at home if you have a pullup bar, and it may help to have an elastic exercise band as well, which can help to unload some of your bodyweight and make exercises like chinups and dips easier.
Perform the exercises as a circuit, completing one set for each in sequence. Rest 60 seconds between exercises, and repeat the circuit for 3 total rounds. Except where otherwise noted, do as many reps as possible for each exercise, but stop one short of failure—that means when you feel your form is about to break down. For example, if you’re doing chinups and you get to the eighth rep and feel like you’re slowing down and won’t get a ninth rep with good form, stop the set there.
Use a shoulder-width grip and turn your palms to face you. If you can’t get at least 5 reps on your own, attach an elastic exercise band around the bar and stand in the open loop to unload some of your bodyweight.
Lower your body until your upperarmsare parallel to the floor. If you can’t get at least 5 reps on your own, attach an elastic exercise band to the dip bars and stand (or kneel) in the open loop to unload some of your bodyweight. If you don’t have dip bars, you can use the backs of two chairs.
Stand with feet between hip and shoulder-width and quickly lower your body until your thighs are parallel to the floor. Explode upward as high as you can. Land softly, and reset yourself before you begin the next rep.
Place your hands just outside shoulder width and lower your body until your chest is about an inch above the floor. Keep your body in a straight line with yourcorebraced. Your lower back shouldn’t arch and your elbows should point 45 degrees from your torso.
Stand with feet shoulder width and squat down to place your hands on the floor. Now shoot your legs behind you fast so you end up in the top position of a pushup. Jump your legs back up so they land between your hands and then stand up quickly.
If you have a jump rope, jump for 30 seconds, landing on the balls of your feet. Any type of jump is OK, or mix a few together.
Intermediate Calisthenics Circuit Workout
This workout is good for people with a year or more of strength training or bodyweight-only training under their belt. You can do it at home, but you’ll need a pullup bar and some space to run, so a public park or a gym may be more appropriate.
Perform the exercises as a circuit, completing one set for each in sequence. Rest 60 seconds between exercises, and repeat the circuit for 3 total rounds. Except where otherwise noted, do as many reps as possible for each exercise, but stop one short of failure—that means when you feel your form is about to break down. For example, if you’re doing jumpsquats, you might get to rep 10 and feel like you’re slowing down. If you’re pretty sure you won’t be able to get the 11th rep at the same speed or with a safe landing, stop the set there.
Set the handles of a suspension trainer around shin level and rest your feet on a bench behind you. Suspend yourself over the handles in a pushup position and then lower your body until your chest is just above your hands. Keep your body in a straight line with your core braced.
Set the handles of a suspension trainer low enough so that when you hang from them with arms extended, your body is angled 45 degrees to the floor, or lower. (If you’re strong enough, rest your feet on a bench for an added challenge.) Keep your body in a straight line and brace your core as you pull yourself up.
Stand with feet between hip and shoulder-width and quickly lower your body until your thighs are parallel to the floor. Explode upward as high as you can. Land softly, and reset yourself before you begin the next rep.
Stand with your feet between hip and shoulder width, and squat down to place your hands on the floor in front of you. Jump your legs back into the top of a pushup position, then reverse the motion to come back up to standing.
Flatten your lower back into the floor and brace yourabs. Extend your legs overhead and then lower them as far as you can before you feel your lower back is about to buckle up from the floor. Begin raising and lowering both legs, alternately, a few inches (as if you were kicking your legs while swimming).
Run as fast as you can maintain for 30 seconds. Other options are to run up a hill, or run in place.
Advanced Calisthenics Circuit Routine
If you’ve been training for a few years and feel pretty strong on bodyweight exercises, give this advanced routine a shot.
Perform the exercises as a circuit, completing one set for each movement in sequence. Set a timer and perform each exercise for 30 seconds. Try to limit your rest between exercises. Do 1–3 total rounds.
Get into a deep squat position and plant your hands on the floor. Tip your body forward and rest your knees on your elbows. Extend your back and hips so that your bodyweight is supported on your hands, and hold the position.
2. Jump Squat with Rotation
Reps:Jump in the 3 directions shown for 30 seconds
Lower your body into a squat quickly and then explode upward as high as you can. Swing your arms back as you go down, and throw them forward as you jump. Land softly, driving your knees outward. Hop 90 degrees to your right side, and repeat the jump. Hop back to face forward again, jump, and then rotate to face your left side, and jump again. Continue in this manner, jumping in the three different directions. Don’t let your knees cave inward on your landings, and make each jump as vertical as possible.
Get into pushup position and drive your hips backward as you extend your arms overhead. You’ll end up in a downward dog pose. Now lower your chest toward the floor in an arcing motion, finishing the pushup with your chest facing forward and your hips just above the floor (an upward dog pose). Keep your core braced so that your ribs don’t flare, and avoid shrugging your shoulders. Keep your shoulder blades together and pulled downward as you move toward the floor, and spread them apart as you push up.
Get into a deep squat and roll backward onto your shoulders. Roll forward again and go into the bottom of a deep lunge with your back knee pointing 90 degrees to the side. The heel of your front foot should stay flat on the floor. Repeat on the other side.
Shift your weight to your left leg so you feel like you’re sitting into your left glute. Now raise your right knee up and outward, planting your right foot on the floor at a 90 degree angle—both heels should be in line. Lower your body into a squat, keeping a long spine from your head to your pelvis. Alternate sides each rep.
Lie on your back and extend your arms and legs to form an X shape. Flatten your lower back into the floor. Perform a crunch, drawing your knees to your chest along with your arms.
Get into pushup position and turn your palms around so that your fingers point behind you. Hold your body in a straight line with your core braced and squeeze your shoulder blades together so that only your torso moves closer to the floor. Spread your shoulders apart to raise it back up while you hold your body in position.
Get into a lunge position—rear knee just above the floor and front knee bent 90 degrees. Jump and switch legs in mid air, landing with the opposite leg forward. Drive the arm that’s opposite the front leg forward on every rep.
Grasp the bar with hands outside shoulder width. Raise your legs up straight in front of you as you pull your body up until your chin is over the bar.
Extreme Athlete Calisthenics Circuit Routine
This workout is for very strong individuals who feel they’ve mastered their bodyweight on the basic exercises. It will challenge you with different movements you’ve probably never tried before, many of which are borrowed from the routines of gymnasts andMMA fighters.
Perform the exercises as a circuit, completing one set for each movement in sequence. Perform each exercise for the amount of time shown, and rest 30 seconds between exercises. Do 3 total rounds of the circuit, resting as little as possible between rounds.
Hang from a pullup bar with hands at shoulder width and raise your knees to your chest. Roll your body backward until your shins face the ceiling, and then reverse the motion.
Lie on your back on the floor and place a block or other light object between your knees. Squeeze your legs to keep it in place. Grasp a heavy or sturdy object with both hands behind your head. Keeping your legs straight, flatten your lower back into the floor and raise your legs up until your hips are off the floor.
Hang from a pullup bar with hands shoulder width. Tuck your knees to your chest and roll your body back so your torso is nearly parallel to the floor. Hold the position.
Get into pushup position and turn your palms around so that your fingers point behind you. Hold your body in a straight line with your core braced, and raise one leg off the floor. Maintain this position as you perform two pushups. Switch the leg that’s raised and repeat. Continue until the time is up.
Get into pushup position in front of a wall and walk your feet up the wall until your torso is nearly vertical. Brace your core so your ribs are pulled down and your torso is a solid column. Hold the position, then walk your feet down the wall slowly to return to the floor.
6. Mammoth March
Reps:Do 1 rep of each lunge, then squat, and repeat on the opposite leg. Continue for 30 seconds.
Step forward with your right leg and lower your body into a lunge position. Step back and all the way behind you to do a reverse lunge. Then step out to your right side for a lateral lunge, come back, and step behind you to the opposite direction for a dragon lunge. Step back until your feet are parallel, squat, and repeat the lunges on the opposite side. Squat again, and repeat the entire sequence until time runs out.
]]> https://www.onnit.com/blogs/the-edge/5-killer-back-and-bicep-workouts-for-building-muscle2025-07-10T10:55:28-05:002025-08-14T13:52:22-05:005 Killer Back and Bicep Workouts For Building MuscleJeremy GottliebBack andbicepspair together well. Learn how to set up the perfect workout; plus, 5 workouts to build more muscle in the back and bi’s.
Key Takeaways
1. Back exercises recruit the biceps for assistance,so it makes sense to train them together, giving each muscle more time to recover before training it again (as opposed to training biceps a day or two after back).
2. Each workout should have no more than four back exercises and two biceps movements.
3. Do 2–3 sets per exercise, performing 8–25 reps for back exercisesand 10–50reps for biceps.
5 Killer Back andBicepWorkouts For Building Muscle
There’s no hard and fast rule stating that back and biceps need to be trained together, but, anecdotal bro science aside, there is some logic to combining these two muscle groups that allow you to pull real hard.
Our guide to training the back and biceps together will teach you how to create maximally efficient upper-body workouts that build a thick back and bulgingarms.
First, take a look at the workouts we’ve designed for you. Then we’ll explain the methods behind the madness afterward.
Select whichever workout(s) accommodates your individualfitnesslevel and/or equipment setup. The workouts are meant to provide a basic template; you can insert whichever exercises you want into the template as long as you follow the guidelines (see our exercise lists under The Best Back and Biceps Exercises below).
Do only one back-and-biceps workout per week. However, advanced trainees should be able to handle additional back training during the week.
Grasp a dumbbell in one hand and rest your opposite hand and knee on a bench for support. Keep a long spine from your head to your pelvis and square your shoulders to the floor.
Row the dumbbell to your hip, drawing your shoulder back and downward as you pull. Your elbow should not rise higher than your back. Lower your arm under control. Complete your reps on one side and then repeat on the other immediately.
Sit at a pulldown station, and secure your knees under the pads. Grasp the bar with your hands outside shoulder width and your palms facing away. Drive your shoulder blades down and together as you pull the bar to your collarbone, and control its path back up.
Stand holding a dumbbell in each hand by your side, palms facing in. Without moving your upper arms, curl the weights up until your biceps are fully contracted.
5. Preacher Curl (Pump)
Sets: 1 Reps: 25–30
[See the video at 2:45]
Sit at a preacher bench or use a preacher machine. You can do the exercise with both arms, or one arm at a time, as shown. Rest your triceps on the pad so that your elbows are near the bottom of the pad and curl the weight strictly. As you extend your elbows, stop short of straightening your arms completely.
See the directions above. Use a weight that allows you to perform all the reps and a few more, but do only the prescribed number.
2. Suspension-Trainer Bodyweight Row (Perform)
Sets: 3 Reps: 8
[See the video at 3:30]
Grasp the handles of a suspension trainer with palms down and hang suspended with your legs extended in front of you. Brace yourcoreand pull your body up until your back is fully contracted. Rotate your wrists so that your palms face up in the top position. To make the exercise easier, increase the height of the handles so your body is more vertical. To make it harder, lower the handles so you’re closer to parallel to the floor.
3. Machine Low Row (Pump)
Sets: 3 Reps: 25
[See the video at 4:01]
Attach a V-grip handle, or two individual grip handles, to the pulley of a seated cable row station. Keeping your lower back flat, reach forward and grasp the handle, allowing your shoulder blades to be stretched. Row the handle to your sternum, squeezing your shoulder blades together and downward. Lower the weight with control.
4. Cable Hammer Curl (Prime/Pump)
Sets: 3 Reps: 20
[See the video at 4:18]
Attach a rope handle to the low pulley of a cable station and grasp an end in each hand. Step back so there is tension on the cable and bend your knees slightly. Keeping your upper arms in line with your sides, curl the rope until your biceps are fully contracted, pausing for a moment at the top.
5. Dumbbell Curl (Pump)
Sets: 2 Reps: 30
[See the video at 4:40]
Stand with feet hip-width apart, holding dumbbells at your sides with palms facing forward. Keeping your upper arms at your sides, curl the weights up and hold at the top for a moment.
Attach a band to a sturdy object and grasp the other end with both hands, palms facing each other. Step back to put tension on the band, and get into an athletic stance with hips and knees bent. Row the band to your sternum and hold for a moment.
2. Bentover Row (Perform)
Sets: 3 Reps: 8–10
[See the video at 5:24]
Place a barbell on a rack set to hip level. Grasp the bar with hands shoulder width, and pull the bar out of the rack. (If you’re more experienced, and have a strong lower back, you can also deadlift the bar off the floor to start.) Step back, and set your feet hip-width apart, holding the bar at arm’s length against your thighs.
Take a deep breath, and bend your hips back—keeping your head, spine, and pelvis aligned. Bend until your torso is nearly parallel to the floor. Draw your shoulder blades back and down as you pull the bar up to your belly button.
3. Chinup (Perform)
Sets: 3 Reps: 8
[See the video at 5:54]
Hang from a chinup bar with hands shoulder-width apart and palms facing you. Draw your shoulder blades down and together as you pull yourself up until your chin is over the bar. If that’s too easy, add weight with a belt as shown.
4. Lat Pulldown (Pump)
Sets: 3 Reps: 25
[See the video at 6:11]
See the directions above.
5. Dumbbell Hammer Curl (Prime/Pump)
Sets: 3 Reps: 15–20
[See the video at 6:30]
See the directions above.
6. Barbell Curl (Pump) OR Dumbbell Curl
Sets: 3 Reps: 25–30
Stand with feet hip-width apart holding a barbell or dumbbells at arm’s length with palms facing up. Keeping your upper arms at your sides, curl the bar until your biceps are fully contracted.
[See the video at 6:46 for a demonstration of the dumbbell curl.]
Perform as you did the chinup, described above, but with hands outside shoulder width and palms facing away from you.
3. Meadows Row (Perform)
Sets: 3 Reps: 10
[See the video at 8:09]
Set up a barbell in a landmine unit, or wedge one end into a corner. Stand perpendicular to the bar and stagger your stance, bending down to reach the bar with your lower back flat—head, spine, and pelvis should be aligned. Grasp the bar overhand and row it to your side. You should feel a stretch in your lat in the down position.
Perform hammer curls as described above, but holding an elastic exercise band.
5. Suspension Trainer Curl (Pump)
Sets: 2 Reps: 20–30
[See the video at 11:43]
Set up as you would to do the suspended bodyweight row described above, but curl the handles to your shoulders. Keep your shoulder blades drawn back together and downward throughout the exercise. Brace your core as well.
How To Stretch Before Doing Back and Bis
Warm up for a back and biceps workout by following these mobility drills from Onnit-certified Durability Coach Cristian Plascencia (@cristian_thedurableathlete on Instagram).
Why Work Your Back and Biceps Together?
“When you think about back training, the secondary or tertiary mover in any sort of row, pulldown, or pullup is going to be the biceps,” says John Rusin, P.T., D.P.T., C.S.C.S., owner ofDrJohnRusin.com. So, for the sake of efficiency, “it makes sense to hit the biceps a little more directly in conjunction with their corresponding compound lifts,” (i.e. back movements that involve more than one joint; as opposed to biceps exercises where only the elbow flexes).
Generally, back and biceps workouts begin with rowing or pulldown exercises to hit the bigger back muscles when you’re fresh.Starting the workout with biceps curls would fatigue your arms to the point where they may not be able to assist you like they shouldon your back movements, so the logical approach is to save bicep exercises until after you’ve trained your back.
One of the most popular andtime-honored workout splitsin all of muscledom is the push-pull split, where you train muscles that push one day and those that pull the next. For instance, you could dochest, shoulders, triceps, quads, and calves on Monday, and then work back, biceps, glutes,hamstrings, and rear deltoids on Tuesday. This kind of schedule makes it easy to keep all your training in balance, and ensures that you don’t neglect any muscle groups.
Of course, you don’t have to train your whole body each day. You could do upper-body pushing one day and upper-body pulling—aka back and biceps—the next, and then a leg day later in the week. A back and biceps session fits easily into all variations of the push-pull split.
Back and Biceps Anatomy
The major muscles involved when training back and biceps include:
Back*
–Latissimus dorsi(aka, the “lats”).These are the big sheets of muscle that extend down the sides of your back and let you pull your arms downward and backward.
–Teres major.A small muscle below the shoulder that assists with drawing your arms down and back.
–Rhomboids.Upper back muscles that elevate, retract, and rotate the shoulder blades downward.
–Middle and lower trapezius (“traps”).These guys retract and depress the shoulder blades.
Biceps
–Biceps brachii: Your main biceps muscle, it twists (supinates) the wrist outward and flexes the elbow.
–Brachialis: This one lies between your biceps and triceps on the outer side of your arm. It flexes the elbow.
*When discussing “back training” in strength and conditioning circles, experts are usually referring to the upper back. The lower back—meaning the erector spinae muscles—are considered part of the core musculature, and are also involved heavily in leg exercises, such as deadlift andsquatvariations. You can certainly include lower-back exercises in your back and biceps workouts if you choose to, but be sure to factor in the stress that your other workouts may be putting on the area, and be careful not to overwork it.
The Best Back And Bicep Exercises
Back and biceps exercises can be broken up into different categories. There are three types of back exercises, and five types of biceps exercises.
Back
1. Horizontal pulls (rows).To understand how the back exercise categories work, picture your body in a standing position. If you pull something toward your midsection, you’re moving it along a horizontal plane. Any exercise done along that plane is a type of row—be it a seated cable row, face pull, one-arm dumbbell row, etc. Even when you change the position of your torso, such as by bending your hips back to angle it so your torso is parallel to the floor (as in abent-over barbell row), you’re still pulling toward your body as if it were erect, and the exercise is still classified as a horizontal pull.
“Rows should make up the majority of your training volume for back,”says Rusin. “When rowing with dumbbells or handles, you can rotate the hands to achieve a more externally rotated position at the top of the pull [thumbs pointing away from you]. You can’t do that with pulldowns and pullups; with those, the shoulder has to internally rotate, and we’re already doing enough of that in everyday life through driving, texting, and typing. Our training should be trying to get us out of that, which is why I prescribe a ton more volume on horizontal pulls versus vertical.”
Target muscles:Rows effectively train all the major back muscles—lats, teres major, rhomboids, and trapezius. Developing the latter two in particular makes for a thicker, meatier back.
Exercise variations:Barbell bent-over row, one-arm dumbbell row, bodyweight row (with a suspension trainer or a barbell set up in a power rack or Smith machine), seated cable low row, T-bar row,landmine row, Meadows row, trap-bar row, chest-supported row, machine row (plate-loaded, selectorized, Smith machine), Pendlay row.
2. Vertical pulls (pullups/chinups, lat pulldowns)
Vertical pulling is a little simpler to picture than horizontal pulling. Movements that have you pull yourself upward in a straight line, or pull a bar down to meet you, are known as vertical pull exercises, and include the many pullup and lat pulldown variations.
Target muscles:Lat pulldowns and pullups emphasize the upper lats and teres major, adding width to the upper back.
Exercise variations:Wide-grip lat pulldown, neutral-grip lat pulldown, reverse-grip lat pulldown, wide-grip pullup, neutral-grip pullup, chinup, assisted pullup or chinup (using a machine or bands).
3. Isolation exercises(straight-arm pulldowns and pullovers).
While horizontal and vertical pulls are always compound lifts and involve the biceps as a secondary mover, exercises like the straight-arm pulldown and pullover, on the other hand, virtually remove biceps muscle involvement by keeping the elbows in a fixed position throughout. This allows you to zero in on the lats and various upper back muscles more directly, forcing them to do the work unassisted. “You’ll need to use lighter weight with these exercises,” says Rusin, “but the mind-muscle connection tends to be higher with these isolation movements.” That is, your ability tofocusyour mind on the muscles you want to train will be easier, and that improves their potential to grow.
Target muscles:Straight-arm pulldowns and pullovers emphasize the lats and teres major, with very little involvement from the biceps.
Exercise variations:Straight-arm pulldown(rope or bar attachment), one-arm straight-arm pulldown, dumbbell pullover, barbell pullover, cable pullover, dumbbell pullback.
Biceps
Because the elbow is a simple hinge joint, there’s really only one movement you can do for direct biceps training: the curl. However, curls can be manipulated through both hand and shoulder position to target the biceps (and their surrounding assisting muscles) very differently. Hence, there are five types of curls.
1. Supinated-grip curls (standard curls).In a typical barbell, dumbbell, or machine curl, the forearms are in a supinated position, with the palms facing forward at the bottom.
Target muscles:Supinated curls place the brunt of the load on the biceps brachii (the main arm muscles when you flex your elbow).
2. Neutral-grip curls (hammer curls).When you turn your wrists so that your palms face in toward your body, you’re doing a hammer curl (or some variation).
Target muscles:The brachialis muscle, which lies beneath the biceps brachii, becomes more involved in the movement, as does the brachioradialis, the meaty muscle that runs along the thumb-side of your upper forearm. However, the biceps are still the prime mover.
3. Pronated-grip curls (reverse curls).The opposite of a supinated grip, pronated curls flip your grip so that the palms face toward you in the down position and downward to the floor at the top of the lift.
Target muscles: Pronated/reverse curls hit the brachialis and brachioradialis to a greater extent than both supinated and neutral-grip curls.
4. Shoulder flexion (preacher curls).When doing curls using a preacher bench, the upper arms are locked into a position of slight shoulder flexion. Your elbows are held in front of your body.
Target muscles: The flexed shoulder position helps you better isolate the biceps, and helps establish a stronger mind-muscle connection (probably because you can watch your biceps as you train them!).
5. Shoulder extension (incline curls).In contrast to the preacher curl, you can get a greater stretch on the biceps by keeping the upper arms behind the torso (shoulder extension) throughout the curling movement. The most common way to do this is by lying back on an incline bench so that the upper arms are perpendicular to the floor throughout the movement.
Target muscles:Performing a curl while the biceps are in a stretched position puts slightly more emphasis on the long head of the biceps, the outermost portion of the muscle that provides most of the muscle’s peak when you flex it.
How Many Back Exercises And Biceps Exercises Should I Do?
Although the back and biceps work together on virtually all compound upper-body pulling movements, the amount of work the two muscle groups can tolerate is vastly different. Rusin recommends anywhere from four to six exercises total for back and biceps in a given workout, using roughly a two-to-one ratio of back to biceps exercises.At the high end, this would mean four back exercises and two isolated biceps movements in a session.
“The back can be trained multiple days a week,” says Rusin. Since its muscles support your posture all day long, they’re very durable, and can recover from quite a workload. “But the biceps can’t take the same amount of training volume and frequency as the back. People often think about doing back and biceps workouts with a one-to-one ratio of exercises—doing one biceps exercise for every back exercise—but that doesn’t line up for long-term success in terms of health and results.”
Yes, the biceps are relatively small muscles, and smaller ones generally recover faster than big muscles.But the biceps act on the elbows and shoulders—two joint complexes you really don’t want to risk overworking,especially when you’re alreadytraining chest, triceps, and shoulders elsewhere in your week.
According to Rusin, “Most people simply can’t tolerate more than one day a week of dedicated biceps training in terms of shoulder and elbow health and recoverability—even the bodybuilders I work with.”
How Many Sets and Reps Should I Do for Back and Biceps?
A good rule of thumb, especially if you’re on the high end of the exercise count, is 2 to 3 working sets per exercise. A working set means not a warmup—you’re using a challenging load and going to failure, or close to it (within one or two reps of failure).
In many cases, you won’t hit the aforementioned two-to-one ratio of back to biceps exercises perfectly; for example, you may do 3 back exercises and 2 for biceps. In these instances, aim for a two-to-one ratio of total sets (in this example, 6 total sets for back and 3 for biceps).
Rusin prescribes 8 to 25 reps for back exercises(with 45–75 seconds rest between sets).For biceps, you can do 10 reps all the way up to 50(20–45 seconds rest between them).
Rusin says you can tweak your back training to emphasize strength or maximum muscle growth (low reps for strength; moderate to extremely high reps for growth), but with biceps, there’s no need to train for strength. The elbows aren’t designed to curl ever-increasing loads, so you’ll get more out of them (and keep them healthy) by training them for hypertrophy (max muscle gain) via going for a big pump. “That’s what the biceps respond best to,” says Rusin.
How Should I Set Up A Back and Biceps Workout?
Just as important as the exercises you choose for your workout is the order you do them in. Rusin follows a simple protocol that delivers results in size and strength and minimizes the risk for injury. He calls the system the three P’s: Prime, Perform, and Pump.
1) Prime.You want to start your workout with an exercise that primes the central nervous system, essentially waking up the muscles you’re trying to train so that you can best recruit them throughout the workout. This should be a lift that you can really feel the target muscles working on. It may be an isolation lift or a compound one, but it should be done with fairly light weight so you can focus on form and making a mind-muscle connection. Done right, the priming exercise will help flush blood into the muscles and reduce your risk for injury.
For the back, straight-arm pulldowns, are a good choice.You could also go with a machine or chest-supported row (something where the body is supported and the movement is somewhat isolated).For the biceps, Rusin recommends hammer curls.Reps for both primer exercises should be in the range of 12–25.
“I always do neutral-grip curls to hit the underlying brachialis before fully lengthening out the biceps with supinated curls,” says Rusin. “So, for example, I wouldn’t do preacher curls before hammers.” Training the muscles in a stretched position when they aren’t fully activated can lead to biceps muscle pulls or elbow pain.
2) Perform.Following the prime, you’ll do one or two strength-focused lifts using heavier weights and lower reps (around 8, give or take). This is the real meat-and-potatoes of your workout, but don’t think that means you can skip the prime exercise andjumpright into it.
For back, barbell and dumbbell rows are money.Pullups can also be done here, simply because Rusin says most people can’t do more than 8–15 reps of them, so they can’t go in the (next) pump phase of the workout.For biceps, barbell and dumbbell curls, or cable curls will suffice.
3) Pump.Here’s where you chase total hypertrophy and finish the muscle off using light- to moderate-weight and moderate- to high-reps.
“What we don’t want is the spine, core position, or posture to be the limiting factor in any back exercise when we’re chasing those higher rep ranges,” says Rusin. This is why an exercise like the lat pulldown is perfect here; being seated and locked into place minimizes core and postural muscle involvement.Seated cable rows, machine rows, and rows with a band are also good options.
For biceps, preacher curls, incline dumbbell curl, and band curls work well.“Any curls where you’re putting a stretch on the biceps should definitely be at the back of the workout,”says Rusin.
]]> https://www.onnit.com/blogs/the-edge/how-to-do-b-stance-romanian-deadlifts-rdls-like-a-pro2025-07-10T10:55:27-05:002025-08-14T14:53:41-05:00How To Do B-Stance Romanian Deadlifts (RDLs) Like A ProJeremy GottliebThe B-stance Romanian deadlift is a way to make both the Romanian deadlift (RDL) and the single-leg deadlift a little easier to manage, while still giving you a great workout for the glutes and hamstrings.
What Are B-Stance RDLs and What Are Their Benefits?
First, let’s make sure we’re on the same page about what regular oldRomanian deadliftsare. The RDL is very similar to a conventional deadlift, but rather than picking the bar up off the floor, you start from a standing position with your hips locked out, and then bend your hips back as far as you can while keeping a little bend in your knees.
The RDL trains the glutes, hamstrings, and lower back, making it a great exercise for building muscle in those areas, as well as a good supplemental lift for the deadlift itself.Many lifters like to progress from the RDL to a single-leg RDL, where you perform the same basic movement but on one leg. Being able to do a single-leg RDL, or single-leg deadlift, demonstrates great balance and stability, so it’s arguably a good exercise for athletes to work on, but it takes a lot of practice for most people to achieve. It’s also not really a great choice for building muscle in your glutes and hamstrings, because you expend most of your energy trying to stabilize the movement—that is, keep from losing your balance and falling over. Single-leg deadlifts can’t really be loaded heavy, so there’s a diminishing return as far as gaining muscle and strength from them.
Now here’s where the B-stance RDL comes in.By taking your normal RDL stance and sliding one foot back and using it as a sort of kickstand, you can shift the load to your front leg, making the RDL more of a unilateral movement like the single-leg deadlift, but keeping most of the stability that makes the RDL such an effective muscle and strength exercise.
Therefore the B-stance RDL is a good progression from the bilateral RDL as well as a prerequisite or alternate for single-leg deadlifts.
Also, if you suffer from lower-back pain and find that regular two-legged RDLs are uncomfortable, the B-stance RDL may be a good alternative. You can’t lift as heavy with a B-stance as you can using a normal, two-legged stance, but in this case, that can be a good thing. Using lighter weight will place less strain on your lower back, but it will still be heavy enough to train one leg at a time effectively. The B-stance will also allow you to improve the mobility in your hips, one side at a time, so it may help to relieve the source of your back pain in the first place.
You can perform B-stance RDLs with a barbell, dumbbells,kettlebells, or a trap bar.We like the trap bar because it allows you to keep the weight very close to your center of gravity, which is easier on the lower back,so that’s the version that is depicted here. But the same mechanics apply to a B-stance RDL with any implement.
Step 1.Take the bar off the floor or a rack—if you’re going off the floor, you have to deadlift the bar up and into position, so be sure to do it with a flat back and lift with your legs. Now stand with your feet hip-width apart and soften your knees. From here,slide one foot back so that your toes are even with the heel of the other foot.Some people like to move the foot a little further backward or keep it more forward, but the toe-to-heel alignment seems to work best for most. Experiment and see what feels right to you.
Step 2.Brace yourcore, and bend your hips back as far as you can while keeping a little bend in your knees. You want your front knee to stay soft and just bend as needed to give your hips the greatest range of motion. The knee on your kickstand leg will bend a little more, but don’t try to bend either leg like you would in asquat.
Keep a long spine from your head to your tailbone as you push your hips back.You’ll feel a strong stretch in your glutes and hamstrings on the front leg. You want that stretch, because that means you’re working the muscles, but it shouldn’t be really uncomfortable. You also shouldn’t go to where you feel your lower back is beginning to round forward.
Step 3.As soon as you feel a strong stretch, and you know your hips are as far back as they can go with that stance, extend your hips to stand back up tall. Watch that you don’t hyperextend your back at the top. You want to be standing tall, not leaning back in an effort to push your hips forward even more.
Complete your reps (sets of anywhere from 5–10 reps are generally fine), rest, and repeat on the other leg.
B-stance RDLs will primarily target the gluteus maximus, your main butt muscle. But they will also hit your hamstrings and spinal erectors (the muscles in your lower back). Your core, of course, has to brace your spine throughout the whole movement, so you could argue that any RDL is an ab workout too.
Finally, if you go heavy on B-stance RDLs, they will demand a lot of work from your upper back and grip as well, just in supporting the load.
How Do B-Stance RDLs Compare To Other Romanian Deadlifts?
We already said that B-stance RDLs are easier on the low back than conventional RDLs. They also offer more range of motion than a bilateral RDL, so you can bend your hips back a little further and put a little bit more stretch on your glutes and hamstrings. Of course, the B-stance RDL is also more stable than a true single-leg deadlift, so you can lift more weight and provide a better stimulus for size and strength gains.
With all that said,the B-stance won’t allow you to go as heavy as conventional RDLs,so they’re not an ideal choice for building up your deadlift like regular RDLs are when done as an assistance lift. It’s good to use B-stance RDLs as an alternate exercise for the sake of variety, or if you’ve been experience low-back problems and want to train around them.
How To Stretch Before Doing B-Stance Romanian Deadlifts
The B-stance RDL is really just a hip hinge—you bend your hips back as far as you can while keeping a straight, flat back. For that reason, any hip hinge motion can serve as a warmup for it. A basic bodyweight hip hinge can do the trick.
Step 1.Stand with feet parallel and bend your knees slightly.
Step 2.Now drive your hips back as far as you can while keeping a long spine from your head to your tailbone. When you feel a stretch in your hamstrings, or you can’t push your hips back any further without losing your spine position, come back up to standing. Do 3 sets of 10 reps.
Another warmup move that will stretch out the muscles you’ll use on the B-stance RDL is the reverse lunge.
The B-stance RDL emphasizes the glutes when they’re at their most lengthened position—a deep hip hinge with your butt pushed all the way back. A nice complement to this kind of exercise is the B-stance hip thrust, another unilateral glute exercise that emphasizes the muscles when they’re in a shortened position—that is, they contract hardest when you’re near the end of the hip hinge and about to lock your hips out.Click HERE for a full tutorial on the B-stance hip thrust.
Another alternative exercise is the braced single-leg deadlift, as recommended by Bret Contreras, PhD, a glute-training expert and author of the bookGlute Lab. Here, you hold onto something sturdy for support and perform a single-leg deadlift motion. The braced single-leg deadlift is a little more challenging than using the B-stance, and a little closer to doing a real, unassisted single-leg deadlift, so consider it a progression from the B-stance once you’ve got that down.
Step 1.Set up a bench or other sturdy object so it’s at aboutarm’s length in front of you when your arm is at your side. You will hold onto it for stability. Now stand with your feet close and a light dumbbell in the opposite hand.
Step 2.You’ll start by working the leg that’s closest to the bench. Keeping a slight bend in that knee, push your hips back and extend your other leg behind you as you bend your torso toward the floor. Try to keep your hips square to the floor and maintain a long spine.
Step 3.Extend your hips to stand up tall again.
As you get more comfortable with the movement, you can reduce the support you get from the bench.
For example, start the single-leg deadlift unassisted and then reach out and touch the bench only if you begin to wobble.
]]> https://www.onnit.com/blogs/the-edge/how-to-do-b-stance-hip-thrusts-like-an-expert2025-07-10T10:55:27-05:002025-08-14T14:22:18-05:00How To Do B-Stance Hip Thrusts Like An ExpertJeremy Gottlieb
The hip thrust is one of the most popular exercises you’ll see in a gym, and possibly the best glute-building exercise you can do, but the two-legged version isn’t the only variation on this movement that you should be practicing. Doing the hip thrust on one leg while using the other as a kickstand to provide some balance—aka a B-stance hip thrust—can provide aneven greater challenge for those who feel they’ve mastered the basic thrust,while at the same time serving as an alternative for people who find that the classic thrust bothers their lower back. The B-stance hip thrust, then, is both a progression of and a substitute for the hip thrust, and one that allows you to work one side of your body at a time.
What Are B-Stance Hip Thrusts and What Are Their Benefits?
The B-stance hip thrust is sometimes called a “hip thrust with a kickstand,” or a “staggered-stance hip thrust,” because you use one leg for balance while the other one thrusts. Like the conventional bilateral hip thrust, you lie back on a bench (your body perpendicular to it), and raise your hips up to lockout, but in the B-stance thrust, you push with one foot while the heel of the other one stays grounded for extra support.
You see, most people start out with the regular bilateral hip thrust, where you work both glutes at the same time. Later, they try to progress to the single-leg hip thrust, which has you holding one leg up in the air while you thrust with the other one.The problem is, going from two-legged hip thrusts to single-leg thrusts is too big a leap for most people.It can be very hard to stabilize your hips and avoid twisting to one side when you’re doing true single-leg hip thrusts, and many people find that even their bodyweight alone is too difficult to control for more than a few reps.
That’s where the B-stance hip thrust comes in.It’s a nice intermediate exercise that’s more challenging than the basic two-legged hip thrust, but more stable than the single-leg hip thrust, so you can work one side at a time and build your balance without having to work too hard to keep your body aligned and on the bench.
In addition, because it’s a unilateral exercise, it allows you to isolate one glute at a time, which helps correct any imbalances you have between sides. Also, focusing on one muscle area at a time recruits more muscle in that area, which can help you add muscle size more easily.So, if you want a big, round butt, the single-leg hip thrust is a very good exercise choice.
Lastly, if you have lower-back pain, and you find that two-legged hip thrusts hurt to perform—maybe because you hyperextend your back at the top of the movement—you may find that the B-stance hip thrust is more comfortable to do. Because you’re essentially working one leg at a time, you can’t thrust as hard or as high, so it’s harder to overextend your range of motion. The single-leg hip thrust keeps the force where you want it—in your glutes—and out of your lower back.
The B-stance hip thrust builds off the conventional two-legged thrust. Once you’ve found a comfortable position for bilateral thrusts, it’s an easy transition to B-stance thrusts.
Step 1.Secure a bench against a wall or rack so it doesn’t slide; you can also weight it down with heavy dumbbells.Lie back on the bench, perpendicular to its length, so that the edge of the bench supports your body right under your shoulder blades.
If you’ve tried hip thrusts in the past and felt them too much in your lower back,you can try sliding your body up a little higher so the bench supports your mid-backrather than the bottom of your shoulder blades.
Now extend your hips to get into the top position of the double-leg hip thrust, so your shoulders, hips, and knees are aligned. Adjust your feet so that they’re directly below your knees. Now when you lower your hips down, your stance should be set so that you can thrust with the greatest range of motion and good form.
Feel free to play around with your foot position, angle, and spacing a little more, and do a few practice reps, until you find a setup that’s the most comfortable and lets you feel your glutes working more than any other muscle. This will be your normal bilateral hip thrust setup.
Step 2.Now you’ll transition from the bilateral hip thrust to the B-stance. Extend one leg forward so the heel lines up with the toes on the planted foot. This partially-extended leg is called your kickstand leg. Keep the toes on your kickstand leg elevated so the weight of your leg is resting on that heel.
Step 3.Tuck your chin to your chest, and make fists with each hand, driving the back of yourarmsinto the bench for stability. Tuck your tailbone under, and brace yourcore.Now drive through the foot of your planted leg to extend your hipsuntil they’re locked out and parallel to the floor. Push both knees out a bit as you extend your hips, and keep your ribs pulled down so you don’t bend at the spine.
Your shoulders, hips, and knees should form a straight line in the top position.
According to Bret Contreras, PhD, author ofGlute Laband arguably the world’s foremost expert on glute training, the kickstand leg should only apply about 30% of the forcein your B-stance thrust. Most of the work should be done by the leg that’s closest to your body. Remember, the kickstand leg is only supposed to provide some stability, so make your other leg’s glutes do the majority of the work.
Use your bodyweight alone until you’ve mastered the B-stance hip thrust technique. But when you think you’ve got it down, you can add a barbell to your lap for resistance, just as you do with the normal two-legged hip thrust. However: “I suspect that as you lift more weight,” Contreras writes in his book, “you will inevitably use your extended leg more to counterbalance the weight, which defeats the purpose of trying to load mostly one leg. So, as with the single-leg hip thrust, it’s better to keep the load light.” If you get to the point where B-stance hip thrusts for higher reps (north of, say, 10) don’t challenge you much anymore, it’s probably time to progress to the true single-leg hip thrust (with the non-working leg up in the air), which we explain in the B-Stance Hip Thrust Alternatives section below.
The B-stance hip thrust really works the gluteus maximus, which is your main butt cheek muscle, responsible for extending your hips. But it also trains the gluteus medius, which is on the side of your butt cheek, and the glute minimus, which lies under the glute medius. Both the medius and minimus work to stabilize the pelvis, so they will get trained by any variation of the hip thrust too.
While all variations of the hip thrust are fairly new exercises in thefitnessworld, research on them is mounting, and pointing to positive benefits both in terms of athleticism and glute muscle gains. A 2019trialfound thathip thrusting with a barbell improved subjects’ sprint performance.Meanwhile, in a landmark 2023study, subjects were divided into two groups, with one team training the hip thrust and the other doing the barbell backsquat—no other lower-body work was performed. After nine weeks, glute growth in both groups was roughly the same,indicating that the hip thrust is at least as good a glute exercise as the much beloved, age old, and tried-and-true squat.
Perhaps even more impressive, however, was another 2023studythat had two groups perform a full-body workout. One group did leg presses and stiff-legged deadlifts for their lower body in the session, while the other group did those two movements and then two sets of hip thrusts at the very end of the workout. Both groups saw gains. The non-thrusting group enjoyed a six percent increase in glute growth,but the ones who ended their workouts with thrusting grew their glutes by more than nine percent.
This gives us a little to think about. On the one hand, the subjects who hip thrusted did end up performing more work for their glutes than the other group did, which may account for their extra gains. However, you have to factor in that their hip thrusts were done dead last in the session, after they had trained both upper and lower body and accumulated a lot of fatigue.The body’s ability to recruit muscle fibers is greatly diminished for exercises that are done late in a workout—i.e., exercises done at the end of your workouts will never be as effective as those that are done at the beginning—so this suggests that the hip thrust may have outperformed the other glute exercises in the session (the leg press and stiff-legged dead), regardless of fatigue.
Note that all of the above research was done on the TWO-legged hip thrust, NOT the B-stance exercise,so it’s hard to say how B-stance thrusting compares to backsquats, single-leg squats, leg presses, deadlifts, or anything else. But, until further research emerges, it’s a good bet that any hip thrust variation is going to be a solid choice for building the glutes.
How Do B-Stance Hip Thrusts Compare To Other Hip Thrusts?
The B-stance hip thrust is essentially the middle man between the bilateral thrust and the single-leg hip thrust, helping you progress from the former to the latter. It won’t allow you to train as heavy as the more stable, two-legged thrust will, but the B-stance will help you to better isolate the glutes on one leg at a time,while providing enough stability for you to train hard and safely. It’s also likely safer for the lower back than the bilateral thrust, because it lessens the risk of hyperextending the spine when you lock your hips out.
Warm up and stretch out your glutes and hips prior to a B-stance hip thrust session with these moves, courtesy of Onnit-certified coach Eric Leija (@primal.swoledier). Do 2–4 sets each.
When you think you’ve got the B-stance hip thrust down, you can move up to the single-leg hip thrust, where you raise one leg in the air and work the other one without any support.
Single-leg Hip Thrust
Step 1. Set up as you did for the B-stance hip thrust but raise one leg off the floor entirely and bend that knee, bringing it toward your chest.
Step 2. Push your working foot into the floor and raise your hips until they’re roughly in line with your working knee and your shoulders. Remember to keep your ribs down and core braced.
If you want to isolate the glutes a little bit more, you can do a single-leg hip thrust motion on the floor, without a bench. This is known as a glute bridge. Bridging your hips up from the floor will decrease the range of motion some, but it will ensure that only your glutes do the work to move your hips (as opposed to thehamstrings, which do contribute a little bit to the hip thrust, while the quads kick in a little as well to extend the knee).
Luckily, we have a whole video tutorial on how to do thesingle-leg glute bridgein a separate article.
]]> https://www.onnit.com/blogs/the-edge/the-expert-s-guide-to-the-landmine-row-exercise2025-07-10T10:55:27-05:002025-08-14T14:14:32-05:00The Expert’s Guide To The Landmine Row ExerciseJeremy Gottlieb
CrossFitters call it a landmine row. Bodybuilders call it a T-bar row. But this row, by any other name, would still build back muscle and strength as sweet. Use this guide to learn all the different ways to row with a landmine to build complete back and latmassand strength.
What Is The Landmine Row and What Are Its Benefits?
The landmine row is a barbell rowing movement where one end of the barbell rests on the floor, or is anchored using a landmine apparatus, allowing you to row the bar in an arcing motion rather than straight up and down. There are many ways to row with this setup, and we’ll go over all of them in this article, but the most basic and popular version is tostraddle the bar and row it with both hands using a V-grip handle (the kind you see on cable machines).To bodybuilders, this is called a T-bar row, and it’s a great, old-school exercise for the back, and thelats specifically. (Some landmine machines provide barbells that have a handle fixed perpendicular to the bar, forming a T-shape, hence the name.)
While it’s very similar to the classic bent-over barbell row, the landmine row has some big advantages.“The arc that the bar travelsallows you to keep a more upright torso, which is easier on your lower back,”says Jonny Catanzano, an IFBB pro bodybuilder and physique coach (@jonnyelgato_ifbbpro). It also means that the weight will be closer to your center of gravity at the top of each rep, and that allows you to control it better, and even hold the top position longer than you could with a bent-over row, if you choose to. That can give you a better muscle contraction in your back, and makes the landmine row a good choice for hypertrophy (muscle-gain) training.
With one end of the bar fixed on the floor, the landmine—aka T-bar row—is also a more stable movement than a conventional barbell or dumbbell row, and thatallows you to liftheavier weights.Flip through old bodybuilding magazines or books and you’ll see many lifters hoisting hundreds of pounds on T-bar rows, butsuper heavy bent-over rows are less common. The landmine setup simply allows for heavier weights to be lifted in a safer, more user-friendly movement, so it’s arguably the better choice between the two barbell rowing movements for physique development.
Ideally, you’ll perform the landmine row using a landmine unit. They usually look like home plate (baseball) with a metal sleeve attached that swivels, but some have feet (like furniture) or are simply a sleeve that can attach to the base of a power rack or even fit inside the donut hole of a weight plate (this is shown above). You can see a number of landmine options onamazon.com.
Using a landmine will keep the end of the bar secure and stable, but it isn’t absolutely necessary to perform landmine training.A second option is to cut a hole in a tennis ball and ram the end of the bar in so that you have a cushion, and then wedge the bar into the corner of a room. At the very least, you can wrap a towel around the bar and push it into a corner (the towel will help protect the walls).
Now let’s discuss how to perform the classic landmine row/T-bar row.
Step 1.Grasp a V-grip handle—the kind you often see people do cable rows with. If you don’t have a V-grip, you can improvise one by attaching gymnastics rings or any other adjustable handles you can access. The point is only to have a comfortable, firm grip that allows your palms to face each other when you row (a neutral grip). Place the handle on the floor next to the front of the bar.
Straddle the bar with feet about shoulder width, facing away from the landmine, and hinge your hips back. Allow your knees to bend, and keep a long line from your head to your tailbone, until your torso is 30–45 degrees to the floor and you can reach the handle. Hook the handle underneath the barbell, close to end of the bar where you’ll load the plates. Pick the bar up off the floor and play around with your stance, torso height, and the distance between your feet and the front end of the bar until you feel balanced and stable with yourarmsfully extended.
Step 2.Keeping your back straight and flat, and yourcorebraced, row the bar until your back is fully contracted. Your elbows should come up close to your sides and your shoulder blades should squeeze together at the top. If the bar hits you in the groin, adjust your stance!
Step 3.Lower the bar until your arms are fully extended again, but don’t let the weight rest on the floor. Allow your shoulder blades to spread as you go down.
*Use 25-pound plates, or smaller.While it may be less efficient than loading the big 45s, smaller plates will allow you the greatest range of motion on the exercise. Bigger plates, on the other hand, will tend to bump into your chest and/or the floor, reducing the range you can train your muscles, and thereby making the exercise less effective.
“Think about driving with your elbows, rather than your hands,” says Catanzano. That will help you get the proper range of motion. “And be careful to keep a tight core.”As with a bent-over row, deadlift, or any other exercise that has you bending forward at the hips, you need toprotect your lower back at all times.Bracing your absand thinking “long spine” are essential. Catanzano also cautions against “ego lifting,” where you bounce the weight up and round your back on the way down for the sake of lifting heavier or getting more reps. Your hip and back position should remain the same the entire set; only your arms move.
Incidentally, if you’re in a gym that has a proper T-bar row (a handle that forms a T-shape), you can use that for your landmine rows too. The wider, palms-down grip will recruit more of your upper back and rear deltoids, while the landmine row with palms facing each other and elbows tight to your sides emphasizes the lat muscles.
It should be noted that holding the bent-over position tenses yourhamstringsisometrically as well. Probably not to the degree that it will buildhamstringsize, but don’t be surprised if you feel stronger and more stable on deadlifts, RDLs, or other hip hinge exercises after a few weeks of landmine rowing.
Single-ArmLandmine Row Vs. T-Bar Landmine Row Vs. Barbell Landmine Row
Just to reiterate (or, if you’ve been skimming the page and missed it), the T-bar row and landmine row are essentially the same exercise. If you use a T-bar, which allows you to raise your arms out wider so your palms are turned down,you’ll work a little more upper/middle back and rear deltoids than if you use a V-grip handle and row with your elbows close in(the latter emphasizes the lats). There are several other variations of the landmine row, including single-arm versions, which we’ll explore in the next section. Single-arm landmine rows allow you to isolate one side of the back at a time and can increase the range of motion you get, making them a good option for physique training. They also allow you to use your free hand to help brace your hips, which can add stability. You’ll have to use less overall weight when doing a single-arm row of any kind, but this can be an advantage if your lower back is recovering from injury and you don’t want to load it with a heavy bent-over exercise.
Landmine Row Alternatives
The landmine row can be done in different ways to suit your changing goals.
By stepping off to one side of the barbell, you can easily turn the landmine row into a unilateral exercise for the lats, similar to a dumbbell row.
Step 1.Set up as you did for the regular landmine row, but stand to one side of the bar and narrow your stance to between hip and shoulder width. Hinge your hips and grasp the bar with the hand nearest to it (grip it close to the end of the bar). Stand up with the bar, and reset your hinge so your torso is angled forward and your back is straight and flat.
Step 2.Row the bar, retracting your shoulder blade, and then lower it back, allowing your shoulders to spread. Avoid twisting your torso to either side. Keep your core braced and your shoulders square to the floor.
“You can adjust your position to affect the muscles in different ways,” says Catanzano. If you stand with your feet a little further forward so that you get into an even deeper hip hinge, and then lift the bar with your elbow out a little wider,you will shift the emphasis from the lats to your upper back.“If you set up to where your legs are straighter and your chest is a little lower, you can hit a little more lower lat.”
Standing perpendicular to the bar and rowing it with your elbow flared out really shifts the work from the lats to the upper back and rear delts. This version was popularized by the late bodybuilding coach John Meadows, and has therefore come to bear his name.
Step 1.Stand so that the end of the barbell points to your side and spread your feet shoulder-width apart, or stagger them—whichever feels more balanced and comfortable. Hinge at the hips and grasp the end of the bar with one hand. Since the sleeve where you load the plates is thick in diameter, it can be hard to hold onto—especially with sweaty hands—so considerusing lifting straps to reinforce your grip. Brace the elbow of your free arm against your leg for some extra stability.
Step 2.Row the bar, driving your elbow as high as you can. Again, avoid twisting and keep your shoulders square. Your upper arm should end up about 60 degrees from your side—much farther away than the landmine rows we’ve shown up to this point.
If the landmine row (any variation) has a weak link, it’s that it requires a lot of stability to perform. Bracing your core and torso in the bent-over position takes a lot of energy and spreads the muscle tension over your whole body.That’s cool if your goal is to build total-body strength with a movement that works a lot of muscle at once, but it’s a bit limiting if you want to make your back muscles workto the max and get the best stimulus for growth. In the latter case, Catanzano recommends pulling a bench over to rest your free hand and knee on while you perform the Meadows row. “The stability the bench provides will allow you to lift heavier loads,” says Catanzano, “and that will recruit more muscle fibers in your back.”
Catanzano has one other minor gripe with the landmine row, arguing that, as you row the bar closer to your body, your mechanical advantage increases and the weight gets easier to lift. This reduces the tension on the muscles. “In a muscle-building scenario,” he says, “we ideally want the resistance to stay the same or get even heavier throughout the range.” The fix is as simple as adding a resistance band to the bar.
Step 1.Set up a bench as shown for the bench-supported landmine row, and place a heavy dumbbell on the floor next to it. Wrap a mini band around the dumbbell a few times so there’s only a foot or two of slack end. Loop the end of the band over the sleeve of the barbell.
Step 2.Row the bar in the Meadows row style explained above. Because the band will be pulling the bar back down, and the tension increases the higher you row it, you’ll have to row faster and more powerfully. This will ensure that your back is giving its all throughout the exercise.
]]> https://www.onnit.com/blogs/the-edge/how-to-lat-spread-like-a-bodybuilder2025-07-10T10:55:27-05:002025-08-14T11:13:40-05:00How To Lat Spread Like A BodybuilderJeremy Gottlieb
If there’s one set of muscles that always seems to lag behind the others on gym rats everywhere, it’s the back—specifically, the lats. (OK, the calves too, but that’s the subject of another article.) Some people claim that they just can’t feel their lats working in the same way they do their pecs orbiceps, so they can never fully stimulate them. For others, simply not being able to see the lats as clearly in the mirror has caused them to neglect these muscles.
That’s a bummer, because the lats are essential for a physique that looks muscular and lean. When you flex them,they make your waist look smaller and your shoulders look wider, giving the impression of a powerful, even super-heroic upper body.
Whether you’re a regular guy or gal who wants to sculpt a more balanced physique, or a die-hard lifter who has aspirations of one day competing in a physique show (Bodybuilding, Figure, Classic Physique, etc.), we’ll help you get your back training on track, so that when you spread your lats, you look like you’ve sprouted wings!
What Is A Lat Spread and Why Do People Do It?
The lat spread is a traditional bodybuilding pose used in competition to highlight the width and thickness of the competitor’s latissimus dorsi muscles. The lats, if you weren’t sure, are the big slabs of muscle that run down the sides of your back. They originate on the lower three or four ribs, lower six thoracic vertebrae, and iliac crest (the top border of the pelvis), and insert on the humerus (upper-armbone) just below the shoulder joint.
In a physique contest, the athlete is required to display their lats in two distinct lat poses—the front and rear lat spread. (The competitor must show the lats facing the judges/audience, as well as facing away, so the dimensions of the muscles can be appraised.) The term “spread” refers to how the lats appear when they’re flexed in a dramatic fashion. When well-developed, the lats appear to spread out from the person’s torso, andthe effect is something like a bird spreading its wings—the back looks so wide and dense that you can see it from the front!
Of course, if you’re not planning on posing your physique on stage for sport, you don’t absolutely need to know the technique of flexing the lats aesthetically. But many people like to motivate themselves to get in their best shape by scheduling a photo shoot or other event where they’ll have pictures taken to commemorate their condition, and in that case, understanding how to show off your lats to their best advantage will help them get the credit they deserve, and prove that you put some serious time and dedication into building them. Scroll down for a full tutorial on how to pose your lats effectively when that time comes.
Exercises To Build Stronger Lats
The lats work to pull thearmsfrom overhead to down to your sides, extending your shoulder joints. They’re the main upper-body muscles involved in climbing and swimming. For ages, the go-to lat-building exercises for bodybuilders and other weight-training populations alike have been theclassic pullup, chinup, and lat-pulldown, along withvarious types of rows. These are all great options, but if you’ve lived on a steady diet of thestandard lat exercisesfor years and still feel like your wings haven’t spread, we’ve got some variations to show you that may help you target your lats a little better.
These come by way of Jonny Catanzano, an IFBB Classic Physique pro bodybuilder and coach to physique competitors at all levels (@jonnyelgato_ifbbproand@tailoredhealthcoachingon Instagram).
Pulling with your palms facing each other (a neutral grip) helps you to keep your arms closer to your sides during a pulldown or row. This in turn helps tofocusthe exercise on the lat muscles, as opposed to the muscles of the upper back. Furthermore, doing the movement with your torso supported on a bench makes the exercise more stable,so your muscles can focus purely on lifting the weight rather than trying to brace your body position at the same time.
“This type of pulldown primarily hits the lower lat fibers, which really contributes to the V-taper,” says Catanzano, referring to the impression the lats give as they descend from their widest point beneath your shoulders to their insertion at your pelvis. The lower fibers are usually underdeveloped relative to the rest of the lats, and adding size to that area will improve the cobra-hood effect of your lats when you spread them. In other words, it will make your waist look smaller while your back looks broad.
Step 1.Set an adjustable bench on a 45–60-degree angle and place it in front of a cable station with a high pulley. If the station offers dual pulleys, attach single-grip handles to them. But if it’s a single pulley, attach a lat-pulldown bar and then attach some single-grip handles to the bar at about shoulder width (we usedAngles90 Gripsin the video, another great option).
Step 2.Rest your chest on the bench and grasp the handles with palms facing each other (inward). Pull the handles down until your elbows reach your hips. Lower the weight with control.
Be careful not to pull the handles too far back—go until your arms are in line with your body. Pulling further than that can shift the emphasis to the upper back, and we want to keep it on your lats.
You’re almost certainly familiar with the close-grip pulldown done with a V-grip handle attachment, butCatanzano recommends using two separate single-grip handles instead(preferably the type with soft, spongy material on the handle). These are the kind you’re probably used to using for chest flyes and lateral raises.
The single-grip handles will allow you to move your hands further apart as you pull the cable down, and that means more range of motion, so you can get your elbows closer to your hips for a full contraction of the lower lats.
Step 1.Attach the two handles to the pulley of a lat-pulldown station and grasp them with a neutral grip. Secure your knees under the pad so your lower body is braced. Lean back a bit so you feel a stretch on your lower lats, but try not to arch your back.
Step 2.Pull the handles down until your elbows line up with your hips. Lower the weight with control.
This one hits the lats but puts more emphasis on the rhomboids in the middle back, which is literally the centerpiece of a rear lat-spread pose. “Developing this area will add to the overall width of your back,” says Catanzano. As with the reverse-incline pulldown, using a bench takes the lower back out of the movement and reduces your ability to cheat or use momentum, so the target muscles get worked in near isolation.
Step 1.Set a bench to a 45-degree angle and grasp dumbbells. Rest your chest against the bench and allow your shoulder blades to spread apart at the bottom of the movement.
Step 2.Row the weights to your sides with your elbows pointing at about 45 degrees from your torso. Squeeze your shoulder blades together at the top. You may want to use wrist straps to reinforce your grip, as your hands will likelytirebefore your back does.
Done standing upright, shrugging motions work the uppertraps, but when done with your chest supported, they hit more of the trap fibers, along with the rest of the upper back. Like the incline rows above, this movement will widen and thicken the middle part of the back, which contributes to a powerful lat spread viewed from behind.
Step 1.Set up as you would for the incline row and simply retract your shoulder blades, squeezing them together at the top of the movement. Keep your elbows straight. Lower the weights with control, and allow your shoulder blades to spread apart at the bottom.
Incidentally, Kelso shrugs can be done at the end of a set of incline rows to finish off the upper back. In other words, do a set of rows to failure, and when you can’t perform another full-range row anymore, simply retract your shoulders for a few reps of shrugs to failure.
“Pullups with a neutral grip almost force you to keep your elbows a little in front of your body,” says Catanzano, “which is where your lats are more active than they would be pulling with your elbows flared out to the sides.”
Step 1.Hang from a bar using a neutral grip. If your chinup bar doesn’t allow that, attach single-grip handles as explained in the close-grip pulldown above. Your hands should be about shoulder-width apart.
Step 2.Pull yourself up until your chin is over the bar and your elbows are in line with your hips. Lower your body down with control.
If that’s too hard, attach an exercise band to the bar and stand on the free loop. The band’s tension will unload some of your bodyweight so that you can get more reps.
Sample Workout For a Better Lat Spread
Catanzano offers the following routine to bring up your lats andimprove your lat spread. Perform it once every five to seven days. Rest 2–3 minutes between sets.Note that the neutral-grip pullups and Kelso shrugs are paired, so perform them in alternating fashion,doing a set of the pullup and then a set of the shrug without rest in between. Then rest 3 minutes before repeating until all sets are complete for the pair.
1. Reverse-Incline Lat Pulldown
Sets: 4 Reps: 10–12
2. Close-Grip Cable Pulldown
Sets: 4 Reps: 10–12
3A. Neutral-Grip Pullup
Sets: 4 Reps: 10
3B. Kelso Shrug
Sets: 4 Reps: 12
4. Reverse-Incline Dumbbell Row
Sets: 4 Reps: 12
A Lat Flexing and Spreading Tutorial
Once you’ve built a substantial set of lats, you can work on posing them effectively. Catanzano, who coaches posing as well as training for physique competitors, offers this three-step guide to mastering the lat spread.
(See04:09in the video for Catanzano’s demonstration)
1. Squeeze your shoulder blades together and place your fists on your hips.“Imagine holding a pencil between your shoulder blades,” says Catanzano. That’s how far back you want to pull your shoulders.
2. Drive your shoulders down.The movement is the opposite of a shrug, so get your shoulders as far south of your ears as you can. You should feel your lats get tense.
3. While keeping your shoulders down and your lats tense, roll your shoulders forwardand slightly upward. Your chest and ribcage should lift in front of you, “nice and high and proud,” says Catanzano. Think about spreading your lats apart as wide as you can.
Catanzano warns that you need to havegood shoulder mobilityin order to spread your lats impressively. You should be able to raise your shoulders up and down and retract and protract them through a large range of motion—and pain-free. If you can’t, then you won’t be able to achieve the positions that showcase the lats to their fullest potential. If you need work on shoulder mobility, start with this article,Shoulder Mobility for Strength and Injury Prevention.
]]> https://www.onnit.com/blogs/the-edge/basic-to-beast-complete-bodyweight-workout-program2025-07-10T10:55:26-05:002025-08-14T17:16:01-05:00Basic to Beast Complete Bodyweight Workout ProgramJeremy GottliebToo many trainees and athletes are quick to overlook (and sometimes forget) about thebodyweight workout. Even so, you can become very strong when training with just your bodyweight.
Bodyweight trainingis all about the basics and the truth is, no matter how advanced you are, your body will always fall back on its base level of strength. Your overall bodyweight strength will always serve as the foundation and bridge to your other strengths.
Obviously there are hundreds, if not thousands of different variations for each of the basic bodyweight training movements out there, but no matter what, all of them come back to being able to perform the basics.
Bodyweight training serves as your foundation and is the driver of all of your other strengths and skills. Strength tools such askettlebells, dumbbells,barbells, andsandbagsare useless without having the proper bodyweight strength and conditioning foundation.
One of my biggest pet peeves is when young athletes or new clients come into my gym and they get frustrated when I don’t quickly put them under a heavy barbell to see how much weight they can lift.
Most of my clients (and even advanced athletes) have HORRIBLE form and technique when they first come in; this is totally normal, and quite frankly, all too common.
I’ve always made it a point to go bodyweight training first and to make my clients prove to me and themselves that they are strong enough to handle their own bodyweight correctly and efficiently before using other strength tools extensively.
Bodyweight Workout Program for Strength and Conditioning: Bodyweight Standard
Duration:30-40 minutes Frequency:3x per week Exercise Type:Strength training Intensity:Steady, deliberate Repetitions:Varies by workout Rest:As needed
The rule of thumb I have for my clients and athletes is that they have a solid level of bodyweight strength before they go on to any external types of resistance. You should easily be able to perform the following:
Standing Poses – Build leg strength as well as flexibility in the hips andhamstrings. 2. 25 “Ass to Grass” Bodyweight Squats. 3. 5 Chest-to-Bar Pull Ups (any variation). 4. 25 Chest-to-Deck Push Ups 5. 25 Lunges per Leg Non-Stop. 6. 3 Handstand Push Ups OR 5 Pike Presses. 7. 20 Recline Rows. 8. 10 Hanging Knee Tucks. 9. 90 sec Basic Plank Hold.
The Bodyweight Gauntlet
One of the best types of tests that I like to put my athletes and clients through challenge their general bodyweight conditioning and strength levels is the Bodyweight Gauntlet.
I’ve always been a huge believer of training aggressively and pushing your body to the limit in order to take your results to the next level. Yes, there are progressions to follow, but the bottom line is that in order to get the best results possible, you must attack your workouts relentlessly.
Basics are always important, but intensity andfocusshould be number one over everything else!
The Bodyweight Gauntlet features four essential movements:
1. Push Ups – any variation
2. Strict Pull Ups – all grips and variations
3. Squats – ass to grass only!
4. Burpees – chest to floor with a jump at the top
Perform an all out, three minute set of each exercise and keep track of all of your reps.
For a beginner, this can get brutal real quick. As a person progresses overtime, they’ll start to see the differences in strength and overall conditioning quickly.
I don’t recommend an absolute beginner to take this on. I’ll usually have a complete beginner progress through each of the four basic movements first to get a solid base of bodyweight strength and conditioning built up before I let them loose on the Bodyweight Gauntlet.
While this may look like nothing more than a simple conditioning test, the real key to success is having a solid base of bodyweight strength to begin with. From there, it’s all about improving on this strength and increasing your efficiency of each movement over time.
Try it out and take the test to see where you’re at. Are you a BEASTor just a Proven Soldier? Leave your comments and score!
Beyond Bodyweight Training Basics
Now, beyond the basics of bodyweight training, you must understand that in order to get stronger with your own bodyweight, you must start to progress in difficulty.
Being able to bang out squats, push-ups, lunges, and pull-ups by the dozens or even hundreds is pretty good, but to what point? This will indeed help you achieve more conditioning-wise, but overtime, you won’t get that much stronger maximum strength-wise.
In order for your training to be truly effective in helping you gain more strength, you must start to build more strength with more progressed movements over time.
A great way to enhance your training and make it more advanced is to make it explosive by increasing the speed of the movement.
While this won’t work strength directly, it will help the body move with more force and speed which will ultimately crossover into helping you increase in overall strength. The faster you can move, the better.
One of my main coaching cues to my athletes and clients is to always be as explosive as possible with your movements during the concentric phase. I want my people to be thinking about lifting fast, never slow.
Obviously, I want people to be under control during the eccentric portion of the movement, but when it’s time to contract, you must contract with speed!
An example of this would be the push-up. Imagine yourself at the top of the movement; as you descend down into the push-up, you want to keep your whole body tight from head to toe (coreespecially).
A key point is that your whole body should work as one solid unit, never in parts, so keep your whole body engaged throughout the movement. As you come down you want to be in control.
You don’t have to go slow, but make sure to be under control. This is the eccentric portion of the movement. Now, as you come back up, you want to imagine moving your body as fast and as explosively as possible.
This is the concentric portion of the movement and you always want to focus on moving as fast as possible here.
Once you start to really slow down with your movement and you can’t move as fast as you know you can, (i.e. you start to grind out your reps), that’s a good point to stop your set.
This is known as “submax” training and this is a very important key to focus on to help increase bodyweight strength overtime. I refer to this point a lot when training push ups, pull ups, and rows.
I see too many people do these movements to failure, and when you train like this all the time, you fry out your central nervous system.
To make a long story short, it takes your central nervous system a lot longer to recover than it does for your muscles, so whenever you train to failure, it’s going to take your body a lot longer to recover from your workout.
Recovery and Bodyweight Training
Getting stronger requires your body to recover, and if you’re always cashed out from taking all of your movements to clear failure, you’ll be struggling at getting stronger, faster.
The overall point of this is to focus on being FAST with your movements and avoiding taking your sets to failure most of the time. Be efficient and crisp with your movements and you’ll continue to progress. Just think: quality over quantity.
Another way to increase your overall strength is to use advanced variations of movements. Obviously, if you’re not someone who can do advanced movements, you need to work through your progressions.
When it comes to building up more strength via bodyweight movements, it should be a no-brainer to make the movement harder.
One of the simplest ways to make a bodyweight movement more advanced is by moving the positioning of your feet or hands.
I’ll use the push up as an example again: a simple beginner’s push up would be your regular push up from the floor, the next level would be a push up with your feet elevated on a box.
You could also implement the use of asuspension trainerand do push ups while holding the straps or having your feet suspended in the straps. You could also do extended range of motion push ups with your hands on medicine balls or boxes.
There’s pretty much a limitless amount of things you can do to progress.
You can implement speed and power into the mix by doing explosive plyometric push-ups which would be another way to make your normal push-ups even harder.
One of the top progressions would be to totally remove the oppositearmout of play and perform single arm push ups.
The point is, there are literally thousands of ways you could progress your different bodyweight training movements to make them harder. The harder you make them, the more strength you’ll build up in the end.
Switching over to the lower body, another example would besquatprogressions. Obviously, you would start off with your basic bodyweight squat, making sure to always get your “ass to the grass” first and then progress from there.
One of the first things you could do to make it more difficult is to add an explosive jump at the end of your squat. This would be another example of manipulating the speed of your movement.
You could also hold your hands overhead in a prisoner position or an overhead position to make it more difficult. To take things up another notch, implement the single leg squat (also known as a pistol squat).
Bodyweight Standard Tips and Tricks
1. Focus On The Basics First
Master your basic squat, push up, pull up, row, lunge, and your abilities to sprint, jump, climb, and crawl. Once you get those down, you can then move on to the more advanced movements.
2. Train FAST
Focus on performing your movements as crisp, clean, and explosive as possible.
3. Avoid Failure
Grinding out reps by going to complete failure will have you regressing in the long run. Leave a few reps left in your tank each set. This will keep you fresh and allow you to train aggressively more often.
4. In Reference To The Bodyweight Gauntlet
Make sure you only do this type of challenge every 4-6 weeks since you will be pushing yourself beyond failure when doing so. Doing the Bodyweight Gauntlet or a similar type of extreme workout too much and too often will result in a decrease in overall results.
How To Stretch For A Bodyweight Workout
Follow the videos below for routines to warm up your entire body before a workout. For more tips on mobility and stretching, follow Onnit’s Durability Coach, Cristian Plascencia, on Instagram (@cristian_thedurableathlete).
Bodyweight Exercises and Workouts
The following are three different levels of workouts: Beginner A and B, Intermediate A and B, and Advanced A and B. The workouts are progressive in nature, so if you are a beginner, you would want to start on the beginner workouts A and B and then progress to the intermediates then hit up the advanced.
The workouts are set up in such a way that you’ll first hit an explosive/plyo-type movement to get the body moving fast, hyping it up for the rest of the workout.
From there, you’ll hit a few non-combative supersets using a mixture of upper and lower body strength movements, then you’ll end your sessions off with some core work. The advanced workouts end off with a short conditioning interval via a Tabata set.
If you wanted to use these workouts as a whole program, spend four weeks on each level like this:
Week 1 – A, B, A Week 2 – B, A, B Week 3 – A, B, A Week 4 – B, A, B
With this, you would hit each workout six times, giving you plenty of time to increase efficiency on the different movements contained in each workout. After the fourth week, I would take an off-week to allow the body to recover, then come back with the next set of workouts at the next level.
]]> https://www.onnit.com/blogs/the-edge/3-dumbbell-chest-workouts-and-top-6-exercises-to-get-ripped2025-07-10T10:55:26-05:002025-08-15T06:38:14-05:003 Dumbbell Chest Workouts and Top 6 Exercises to Get RippedJeremy GottliebGym wisdom suggests that building a big chest is all about slapping as much weight as you can find on a barbell and bench-pressing it till you’re blue in the face.
But if benching hurts your shoulders, you train at home without a trusty spotter, or you’ve found that barbell training just doesn’t give you a bigger chest, dumbbell work is the answer.In this article, we will guide you through some of the best dumbbell chest exercises and chest workouts with dumbbells.
Key Takeaways
1. Dumbbell chest exercises are vitalfor building a strong chest, especially if barbell training causes shoulder discomfort, or you train without a spotter.
2. Dumbbell workouts offer a greater stabilitychallengeand balanced muscle development compared to barbells, reducing the risk of joint stress and injury.
3. Dumbbells allow for a wider range of motion,maximizing muscle activation and promoting muscle growth.
4. Dumbbell training enables customization of exercisesto fit individual body mechanics, enhancing effectiveness and safety during workouts.
How To Build Your Chest Muscles With Dumbbell Exercises
Dumbbell training may not be as sexy as loading up the bar till it bends, but for most people, it’s actually a better road to a bigger, stronger, set of pecs, and offers less risk of injury to boot. In this comparison article, barbells vs dumbbells, we’ve explained the major differences between working out with both.
Now, we’re about to show you our recommended top 6 best dumbbell exercises and 3 workouts to develop your chest, top to bottom.
What Are The Most Effective Dumbbell Chest Exercises You Can Do?
Any chest move that you can do with a barbell can be replicated with dumbbells. Here are our favorites—many of them classic moves you’re probably already familiar with, but with a clever twist that elicits even greater gains—courtesy of Dr. John Rusin, a strength and conditioning coach and author of Functional Hypertrophy Training (available atdrjohnrusin.com). We categorized them by the area of the chest they emphasize most.
Step 1:Elevate one end of a flat exercise bench on two or three heavy barbell plates, or a small box or step. The angle should ideally be 30 degrees or less.
Step 2:Lie back on the bench, your head at the elevated end, holding two dumbbells atarm’s length above your chest.
Step 3:Slowly bend your elbows and pull your shoulder blades together on the bench, lowering the dumbbells until they are close to the sides of your chest. In the down position, your elbows should be at a 45-degree angle to your torso—not straight out to the sides.
Step 4:Pause in the stretched position, and then press the dumbbells back up, flexing your chest as you push.
Standard incline bench presses put your hips in a flexed—or bent—position, says Rusin. This basically takes your entire lower body out of the exercise, which isn’t always what you want. By elevating the bench just a little bit, you can incorporate leg drive into the movement in the same way you do (or should) perform a flat barbell bench press.This effectively turns the move into a full-body exercise, which will allow you to handle more weight.
The incline also works the pec fibers that attach to the clavicle more strongly.
Step 1:Elevate one end of a flat exercise bench on two or three heavy barbell plates (the same as you did for incline press described above).
Step 2:Lie back on the bench with your head at the elevated end, holding two medium-heavy dumbbells at arm’s length above your chest, palms facing inward.
Step 3:Slowly lower the dumbbells directly out to the sides, simultaneously bending your elbows and squeezing your shoulder blades together until your chest is comfortably stretched and your elbows are at about a 90-degree angle. (If you experience shoulder pain in the fully stretched position, limit the range of motion).
Step 4:Reverse the movement, contracting your pecs as you straighten yourarmsfully, until you are back in the starting position.
Standard flyes are great for building muscle—but brutal on the shoulders. Bend the arms as you lower the weights, explains Rusin, and you maintain the stress on the pecs while taking it off the shoulder joints.Learn more effective exercises tailored to the upper pecs with ourupper chest workoutarticle.
Step 1: Lie back on a flat exercise bench holding two heavy dumbbells on your chest, palms facing one another.
Step 2:Press the dumbbells together in the center of your chest (this is your starting position).
Step 3: Keeping the dumbbells pressed together, slowly push them to arm’s length over your chest. Pause for a moment, squeezing your chest muscles.
Step 4: Slowly reverse the movement, returning to the starting position.
Crush presses force the pecs to contract hard in a shortened position. This makes for a good contrast to flyes and dumbbell pressing movements—where the weights lower past your chest, emphasizing a stretch on the muscles. Squeeze hard at the top on crush presses and you’ll get a similar effect to cable crossovers, without needing two fancy cable stations to do it.
For an even better contraction, attach bands to the dumbbells so they’re pulling the weights away from each other when you do the exercise. You’ll have to work much harder to maintain the squeeze. The crush press with dumbbells is one of the most effective exercises for targeting the inner chest during a workout with dumbbells. Explore other inner-chest training options with our comprehensive guide in this inner chest workout article.
Step 1:Lie back on an exercise bench holding two dumbbells at arm’s length above your chest, palms facing inward. This is your starting position.
Step 2: Slowly lower the dumbbells directly out to the sides, simultaneously bending your elbows and squeezing your shoulder blades together, until your chest is comfortably stretched and your elbows are at about a 90-degree angle. (If you experience shoulder pain in the fully stretched position, limit the range of motion).
Step 3: Reverse the movement, contracting your pecs as you straighten your arms fully, until you are back in the starting position.
Flyes take the triceps virtually out of the equation, largely isolating the pecs and working them hardest in the fully stretched position—where the maximum amount of muscle fibers can be recruited.
Step 1:Lie on your back on the floor, holding two dumbbells at arm’s length over your chest. You can either lie back from a sitting position while holding the dumbbells, or have a partner hand them to you.
Step 2: Rotate your wrists so that the thumb sides of your hands are closer together than the pinky sides (as if holding a steering wheel at 10 and two o’clock). This is your starting position.
Step 3: Slowly lower the weights, keeping your elbows close to your sides, until your triceps lightly contact the floor.
Step 4: Press the weights back to the starting position.
The floor press works similarly to the crush press, working the pecs when they’re in a shortened position. Because the range of motion is abbreviated, resulting in little stretch on the shoulders, they’re a good option for people with shoulder pain.
Step 1:Elevate one end of a flat exercise bench on two or three heavy barbell plates.
Step 2: Lie back on the bench, your head at the lower end, holding two heavy dumbbells at arm’s length above your chest. Place your feet flat on the bench.
Step 3: Slowly bend your elbows and pull your shoulder blades together on the bench, lowering the dumbbells until they are close to the sides of your chest.
Step 4: Pause in the stretched position, and then press the dumbbells back to the starting position.
The slight decline works the pecs with the shoulders in a centrated—or neutral—position. This balanced position permits maximal drive from your muscles, while the decline angle recruits more of the muscle fibers that connect to the sternum (targeting the lower chest). Want to load up on a chest exercise? Choose this one. It’s safer than doing flat or incline presses with heavy weight.
What Is The Best Dumbbell Chest Workout?
If you’re ready to build some serious pressing strength and size in your chest, try one of the suggested workouts below. Each is designed to suit a specific goal and experience level. If you are looking to build up your arms and chest in the same session, make sure to check out our article chest and tricep workout.
Dumbbell Chest Workout For Beginners
If you’re fairly new to the iron game and are looking for some basic dumbbell chest exercise, start with this simple, two-move chest workout with dumbbells. You can do it as part of a full-body workout or upper-body day. On the pushup, perform each rep at a deliberate pace, stopping before you reach failure on your first set. On the final effort, get as many reps as you can. Then hit the second move, leaving a couple of reps in the tank on all your sets. Perform this workout up to three times a week on nonconsecutive days.
1. Pushup
Sets:2 Reps: Stop two reps shy of failure on the first set; last set, as many reps as possible
Step 1: Place your hands on the floor, or on a stable elevated surface (a bench, box, or table work well—the higher the surface the easier the exercise). Set them slightly wider than shoulder width and do the same with your feet. Your arms should be locked out and your body straight from your heels to the top of your head. Tuck your tailbone under, brace your core, and squeeze your glutes, so your pelvis is perpendicular to the floor.
Step 2: Keeping your body straight and your head in a neutral position, simultaneously bend your arms and retract your shoulder blades until your chest is just above the floor—or as far as you can go without losing good form.
Step 3: Press back up, spreading your shoulder blades at the top of the movement. (Think of yourself as pushing through the floor.)
2. Incline Fly-Press
Sets:2–3 Reps:12–15
See the directions above.
Dumbbell Chest Workout For Intermediates
If you’ve been hitting the weights consistently for at least six months, this trifecta of pec punishers will nudge you up another level. Use it in place of the chest day you were doing, or add it to your program for extra work (spaced out a few days from any other chest work you do). Rest about 2 minutes between sets of the first move, 60 seconds between sets of the second, and 30–45 seconds between sets of the third.On each exercise, choose weights that allow you to complete the lowest number of reps listed. Over time, work up to completing the highest number of reps listed for every set before increasing the weight. Perform this chest dumbbell workout twice a week on nonconsecutive days.
1. Slight-Incline Dumbbell Press
Sets: 4–5Reps: 4–6
See the directions above.
2. Press-Fly
Sets: 2–3 Reps:8–12
See the directions above.
3. 45-Degree Dumbbell Floor Press
Sets: 1–2 Reps: 15–20
See the directions above.This exercise is easily performed in the comfort of your home, and you can discover more home-suitable exercises by reading our article about chest workouts at home.
Advanced Dumbbell Chest Workout
Ready to sear your chest? This workout will do it. Use it in place of your current chest day and limit any other chest training you do in the same week to ensure recovery. Load up on the decline presses—they’re a serious strength builder—and use progressively lighter weights as the workout goes on and fatigue sets in. Finish with two sets of old-fashioned pushups, which will feel shockingly difficult after the other moves.
1. Feet Up, Slight-Decline Dumbbell Bench Press
Sets:4-5 Reps: 3–5
See the directions above.
2. Incline Fly-Press Hybrid
Sets: 3–4 Reps:6–10
See the directions above.
3. Crush Press
Sets:2–3 Reps: 12–15
See the directions above.
4. Pushup
Sets: 2 Reps:As many reps as possible
See the directions above. If you can do more than 20 reps, wrap an elastic exercise band around your back and grasp an end in each hand for extra resistance. If you want info on how to maximize gains with the crush press, check out our article on the dumbbell hex press exercise (the same movement by a different name).
How To Stretch Before A Dumbbell Chest Workout?
We know you’re anxious to get to the gym and start trying all these moves out… but before you start training your pecs, please make sure to warm up your chest, shoulders, and elbows. These chest warm up exercises from Onnit’s former Chief Fitness Officer, John Wolf, will help you prepare properly for the chest workouts that follow. (See the video above.)
What Are The Benefits of Working Out My Chest With Dumbbells?
“The second you put two weights into your hands, it becomes doubly hard to stabilize them,” says Dr. John Rusin, a strength and conditioning coach and author ofFunctional Hypertrophy Training(available atdrjohnrusin.com). That’s a good thing, he says: the smaller muscles in your shoulder joints learn to stabilize those joints, while the big muscles (the pecs, mainly) work harder to control the weights, preventing them from drifting in all directions. Dumbbell training offers the following benefits for chest gains.
#1. Dumbbells Allow a Greater Range of Motion
When you perform bench presses with a barbell, the bar hits your chest before your pectoral muscles achieve a full stretch. That’s not so bad if your goal is to press the biggest weight you can. But if you want to gain size and athletic performance, you may be better off with dumbbells, which allow you to lower the weights past chest level—maximally stretching the pecs and activating more muscle fibers. Astudyfrom theJournal of Strength and Conditioning Researchsuggests that larger ranges of motion lead to more muscle growth.
#2. Dumbbells Build More Stability
Yes, they’re harder to control than a barbell or machine handle, but that’s kind of the point. Your arms may shake a bit when you’re doing a dumbbell bench press or flye for the first time, or the first time in a long time, but that’s because your muscles are learning to stabilize your shoulder joints while they’re producing force. This is helpful for making you functionally stronger in the long run, so your muscles can produce force under various conditions—not just when the object they’re pushing against is perfectly balanced or moving in a straight line.
#3. Dumbbells Place Less Stress on Your Joints.
Funny thing about the human body: it only looks symmetrical. In fact, your shoulders, hips, wrists and other joints are all slightly different from one side to the other. So, when you force the body to move with perfect symmetry—as when you lower an evenly-weighted bar directly to the middle of your chest—one side will always take on a little more of the stress than the other. Do this often enough, and the joints on that side will start to complain.
Dumbbells allow both sides of your body to find their optimal path when performing an exercise. Your wrists are free to rotate, and your elbows and shoulders can travel along the path that’s most comfortable for them, essentially customizing the exercise for your body. That places the stress of the exercise right where it belongs—in your muscles, and not your joints.
#4. Dumbbells Give you Balanced Development and Strength.
This builds on our last point. You may feel like your right and left arm push with equal force on the barbell bench press, but humans are very good at compensating—throwing a little more stress onto their stronger side while favoring their weaker one. That’s not possible with dumbbells: your right and left sides have to stabilize and push with equal force—and if one side lags behind, you feel it immediately. This ensures that you never push a set farther than your weaker side can handle. Eventually, the strength on your two sides should roughly even out. And if you need extra work to bring up the weaker side, dumbbells make doing a few more reps or sets with it simple to do.
#5. Dumbbells Work the Pecs Harder.
Bench-press a pair of dumbbells and you’ll feel that the chest muscles have to contract at the top of the movement to prevent the weights from drifting outward. That’s not something you need to worry about when your hands are connected by a steel bar. A 2017studyfound that dumbbell bench presses activate the pectoralis major—the impressive slab that makes up most of the chest musculature—more effectively than both the barbell bench press and the Smith machine bench press.
#6. Dumbbells Are Safer
We all know somebody who’s gotten trapped under a barbell when he couldn’t press it back up (you probably see him in the mirror every day). When you train at home, alone, such accidents can be extremely dangerous, so dumbbells are the better equipment choice for solo chest training. If your muscles give out sooner than you expect, you can easily drop the weights to the floor and live to lift another day.
What Kind of Dumbbells Should I Buy?
If you’re tired of schlepping to the gym and are ready to build a weight room of your own at home, dumbbells should be one of your first buys. You basically have two choices in the dumbbell market:
1) Adjustable dumbbells.Plates can be added and held on with collars, or the turn of a dial or lever.
2) Fixed dumbbells.The weight is secured to the handle. This means you’ll need multiple pairs of dumbbells to cover an array of weight increments.
While fixed-weight dumbbells are inexpensive, indestructible, and have a nice old-school vibe to them (your grandfather probably had a pair), they’re not all that practical. If you work out at home, you’ll need at least three pairs (something that feels light, medium, and heavy) right off the bat, plus new ones whenever you get too strong for the old models. Over time, you’ll be tripping over dumbbells, and wondering why you didn’t shell out a little more for the adjustable type up front.
But, if you like the real-gym feel of one-piece dumbbells, and money and space are no object, it’s hard to beatCAP Barbell Rubber-Coated Hex Dumbbells, which feel great in your hands and won’t nick up your flooring if you drop them.You’ll pay about 25 bucks for a pair of 10-pounders, 60 bucks for two 25-pounders, and 110 for a pair of 45s.
With adjustable dumbbells, you’ll save money in the long run, and space right away.PowerBlocks($160 per bell for the Elite model, adjustable from 5–50 pounds in 2.5 or 5-pound increments)—are industry standard, and easy to use after some practice shifting the weight around. Known as selectorized dumbbells,the handles sit in the center of square-shaped plates, and you can load and unload them quickly with the flip of a lever.Try a pair before you buy though, as some people find the handgrips a little awkward.
Another adjustable option isBowflex Selectech Dumbbells, which range in weight from 5 to 52 pounds in 2.5 or 5–pound increments. They work similarly to the PowerBlocks and they’re about as pricy (you’ll pay around 300 dollars for a pair), but are a little easier to use and feel better in your hands.
If you’re after a classic strongman feel, and don’t feel like plopping down three bills for hand weights, you can’t beat a pair ofYork Fitness Cast Iron Dumbbells.You load and unload plates with these guys like they were mini-barbells, spinning the collars into place around the ends of the threaded bars.Not as convenient as the other adjustable options, but at about $120.00 for a 5 to 45-pound pair, they’re way less expensive.
One other thing about adjustable dumbbells vs. fixed: sometimes it pays to get both. Most selectorized sets only go up to around 50 pounds, and ones that do offer more weight tend to be long and bulky and cumbersome to use.To economize space as well as cash, it’s a good idea to get a selectorized set that goes up to 50 pounds, and then fixed-weight dumbbellsfor every increment you need beyond that.
]]> https://www.onnit.com/blogs/the-edge/6-kettlebell-exercises-to-build-muscle2025-07-10T10:55:25-05:002025-08-15T07:00:31-05:006 Kettlebell Exercises to Build MuscleJeremy GottliebDeadlifts,squats, presses, and pulls – these are the staples of anymuscle buildingprogram, and I am not here to argue that.
All of these fundamental movements can be transitioned from barbell exercises tokettlebell exercises.
These were all valid questions over a decade ago when kettlebells were first introduced, but get with the times my friends. The same principles of bilateral training with a barbell can be implemented with a heavy pair of kettlebells, and I mean heavy.
The following 6kettlebell exerciseswill have you packing on the muscle in no time:
The DoubleKettlebell Cleanand Press is a powerful exercise that combines both upper and lower body strength and power. The clean and press is a complete workout hitting nearly every muscle in the body, generating full body tension. This is one of the best strength exercises available yielding phenomenal results. Performing clean and presses with a heavy pair of kettlebells takes pressure off the wrists usually found when performed with a barbell.
The Double Floor Press combines a shoulder andchest workoutalong with yourcore. Using kettlebells for the exercise provides a unique challenge. This is a greatchest exercisefor those with shoulder issues, since you are only going as low as the floor rather than below as in normal benching, it takes a lot of strain off the rotator cuff. Because there is a little twist at the top yourabsreceive some attention as well. Use this exercise if you want to build some massive upper body strength!
An excellent upper-body pulling movement; the double bent over row will build strength in the back andbicepsmuscles. Pulling exercises are a necessity to ensure balance for the upper body. There is an alliance between pulling and pressing muscles. The better you get at pulling, the stronger your pressing will be andvice versa.
To avoid looking like a rec-room hero you need to work the legs. Even if you don’t care about leg development, lower body training will help upper body development through a greater release of growth hormone. The Double Front Squat is one of the best core and leg strengtheners out there. You not only get the benefit of stronger legs, but your shoulders will be given a fantastic workout as well. Simply holding the kettlebells in place is taxing on your shoulders, upper back,arms, and core.
Balance is key when building muscle and you need to balance the quad growth from the squats with somehamstringexercises. The DoubleKettlebell Swingis the brutal distillation of everything kettlebell training is about: power, explosiveness, flexibility and lung searing cardio. The double kettlebell swing will hit your lower back, glutes, andhamstrings, strengthening the entire posterior chain. Double swings are great progression that can be used to increase your strength and power.
The core connects the lower body to the upper body and if your midsection is weak, everything is weak. The Turkish Get Up is great core exercise that also had tremendous benefits to your pressing ability. Throughout the entire movement your core is being worked. To the same degree, the shoulder is being used to maintain that overhead position. Since you go through a wide range of positions, you’re flexibility and mobility are challenged giving you a far greater exercise.
Heavy kettlebells are bells you can only do a few reps with. Start with low reps to get used to the heavier kettlebells. Make each rep perfect. Once that gets easy, start building the reps. When you can start completing the lifts for 8-10 reps, increase weight.
A1:Double Kettlebell Clean and Press – 5 rounds x 5 reps
B2:Double Kettlebell Floor Press – 5 rounds x 5 reps B3:Double Kettlebell Bent Over Row – 5 rounds x 5 reps
C1:Double Kettlebell Front Squat – 5 rounds x 5 reps C2:DoubleKettlebell Swings– 5 rounds x 5 reps
D1:Turkish Get-Ups – 5 rounds x 3 reps (each side)
]]> https://www.onnit.com/blogs/the-edge/train-like-an-nfl-linebacker-brian-cushing-workout2025-07-10T10:55:25-05:002025-08-15T06:45:21-05:00Train Like An NFL Linebacker: Brian Cushing WorkoutJeremy GottliebThe goal during the season is entirely different than the off-season. The off-season is a time for growth. It’s the time to get bigger, faster, stronger, and make tweaks to your diet. Brian Cushing’s off-seasonworkout is designed to build muscleand make him more explosive. Just try and keep up.
Upper Body Warmup
1. FOAM ROLL/LAX BALL 2. CATCAMEL – 15 REPS 3. T-SPINE ROTATION – 10 EACH SIDE 4. WALL SHOULDER CIRCLES 10 EACH SIDE 5. LYING SHOULDER SWIMS 10 EACH SIDE 6. 4-WAY PLANK ROLLS – 10 EACH SIDE 7. MB HALO – 10 EACH SIDE 8. MB AROUND THE WORLD – 10 EACH SIDE 9. MB OVERHEAD THROW – 10 REPS 10. MB SLAM 10 REPS 11. POWER PUSH UP 10 REPS
Lower Body Warmup
1. FOAM ROLL/LAX BALL 2. CAT CAMEL 15 REPS 3. T-SPINE ROTATION – 10 EACH SIDE 4. ANKLE FLOW – 1-2 MINUTES 5. 90/90 HIP FLOW 2-3 MINUTES 6. BAND HIP STRETCH 1-2 MINUTES 7. 4-WAY PLANK ROLLS – 10 EACH SIDE 8. FACE THE WALLSQUAT– 10 REPS 9. HIP HINGE – 10 REPS 10. WALKING LUNGE – 10 YARDS FORWARD & BACKWARDS 11. A-SKIP/HIGH KNEE – 10 YARDS EACH 12. HIP CIRCLES – 10 EACH SIDE 13. GATE SKIP – 10 YARDS FOWARDS & BACKWARDS 14. LEG SWINGS – 10 EACH SIDE 15. TIN MAN SKIP – 10 YARDS DOWN & BACK 16. SIDE LINGE – 5 EACH SIDE
Monday Power & Max Effort Upper Body
PERFORM DYNAMIC WARMUP
1A. KNEELING MED BALL CHEST PASS INTO WALL 3 X 5 1B.ISOMETRIC SHOULDER Y-W-T (ON BENCH) 3 X 15 SECONDS EACH POSITION
02. BARBELL BENCH PRESS– WORK UP TO 5 X 1 AT 90% 1RM *LAST SET PERFORM 1 OR MORE REPS
03.STRIP SET CHAIN PUSH UPS – 2 SETS OF THE FOLLOWING: 4 CHAINS X 10 REPS 3 CHAINS X 8 REPS 2 CHAINS X 6 REPS 1 CHAIN X 4 REPS BODYWEIGHT X MAX REPS
4A. STANDING HAND OVER HAND ROPE PULL W/SLED – 3 TIMED SETS 4B. BAND FACE PULLS – 3 X 15
05.DEFRANCO “SHOULDER SHOCKER” 2-3 REPS OF 8 EACH VARIATION
6A.THICK ROPE CURLS W/70LB KB 3 X 10 6B.BAND TRICEPS PUSHDOWN 3 X 100 TOTAL REPS (USE LIGHT/MODERATE BAND)
Tuesday Power & Dynamic Effort Lower Body
PERFORM DYNAMIC WARMUP
01. MB CHEST THROW INTO SPRINT - 6 X 10-15 YARDS
02. PUSH UP INTO SPRINT - 6 X 10-15 YARDS
03.KNEELINGJUMPINTO BOX JUMP – 6 X 3 *START AT 30″ AND INCREASE BOX HEIGHT EACH SET
6A. AB WHEEL ROLL OUT – 3 X 10 6B. FAT BAR HOLD W/ 185 LBS. – 3 X AS LONG AS POSSIBLE
Saturday
REST DAY
Sunday
REST DAY
Download A PDF Of The Brain Cushing Workout Below:
]]> https://www.onnit.com/blogs/the-edge/so-you-want-to-do-a-human-flag2025-07-10T10:55:25-05:002025-08-14T17:41:46-05:00So You Want To Do a Human Flag?Jeremy GottliebIt’s a showstopper for sure! Pull one of these puppies out on a busy city corner intersection and watch all the whistles and atta boys you get! Perhaps not as hard as front or back levers, but it’s an exercise that requires enormous strength where the shoulder girdle meets the torso and a rock solid controlledcorethat has the tensile strength of an I-beam.
It’s convenient as well, because any medium diameter street sign or piece of playground equipment will do!
What benefits do you get from performing the flag? Great grip strength, shoulders lats, obliques and quadratus lumborum all get an outstanding work out.
The only problem is the taller you get, the harder it is! Longer legs? Harder! Longerarms? Harder!
I am 51 years young, 6’ 1” 164 pounds. It took me 3 months from being in good condition to pull off the flag using this program. I have seen a 6’3” 215 lb. man do it. If you are taller than that, don’t let this dissuade you from doing the flag. Remember it’s about the journey and not the destination. You will be the better for it!
OK, let’s get down to the nuts and bolts of the process. This will be a 3-part series in taking a rank beginner inbodyweight training to create the endurance and strengthto pull off the human flag in 3-6 months depending on what kind of shape you are in when you start. Some may take longer, some shorter.
I would also like to add that this aspect of training helped me to heal my back pain after years of over emphasizing my lower back muscles deadlifting. What a nice side effect!
Prerequisites to Start Human Flag Training
A.Singlearmhang for 30 seconds B. 10 pullups for 4 sets C. Side plank 45 seconds
Let’s get started!
Human Flag Training Phase 1: 5 Basic Core and Shoulder Strength Exercises
1. Basic Side Plank on Elbow
Hold as long as possible then switch sides. 45 seconds rest. Repeat for 5 sets.
2. Side Plank With a Reach
Hold as long as possible, then switch sides. Rest for 45 seconds. Repeat for 5 sets.
3. Inclined Side Plank
Hold as long as possible, then switch sides. Rest for 45 seconds. Repeat for 5 sets.
4. Hanging Hip Hiker
Hang from a bar and fire your lower back so your legs come out to either side. 5×5 each side hold for about 4 seconds each side.
Strong lats and shoulders are also necessary, so you need to be able to do perfect, chin above bar, strict pull ups (do not kip, cross your legs, or swing. In other words, do not cheat.) You need to be able to pull off 5 sets of 15-20 reps. Take a 1-minute break between efforts.
5. Piked Shoulder Push Ups
15-20 reps. 30 seconds rest between sets.
You will be ready to move on to the next phase when you can do this workout 2 to 3 times a week and hold all the planks for 2 minutes and complete all the sets of pull ups and piked push ups for 15-20 reps.
Good luck on your progress. I look forward to you joining the eliteclubof folks who can pull off the human flag. This one will take time. Patience will be rewarded with diligent training.
]]> https://www.onnit.com/blogs/the-edge/front-squats-vs-back-squats-everything-you-need-to-know-for-building-muscle2025-07-10T10:55:24-05:002025-08-15T08:00:02-05:00Front Squats vs. Back Squats: Everything You Need To Know For Building MuscleJeremy GottliebTrainers don’t agree on much—like how many sets a client should do, whether the person needs to take creatine, or if Taylor Swift music is an appropriate workout jam—but they all know that people who exercise, regardless of their body type or fitness goals, need to squat. The question then becomes, “What type of squat should they do?” Front squats and back squats are the two most popular versions of this foundational exercise, but they work your major muscle groups in different ways, and each has its pros and cons. Here, we’ll lay out the differences between front squats vs. back squats, the muscles worked, and the advantages and disadvantages of each, so you can decide which type of squat is best for you.
What’s The Difference Between aFront Squatand a Back Squat?
The main difference between the front squat and the back squat is where you position the barbell. When performing a front squat, the bar is held on the fingertips (or directly on the front of the shoulders) and is supported by the front deltoids. Conversely, in a back squat, the bar rests across your trapezius and rear delts, so the weight is loaded on the backside of your body.
Front squatting recruits the chain of your body’s anterior muscles more heavily, engaging the quads andcoreto a greater degree. Back squatting, on the other hand, emphasizes the posterior chain—the large muscle groups of the back, glutes, andhamstrings.
Where you hold the bar also affects how you’re inclined to move throughout the exercise. “Back squats are a hip-dominant movement,” saysDon Saladino, owner of Drive Health Clubs in New York City (where he trains stars such as Hugh Jackman and Blake Lively).“You’re leading with the hips, so your torso is more inclined to lean forward as you perform the exercise.With front squats, because of where the weight is loaded, you’re forced to remain more vertical.” If you lean forward on a front squat like you do back squatting, you’ll lose your balance and drop the bar at your feet. “This makes the front squat a more quad-dominant movement,” says Saladino.
The differences between the front and back squat are really just a matter of degrees. Both versions work your entire body, and Saladino compares squatting in general to moving while performing a plank position—your shoulders, abdominals, and back must engage to support proper form as your legs go through a full range of motion. That makes squats—of any kind—arguably the most functional and challenging exercise you can do.
Step 1.Grasp the bar with hands shoulder-width apart and point your elbows forward so that you can position the bar over the tips of your fingers (palms face up). As long as you keep your elbows pointing forward, you will be able to balance the bar.
Another way to do it is to cross yourarmsin front of you, holding the bar on the front of your shoulders (left hand in front of right shoulder, right hand in front of left, as pictured below). To do the classic front squat with the bar on your fingertips, you need a reasonable amount of flexibility through your shoulders and wrists to position the barbell correctly. If you don’t have it,the cross-armversion may be the better option for you at the moment(see also “Using Straps To Front Squat” below).
Step 2.Lift the bar out of the rack and step back, setting your feet between hip- and shoulder-width apart. Turn your toes out slightly. Without letting your feet actually move, try to screw both legs into the floor as if you were standing on grass and wanted to twist it up—you’ll feel your glutes tighten and the arches in your feet rise.
Step 3.Pull your ribs down and take a deep breath into your belly and brace your core. Your head, spine, and pelvis should form a long line—your pelvis should also be perpendicular to your spine, and not tilted toward the floor.Focusyour eyes on a point straight in front of you.
Step 4.Squat as low as you can while keeping alignment and maintaining your upright torso position. Remember to point your elbows forward, and raise them up if you feel them slipping downward. Ideally, you’ll be able to descend to where the crease of your hips is below the top of your thighs.
Your knees must stay in line with your toes. Trying to push them out and actively root your feet into the ground will all but ensure this.
Step 5.Extend your hips and knees to return to standing, pushing through the middle of your feet and squeezing your glutes.
Note:Because of the awkward bar position, which is less stable than in the back squat, you won’t be able to use as much weight as you would back squatting. If you’re used to doing back squats, make sure you adjust accordingly.
One way to make the front squat more comfortable is to use lifting straps. Many people don’t have the mobility in their shoulders, wrists, and fingers to hold the bar in the classic front squat position (called the rack position), and the straps allow you to rest the bar on your shoulders instead, making it much easier to stabilize the bar.
Simply loop the straps around the bar and wrap the loose ends around each hand. Then hold onto the straps when you take the bar out of the rack.
Step 1.Set up in a squat rack and grasp the bar with your hands as far apart as is comfortable. Step under the rack and squeeze your shoulder blades together and down, wedging yourself under the bar so that it rests on yourtrapsor the back of your shoulders.
A “high-bar” squat describes the position of the bar as being high up on the traps, just below the neck. If you feel more stable with the bar resting lower on your back, balanced across the rear delts, you’re doing a “low-bar” squat.The former is advantageous for staying more upright with your torso and hitting your quads. The latter may allow you to lift heavier, but you’ll lean forward more on the descent.Either technique is OK. Experiment with both and see which you feel more comfortable with.
Step 2.Nudge the bar out of the rack and step back, setting your feet between hip and shoulder-width with your toes turned slightly outward. Without letting your feet actually move, try to screw both legs into the floor as if you were standing on grass and wanted to twist it up—you’ll feel your glutes tighten and the arches in your feet rise.
Step 3.Pull your ribs down and take a deep breath into your belly and brace your core. Your head, spine, and pelvis should form a long line—your pelvis should also be perpendicular to your spine, and not tilted toward the floor. Focus your eyes on a point straight in front of you.
Step 4.Bend your hips back as if you were going to sit in a chair, continuing to screw your feet down. Allow your knees to bend and push them out as you lower your body down. Go as low as you can while keeping your alignment. Ideally, you’ll be able to descend to where the crease of your hips is below the top of your thighs.
Your knees must stay in line with your toes.Trying to push them out and actively root your feet into the ground will all but ensure this.
Step 5.Extend your hips and knees to return to standing, pushing through the middle of your feet and squeezing your glutes.
Front Squat Benefits
If you’re looking to develop your quads, you can’t go wrong with adding front squats to your workout routine. Some bodybuilders build their leg workouts around front squats for this reason. If you’re interested in training in Olympic weightlifting, the front squat is a major component of the clean and jerk, so it will give you a foundation of strength and technique to base weightlifting training on.
The biggest potential benefit to front squatting versus back squatting, however, is that the vertical torso position makes the squat pattern safer for the lower back. “When people are back squatting, it’s common that they can’t maintain a neutral lumbar spine,” says Saladino.They lean their torsos too far forward, or let their hips rise faster than their shoulders as they come up out of the bottom of the squat,and their lower backs round over, putting the little muscles and discs in the lumbar spine at risk for strain. In the front squat, your vertebrae are essentially stacked, so your torso moves almost straight up and down, avoiding shear forces that cause injury.
Onestudyin theJournal of Strength and Conditioning Researchexamined the biomechanical differences between front and back squats.Researchers found that the back squat placed significantly more compressive forces on the lumbar spine,and concluded that front squats may be the better choice for lifters with knee problems such as meniscus tears, as well as for long-term joint health.
Back Squat Benefits
There’s ample reason why the back squat is called the “king of all exercises.” If you’re interested in getting as strong as possible, or training in powerlifting, it’s essential. The bar placement (along the back) is more comfortable and easier to balance than that of the front squat, so you have the stability to lift greater loads. Though the science isn’t clear, most coaches argue that it also recruits more overall musculature than the front squat, drawing heavily on everything from your shoulders and back to your glutes, hamstrings, and calves, in addition to the quads and core.
Strength gains (i.e., big numbers) will come faster with the back squat, but, as discussed above, the risk for lower-back injury is greater. For general population clients who are only interested in having healthy, well-shaped, and strong legs,many trainers eschew the back squat entirely for front-loaded squat variations,such as front squats, landmine squats, and goblet squats. Unless you’re an athlete who competes in the sport of powerlifting or gets tested on back squat strength (as some power athletes do), it’s not an exercise that you “must” do.
Muscles Used In The Front Squat
The primary muscles worked are:
– Quadriceps
– Glutes
– Hamstrings
– Abdominals
– Lower back (spinal erectors), upper back
– Shoulders
A 2015studypublished in theJournal of Sports Sciencescompared the muscle-recruiting effects of the front squat versus the back squat.The researchers found that the vastus medialis—one of the four quadriceps muscles—was targeted more heavily during the front squat.Of course, all the major muscle groups of the legs were shown to be highly active during both lifts, but the quads engage to a greater degree when the weight is loaded anterior to the trunk.
Muscles Used In The Back Squat
The back squat targets all the major muscle groups of the body, but its focus is on the posterior chain. The primary muscles worked are:
– Glutes
– Hamstrings
– Quadriceps
– Lower back (spinal erectors), upper back
– Abdominals
– Shoulders
The same 2015 study that identified that the vastus medialis worked harder in the front squat showed that the semitendinosus—one of the threehamstringmuscles—was lit up more during the back squat.Again, both versions of the squat hit all the major muscles of the lower body, but when the weight is loaded posterior to the trunk, there’s greater engagement of the hamstrings.
Front Squat vs. Back Squat Ratio
Some coaches believe that a lifter should be able to front squat 90% of the weight that he/she back squats. So if your best back squat is 315 pounds, your front squat ought to be around 280. However, Saladino scoffs at this notion, arguing that it’s nothing more than nonsense used to help trainers market programs.
“There are any number of anatomical or mechanical reasons that a person might be better at either the front squat or back squat,” he says. Generally speaking, your front squat load will be less than your back squat load, simply because of the less stable bar position and biomechanics of the lift, butyou don’t need to shoot for a specific strength ratio to ensure balance—or meet anyone else’s criteria of fitness.Rather, focus on incorporating both versions of the squat—if you can—and aim to perfect your form so you can safely and effectively improve the performance of both lifts over time.
]]> https://www.onnit.com/blogs/the-edge/the-pro-s-guide-to-working-out-twice-a-day2025-07-10T10:55:24-05:002025-08-15T06:43:22-05:00The Pro’s Guide to Working Out Twice A DayJeremy GottliebThe phrase “two-a-days” may bring back traumatic visions of repeated high school football practices in the blazing summer sun, or times when you tried to get your body into peak shape in a few weeks before a beach vacation. While the process may have been grueling, the concept might not have been so crazy after all. By packing in extra physical preparation, you can push your body to the next level, whether you want to perform better during a sports season, or just look your best naked. The fact is, training twice per day can help you reach your goal faster.
With the help of Bobby Maximus, owner of the Maximus Gym in Salt Lake City, and author ofThe Maximus Body(@bobbymaximuson Instagram), we’ve put together the quintessential guide to two-a-day training.
Benefits of Two-A-Day Workouts
It makes sense that the more work you put in, the better the results. That usually holds whether you’re studying for an exam, or trying to build muscle with strength training (but not always, as you’ll see below). According to a recentstudyinMedicine and Science in Sports and Exercise,training volume is the make or break factor that determines gains.The researchers discovered a “dose-response” relationship, where more sets led to greater improvements in musclemass. Otherresearchhas found that training twice a day may better help your central nervous system adapt to exercise, and in turn improve your strength.
Two-a-days can also boost your stamina. Two studies (1,2) showed thattraining twice a day can increase yourendurance, and help your body burn fatand glycogen (stored carbohydrate) more efficiently.
But remember: too much of a good thing is bad. When subjected to higher training volumes, your body can adapt, but it needs time to do so, and there is a tipping point.If you’re putting in so much work that you can’t recover from your sessions, you’ll become overtrained,and you won’t see progress. Be warned: “If you have trouble recovering from one-a-days now,” says Maximus, “you shouldn’t be doing two-a-days.” Nutrition,sleep, stress management, and active recovery practices (foam rolling, massage, cold therapy, meditation, etc.) are hugely important for anyone to see gains, but they become even more so when doing two-a-days.
If you work too hard, too soon, and recover too little, you can hurt yourself.Researchin theBritish Journal of Sports Medicinerevealed that training-related injuries are largely due to excessive and rapid increases in work performed, but noted thathigh training volumes can actually help protect against injury as long as you ease into them.
The key is to up your workload gradually, and in a way that balances out your training. Maximus says to think opposites. “On days you train twice, train opposite energy systems or opposite movements.For example, weights in the morning and cardio at night, pushing exercises in the morning and pulling exercises at night,or lower body in the morning and upper body at night.”
This works because it “builds recovery in,” says Maximus. One energy system or group of stressed muscles rests while another works, maximizing training efficiency. You never hit any one area of the body or style of training (such asHIITor long-duration cardio) more often than you can handle. The evening sessions complement the morning ones, and vice versa.
“Training twice per day byseparating resistance training from a cardio metabolic workout allows you to perform better during each individual workout,without sending your body conflicting training signals,” says Eric Bach, C.S.C.S., a Georgia-based online performance coach (bachperformance.com). He adds that lifting twice a day is fine for those who want to bulk up, but you should train heavier, lower-rep exercises in the morning, and higher-rep, bodybuilder-esque accessory work in the evening. For instance, do your heavysquatsand deadlifts in the a.m., and light dumbbell pressing and rows in the p.m.
None of this should give you the impression that bidaily wokouts are only for the most dedicated athletes. “Two-a-days are also a good approach for people who are busy and constantly racing the clock,” says Bach.“Breaking up your workouts can be an effective way to piece together a training plan for busy professionals and parents.”You could take the amount of training you were doing in one-hour sessions and simply split it in half, performing 30 minutes of training in the morning, and 30 minutes after work, if that better suits your schedule.
Is Working Out Twice A Day Bad for Building Muscle?
Two-a-days work by stressing your body more than it’s used to, forcing it to adapt faster. But if you don’t prioritize your recovery, you could overtrain and get injured. So the upside to two-a-day training is huge, but it comes at a higher risk. In addition to the guidelines Maximus and Bach gave above, consider the following to decrease that risk and improve your odds of making the best gains of your life.
First, both coaches say it’s key tohave at least four to six hours between workouts. This will give your body enough time to rest and recover for the next round. Have a meal with protein and carbs after your first training session, and another small meal before your second session. This replenishes your energy stores and elicits the repair and rebuilding process.Maximus suggests you eat a meal that’s roughly 75% carbs and 25% protein(you don’t need to include fat at this time that isn’t a byproduct of your protein consumption).If you’re trying to bulk up, make sure this meal contains at least 500 calories.
“Don’t try to perform two full workouts in the same day,” says Bach.“You should cut back your training volume and do two shorter sessions.Doing less but better is a key to making two-a-day training work for you.” Streamline your workouts so that each session is 70–80% of what you’d usually do for a full-intensity workout.
Avoid any exercises that have plagued you in the past. If you’ve hurt your back deadlifting, this is not the time to add deadlifts back to your routine. Extra training can drain your recovery ability, and it may put your body in a more vulnerable state, setting you up for injury. Furthermore, theadditional fatigue you’ll experience from the increased workload can compromise your form on lifts,especially ones you’re not proficient in or that have proven problematic for you in the past. By the same token, this is a good time to revisit old standby exercises that you know work for you and that you can perform safely.
For example, in the Advanced Two-A-Day plan below, one day calls for overhead squats. It’s a massively beneficial exercise, but many lifters struggle to do it with perfect form. If you’re one of them, find an easier swap, like rear-foot elevated split squats. Both exercises train the quads hard, but the splitsquatis easier on your lower back, and doesn’t require the same degree of shoulder and thoracic mobility.
Make sure your form on all your exercises is damn near perfect.“The biggest thing I tell people to watch is their knees and shoulders,”says Maximus. “The worst offenders for the knees are improper squats.” Maximus also stresses keeping your program balanced. “The shoulders get hurt when you do too much pushing [like bench pressing] without enough overhead work and pulling exercises [like rows and pullups].”
No matter what exercises you choose or how you set up your program, you’ll need to bulk up your recovery practices. “If you’re going to do two-a-days, you’re essentially doubling the stress on your body,” says Maximus. “So think of it in business terms: If your operating expenses double, you need to pay for that somehow. We pay for workouts through recovery practices—so plan on increasing your efforts there.”
For example,if you used to sleep seven hours a night, you may need to plan on getting eight or even nine.You might need to do more foam rolling, or get massages, or incorporate yoga and other stretching. “Whatever it is you usually do for recovery, double down on it,” says Maximus.
Understand that you don’t need to do two-a-days every day you work out, and if you haven’t been training long, you shouldn’t (see the sample schedules for two-a-days below). With all that said,you can do two-a-days for as long as you want, particularly if you feel healthy.Let your body be your guide—and know when to back off if you’re feeling down.
Sample Schedule for Multiple Workouts Per Day
The number of twice daily workouts you should perform each week depends on your training history.
If you’re new to training (or are coming back after a year or so off),you probably only want to perform two-a-day workouts once each week.“Dip your toe into the water rather thanjumpinto the deep end,” says Maximus. “And, if after a couple of weeks, you feel good and like you’re acclimatizing well, then you can add on another two-a-day each week. And when you’re acclimatized to that, you can add another day, so you’re doing three a week.”
You can continue building up until you are doing four or five two-a-days a week, max (8–10 total workouts).Anything more than that, and you’re certain to get injured, say both Maximus and Bach. “How much people can take is often dependent on genetics, training history, how they pay attention to recovery, and more,” says Maximus. But a program of three or four two-a-days is plenty for most people and most goals.
Below, Maximus offers two sample two-a-day programs that will accelerate fat loss and muscle growth. Expect to get in the best shape of your life!
Two-A-Day Workout Plan for Beginners
If you’re a “I haven’t been in a gym for years¦” type of beginner, then this plan isn’t for you. But if you’ve been lifting religiously for at least a few months and have hit a plateau, or you want to peak yourfitnessin a few weeks for an upcoming event, give this program a try.It’s a six-day a week schedule, but you’ll perform three two-a-day workouts per week.If that’s intimidating, ease in by selecting just one of the multi-session days, and build up to three from there.
Monday A.M.
Warmup:10 minutes of easy cardio, just to break a sweat. You could use a rowing machine, ski erg, or run.
Cardio Workout: “Can’t” Vs “Won’t” Rowing
Set a rowing machine computer’s interval setting to 30 seconds of work and 90 seconds rest. Row 140 meters (115 for women), and stop there, even if you have time left in the 30-second interval. Rest 90 seconds. That’s 1 round. Next round, row 141 (or 116) meters and no more, followed by 90 seconds rest. Continue to add 1 meter to each round until you “can’t” or “won’t” go any farther.
Step 1.Sit on the rower and strap your feet down. Pick up the handle and extend yourarms. Bend your hips and knees so that your shins are vertical and your chest is just behind your knees with your back straight. Your hips are behind your shoulders.
Step 2.Push through your legs until they’re extended, and then lean back slightly. Now row the handle to your chest. Keep your wrists straight and in line with your arms.
Step 3.Extend your arms, bend at the hips to close the angle between your torso and your legs, and then bend your knees to slide back to the starting position.
Cooldown:10 minutes of easy rowing.
Monday P.M.
Warmup 1:10 minutes of easy cardio.
Warmup 2:Take 10 minutes to practice and warm up with pullups, barbell bench press, barbell overhead press, and barbell bent-over row. Do light reps of each to prepare yourself for the workout.
Strength Workout: “Ticket To Gainzville”
Do the exercises as a circuit, completing one set for each in sequence. Do 10 reps of each exercise the first round, 9 reps the second, then 8, and so on until you’ve completed a final round of just 1 rep of each exercise. Choose a weight that makes it moderately difficult to complete the first 10 reps, and stick with it throughout (you may have to change weights for each barbell exercise). Rest as long as you need between circuits to complete the next round with good form (try starting at 2 minutes).
Bench Press
Step 1. Lie on the bench and arch your back, pulling your shoulder blades down and together. Grasp the bar just wider than shoulder width, and pull it out of the rack.
Step 2. Take a deep breath, tighten your glutes, and lower the bar to your sternum, tucking your elbows to your sides at 45 degrees on the descent. When the bar touches your body, push your feet into the floor and press the bar up at the same time.
Pullup
Step 1. Hang from a bar with your hands shoulder-width apart and your palms facing away. Pull your ribs down and keep yourcoretight.
Step 2. Draw your shoulder blades back and together and pull yourself up until your chin is over the bar. If your body weight isn’t challenging enough, attach extra weight with a belt, or hold a dumbbell between your feet.
Overhead Press
Step 1.Place a barbell in a power rack and grasp it with hands shoulder-width apart. Take the bar out of the rack and stand with feet shoulder-width apart. Rotate your elbows forward so that your forearms are vertical, and the bar is just below your chin. Tuck your pelvis slightly so that it’s parallel to the floor, brace your core, and tighten your glutes.
Step 2.Press the bar overhead, pushing your head through as the bar passes it. Shrug your shoulders at the top, and then lower the bar back down under control.
Bent-over Row
Step 1. Place a barbell on a rack set to hip level. Grasp the bar with your hands at shoulder width, and pull the bar out of the rack. Step back, and set your feet at hip width; hold the bar at arm’s length against your thighs. Take a deep breath, and bend your hips back—keep your head, spine, and pelvis aligned. Bend until your torso is nearly parallel to the floor.
Step 2. Draw your shoulder blades together as you pull the bar up to your belly button.
Core Workout: Pushup Plank Holds
Finish the workout with pushup plank holds. Hold the position for 30 seconds, and then rest 60 seconds. Repeat for 6 total sets. As you gain core strength, work up to 10 sets.
Pushup Plank Hold
Step 1.Get into a pushup position with hands shoulder-width apart and legs extended behind you. Tuck your pelvis so that it’s perpendicular to the floor, and brace your core.<iframe width="560" height="315" src="https://www.youtube.com/embed/VVoAsUrSTOw?si=ia_W1ij_ZKGCRw3u" title="YouTube video player" frameborder="0" allow="accelerometer; autoplay; clipboard-write; encrypted-media; gyroscope; picture-in-picture; web-share" referrerpolicy="strict-origin-when-cross-origin" allowfullscreen></iframe>
Step 2.Hold the position, keeping your body straight from your shoulders to your heels.
Cooldown:10 minutes of easy cardio.
Tuesday
Warmup:10 minutes of easy cardio.
Cardio Workout: 30/30 Intervals
Use a rowing machine and row as hard as you can for 30 seconds. Rest 30 seconds. That’s 1 round. Do 6 total rounds, and then rest 4 minutes. That’s 1 block. Do 3 total blocks (you’ll have completed 18 total rounds).
Men should aim to row 150 meters each round. Women should shoot for 120.
Note: If you don’t have access to a rower, you can use a fan bike, stair stepper, or treadmill, andfocuson the intensity rather than distance.
Cooldown:10 minutes of easy cardio
Wednesday A.M.
Warmup:10 minutes of easy cardio.
Cardio Workout: “The Long Road”
Row 500 meters in 2 minutes, and then rest 1 minute. That’s 1 round. Do 10 total rounds, trying to take 1 or 2 seconds off your time each round. So, for example, you’d want to finish your second round in 1:58, and your last round somewhere around 1:40.
Cooldown:10 minutes of easy cardio.
Wednesday P.M.
Warmup 1:10 minutes of easy cardio.
Warmup 2:Take 10 minutes to practice and warm up with the barbell deadlift, barbell bench press, pushup, pullup, and barbell back squat. Do light reps of each to prepare yourself for the workout.
Strength Workout:“555”
Do the exercises as a circuit, completing one set for each in sequence. Do 10 reps of each exercise the first round, 9 reps the second, then 8, and so on until you’ve completed a final round of just 1 rep of each exercise. Choose a light weight for the barbell exercises—one that you don’t have to work up to so that you can keep the circuit moving fast. We recommend no more than 135 pounds. Rest as needed between rounds of the circuit, but aim to finish the workout in 20 minutes.
Maximus calls this workout 555 because you do 5 exercises for 55 total reps each!
Bench Press
See the description from Monday.
Deadlift
Step 1.Stand with feet hip-width apart and tilt your tailbone back. Bend your hips back to reach down and grasp the bar with hands just outside your knees.
Step 2.Keeping a long spine with your head in line with your hips, take a deep breath into your belly, brace yourabs, and drive through your heels. Pull the bar up along your shins until you’re standing with hips fully extended and the bar is in front of your thighs. Keep the bar pulled in tight to your body the whole time with your shoulder blades pulled together and down (think “proud chest”).
If you can’t keep your lower back flat throughout the exercise,it’s OK to elevate the bar on some weight platesor mats, as shown.
Pushup
Step 1.Place your hands on the floor, shoulder-width apart, and extend your legs behind you. Tuck your pelvis so that it’s perpendicular to the floor, and brace your core.
Step 2.Keeping your body straight from shoulders to heels, bend your elbows and lower your chest until it’s about an inch above the floor. Press yourself back up.
Pullup
See the description from Monday.
Squat
Step 1. Set up in a squat rack and grasp the bar with your hands as far apart as is comfortable. Step under the bar and squeeze your shoulder blades together and down, wedging yourself under the bar so that it rests on yourtrapsor the back of your shoulders.
Step 2. Nudge the bar out of the rack and step back, setting your feet at shoulder width with your toes turned slightly outward. Without letting your feet actually move, try to screw both legs into the floor as if you were standing on grass and wanted to twist it up—you’ll feel your glutes tighten and the arches in your feet rise. Take a deep breath into your belly and bend your hips back, then bend your knees and lower your body down. Push your knees out as you descend.
Step 3. Go as low as you can while keeping your head, spine, and pelvis aligned, and then extend your hips and knees to return to standing.
Cooldown:10 minutes of easy cardio.
Thursday
Warmup:10 minutes of easy cardio.
Strength Workout Part A:“Gut Punch”
Grab twokettlebellsor dumbbells (men should use 16-kilogram kettlebells or 35-pound dumbbells; women should use 12kg or 24 pounds)—and do 20 reps of each of the following exercises in circuit fashion. Rest 1 minute, and then do 15 reps, then 10, then 5. As you improve week to week, increase the number of reps you do. Build up to where you can complete sets of 50, 40, 30, and so on down to 10 reps.
Dumbbell Stepup
Step 1.Hold a weight in each hand and place your foot on a box or bench. It should be high enough so that your thigh is about parallel to the floor when the foot is resting on it.
Step 2.Step up onto the bench without letting your rear leg rest on it—let it dangle behind you. Step back down with the trailing leg. Do 10 reps on each leg (20 total).
Feet-to-Hands
Step 1.Hang from a pullup bar with your hands shoulder-width apart.
Step 2.Raise your feet to your hands. If that’s too tough, pull your knees to your elbows instead.
Strength Workout Part B: Pushups
Do 100 pushups, breaking them into however many sets you need to in order to complete all the reps.Tip:Don’t go to failure on any of the sets. For example, if you can do 20 reps when going all out, do sets of only 10 to 15. This will ensure you keep enough in the tank to reach the total without burning out.
Cooldown:10 minutes of easy cardio.
Friday A.M.
Warmup:10 minutes of easy cardio.
Cardio Workout: “Row To Hell”
Hop on a row machine and set its computer to “Single Distance.” Enter 500 meters into the computer. Row as hard as you possibly can until you finish 500 meters. Now rest as long as it took you to complete the 500-meter row. So, for example, if you rowed 500 meters in 1:30, you’d rest for 1:30. Repeat the process for 400 meters, and so on down to 100 meters.
Cooldown:10 minutes of easy cardio.
Friday P.M.
Warmup:10 minutes of easy cardio.
Strength Workout: “The Holy Trinity”
Set a timer for 30 minutes. Do as many reps of each of the three exercises as you can in circuit fashion, resting as needed, until the timer goes off.Tip:Don’t go to failure. Instead, cycle through small sets of each. If this feels like a lot, take longer rest breaks between exercises.
Pullup
See the description from Monday.
Dip
Step 1.Suspend yourself over parallel dip bars with hands just outside shoulder width. Lean slightly forward, and lower your body until your upper arms are parallel to the floor.
Step 2.Push yourself back up.
Pushup
See the description from Wednesday.
Core Workout:100 Curlups
Take as many sets as you need to complete 100 total reps of the curlup.
Curlup
Step 1.Lie on your back on the floor with feet flat on the floor and knees bent.
Step 2.Slowly lift your shoulder blades off the ground, curling your torso upward while you slide your hands forward on the floor.
Cooldown:10 minutes of easy cardio
Saturday
Perform steady-state cardio for 30–90 minutes. You can row, run, or bike at 70–90% of your max heart rate.
This is meant to be hard but not crushing. The goal is to get a really good sweat. If you like, you could do the workout “Fartlek” style. Fartlek is Swedish for “speed play.” That means an unstructured interval run, where you go from easy to moderate to hard efforts at random. Fartlek is fun to do with friends by playing games like follow the leader. There’s a hugementalbenefit from this training due to its unpredictability. So, ditch your watch, your distance goals, and all your other numbers, and just go out, have fun, and keep it free flowing.
Sunday
Rest day
Advanced Two-A-Day Workout Plan
If you’ve trained regularly for years, and are ready to take your body and performance to the next level, this is the plan for you. It’s designed to help you build muscle, burn calories, and enhance your athleticism.
The program features five two-a-day workouts—the maximum allowable—which should be enough to bust any rut. However, it’s also a lot to recover from. If you feel run down at any point during the program, it’s OK to skip a training session, or reduce your intensity for a session or two. Make sure you’ve put in some time doing 3 two-a-days per week before you attempt five.
Monday A.M.
Warmup:Do the exercises in the order shown.
Wall Squat
Sets:3 Reps:5
Step 1.Stand facing a wall with your toes touching it.
Step 2.Squat as low as you can. (The wall is used to keep your torso upright.)
Bodyweight Squat
Sets:2 Reps:20
Step 1.Stand with your feet between hip and shoulder-width apart.
Step 2.Push back your hips, bend your knees, and squat as low as you can while keeping your back straight.
Walking Lunge
Sets:3 Reps:20
Step 1.Take a long step forward. As your foot lands, bend your knee and lower your body until your front thigh is parallel to the floor.
Step 2.Step forward with your rear leg and lunge on that side. Each rep should have you walking forward.
Strength Workout: Deadlifts
Deadlift
Sets:4 Reps:4
See the description in the beginner’s workout above. Slowly add weight to the bar, working up to about 80% of what you know or estimate you can lift for one perfect rep. Use that weight to perform 4 sets of 4 reps, resting 4 minutes between sets.
Core Workout:Pushup Plank Hold
See the description in the beginner’s workout above. Take as many sets as you need to complete 5 total minutes of holding, or as much time as you can.
Monday P.M.
Warmup:10 minutes of easy cardio, just to break a sweat. You could use a rowing machine, ski erg, or run.
Strength Workout: Walking Lunge/Wall Sit Ladder
Do 20 walking lunges on each leg, and then immediately perform a wall sit, holding the position for 30 seconds. Next, do 19 walking lunges on each leg, and then immediately perform a wall sit, holding the position for 30 seconds. Continue the pattern, doing one fewer walking lunge on each leg, until you’ve performed just one lunge on each leg.
Walking Lunge
See the description from Monday a.m.
Wall Sit
Step 1.Get into a squat position with your back supported by a wall and your hips and knees 90 degrees.
Step 2.Hold the position.
Cooldown:10 minutes of easy cardio
Tuesday A.M.
Cardio Workout:Perform 60 minutes of cardio at a pace that would allow you to easily hold a conversation. You could run, row, climb stairs, etc.
Tuesday P.M.
Cardio Workout:Perform 60 minutes of cardio at a faster pace than you used in your morning session. Think: a pace that would make it challenging to have a conservation. If possible, perform a different activity than you did in the morning.
Wednesday A.M.
Warmup:Do the exercises in the order shown.
Wall Squat
Sets:2 Reps:5
See the description from Monday.
Bodyweight Squat
Sets:2 Reps:10
See the description from Monday.
Goblet Squat
Sets:2 Reps:5
Step 1.Hold a dumbbell orkettlebellclose to your chest and under your chin with both hands. Stand with feet between hip and shoulder-width and turn your toes out slightly.
Step 2.Push your hips back, bend your knees, and squat as deeply as you can while keeping your torso upright.
Do the exercises in the order shown. For the clean + front squat + hang clean complex, use a light weight that allows you to maintain good technique.
Clean + Front Squat + Hang Clean Complex
Set a timer for 20 minutes, and perform 1 rep of the complex every minute on the minute until the time is up. For example, when the clock starts (0:00), you’ll do one rep. Rest until that minute is up, and then perform your next rep when the clock reads 1:00.
Step 1.Hold the bar at hip level with arms straight and shoulder-width apart. Stand with feet between hip and shoulder-width.
Step 2.Keeping a long spine (a straight line from your head to your pelvis), push your hips back, and then quickly lock them out, using the momentum to pull the barbell up to shoulder height. Catch the bar at your shoulders, your palms facing the ceiling and upper arms parallel to the ground. The bar should be resting on your front delts.
Step 3.From this position, push your hips back, bend your knees, and descend into a front squat. Go down as fat as you can without your lower back rounding. Come back up.
Step 4.Lower the barbell back to your hips. Now put both moves back together into one: clean the bar up to your shoulders, immediately squat with it, stand back up, and lower it. That’s one rep.
Front Squat
Sets:5 Reps:2
Work up to a weight that’s 80–85% percent of your one-rep max, and use that load for your 5 sets of 2. Rest 2–3 minutes between sets.
Step 1.Set the barbell on a power rack and grasp it with hands shoulder-width apart. Roll your elbows under the bar so that they point forward, and lift the bar off the rack with arms parallel to the floor. Step back into your squat stance.
Step 2.Lower your body into the squat, and come back up.
Core Workout: Knees-To-Elbows
Perform 100 reps of knees-to-elbows, taking as many sets as you need. If that’s too hard, aim for 50 total reps, and build up from there.
Step 1.Hang from a pullup bar with your hands shoulder-width apart.
Step 2.Bend your knees and raise them to your hands.
Wednesday P.M.
Warmup:Do the exercises in the order shown.
Wall Squat
Sets:2 Reps:5
See the description from Monday.
Bodyweight Squat
Sets:2 Reps:10
See the description from Monday.
Goblet Squat
Sets:2 Reps:5
See the description from Monday.
Walking Lunge
Sets:2 Reps:10 (each leg)
See the description from Monday.
Banded Shoulder Circles
Sets:2 Reps:10
Step 1.Stand holding an elastic exercise band (or dowel) with both hands outside shoulder width. Draw your ribs down, tuck your pelvis so it’s parallel to the floor, and brace your core.
Step 2.Keeping your arms straight, raise the band over and behind your head as far as you can. Reverse the motion to bring the band back in front of you.
Push Press Hold
Sets:2 Reps:10
Step 1.Grasp two light dumbbells and hold them at shoulder level. Stand with feet shoulder-width apart. Tuck your pelvis and brace your core.
Step 2.Dip your knees quickly and, keeping your torso upright, use the rebound to press the weights overhead to lockout. Complete 10 reps, holding the lockout position of the last one 30 seconds. Repeat for 2 total sets.
Strength Workout: Overhead Squat and Turkish Getup
Do the exercises in the order shown.
Overhead Squat
Sets:5 Reps:10
Step 1.Load a bar with a light weight and grasp it with hands wider than shoulder width. Press the bar overhead, and get into your squat stance.
Step 2.Squat down, keeping the bar behind your head and a long line from your head your pelvis. Rest 2 minutes between sets.
Turkish Getup
Sets:1 Reps:6 (each side)
Step 1.Lie on your back on the floor and hold a kettlebell or dumbbell over your chest with your right hand. Bend your right knee and plant that foot; extend your left arm out at 45 degrees and push your hand into the floor for stability.
Step 2.Roll your torso up off the floor, using your left arm for support. Keep the kettlebell overhead and pointing to the ceiling. Drive your right foot into the floor to bridge your hips up, and swing your left leg under you to rest on your left knee.
Step 3.Windshield wiper the left lower leg so it’s in line with the right leg, and you’re resting in the bottom of a lunge.
Step 4.Stand up tall, with the weight still raised overhead.
Step 5.Reverse the steps to return to the floor. Complete 6 reps on the right side and then 6 on the left. That’s one set. Rest 1–2 minutes between sets.
Cooldown:10 minutes of easy cardio.
Thursday A.M.
Warmup:10 minutes of easy cardio.
Cardio Workout:“Can’t”Vs“Won’t” Rowing
Set a rowing machine computer’s interval setting to 30 seconds of work and 90 seconds rest. Row 140 meters (115 for women), and stop there, even if you have time left in the 30-second interval. Rest 90 seconds. That’s 1 round. Next round, row 141 meters (or 116) and no more, followed by 90 seconds rest. Continue to add 1 meter to each round until you “can’t” or “won’t” go any farther.
Cooldown:10 minutes of easy cardio.
Thursday P.M.
Warmup:10 minutes of easy cardio.
Strength Workout
Do the exercises in the order shown. For the barbell overhead press, slowly work up to a weight that is 80% of what you think you can lift for a one-rep max. Use that load for all 4 sets, resting 3 minutes between sets.
Overhead Press
Sets:4 Reps:4
See the description in the beginner’s workout.
Bent-over Row
Sets:10 Reps:10
See the description in the beginner’s workout.
Push Press Hold
Sets:4 Reps:10
See the description from Wednesday.
Cooldown:10 minutes of easy cardio
Friday A.M.
Warmup:Do the exercises in the order shown.
Wall Squat
Sets:2 Reps:5
See the description from Wednesday.
Bodyweight Squat
Sets:2 Reps:10
See the description from Wednesday.
Goblet Squat
Sets:2 Reps:5
See the description from Wednesday.
Walking Lunge
Sets:2 Reps:10 (each leg)
See the description from Wednesday.
Strength Workout:Back Squat and Wall Sit Hold
Do the exercises in the order shown.
Squat
Sets:9 Reps:8
See the description in the beginner’s workout. Work up to 90% of what you estimate to be your one-rep max and perform 1 rep. Then back off to 55% of your max and perform 8 sets of 8 reps, resting 2 minutes between sets.
Wall Sit
Sets:10 Reps:Hold for 30 seconds
See the description from Monday.
Cooldown:10 minutes of easy cardio
Friday P.M.
Cardio Workout:Perform 60 minutes of cardio at a pace that would allow you to easily hold a conversation. You could run, row, climb stairs, etc.
Saturday
Warmup:10 minutes of easy cardio.
Strength Workout: “The Holy Trinity”
Set a timer for 30 minutes. Do as many reps of each of the three exercises as you can in circuit fashion, resting as needed, until the timer goes off.Tip:Don’t go to failure. Instead, cycle through small sets of each. If this feels like a lot, take longer rest breaks between exercises.
Pullup
See the description in the beginner’s workout.
Dip
See the description in the beginner’s workout.
Pushup
See the description in the beginner’s workout.
Core Workout:100 Curlups
Take as many sets as you need to complete 100 total reps of the curlup.
Curlup
See the description in the beginner’s workout.
Cooldown:10 minutes of easy cardio
Sunday
Rest day
]]> https://www.onnit.com/blogs/the-edge/5-barbell-exercises-for-full-body-explosive-power2025-07-10T10:55:24-05:002025-08-15T07:29:31-05:005 Barbell Exercises for Full Body Explosive PowerJeremy Gottlieb
Summary
If your are looking to build or improve explosiveness, try one or all of these 5 barbell exercises. These full body movements will develop explosive power and have you ready for any athletic challenge. Power is the combination of strength and speed. The ability to generate high levels of power output is dependent on how well you can recruit fast twitch muscle fibers. In doing so, the end result is better performance in the gym in the form of both increased speed and strength. Grab a barbell and get to work!
Barbell Exercise #1: Power Clean
The Power Clean is a powerful exercise that builds explosive power and strength throughout your entire body. Performing the Power Clean will help you build a powerful grip. You will also develop a powerful hip snapping motion that will transfer into any sport or physical activity you choose.
Barbell Exercise #2: Thruster
The Barbell Thruster hits your whole body, burns fat, and increases strength. The Barbell Thruster is really a combination of two exercises, thefront squatand the overhead press, and is a very effective exercise. The Barbell Thruster works both the upper and lower body in a compound movement for a complete body workout.
Barbell Exercise #3: Power Snatch
The Barbell Snatch will strengthen you from head to toe. The Barbell Snatch is used in many instances as a test because it is one the best exercises to demonstrate ones strength. This exercise not only has a strengthening effect, but will also cut body fat very fast. Building an iron grip is not a problem since any ballistic exercise performed repeatedly will do so. Try the Power Snatch to add a ton of power and muscle to your frame.
The 1-Arm Fighter Stance Axle Press works nearly every muscle on one side of your body at a time, but specifically hits the glutes, deltoids, and quads. This exercise is great for lifters who lack the shoulder integrity to perform overhead presses with barbells due to the fact that the lift puts less load on the joints than if you were using a barbell sans landmine.
Barbell Exercise #5: Alternating Axle Squat Toss
The Alternating Axle Squat Toss is another barbell landmine variation that will strengthen movements in all planes of motion and build power and explosiveness in the fast-twitch muscle fibers. The lift also integrates muscle groups putting heavy emphasis on the core as well as training the body through the vertical load.
]]> https://www.onnit.com/blogs/the-edge/how-to-develop-power-with-sledgehammer-workouts2025-07-10T10:55:23-05:002025-08-15T08:32:55-05:00How to Develop Power with Sledgehammer WorkoutsJeremy Gottlieb Who would have thought that training with sledgehammers would be one of the best ways forfunctional strength and conditioning?
One of the oldest forms of training around is becoming a staple of building fantastic results for athletes and everyone else looking to become a force to be reckoned with.
I can remember many years ago using sledgehammers for destruction; tearing down walls and breaking up concrete when I worked in construction.
When I was done with a long day’s work with the sledgehammer, I felt like a badass, even though I was tired as hell.
My forearms would be the size of grapefruits, and mycore, shoulders, back, and grip would be sore for days.
An Introduction To Sledgehammer Workouts
When you think of old school training methods, the sledgehammer is one of the first things that probably comes to mind. In regards to building and developing raw strength and explosive power, nothing beats it.
Of course, the primary recipient of your “destructive” sledgehammer swings is a large tractortire.
Sledgehammers come in many weights: from 4 pounds, all the way up to 30+ lbs, and some are even bigger.
Along with many of the physical benefits that come with sledgehammer training, you also feel damn good just swinging and slamming it down.
It brings out your innate raw power and leaves you feeling like a superhero (or villain, depending on yourmood).
You just can’t get this feeling from any piece of equipment that a fancy gym might provide.
The Benefits Of Sledgehammer Exercises
For fighters and athletes, sledgehammer exercises are great tools to use from time to time, whether it’s included in your circuit training program or as the primary tool you use forstrength and power development.
Along with developing strength and power, you can also look to enhance wrist stability as well as strengthen the forearms and grip.
Grip strengthis key for both strikers and grapplers along with the other major sports athletes.
Sledgehammer workouts are some of the meanest tools that you can train with, improving your strength,endurance, flexibility and explosive power.
When using a sledgehammer for strength training, it causes you to use the full range, multiple-joint movements focusing on acceleration, agility, coordination, speed, andmentaltoughness.
You can use it as afull-body workout with or without a tire. You can also use the sledgehammer as a warm up exercise before starting your workout with another tool.
Sledgehammers will strengthen muscles, tendons, and ligaments in the wrist, elbow and shoulder girdle.
This is the perfect tool for fighters looking to strengthen those areas and increase explosive power.
It allows for circular weight training exercises not possible with other traditional equipment. Your hand-eye coordination even improves!
Selecting A Sledgehammer For Your Workouts
Buying the right size hammer is key, if you are starting off, don’t go out and get a 16-pound hammer; this will only get you injured.
Start off light and work your way up; a good weight for first timers is the eight pounder.
You can learn the technique and form with this weight and master the main exercises while increasing your endurance levels.
Even a small handle sledgehammer that weighs only 4 pounds with a 12-inch handle are great to use for Donkey Kongs, short range slams while kneeling, and double slams (one small hammer in each hand).
Sledgehammer Exercises
When training with sledgehammers, emphasize repetitive slams into the program; this can develop endurance in a lot of key areas like your back, shoulders,traps, core, andarms.
You can also use one-handed slams (also known as Tomahawks) which will cause you to use balance andcore strength.
Footwork is key: you have to pivot one foot in some exercises and then make sure that your feet are set firmly every time (the last thing you want is the hammer coming back at you and hitting your shin).
You can also square your feet up with the tire and do overhead slams, keeping your body straight and aligned.
Slams require major muscle groups and stabilizer muscles to work together during the movement, causing an awesome exercise for raw power and endurance.
If you are a beginner, this is the first exercise to start with before progressing into singlearmslams and so on.
As you get comfortable with the sledgehammer and doing slams and other exercises become easy, you can try juggling them. This is a true skill and takes time to develop, so start off using a very light weight and progress up.
With juggling sledgehammers, you start to develop a whole new level of strength and reflex along with hand-eye coordination. I would recommend starting off practicing on sand, grass, or other soft surface; you don’t want the sledgehammer to bounce if you drop it.
Sledgehammer Workouts
Beginner Sledgehammer Workout
A1: Right Side Slams – 4 x 15 A2: Left Side Slams – 4 x 15 A3: Overhead Slams – 4 x 15
Perform as a non-stop circuit, resting 15 seconds in between rounds.
Advanced Sledgehammer Workout
A1: Tomahawks (Right Hand) – 15 to 1 A2: Tomahawks (Right Hand) – 15 to 1 A3: Double Arm Slams – 15 to 1
After each circuit round, rest 15 seconds. Start with 15 reps for the first circuit and decrease reps for each progressive circuit until you are only performing one rep per exercise.
Check Out Some Killer Sledgehammer Workouts In This Video
]]> https://www.onnit.com/blogs/the-edge/skill-of-the-week-sandbag-shouldering2025-07-10T10:55:23-05:002025-08-15T08:03:12-05:00Skill of the Week: Sandbag ShoulderingJeremy GottliebThe skill of the week at the Onnit Academy Gym is the SandbagShouldering exercise. In this specific case, Sandbag Shouldering will teach you how to build explosive power using the hips.
Sandbag Shouldering is a relatively simple exercise. You lift the sandbag to your shoulder, then repeat. But don’t be fooled by its simplicity, if youfocuson the work as opposed to the skill, you will run into problems.
Sandbag Shouldering is a full body movement that works strength and conditioning simultaneously. Ideally, this exercise variation should be more efficient than breaking down the movement into different parts.
It extremely important to work this sandbag exercise as a skill. If you think about shouldering a sandbag as a conditioning exercise before you work it as a skill, then you will get caught in the trap of “hard work,” meaning that you will only think about getting the sandbag into the shouldered position through whatever means necessary (this is wrong).
There are certain aspects of the Sandbag Shouldering exercise that are important to focus on. You want to break up the different components of movement and make sure alignments are sound before you insert it into a conditioning workout. Here are three steps to achieving a perfect execution of the Sandbag Shouldering exercise.
Sandbag Shouldering Step #1: The Set Up
Place the sandbag length ways, forward and back, located between your feet and the middle of the bag.
Make sure the sandbag is lined up somewhere around the middle of your big toes.
As you hinge back maintaining a neutral spine position, you are going to need to drop your hips to keep your back flat.
This positioning will make sure alignment of the hinge stays true.
Make sure the shin angle is as vertical as possible keeping your hips as far back and relatively high as possible
Keep a neutral, to slighlty extended spine with your shoulders at least slightly higher then your hips.
What that means is your hips are going to have to drop as you reach down towards the floor. You need to find out the give and take of how high can you keep your hips, while keeping them lower then your shoulders.
Keep your hips higher then the knees while maintaining neutral to slightly extended spine.
Sandbag Shouldering Step #2: The Pull
Reach down and grab under the middle of the sandbag.
While grabbing the bag, you want to continue tracking the shoulders to avoid any roundness in the upper back. It is an important focal point to prevent the shoulders from collapsing forward.
Maintain a proud chest, extended in the thoracic spine, and keeping the shoulders from any internal rotation.
Pinch the shoulder blades back so it amplifies the load on the posterior chain. This will create an intensified load into theHamstringsand Glutes.
Sandbag Shouldering Step #3: The Catch
Forcefully drive your feet downward into the floor to extend the hips into a tall standing position.
Accelerate the bag along the front line of your body. As it passes the hips you are going to pull the elbows back and in, keeping the bag close to your body.
You want the bag to land on the shoulder softly, stabilizing your standing tall position with your hips and shoulders square.
Always keeping a proud posture, I want you to finish the exercise and sell that finished position.
From there, pitch the hips back as you follow the bag back down into that original hinge position for one repetition.
Tips for the Sandbag Shouldering Exercise
Make sure there is no rotation of the hips or shoulders.
Stand tall with the sandbag shouldered squarely on one shoulder or the other, with no excessive amount of rotation at the torso, hips, or knees.
Ideally you will, alternate shoulders from one side to the other.
When you accelerate the bag up towards the shouldering portion, keep the elbows and sandbag as close to the body as possible during the entire range of motion.
Do not let the bag swing away from your body
Do not lock out yourarms, this will create a long arc. You want to keep the bag as close to the body as possible, while avoid any rotation of any body parts.
]]> https://www.onnit.com/blogs/the-edge/build-muscle-with-the-gorilla-row-exercise2025-07-10T10:55:23-05:002025-08-15T08:23:13-05:00Build Muscle With The Gorilla Row ExerciseJeremy GottliebIf you want to build a thick, strong back, you have to train like an animal—and what better way to do that than with an exercise that actually makes you look like a silverback gorilla when you’re performing it? Let’s look at the gorilla row kettlebell exercise and how you can use it to build strength and size.
The gorilla row is a variation on thebent-over rowyou’re probably already aware of and usually see done with a barbell. You hinge at the hips and row the weight from the floor until your elbows are at your sides. The key difference with the gorilla row vs. a barbell bent-over row is thatthekettlebellsallow you to work one side at a time.
You’ll actively push one kettlebell into the floor while you row the other one, all while staying in that bent-over position. The movement can’t help but make you look something like a gorilla foraging for food, but it will also give you the back muscle strength to be king of your own (iron) jungle.
Gorilla Row Exercise Benefits
Any type of bent-over row is a good idea for stimulatingtotal-body strength gains. Your lats and upper back work when you row the weight, but your lower back, hips, andcoremust also engage just to keep you in position and support your torso. Lifting the weight from the floor on each rep, as opposed to letting the weight hang just slightly above, as you do in some rowing variations, offers the added benefit of keeping the movement more strict, as well as training explosiveness. You can’t let your muscles’ stretch reflex bounce the weight up for you—you’ll have to pull the bell up with muscle power alone.
The gorilla row takes all of this to the next level by having you work unilaterally—one side at a time—which means you’ll be able totrain your back through a greater range of motion,and you’ll have to resist any twisting or bending on one side while you row on the other, further heightening thecore stabilitycomponent. Of course, maintaining a deep hip hinge through it all is an important posture to master for lower back health and overall power and explosiveness (nearly all explosive movements involve hip extension, so you might as well master the setup for it).
Step 1.Place two kettlebells on the floor and straddle them with your feet between hip and shoulder width. Hinge your hips back, keeping a long spine from your head to your tailbone. Allow your knees to bend as needed, but keep your lower back flat, not rounded. Grasp the kettlebell handles.
Step 2.Press one bell into the floor and brace yourabs. Now row the opposite bell till your elbow is at your ribs. Lower it to the floor again, and repeat the row on the other side while you press the opposite bell into the floor.
The gorilla row is typically done by alternating sides, butyou may choose to do all your reps on one side and then the other if you want to better isolateyour back one side at a time.
For the best muscle gains, you should keep your shoulders square to the floor throughout the set. However, “You can also rotate your thoracic spine to get a little more mobility out of this exercise,” says Eric Leija, an Onnit-certified coach (@primal.swoledier) and the model in our video. “But you’ll get less lat activation, because the lat won’t be able to fully shorten.”So, if you’re an athlete like a fighter or baseball player who throws or twists a lot in their sport, you may want to allow your torso to turna few degrees as you row. “But if you’re looking to put on a nice, thick back,” says Leija, “try to minimize that rotation.”
Due tokettlebells having handlesthat reach a few inches above their center ofmass, they’re easier to grab a hold of than dumbbells when rowing weight from the floor.Unless you have a contortionist’ship mobility, trying to grip dumbbells on the floor for gorilla rows will cause you to round your lower back,which you never want to do on a bent-over rowing movement for the sake of avoiding injury.
But, if dumbbells are all you have, you can still do the basic gorilla row movement and get plenty out of it. Simply elevate the dumbbells on a box, bench, or mats in order to raise them to mid-shin level. Now you’ll be able to bend over safely to grasp the handles.
How To Stretch Before Exercising
Warm up your upper back,lats, and core muscles with the sky reach toarmthread. Do this move as part of your warmup/stretching routine before any session that includes the gorilla row.
Step 1.Get on all fours with your hands under your shoulders and your knees directly beneath your hips. Brace your core.
Step 2.Draw your right arm up and across your chest as you twist your right shoulder toward the ceiling and reach overhead. Be careful to keep your hips facing the floor.
Step 3.Reverse the motion, reaching your arm across your body and behind the support arm. Twist as far as you can, ideally until the back of your right shoulder touches the floor. Complete 6–10 reps on that side, and then switch sides and repeat. Do 2–3 sets total.
Gorilla Row Alternatives
If the gorilla row feels too advanced, or you can’t seem to perform it with a safe lower-back position, try these two alternatives that will train the back and core in a similar way.
One-Arm, Split-Stance Row
(See04:54in the Build Muscle With The Gorilla Row video.)
Step 1.Step forward with your right leg, as if getting into a lunge position, and extend your left leg straight behind you. Your front knee should be bent about 90 degrees and your back heel may be raised off the floor. Bend at the hips and brace your right forearm against your right knee. Press it into your leg—this will help create stability. Your body should form a long straight line from your head to your heel. Reach with your left hand to grasp a kettlebell on the floor.
Step 2.Row the kettlebell to your side while keeping your shoulders square to the floor. Complete your reps on that side, and then switch sides and repeat.
Renegade Row
(See06:10in the Build Muscle With The Gorilla Row video.)
Step 1. Get into a pushup position, resting your hands on a pair of kettlebells (or dumbbells). Turn the handles so they make an A-shape, which will help you balance on them better. Place your feet as wide apart as is comfortable. A narrower stance will make the exercise harder; a wider foot placement will make it easier. Take a deep breath into your belly and brace your core.
Step 2. Lean your weight to your right side, pushing that hand into the floor. Your left side will feel lighter. Now row the left-hand weight to your side, but avoid twisting your hips or shoulders. Lower the weight and repeat on the other side.
]]> https://www.onnit.com/blogs/the-edge/how-to-do-the-hang-clean-exercise-like-a-pro2025-07-10T10:55:23-05:002025-08-15T08:13:19-05:00How To Do The Hang Clean Exercise Like A ProJeremy GottliebThe hang clean is an abbreviated version of the barbell clean exercise that you see in Olympic weightlifting competition (there are actually two parts to the Olympic lift—the clean and the jerk). Even if your goal isn’t to hoist hundreds of pounds while wearing a singlet, the hang clean is a great exercise to master, as it builds power that can translate to other lifts you might like to do (such assquatsand deadlifts) as well as sports in general. Of course, because the hang clean works so many muscles, it can make you look jacked, and it contributes to an impressive set oftraps(the muscles that slope down from your neck to your upper back).
The hang clean, however, is a highly technical movement that takes A LOT of practice to really get down. Follow the advice given here by Zack Telander (@coach_zt), Olympic weightlifting competitor and coach, to master the hang clean and use it to gain muscle, power, and total-body strength.
What Are Hang Cleans and What Are The Benefits of Doing Them?
In the full clean exercise, as done in the sport of weightlifting, you start with the bar on the floor and heave it up to shoulder level (called the “front rack” position). In the hang clean, you start the movement already standing straight and then bend your hips back to lower the bar—usually to just below the knees. From there, you explosively extend your hips, knees, and ankles to get the bar up to the rack position. This is done right after you lower the bar, so the stretch reflex kicks in and helps you power the bar up. Because you start in a stronger position, says Telander, the hang clean is a little easier to control than the regular clean, and therefore a better move for beginners to work on.
The hang clean offers numerous benefits. The explosive extension of the hips, knees, and ankles (called “triple extension” by coaches) happens almost simultaneously, producing tremendous power.A football player’s ability to charge forward out of a three-point stance, a basketball player’sjumpshot, and a track star’s sprint all owe their power to triple extension.Unsurprisingly, the hang clean almost always figures into the workouts of these types of athletes.
The hang clean also recruits pretty much every muscle you can think of, but particularly the glutes,hamstrings, calves, upper back, andcore. Progressively loading the hang clean over time can get you big and strong and change your physique.
The hang clean is awesome… but it’s not as easy as doing a barbell curl or a dumbbell shrug. It’s an incredibly technical movement that’s going to require a lot of practice to do properly—so be patient. Telander recommends you break the hang clean down into its component parts and work them one at a time. Practice the following with an EMPTY barbell.
The first thing to familiarize yourself with is the front rack position—holding the bar at your collarbone/shoulder level. This is the last part of the clean movement—where the bar finishes—but Telander likes to drill it first because it’s the easiest part of the lift to get down. It also sets you up for presses and jerks, which you’ll want to progress to after you have the hang clean under your belt.
Step 1.Stand with your feet between hip and shoulder width and hold the bar atarm‘s length with your hands at shoulder width.Your hands should be about thumb length from the outside of your thighs.Now press the bar overhead.
Step 2.Lower the bar with control until it’s at shoulder level, and point your elbows forward as you bring it down. This should allow the bar to settle just above your clavicle in the front rack position. If you lack mobility in your wrists, upper back, or shoulders, you may have difficulty holding onto the bar. Your hands can open to allow you greater range of motion, but don’t let the bar roll all the way to your fingertips—you won’t be able to control it.
Repeat this motion for several reps and practice it for multiple sets. Your mobility should improve within a few sessions. When you’re confident in your front rack, move on to the next component.
The muscle clean is where you’ll work on popping the bar from your hips to your chest—the stage right before you finish in the front rack. It’s basically an upright row done with momentum.
Step 1.Start with the bar at arm’s length in front of you again.
Step 2.Row the bar straight up in front of your body, raising your elbows high and out to your sides. As the bar reaches your chest, push your elbows forward and under the bar so you end up in the front rack. Essentially,“as soon as you feel you can’t pull the bar any higher with the grip you’ve taken,” says Telander, “you’ll want to begin turning your elbows over.”
Be careful not to lift the bar too high so that it flops over and bounces into the front rack. You want to pull it fast, but don’t let momentum take control away from you.
Practice this for several workouts, and integrate it with the front rack. At this point, you’ll have two-thirds of the hang clean down pat.
Now you’re ready to practice getting the bar in contact with your legs and beginning the explosion upward.
Step 1.From the same standing position, bend your knees slightly and then bend your hips in order to lower the bar to mid-thigh level.
Step 2.Let the bar drift away from your body and then, using only yourarms, snap it back so it touches your thighs again. As soon as you feel it hit your thighs, extend your hips and knees and go into the muscle clean you learned in Part 2.You don’t have to raise the bar all the way up to your chest though. Keep the movement between your thighs and about sternum levelso you canfocuson that initial hip and knee drive. The bar should glide up in a straight line, just in front of your shirt.
When that feels natural, try integrating the contact drill with the full muscle clean and finishing in the rack position. Then, when that feels strong, you can begin to catch the bar in the front rack position by jumping and descending into a quarter-squat. As you come up in the muscle clean, use enough power so that your feet leave the floor and you come back down bending at the hips and knees to absorb the force.
Hang in there, no pun intended. You’ve got almost the entire hang clean movement now.
The hang clean can begin just above or below the knees, depending on how you want to implement it in your training. For those just learning the clean, Telander likes to begin from below the knee at about mid-shin height, as that’s the safest way to practice the hang clean and reinforces good technique.
Practice the integrated hang clean drills you’ve already worked on, but instead of beginning the contact drill with the bar drifting in front of you, you’ll begin with the bar in contact with your legs at mid-shin.Start from standing, take a breath in and hold it, and bend the hips and knees until the bar is low enough. As soon as you reach that position, begin extending your hips and knees and clean the barto the front rack. Exhale, drop the bar back in front of you with control, and repeat.
When you feel good about your form, you can add weight to the bar. Start with 25-pound plates, and you may need to elevate the bar on some blocks or mats so that you can set up with the bar at mid-shin. When you work up to using 45s on each side, the bar will be high enough just sitting on the floor. (If you have rubber bumper plates, any weight you use will be the same diameter and therefore the same distance from the floor).
How To Choose The Right Weight For The Hang Clean (Plus, Sets and Reps)
The hang clean is meant to be loaded heavy, so you can build as much muscle and strength as possible. But when you’re new to the lift, you need to go light so you can master good technique. Start with no more than 45 pounds on each side (again, lighter weight with the use of bumper plates is even better, if you have access to them).“Go for 5–10 sets of 1–3 reps,” says Telander.As you get better, you can work up to sets of as many as 5 reps, but you should rarely go higher than that. The more reps you perform, the more fatigue you’ll accumulate, and fatigue causes form to break down and can lead to injury, or, at the very least, sloppy hang cleans that don’t have the desired training effect.
Five to 10 sets seems like a lot, doesn’t it? Remember, this is Olympic weightlifting, not bodybuilding, and the emphasis is on technique and power—not muscle failure.You want to do a fair number of sets to ingrain good form, so think of them as practice.A set of hang cleans should end when you feel you can’t do another rep with perfect form, not the point where you’re straining to even get the bar moving. It’s a different kind of training than most people are used to, and it requires a different mentality.
The hang clean is truly a full-body movement, as it involves so many muscles to take the bar from near the floor up to your collarbone. With that said, weightlifters often sport impressive trapezius muscles, thick upper backs, and dense glutes and hamstrings. Beyond the changes you’ll notice hang cleans have on your physique,their main benefit will be to your athletic potential.Telander says hang cleans build the muscles and the neuromuscular coordination necessary to jump higher, run faster, and lift more weight, particularly on exercises that use similar body mechanics, such as the squat and deadlift.
We mentioned above that the front rack position can be awkward for many people. The hang clean also demands a lot of mobility in the hips and hamstrings. Therefore, Telander recommends these two drills that can help open up the areas that allow you to control the bar better throughout the hang clean’s range of motion.
Step 1.Grasp an elastic exercise band (preferably a loop band as opposed to a tube) with your right hand and stand on the other loop with your right foot.
Step 2.Get into the front rack position and then raise your arm overhead so your elbow points to the ceiling and the band pulls on your arm in a straight line from behind your back. Allow the band to stretch your arm—you should feel a strong pull through your triceps and back.Pull your ribs down so you don’t hyperextend your spine, and brace your core. Hold the stretch for 30–60 seconds, and then repeat for 2–3 sets, or until you feel that your front rack position has improved. Do the stretch on both sides.
Step 1.Stand with feet at hip width and bend your knees slightly.
Step 2.Push your hips back as far as you can while keeping a long spine from your head to your tailbone—don’t lose the arch in your lower back. You’ll feel a strong stretch in your hamstrings.Do 2–3 sets of 10–20 reps.You can also use the exercise band you had for the front rack stretch to increase the intensity: stand on the center of the band while holding a loop in each hand. Yet another option: use akettlebell.
If you’re having trouble with the hang clean, back off to a less complicated exercise that shares similar mechanics but is less technically demanding. TheRomanian deadliftand kettlebell hang clean build strength and power in the hips and will help you get familiar with the hip extension movement you need to be proficient at hang cleans when you go back to them.
See the description for the bodyweight RDL above. The exercise is essentially the same, but now you’ll add weight, performing the lift with a barbell.Perform 2–3 sets of 5–10 reps.
While the kettlebell hang clean is easier to master than the barbell version, it offers a different kind of challenge and a unique array of benefits. You’ll use twokettlebellsat once, which means your body will have to stabilize two weights independently, and this is helpful for simulating the chaos that comes in real-life sports play.
Step 1.Stand with feet outside shoulder width and hold a moderate-weight kettlebell in each hand.
Step 2.Bend your hips back and, when you feel a stretch in the hamstrings, explosively extend your hips and pull the kettlebells up in front of your torso.Drive your elbows back against your sides as you do this—this will help you avoid flipping the kettlebells over your wrists so they slam into the back of your forearms,a common (and painful) mistake. Then drive your elbows forward. The weights should end up just under your chin (basically the same rack position as in the barbell hang clean).
The hang clean isn’t any more dangerous than virtually any other barbell lift, but it can be trickier. You absolutely must pay attention to your form at all times. Telander says to think about the three parts to the lift that he described above as a spectrum—you’re free to go back and forth between them and revisit a section as needed when you recognize that one part needs work. “If you struggle with the full hang clean,” says Telander, “you might need to go back and work on the contact drill.” Likewise, if you feel off on your contact drill, go back and drill the muscle clean some more. Each part sets you up better for the one that follows it.
Telander also cautions not to think of the clean as a reverse curl with momentum—a very common mistake.You’re not heaving weight up with just your back andbiceps. “Think ‘elbows high’ when you do the muscle clean,” he says, so you row the weight up rather than sling it.
It’s also a good idea to hire a coach to observe your form and correct it on the spot.USA Weightliftingcan connect you with such a person (many CrossFit boxes have weightlifting-certified coaches as well). At the very least, video yourself so you can look at what you’re doing and gain awareness. Having a training partner is a good idea too.
]]> https://www.onnit.com/blogs/the-edge/top-7-full-body-exercises-for-efficient-workouts2025-07-10T10:55:23-05:002025-08-12T00:11:45-05:00Top 7 Full Body Exercises For Efficient WorkoutsShane HeinsAren’t we always looking for the most effectivefitnessprogram or exercise that will deliver us speedy and significant results? Of course we are, and I’m here to let you in on a little secret¦
Efficiency in fitness is found in full body exercises! Meaning, you have to do exercises that stimulate multiple muscle groups at once, and these exercises will save your ass a lot of time in the gym.
Let’s be honest. In this day and age, most of us don’t have an hour a day, 5 days a week to spare for training. For the luck few of you who do, wouldn’t it be nice to cut that back a bit?
We are living in the new age of fitness. Gone are the days of muscle isolation – separating back days from chest and leg days to reach optimal personal fitness.
ThinkQUALITYoverQUANTITYwhen it comes to you workouts and you will be far more productive and efficient with your training program.
Now this isn’t rocket science or is it groundbreaking news, but it is vital you understand the benefits of full body exercises, who they are best for, and which exercises you have to choose from.
5 Benefits from Doing Full Body Exercises
â Greater caloric expenditure in less time. â Build strength & muscle tone. â Increases training program efficiency. â Allows for more training variety and decreases your chances of overtraining and burning out. â Challenges aerobic capacity.
Who benefits from full body training?
Almost everyone can benefit from full body training. Full body training incorporates the most muscle recruitment per exercise, which means you get more caloric expenditure, muscle activation, culminating in more muscle tone.
This helps build size, strength andendurance. The only time full body training isn’t ideal is for serious bodybuilders because they need tofocusall their energy and efforts into one muscle group to make specific gains.
My 7 Favorite Full Body Exercises
1. Overhead Lunge
This brutal exercise is extremely demanding and dynamic as you are holding a pair of dumbbells,kettlebellsor barbell overhead while walking into a traveling lunge. Great for upper and lower body strength.
2. Burpees
Come on, you cannot train without tossing in a few sets of burpees. Burpees are the epitome of fitness. As much as they suck, this bodyweight exercise is a complete upper and lower body exercise.
3. Dive Bomber Push Up
Also known as a Hindu Push Up, this dynamic push up challenges strength, shoulder, and hip flexibility. It takes a traditional push up and transforms it into a super push up.
4. Thrusters
This upper and lower body combination is torturous. This exercise combines afront squatto an overhead press in one unbroken movement. Perfect for building full body strength and making you feel miserable.
5. Pull Up
The pull up is a must-do-exercise! It enhances the shoulder and posture, buildsbicepand grip strength, and activates thecore. Make sure to include all types: mix grip, under/overhand, close/wide grip and slow/fast pulling.
6. Farmer Walks
The farmer walk is amazing in building grip, core, back and posture strength. Usually done carrying a heavier load, the farmer walk is tested by traveling varied distances.
7. The Plank
While some may laugh at the simplicity of the plank, it is genuinely a phenomenal exercise that targets the glutes, core, posture, quads, shoulders, and many small stabilizer muscles. The plank is a great exercise that never gets old!
Are these the only full body exercises that you can do? Of course not! There are plenty of others but I feel these bad boys really drive results.
Below is a sample to give you an idea of how to incorporate these exercises into your training (reps and sets are dependent on your goals). Feel free to mix things up, add in both core and conditioning sets to boost your results.
The key is to do the bulk of your training with full body exercises.
Sample Workout Plan for the Week
MONDAY
Strength
A1: Pull Ups x 7-10 reps x 3-5 sets. A2: Burpees x 20 reps x 3-5 sets.
MetCon
B1:Jump Rope x 50 reps x 3 sets. B2: Plank x 30-60 sec x 3 sets.
TUESDAY
OFF
WEDNESDAY
Strength
A1: Thrusters x 7-10 reps x 3-5 sets. A2: Dive Bomber Push Ups x 15-20 reps x 3-5 sets.
MetCon
B1:Kettlebell Swings x 10 reps x 3 sets. B2: Plank x 30-60 sec x 3 sets.
THURSDAY
OFF
FRIDAY
Strength
A1: Overhead Lunge x 60 sec x 3-5 sets. B2: Farmer Walks x 30 sec x 3-5 sets.
MetCon
B1: Double Unders x 10-15 reps x 3 sets. B2: Plank x 30-60 sec x 3 sets.
Full body training can save you time in the gym without sacrificing your results. Make your workouts count and don’t waste time. But wait!
Couldn’t increasing your training frequency help you to achieve faster results? Sure it can, but that doesn’t mean you need to stress out and force yourself to train all week to get fit.
Cycle in my top 7 full body exercises regularly and witness your fitness go from zero to hero!
Good Luck!
]]> https://www.onnit.com/blogs/the-edge/muscle-pump-training-for-more-mass2025-07-10T10:55:23-05:002025-08-08T17:41:50-05:00Muscle Pump Training for More MassShane Heins Muscle Pump Training Summary
– Begin your workout with an exercise that primes the muscles you’re going tofocuson that day for growth. Ex: leg curls before a leg workout and face pulls at the start of a push/pull session.
– Do 2–3 sets of 25–40 reps, or simply aim to work for 45–70 seconds per set. Rest between sets should be 20–45 seconds.
– For the last exercise in your workout, choose a lift that places no demand on your stabilizers so you can focus solely on the target muscles without fear of breaking form when fatigued. Ex: chest-supported row or double-banded hip thrust.
– Finish the workout with a stretch lasting 20–60 seconds for the muscles you pumped.
Getting a pump is probably the main reason people train with weights. While it can take weeks to see actual muscle growth from a resistance-training program, a pump lets you look swole right away, so even “bros” who don’t have the discipline to follow a long-term plan can still will themselves to hit a workout now and then. Arnold said it’s the most satisfying feeling you can get in a gym, and even likened the sensation of a pump to having an orgasm.
Hell, you don’t even have to know what you’re doing to get a good pump. Do a few moderately-challenging sets without too much rest in between and before you know it you’re filling out your T-shirt. But here’s the thing: getting a pump isn’t just for vanity, and it doesn’t have to be just a byproduct of a good workout, either. Science is beginning to confirm what bodybuilders have known for years—that pumping up your muscles is highly effective for eliciting real and lasting muscle growth. Therefore, learning how to get a pump efficiently, and maximizing its effects, should be a regular part of your workouts if your goal is to build muscle—especially if you want to do it without the use of heavy weights to minimize the risk of injury.
The Science of Swole
The technical term for the pump, as you’ll see in exercise science literature, is “cellular swelling.” When you lift weights, blood rushes to the muscles to supply them with the nutrients they need to perform.The intense muscle contractions produced by your reps temporarily compress the veins that take blood out of the muscles and back to the heart.As a result, extra blood gets trapped in the muscles, swelling them to greater than normal size. You may shrink back down to your old self shortly after your post-workout shower, but that doesn’t mean bigger muscles—permanently bigger muscles—aren’t on their way. Getting a good pump foreshadows your physique to come.
According to 2013 research published inStrength and Conditioning Journal, “there is a paucity of resistance training studies directly investigating the effects of acute cell swelling (i.e., the pump) on muscle hypertrophy [muscle gain]. However, basic research provides a compelling reason to believe that exercise-induced cell swelling enhances hypertrophic gains.”
The pump may lead to muscle growth by stretching muscle cell membranes. The theory goes that these membranes perceive the stretch as a threat to their structural integrity, and respond by growing bigger. So if you’ve ever laughed at a buddy who only “chased the pump” in his workouts, he may be getting the last laugh now.
How To Get A Muscle Pump
If you’ve read up on strength training, you may know the textbook set and rep prescriptions for building muscle. By most accounts, performing 3–6 sets of 8–15 reps is the most effective protocol for putting on size. Conventional thinking assumes that lower rep ranges would do more for pure strength gains, while higher rep counts mainly benefitendurance.
But a look at the training of numerous bodybuilders, both steroid-enhanced and “natty,” clearly shows otherwise.These guys often train with sets of 25 reps or more.Furthermore, they use tricks like slowing down their rep speed and avoiding lockout to keep constant tension on the muscles, which can make their sets last even longer and feel a hundred times more taxing than the typical “3 sets of 10.” This approach also leads to a more dramatic pump.
Maximizing a pump requires moderate or even very light weights done for high reps (or a long set duration), followed by short rest periods.
While you probably enjoy pumping up your chest, some muscles lend themselves better to the pump than others, and the pecs aren’t muscles that respond best to targeted pump training.The muscles that do are the ones that act as postural stabilizers, and therefore have a greater capacity for endurance,because they work almost constantly to keep your body in alignment. These muscles include the rear delts, upper back, spinal erectors, and glutes.
While they certainly can pump up, muscles like the quads,hamstrings, and pecs aren’t meant to be worked with a maximum-pump set and rep scheme—at least not with free weights—so training them that way can be risky. Imagine trying to perform high-rep sets of barbell backsquatswith little rest in between. Your form will probably break down quickly, and you could hurt your back or knees as a result. If you try to bench press for high reps, you run the same risk of pressing out of your groove and hurting your shoulders. The only way to do high-rep, long-duration sets for these muscle groups safely is to use machines (leg extension and pec-deck, for example), which is certainly a viable option if maximizing hypertrophy is your goal.But if you train at home, or your workouts are limited to free weights, you’ll have to pump the quads, hams, and pecs with more conventional set and rep schemes.
Apart from the postural muscles, the shoulders,arms, forearms, calves, andabs—all of which are made to perform long-duration work—also respond well to pump training. I shake my head when I see people going heavy on curls, breaking form and swinging the weight up. I can get a skin-tearing pump using a mere 12.5 pounds just by squeezing mybicepsat the top and keeping tension on them by not locking out my elbows at the bottom, as you can see in the video below.
Incline Biceps Curl
Here’s an example of an exercise I like to do for glutes, called the double-banded hip thrust.
Double-Banded Hip Thrust
I wrap a band around my knees and stretch another one across my hips and perform a simple hip extension (glute bridge). Having the band around my knees forces me to keep my lateral hips activated while I’m working the glutes for more muscle recruitment (I have to keep forcing my knees out to keep tension on the band). Doing 30 reps of these gives a whole new meaning to the expression “light a fire under your ass.”
Muscle Pump Training Sets, Reps, and Rest
Generally speaking, pump work should be done for 2–3 sets of 25–40 reps, or last 45–70 seconds per set. Rest between sets should be 20–45 seconds.
If you want even more work, and aren’t interested in doing any heavy lifting in your workout, you can do your warm-up sets for your pump exercise in this fashion as well. In other words,do an additional two or three sets for high reps, performed slowly, and ramping up the weight gradually until you reach a load that provides the greatest challengeyou can handle for 25–40 reps, or 70 seconds.
In order to discourage racing through your sets so you achieve the requisite time under tension (the amount of time your muscles spend working during the set), you can experiment with the technique you use to perform your reps. Each one should be done more slowly and methodically than you’re probably used to. You can avoid locking out your elbows on biceps curls, for example, to keep full tension on the muscles without letting the joints support the weight. You can squeeze the muscles at the point of peak contraction too, such as at the top of a curl or the lockout of a hip thrust, to slow things down further and emphasize yourmentalconnection to the muscles.Decades of anecdotal evidence supports the idea that actively thinking about the areas you’re training while working them, called the “mind-muscle connection,” improves their development.Over time, gaining greater neural control over your muscles can translate to greater strength gains when doing heavy lifts—you’ll be able to integrate all your muscles, big and small, for a more coordinated effort.
When To Pump Up
There are two times in a workout when pump exercises are best performed: as an extension of your warm up, preparing the muscles you’re going to focus on that day for heavier poundage, and at the end of a session as a finisher (where you burn the muscles out to finish them off, flooding them with blood as a result).
For example, on a lower-body day, you can prime your posterior chain with a hip thrust or leg curl. You’ll expediteblood flowinto your glutes and hamstrings and lubricate your hip joints with more synovial fluid, as well as begin the release of a cascade of anabolic hormones that will support muscle gains. For an upper-body session that centers around pressing or rowing movements, exercises like the face pull, band pull apart, or straight-armpulldown will do the trick. Choose only one lift as a primer.
Banded Face Pull
At the end of the workout, once the heavy or more technical training is complete, it helps to blow out the muscles for a few sets of high reps to maximize blood flow to them. The caveat at this point, however, is to choose exercises that are very safe. At the tail-end of a workout, once you’ve accumulated fatigue, you don’t want to risk getting sloppy and getting hurt. You should have no fear of your stabilizer muscles giving out so that you break form or lose postural control.Choose lifts that allow you to concentrate on working hard without much concern for losing a safe spine position and paying for it with injury.For the upper body, a chest-supported row (chest-down on an inclined bench) would be perfect. For me, the double-banded hip thrust is a staple for closing out my lower-body days.
After all your lifting is done, end the workout by stretching the muscles you just pumped. For the upper body, for instance, you can hang from a pullup bar or stretch your pecs in the bottom of a pec fly. For the lower body, bend your knee and grasp your instep to stretch your quads, or stretch your calves against a wall.Stretching continues the occlusion effect of the pump training—cutting off blood flow out of the muscles—to promote further gains.Simply put, the lifting pumps the blood in, and the stretching will keep it there for longer. Hold the stretches for 20–60 seconds. Be warned, with your muscles already engorged, they’ll feel extra stiff, so the stretch will be intense, borderline painful. Tough it out, but don’t force yourself into a range of motion you’re not ready for.
More Benefits Of Muscle Pump Training
As you’ve probably guessed, performing reps as I’ve described—at a slow pace, with squeezes and constant tension—is going to limit the amount of weight you can use. It may limit it to tiny dumbbells or machines with just a plate or two loaded on them. That’s totally fine.
The growth stimulus here doesn’t come from load as much as it does increased blood flow and the stretch it puts on your muscle cell membranes,so don’t let your ego ruin your workout.
The lack of weight is actually a good thing in many respects. If you have joint pain or other injuries from going too heavy for too long,you now have a way to build your muscles without risking further stress to your connective tissues.Many muscular injuries (pulls, strains, tears) happen where the contractile units inside the muscle meet the tendon that the muscle attaches to. Pumping the muscles with light weights poses little risk to this area and can actually strengthen the connective tissues to be more resistant to injury.
Finally, learning to perform precise reps without momentum and tolerate the burn that results will build mental fortitude that carries over to other aspects of training, sports, and life where you have to push yourself to the limit. With pump training, you can go to failure and test your mettle but with almost no risk of injury or accidents.
]]> https://www.onnit.com/blogs/the-edge/5-keys-to-mastering-the-deadlift2025-07-10T10:55:22-05:002025-08-15T08:57:05-05:005 Keys to Mastering the DeadliftJeremy GottliebMany people consider thesquatthe “King” of all exercises. While those people make a strong case, the deadlift’s claim to the throne is as strong if not stronger. Few exercises combine the full body strength required for the deadlift, working the back, legs,traps, shoulders,arms, forearms,absand butt!
Unfortunately, the lift is often attempted without using proper deadlift form, resulting in injury. There are five key points to remember when safely performing the proper deadlift: Your feet, your grip, your stance, the pull, and the negative.
Deadlift Key #1 – The Feet
Place your feet shoulder width apart. Make sure your feet are flat and driving down through the heel. If you drop your hips to pull and feel your ankles roll, something is wrong.
For most people, simply changing your foot placement will correct the issue. Others may need to improve their ankle mobility or even try new shoes.
Deadlift Key #2 – The Grip
The deadlift can be performed with a double overhand grip, mixed grip or hook grip among others. For the sake of this article, we are going tofocuson the conventional double overhand grip.
Grab the bar with both palms facing toward your body and your arms vertical to the floor – if yourhamstringsfeel tight, do bodyweightsquatsto open up your hips. Place your hands about shoulder width apart, right outside your legs to minimize the angle of your hips and decrease the distance of the pull.
Deadlift Key #3 – The Stance
Bend your knees until your shins are a few inches off the bar, keeping them above the middle of your feet. You’ll need room to move both your shins and knees forward. This allows your hips to drop into place and help prevent your back from rounding.
Lower your butt until your quads are parallel. Lift your chest, but don’t squeeze your shoulder-blades together. Pull your shoulders back at a downward angle, positioning them over the bar, remembering to keep your head inline with rest of your spine.
Deadlift Key #4 – The Pull
Keep the bar as close to your body as possible, rolling it over your knees and thighs until your hips and knees are locked. Stand straight, do not lean back at the top. By driving your feet down into the floor, the weight will begin its upward trajectory.
Don’t rise too fast into a straight legged position, it is a fluid motion. As the bar hits the knees, use your glutes to lock into a straight torso position. Don’t arch your back, keep yourcorebraced throughout the lift. As the bar passes your knees, don’t pull with your back, but thrust with your hips.
Keep your head up and chest out – this will help maintain proper alignment of the back. As you pull the weight up, you want your legs to straighten out simultaneously with your hips. Your hips, knees and feet should simultaneously form a straight line.
Deadlift Key #5 – The Negative
Now it’s time to return the bar to the floor. Don’t lower the weight straight down. Instead, load both the hamstrings and glutes with aRomanian Deadliftmovement back to the knees.
Once it reaches the knees, move the bar straight back to the floor where you can perform another rep immediately or come to a complete stop, resetting before your next rep.
Putting these five keys to use will ensure proper deadlift form without the risk of injury and build an all-around powerful, muscular, shredded physique while strengthening all the major muscle groups.
]]> https://www.onnit.com/blogs/the-edge/4-traps-exercises-and-2-workouts-for-getting-huge2025-07-10T10:55:22-05:002025-08-15T08:17:51-05:004 Traps Exercises and 2 Workouts for Getting HugeJeremy GottliebTom Hardy as Bane. Pro wrestling’s Bill Goldberg. Brock freakin’ Lesnar¦ When you think of the most jacked and brutally Herculean physiques in the world, these are some of the guys who probably come to mind, and the main reason why is a well-developed set of traps. If you have ambitions of competing in a physique contest, or you just want to look like a football lineman, bouncer, or some other tough SOB, building up your traps ought to take priority in your training. We’ve got 4 traps exercises and 2 workouts that will turn your neck and upper back into that of a Brahman bull.
When weightlifters say “traps,” they’re talking about the trapezius muscles on the upper back. There are two of them, one on each side of the spine, and they consist of three parts—each with a different function.
The upper traps start at the top of the neck and attach to the upper and outer edge of the shoulder blade. This part of the muscle shrugs your shoulder, rotates your shoulder blade upward when you raise yourarmabove horizontal, and helps turn your head. The middle traps originate in the center of the spine and spread out to the shoulder blade and acromion joint. The mid traps pull your shoulder blades back and together.
The lower traps start out way down at the bottom of the rib cage and stretch up to the shoulder blade. They do the opposite of what the upper traps do, drawing your shoulder blades downward.
Most guys only train their traps with barbell and dumbbell shrugs, but as we just explained, that shrugging motion really only works the upper traps,so shrugging alone is incomplete training when you want an upper back like a bull. To get trapezius muscles that appear three-dimensional and make you look like you’re wearing an oxen’s yoke—hence the term “yoked”—you need to train the traps’ other two functions. And that’s not just a good idea for building a bad ass physique.Strengthening the middle and lower traps will also help to ward offshoulder injuriesand keep your upper back in balance with your chest.
Ask any physical therapist who’s dealt with clients complaining of shoulder pain from too much pressing or poor posture—they often prescribe scapular retraction and lower-trap exercises to restore balance. Chronic slouchers often experience scapular winging—excessive outward movement of the shoulder blades—which can lead to poor shoulder mechanics in pressing and reaching overhead.Strengthening the lower and middle trap helps offset that, explains Chad Waterbury, DPT,a physical therapist and strength and conditioning coach in Los Angeles (@drchadwaterbury). “You’ll open space in the shoulder joint and avoid pain and impingement when you reach overhead.”
Finally, from a performance perspective, strong traps play a role inweightlifting cleansand deadlifts. “In sports, they help you throw a punch and swing a racquet,” says Andrew Heffernan, CSCS, an award-winningfitnessjournalist andco-author ofThe Exercise CureandYour New Prime. In short, big traps aren’t just a sign of a guy or gal who can rip sh!t up—they actually help you do it.
Four Effective Exercises for Working Out Your Traps
Start integrating the following movements into your training. They can be done toward the end of any upper orfull-body training daysyou do, as well as on back days, if you follow a body-part workout split. (See sample workouts below in the Best Trap Workouts For Getting Huge section for examples of how they can fit in.)
1. Dumbbell Shrug With Forward Lean (Upper and Middle Traps)
Most people do shrugs by shrugging their shoulders straight up. That will certainly hit the upper traps, but you’ll involve more of the muscle—specifically, the middle traps, the meatiest part of the muscle—by angling your body forward a bit. It also allows you to use a greater range of motion.
This kind of shrug was a favorite technique of Dorian Yates, a Mr. Olympia-winning bodybuilder with one of the biggest backs in history.
Step 1.Hold dumbbells at your sides and bend your hips back about 20 degrees. Keep a long straight line from your head to your tailbone, and brace yourcore. You don’t want to round your lower back here. Retract your neck and tuck your chin. Maintain this body position throughout the exercise.
Step 2.Shrug your shoulders up and slightly back. You should feel your whole upper back pinch together. Hold this top position for a second or two to really make the traps work, and then lower the dumbbells back down under control, letting the weight stretch your traps at the bottom of the rep.
As you get stronger, your grip strength will limit the weight you can use, shortchanging your traps of the stimulus. It’s OK to use lifting straps to reinforce your grip so you can shrug heavier weights and challenge your traps even more.
Any rowing movement that has you squeezing your shoulder blades together will involve a lot of middle traps. But supporting your chest on a bench will provide more stability, which allows you to lift heavier weight, and will better isolate the upper back muscles in general. There’s a time and place for bent-over rowing variations, but if you want to zero-in on the traps, it’s better to take your lower back out of the equation and not waste energy stabilizing the entire body.
You can do these on a machine, with a barbell, or with dumbbells, as shown in the video above.
Step 1.Set a bench to about a 45-degree angle. It just needs to be high enough to accommodate the length of yourarmsand prevent the weights you’re using from hitting the floor at the bottom of each rep. Lie on the bench, chest down, and grasp dumbbells.
Step 2.Row the weights with your arms out about 60 degrees. This will target the traps better than if your arms are close to your sides, which is more of a lat exercise. Drive your elbows back as far as you can and squeeze your shoulder blades together at the top. You may want to hold the top for a second or two as you did with the shrugs to make the exercise stricter and emphasize the traps as much as possible.
Step 3.Lower the weights and allow your shoulders to spread at the bottom.
As with the shrugs, it may be helpful to use lifting straps on your rows once you’ve worked up to very heavy weights that your grip can’t hold onto.
Here’s a movement that really isolates the traps. The goal here is to prevent the other back muscles, along with thebiceps, from assisting, and force your traps to retract your shoulder blades alone. You can do these with a barbell or a machine, but dumbbells work fine too, as long as you use a wide enough grip to allow your shoulders to retract all the way.
Step 1.Set up on a bench the way we described for the chest-supported row.
Step 2.Simply retract your shoulders and squeeze them. Hold the top for a second or two. Be careful not to shrug your shoulders up or hyperextend your back. Just pull the weight straight back. Your chest may come off the pad a little, but don’t arch your back hard trying to get the weight up. It’s a short range of motion and a subtle movement, but the point is to isolate the traps, so don’t turn it into another row.
Remember we said that your lower traps pull the shoulder blades down in a reverse shrugging motion, so any pullup or pulldown variation will involve the lower traps to a large degree while it trains the lats. Still, it’s a good idea to really isolate the lower traps to strengthen them, especially if you do a lot of overhead or chest pressing, which can be hard on the shoulder joints. Strong lower traps help to stabilize shoulders, and the Y raise is a great movement for this purpose.
Step 1.Set a bench to a 45-degree angle and lie on it, chest down. Hold a light dumbbell in each hand, and brace your core.
Step 2.Raise your arms out in front of you on an angle so your body forms a Y shape. Hold the top for a second or two. You should feel the tension in the middle of your back, and if you don’t, make sure you’re not going too heavy or arching your back.
“The traps work in concert with other muscles—such as the rhomboids and serratus anterior—to perform a myriad of scapular movements,” says Waterbury. Any time you perform rows, chins, pulldowns, overhead presses, ordeadlifts, you’re also hitting your traps—especially the upper traps. Because the traps are involved in so many of your other back exercises, you don’t need to blast them with a death ray of volume to see gains.
Try adding one or two trap-focused exercises to your routinesfor two sessions a week, and do only two hard sets to start. (This means sets taken to failure, or within one rep of failure.) If you feel your traps are really lagging and you want to emphasize them, prioritize them by doing a trap exercise first in your workout. Here are two examples of back workouts that emphasize the trapezius.
The traps can get tight from a lot of heavy training in combination with sitting in front of a computer or looking down at your phone all day, so it’s helpful to stretch them out a little bit throughout the day and after training. This stretch from Waterbury may help to prevent headaches as well as injury in the gym.
Step 1.Reach your right hand behind your back and place the back of your hand against the back of your left hip. Hold your shoulders down and back.
Step 2.Grasp the back of your head and gently pull it down and across in the direction of your left shoulder. You’ll feel a strong stretch in the back of your neck and traps. Hold for 30 seconds, and then repeat on the opposite side. Repeat for 3 rounds.
]]> https://www.onnit.com/blogs/the-edge/how-to-do-the-dumbbell-snatch-for-huge-gains2025-07-10T10:55:21-05:002025-08-15T08:26:43-05:00How to Do The Dumbbell Snatch For Huge GainsJeremy GottliebThekettlebellsnatch is one of the best exercises you can perform to help increase power,corestrength, and overall athletic performance, but not everyone is ready to take it on. A kettlebell can be hard to control for beginners, or those not familiar with kettlebell training, resulting in it flopping over in your hand and smashing the back of your forearm as you lock yourarmout overhead. The dumbbell snatch is a solid alternative that works the body in almost the same manner, but is more user-friendly, so it’s a good option for people who want to enjoy the benefits of the one-arm snatch before progressing to the kettlebell version of the exercise.
How to Do The Dumbbell Snatch For Huge Gains
Benefits of the Dumbbell Snatch
The dumbbell snatch is a unilateral exercise, meaning that youfocuson one side of the body at a time. Unilateral movements are excellent for reducing side-to-side muscle imbalances that exist in many people, while helping athletes improve performance in areas that can translate directly to the court, field, or mat.
To perform a dumbbell snatch, “An individual is forced to utilize greater levels of balance, stability, and coordination, when compared to a traditional [barbell] snatch movement,” saysDr. Brian Brabham, C.S.C.S., Associate Professor of Exercise Science at the University of Mary Hardin-Baylor in Belton, TX. “Whether you’re experienced with the snatch or not, using dumbbells is a great way to increase the level of difficulty of a program.” Like the barbell snatch, the dumbbell snatch is also a triple extension movement, meaning that the hips, knees, and ankles all extend at the same time, making for a powerful jumping movement that trains the explosiveness that’s specific to so many sports.
Astudypublished in theJournal of Strength and Conditioning Researchcompared the effects of barbell snatching to the dumbbell version. It confirmed that the dumbbell snatchgenerates greater ground reaction forces and doubles the speed at which forces impact the bodyduring the pull phase (lifting the weight in front of your body) and the catch phase of the lift (finishing the rep overhead), respectively, on the non-lifting side—the one not holding the dumbbell. This asymmetry caused the researchers to conclude that unilateral variations of lifting movements, like the dumbbell snatch, offer different and beneficial training stimuli for athletes.
While the dumbbell snatch may look like it’s primarily an upper-body pulling motion—ripping the dumbbell off the floor and flinging it overhead by using your shoulders and upper back—the power that produces it is actually grounded in the major muscle groups of the lower body and the core. You have to use your quads, glutes, andhamstringsto powerfully extend your knees and press your hips forward as you draw the dumbbell away from the floor. Next, you need to brace your core when you “catch” the dumbbell above your shoulder, and stabilize the weight with your shoulders and upper back to keep the momentum of your pull from tearing your arm off. In other words, the dumbbell snatch targets just about every muscle group in your body, and, when done for high reps, demands a lot from yourcardiovascularsystem.
Muscles Worked With The Dumbbell Snatch
– Glutes(for a powerful hip extension)
– Hamstrings(assist the glutes with hip extension)
– Quadriceps(extend the knees)
– Lats(assist in drawing the dumbbell from the floor)
– Trapezius(assist with pulling the dumbbell from the floor and up in front of the body)
–Spinal erectors(protect the lower back and maintain stability of the spine during hip extension and through the catch)
– Abdominals(assist the spinal erectors in protecting the back and maintaining stability of the spine)
– Shoulders(assist in pulling the dumbbell from the floor and raising it overhead; the rotator cuff stabilizers also help keep the shoulder joints safe as the dumbbell is extended overhead)
– Triceps(help to pull the dumbbell from the floor and lift it into overhead extension)
How To Do The Dumbbell Snatch
“If the movement is new to a client, I always recommend starting with lighter weights and working on technique rather than jumping into the movement with heavier weights,” Brabham says, adding that the dumbbell snatch is meant to be fast and explosive—so muscling up heavier weight at the expense of technique and speed is pointless. “I instruct my students to keep the dumbbell close to the body,” he says. “Pull with a high elbow, and then extend over the head. A common mistake I see is that they will get to the armpit position [where the weight is at armpit level] and then try to press the dumbbell overhead. Momentum should carry the dumbbell overhead—not a press.”
The Setup
Step 1.Place a dumbbell on the floor between your feet. Position your feet slightly wider than shoulder-distance apart.
Step 2.Roll your shoulders back and downward, pulling your shoulder blades down toward the center of your spine (think: “proud chest”). Press your hips back while keeping a long spine—your head spine and pelvis should maintain alignment as you hinge at the hips. Bend your knees as needed so that you can reach the dumbbell. Your chest and shoulders should be level with the floor and remain facing forward.
Step 3.Grasp the dumbbell with one hand, breathe into your belly, and engage your core. Keep your shoulders driving down and back and lock in your long spine position. Allow your free arm to hang at your side.
The Pull
Step 4.Powerfully extend your knees, hips, and ankles, drawing the dumbbell up off the floor and close to your body as you come up. The movement should be powered by your lower body, not your shoulders. Your feet may or may not rise off the floor for a moment.
Step 5.Shrug the shoulder that’s holding the weight, driving your elbow up high and backward. The dumbbell should travel in a straight line up in front of you. Think about pulling your whole body under the weight as it rises.
The Catch
Step 6.When it reaches its highest point (above shoulder level), turn your elbow under the dumbbell. Catch the weight overhead with arm extended as it continues upward.
Step 7.Finish in a quarter-squatposition, which will allow you to decelerate safely. Then extend your legs to stand tall. Carefully lower the dumbbell back to the floor as you squat back down to set up for the next rep.
Where To Use The Dumbbell Snatch In Your Workout
The dumbbell snatch can be incorporated into a workout in a variety of ways, depending on your goals and your experience with the movement. If you’re not experienced with the dumbbell snatch, Brabham says your first priority is to master the technique. “I tend to keep the sets, reps, and weights low, initially,” he says. “Such as 2–3 sets of 3–5 reps. As an individual becomes more confident in his or her ability to correctly and safely complete the movement, the sets and reps and weight can all be gradually, although independently, increased for progressive overload.”
When you’re familiar with the exercise and your form is on point, you can perform the dumbbell snatch with lighter weight as part of your warmup for a heavy-lifting workout. As it targets all the major muscle groups in a functional manner, the snatch primes your nervous system to recruit your muscle fibers effectively for the work that’s to come. You can also do moderately-heavy snatches to kick off a lower-body or back workout, sometimes using it in place of deadlifts.
Likewise, because the dumbbell snatch engages so many muscle groups, it can effectively be used as part of a conditioning workout that helps you develop strength andenduranceat the same time. Consider using the snatch as part of a circuit that includes other exercises like lunges, pushups, and pullups.
Another idea: use the dumbbell snatch as a finisher at the end of your workout, done EMOM style (every minute on the minute). Set a timer for five to 10 minutes and choose a weight that you can do 15 reps with. At the start of the first minute, do 10 reps on one side, and then rest for the remainder of the minute. Repeat at the top of the next minute, doing reps for the other side. This is a good way to perform a lot of volume without going to failure, therefore accomplishing more work than you could usually perform in a similar amount of time with conventional sets.
What’s the Difference Between The Dumbbell Snatch and Kettlebell Snatch?
Both the dumbbell and kettlebell versions of the snatch will build power and muscle, but the dumbbell snatch is better suited to less experienced lifters and those who aren’t familiar with explosive Olympic lifting exercises.
“I like to start people on the dumbbell snatch and then progress them to a kettlebell,” Brabham says. “The kettlebell requires the individual to have more control of the weight compared to the dumbbell.” Slight deviations in form can cause the weight to slap the back of the forearm on a kettlebell snatch, which can cause injury. The dumbbell snatch, therefore, is safer, as well as easier to execute.
Nevertheless, your ultimate goal should be to graduate to the kettlebell snatch. “Because the kettlebell has the ability to roll backward over the hand during the overhead extension, there’s more activation of the posterior chain musculature in a kettlebell snatch,” says Brabham—namely, the glutes and hamstrings.
]]> https://www.onnit.com/blogs/the-edge/how-to-do-the-power-snatch-like-a-crossfit-pro2025-07-10T10:55:20-05:002025-08-15T07:19:21-05:00How To Do The Power Snatch Like A CrossFit ProJeremy GottliebThe snatch is one of the two lifts contested in the sport of Olympic weightlifting. To describe it in the simplest terms, it has you lifting a barbell from the floor and over your head in one efficient movement—arguably the most complex and challenging task you can do in all of strength training. Like its counterpart, the clean and jerk (the other Olympic lift), the snatch has been broken down into many variants that have been used by weightlifters and other athletes to improve several athletic qualities. One of these variants is the power snatch, which has been popularized by CrossFit.
The power snatch is a little more user-friendly than the classic Olympic weightlifting snatch, safer, and easier to learn,but it’s no less effective in developing power, explosiveness, strength, and total-body coordination. In just a few steps, I’ll teach you how to do the power snatch, and show you why it’s a great move to master for anyone looking to become a more powerful athlete.
Bonus:once you know how to do it and why, you’ll be able to drop the word “snatch” into more of your conversations, no doubt turning some heads, ruffling some feathers, and setting the stage for many a crude (but entertaining) joke.
What Is The Power Snatch?
The power snatch was born from the original barbell snatch, a movement performed in Olympic weightlifting to test overall strength and power. Any variant of the snatch is a great measure of these qualities because it requirestriple extension—the ability to extend the hips, knees, and ankles simultaneously, which creates maximum explosiveness.As any smart coach will tell you, getting these joints to extend together with the correct timing is no easy feat, and a thing of beauty when it’s done right. This is why Olympic lifters (as well as anyone else who practices the snatch and its variants) take a lot of time to drill good technique. Olympic lifts are the most technical weight-training exercises you can do.
Olympic weightlifters use the power snatch as a supplemental exercise to improve their performance on the regular snatch, but many other athletes use the power snatch in place of the snatch to train the explosiveness they need for the field, court, or mat, so the power snatch is the more widely used between the two lifts.
The biggest difference between the snatch and the power snatch is the ranges of motion used. The classic snatch has you lift the bar from the floor to overhead while you drop into a deepsquatand then stand up tall.With the power snatch, you don’t have to catch the weight in a deep squat position (you’ll end up in more of a quarter-squat),making the lift less of a test of thoracic and lower-body mobility.
Because you don’t drop into a full squat, yourarmshave to move a little farther to get the bar overhead in a power snatch. This is one reason Olympic lifters drill the power snatch—to get the bar traveling higher, which ultimately makes it easier to catch in the finish position of a regular snatch. That extra range means you’ll have to use lighter weight than you would doing a full snatch, but that’s a blessing in disguise. Less weight means you’ll be able to move the bar faster, and that generates even more power. It also makes make the lift safer, and easier to get the hang of.
How To Properly Power Snatch
There are six parts to the power snatch when it’s done properly. Remember, all Olympic lifts and their variants are highly technical, so you have to invest the time to learn them correctly if you want to maximize the weight you can lift safely. It’s best to start with an empty barbell, or, if you have bumper plates, very light weights. Bumper plates (the kind that bounce) will allow you to reach the bar while it’s on the floor, and let you drop the weight from overhead rather than control the bar’s path back to the floor.
I’ll walk you through the technique in this video.
Now I’ll break it all down in a lot more detail.
Step 1. Start Position
Place your feet between hip and shoulder-width apart, and turn your feet out a few degrees.Think about how you’d stand to do a verticaljump—that’s the stance you want to use for the power snatch.(You’re going to maximally accelerate the bar upward, which is not unlike trying to jump as high as you can).
Roll the bar into position so that it’s over your feet. When you look down, the bar should be directly over mid-foot.
Bend your hips back, and then bend your knees as needed, to reach down and grasp the bar with hands about twice shoulder width—arms straight. (You’ll have to play around with the grip width to see what feels most natural. TheNational Strength and Conditioning Associationrecommends starting out by measuring the distance between both elbows when your arms are held out 90 degrees from your sides and parallel to the floor—that’s the space that should be between your hands when grasping the bar.)
Draw your shoulders down so yourtrapsare stretched, not shrugged. Think about crushing an orange in your armpits so you feel your lats tense.
Take a deep breath into your belly, and draw your ribs down so they’re closer to your pelvis—brace yourcoreas if you were about to get punched in the stomach.
Your chest should point forward—so anyone standing in front of you could see the logo on your T-shirt—but your back shouldn’t be excessively arched. Aim to create a long, straight line from your head to your butt.
Draw your head back as if making a double chin. Your shoulders should be directly over the bar or slightly in front of it. If you have a friend nearby, ask him/her to check on this.
KEY POINT:Get into a position that makes you think of how you’d load up your hips to jump up in the air. Make sure your head, spine, and pelvis make a long, straight line, so your lower back is flat (not rounded forward). Get your body tight. Imagine it as a coiled spring ready to be released.
Step 2. First Pull
This is the portion of the lift that goes from the moment the bar leaves the floor until it’s just below your knees.
Push your feet down so that your hips and knees begin to extend and the bar breaks off the floor.You should feel your weight start on your mid-foot and shift to your heels as you lift.
Keep pulling the bar in tight to you—maintain that tension in your lats (crushed oranges). The bar should travel upward in a straight line along the front of your shins.
This part of the lift does not need to be done explosively. That comes later.Focuson creating enough tension so that your whole body is tight and moving as one unit. It’s OK if the bar comes off the floor slowly.
KEY POINT:Keep the bar pulled in tight and start standing up. Control everything.
Step 3. Transition Phase
The transition phase is when the bar passes the knees. The goal here is to position the body so you can create maximum acceleration with the bar. When the first pull is done correctly and the bar is close to you, your knees will make room for the bar to pass when you extend your legs.
Once the bar passes the knees, extend your hips explosively. Snap them! The bar will usually come up to the top of the hips, but it can also be beneficial to think about “bringing the bar to your hip pockets.”
If your timing is right, your knees will actually re-bend so they pass in front of the bar. This will happen automatically when the form is right.You should feel your weight shift back to mid-foot,but your heels stay on the floor.
KEY POINT:As soon as you feel the bar rise above the knees, drive your hips forward explosively.
Step 4. Second Pull
Here’s where that powerful triple extension comes in.
Keep extending your hips as you also extend your knees and ankles to accelerate the bar upward (just think about jumping). Shrug your shoulders powerfully, but keep your arms relaxed.
Because you’re maximally accelerating the bar, you will have full hip extension at this point, and your shoulders will move behind the bar.
Your feet may also rise off the floor.
When your shoulders are fully shrugged, bend your elbows, as if doing an upright row. Begin pulling your body under the bar.
KEY POINT:Think about it like a vertical jump. I also like to cue it as “throw the bar straight up to the ceiling.”
Step 5: Catch
Now the goal is to safely catch the bar overhead.
As the bar travels up in front of your torso, it will feel weightless. Drive your elbows out wide so the bar stays close to your body.
Bring your body underneath the bar quickly by bending your knees and “catching” the bar in a quarter- or half-squat with arms locked out.
Your feet will land a little wider than they started. Ideally, the width you’d take to perform overheadsquats(if you’ve practiced them before).
KEY POINT:When the bar feels weightless, focus on getting your body underneath it. Flip your elbows around to catch the bar at its highest point.
Step 6: Recovery
Once you have control of the bar, stand up straight and tall with it overhead, and your arms locked out.
Lower the bar to your chest, and then to the floor, or let it drop in front of you with control (if you’re using bumper plates).
Reset yourself before you perform another rep. Don’t rush your set.
It’s important to understand that the goal of the power snatch is to increase power input, so there’s no point in loading it up heavy and grinding out a slow rep. (Leave the heavy snatching to experienced weightlifters.) The rate of acceleration, not the load used, should be the main marker you strive to improve.
Loading the bar with 65%–85% of your one-rep max (1RM) is ideal for most athletes. (Since you’re new to snatching, just estimate it, or start with 10–25 pounds each side.)This should be a weight you can get for three to six fast, clean reps. Repeat this for 3–5 sets.
Only increase the weight if acceleration and proper technique can be maintained for the whole set, and expect to spend several workouts with the same weight until that’s the case.
A common complaint with the power snatch is that the wide grip spacing aggravates the shoulders. If you find that to be the case, you can move your grip inward slightly, which may be more comfortable.Doing so will increase the distance the bar has to travel in order to get overhead, and that will force you to sacrifice load, but it will also help you lift even faster and develop more explosiveness. (See my video on this below.)
Many lifters find the power snatch easier to perform when they wear weightlifting shoes. These shoes have an elevated heel that can help compensate for poor ankle mobility, which is an issue for many people. See my video below for more explanation.
How To Do The Hanging Power Snatch Technique
Some people don’t have the hip and ankle mobility to start a snatch from the floor. If you feel you have trouble reaching the bar, you can’t keep your lower back flat, or your heels tend to rise off the floor at the start/bottom position of the lift, you may want to try the hanging power snatch instead, which is the same basic movement but starting somewhere between your shins and hips, thereby eliminating the bottom portion of the exercise and focusing on the range where you generate the most power.
Depending on your mobility, you can do hanging power snatches from your shin, just below the knees, just above the knees, your mid-thighs, or hip crease.
Hanging power snatches are also good for troubleshooting weak points in your snatch technique.If you want to focus on the second pull, for instance, you can start with the bar at hip level.The hanging power snatch helps you develop power in shorter ranges of motion, which is necessary in many sports—say, a jump shot in basketball.
The hanging power snatch also adds an eccentric component to the exercise. The eccentric is the negative, or lowering, phase of any lift, where the target muscles get stretched under tension. The classic snatch and power snatch don’t really have an eccentric, since you typically drop the weight to the floor to set up for the next rep, or lower it as quickly as possible. With the hanging power snatch, however,you start by standing tall and then taking the bar somewhere between your hips and shins to load up for the rep. That keeps your posterior chain muscles (the backside of your body) much more engagedthan if you just began the rep from the floor. You basically end up doing aRomanian deadliftright before a power snatch.
Emphasizing the eccentric component of any lift aids muscle growth, as it causes more muscle damage that the body needs to repair. This is one reason trainers will tell you to lift a weight explosively, but take two or three seconds to control it on the way down. So, it can be argued that the hanging power snatch is a good choice for adding muscle size.
What Muscles Does The Snatch Work?
The power snatch is really a full-body exercise, making it a very efficient lift for developing muscle and strength from head to toe. The posterior chain takes on the brunt of the work—that is, the muscles that work together on the backside of the body that contribute to the powerful triple extension. But once the bar is traveling up in front of the torso, the upper back and shoulders do their part to get the bar overhead, so the upper body gets worked hard as well.
Here’s a broad list of the muscles that contribute to a good power snatch, from the ground up.
There are several good reasons to invest the time to learn the power snatch. For one thing, if you have aspirations of competing in Olympic weightlifting, the power snatch offers a good starting point for learning the snatch that you’ll have to perform in competition. It’s an easier movement to master, safer to perform, and once you’ve got it down, it isn’t much harder to learn how to transition into a deep squat (thereby completing the full snatch).
For athletes, or anyone looking to enhance their athleticism, the power snatch can be used to develop triple extension power—a skill used in virtually every sport.The power snatch will absolutely help you take off into a run faster, jump higher, and hit harder.
The power snatch offers a good middle ground between exercises like the deadlift and the sprint. In a deadlift, the focus is building absolute strength, so you lift heavy but the bar moves relatively slow. That means it’s good for developing the muscles that help you perform fast movements, but it doesn’t train you to move fast in and of itself. A sprint, on the other hand, trains you to move fast, but it doesn’t offer the resistance the deadlift does to build muscle and strength.The power snatch fits perfectly in between them, providing enough load to stimulate strength gains while focusing on explosive speed to develop the ability to apply force rapidly.A strong guy/gal who can generate a lot of force in an instant is a formidable athlete.
If you are (or were) an athlete, you’re probably familiar with the power clean, another Olympic lifting variant that’s commonly used to build power.I like the power snatch better than the power clean for this purpose for a couple of reasons.For one, the power snatch actually develops more power output than the power clean, or even the regular snatch, for that matter, because the weight used is lighter and the bar moves faster.
The power snatch is also harder to cheat. With power cleans, you’ll often see lifters pulling hard with their backs and arms to get the weight up, failing to utilize the triple extension movement the way they’re supposed to. The power clean then becomes more of a sloppy reverse curl. When you use a power snatch, however, that’s not a concern. There’s no heaving the weight up with the wrong muscles. You have to emphasize hip and leg drive, or you simply won’t be able to do it.
Power Snatch Vs. Snatch
The main thing that differentiates the power snatch from the snatch is the position the bar is caught in. Remember, in the power snatch, you catch the weight in roughly a quarter-squat position—a knee angle of 90 degrees or more, thighs above parallel to the floor. In the classic weightlifting (full) snatch, you descend into a deep squat—knees bent 60 degrees or less, thighs below parallel.
The power snatch also finds you pulling the weight higher, since you aren’t going into a deep squat position to help control the bar.The greater pulling range means you have to produce more power, and that will require using less weight than in the snatch.
Because the snatch requires a lot of mobility in the ankles, hips, and thoracic spine—and for most trainees, achieving a deep overhead squat is very challenging—it’s not as widely used as the power snatch. The power snatch is the better choice for most people who want to develop power and explosiveness, but aren’t weightlifters preparing for competition.
Power Snatch Exercise Alternatives
Before you add any exercise to your workouts, you should always ask yourself, “What’s the goal of this exercise, and what is the risk vs. reward?” The power snatch can certainly be used to build power, helping an athlete get faster, jump higher, and become more athletic, but it can also be difficult to learn and risky for those who have prior injuries or restrictions in their mobility.
If you have your heart set on power snatching, that’s cool. Just make sure you seek out a qualified coach to watch you perform it and tweak your form as needed. Remember to work on technique and speed before adding weight.Don’t be too eager to load up the bar solely for the sake of chasing big numbers.Understand that mastering any Olympic lift will take time and effort, and it may leave less time and energy for other exercises in your program.
The truth is, for the vast majority of people, I feel there are better exercise options than the power snatch to develop power, explosiveness, and athleticism. There are many movements that teach triple extension that can be taught and learned much faster, with much less risk to the lifter. Whether you choose to power snatch or not, you should be aware of the following moves, which offer many of the same benefits, and arguably many more.
For all of the following, perform 3–5 sets of 3–5 reps to start, resting as needed between sets. (Choose one per workout; don’t do more than power exercise in a session.) If you feel yourself slowing down or losing height on any rep, end the set there.
Box Jump
The box jump is a simple plyometric exercise that teaches you to explode from the hips and, just as importantly, absorb the force of a landing.
Step 1. Place a box that you estimate will be moderately challenging to jump up onto on the floor in front of you. Stand a foot or so behind it.
Step 2. Bend your hips and knees and swing your arms backward to generate momentum. Throw your arms forward as you jump up onto the box and land in its center with soft knees. Try to land as silently as possible. Step down off the box; don’t jump off.
Trap-Bar Deadlift Jump
The trap-bar provides a great alternative to the old-fashioned straight bar for a variety of lower-body exercises. It allows you to keep the load you’re lifting closer to your own center ofmass, which reduces shear forces on the spine. It also lets you get into a more natural, athletic position when you deadlift, which should have more carryover to athletic activity. Doing jumps with the trap-bar loads the hips safely and builds explosiveness, and the form is easy to learn.
Step 1.Stand with feet between hip and shoulder-width and bend your hips back. Keep your head, spine, and pelvis in a long, straight line as you reach down to grasp the bar’s parallel handles. Crush oranges in your armpits to generate lat tension, and brace your core.
Step 2.Jump straight up in the air, as high as you can. Land softly, and pause a moment before your next rep to make sure you’re positioned correctly.
Medicine-Ball Scoop Toss
Many coaches like using medicine balls for power development because they’re very user-friendly and allow you to move as fast as possible. The weight can’t get too heavy, so you’re really able to explode with it, and, unlike with a barbell, you don’t have to worry about decelerating the load at the end of the range of motion—you can just release it and let the ball fly. The scoop toss simulates the triple extension used in all snatch variants very closely.
Step 1.Place a moderately-weighted medicine ball on the floor and straddle it with feet outside shoulder-width. (It should be a ball with a soft shell; one that won’t bounce.) Bend your hips and knees to reach down and grasp the ball while keeping a long spine.
Step 2.Scoop up the ball and explode upward, jumping up as you throw the ball as high as you can. Watch its path, and move as needed to avoid the ball landing on you. When the ball lands and comes to a stop, perform your next rep.
Not all snatches have to be done with a barbell. You can use one dumbbell to perform a snatching motion, making for a safer lift that also challenges your balance and stability to a greater degree. As with all unilateral exercises, it can help you identify which side of your body is stronger.
Step 1.Place a dumbbell on the floor, and straddle the weight with feet a bit outside shoulder-width. Observe all the same form points for the snatch described above to bend down and grasp the weight.
Step 2.Use triple extension to raise the weight off the floor and straight up in front of your torso until it’s overhead. Your feet should land just as your arm locks out the elbow. You can reach your free arm out to the side to help you balance. Lower the weight to your chest under control, and then return it to the floor.
]]> https://www.onnit.com/blogs/the-edge/barbells-vs-dumbbells-what-s-better-for-your-workout2025-07-10T10:55:20-05:002025-08-15T06:58:04-05:00Barbells vs Dumbbells: What’s Better For Your Workout?Jeremy GottliebWelcome to the great free-weight debate—the ongoing argument over which classic and widely used training tool is best, the barbell or dumbbell.
Key Takeaways
1. Dumbbells offer freedom of movement,allowing you to better target the muscles you want to work, and improve joint mobility.
2. Barbells are best for strength development,as they allow for more stability which enables heavier loading.
4. The choice to use barbells or dumbbells dependson preferences, goals, and specific exercises.
5. Both barbells and dumbbells are valuablefor a well-rounded workout routine.
For hundreds of years, people have been trying to pick the winner by analyzing every possible feature and benefit of each tool, respectively. Which is more functional? Which should you use in your training? And when would you choose one over the other?
The truth is, there are no one-word answers here. Both the barbell and dumbbell are amazing implements that can bring value to your training, and you should use both, if possible. But to provide the ultimate guidance, we’ve enlisted the help of some reputablefitness-certifiedexperts to break down when, why, and how to use barbells and dumbbells to reach your goals.
“The key with training is to not get married to only one method or one training tool,” says Zach Even-Esh, founder of the Underground Strength Gym in Manasquan and Scotch Plains, NJ (zacheven-esh.com). “It would be closed-minded to do so, and in turn would hinder your results. My preference is to mix barbell and dumbbell work, and find the right time and place for each.”
Differences Between Barbell and Dumbbell Exercises
Most of the time, when you use a barbell, you’ll hold it with both hands. As we’ll discuss in the next section, this allows you to stabilize the weight you’re lifting to a great degree,and that makes it easier to lift heavy, providing maximum overload to your muscles.Training with a barbell is most applicable to weightlifting sports (Olympic weightlifting, powerlifting, CrossFit, for example), where the barbell is used in competition. In contrast, when you use dumbbells, each hand moves independently. You have the option of lifting either one or two dumbbells at a time, but because your hands aren’t fixed to one bar, the range of motion on any lift is going to be greater, and so is the challenge in stabilizing it.
When doing one-armdumbbell exercises (e.g., one-arm dumbbell rows, one-arm dumbbell concentration curls, etc.), where the non-working side is not holding a dumbbell, you’re training “unilaterally” (one side at a time).Unilateral trainingis great for targeting a weak side, and increasing the range of motion for a muscle group.It also works your body in a way that’s more in line with how you move it in real life. Often times we need to use one side of our body while stabilizing the other side (running, throwing, punching, etc.), so dumbbell exercises are highly functional.
Benefits of Using a Barbell
Having your hands locked into a fixed position via a barbell offers one major benefit that you really can’t duplicate to the same degree with any other workout tool: strength. Specifically, high-end maximal strength—the ability to produce as much force as possible.
Barbell lifts, where both legs/armsare working in unison (such as in a backsquat,bench press, and deadlift), allow for maximal loading. This is why world-record lifts are recorded withbarbell exercises(no one cares how much you can DUMBBELL bench press). However, such gains in overall strength require sacrifice in other areas.A lifter with a 300-pound one-rep max (1RM) on bench press probably won’t be able to press a pair of 150-pound dumbbells,because stabilizing the two weights is too difficult.
“A more stable load means you can add more weight and control it a bit more with larger muscles,” says John Rusin, PT, DPT, CSCS, owner of the online fitness platform John Rusin Fitness Systems (DrJohnRusin.com). In other words, when you use a barbell, you won’t be calling upon smaller (and weaker) stabilizing muscles to the extent you do with dumbbells. With barbell exercises, the strongest, most powerful muscles are taking the brunt of the load. (More on stabilizing muscles in Do Barbells and Dumbbells Use Different Muscles? below.)
It’s pretty clear, then, that the barbell is a critical tool for anyone looking to truly maximize muscular strength—including competitive lifters,athletes in strength-speed sports like football, basketball, and track and field, and any gym enthusiast with lofty 1-rep max (1RM) goals.Because the barbell accommodates heavy loading, and big weights recruit a greater number of muscle fibers, one can also argue that barbell training is crucial for maximizing gains in muscle size. You’d be hard-pressed to find a bodybuilder or other physique athlete who has never made at least some use of it.
Benefits of Using Dumbbells
Whether you’re using one or two at a time, dumbbells allow for both greater range of motion (ROM) and more freedom of movement than an equivalent barbell exercise. Let’s use the barbell and dumbbell variations of thebench pressto illustrate these points.
With a barbell, your ROM is limited to the point at which the bar is touching your chest at the bottom of the lift.With dumbbells, you’re able to bring your hands lower at the bottom simply because there’s no bar stopping you at chest level.The obvious benefit of greater ROM is increased joint mobility. “Many individuals and athletes have limited mobility in joints like the shoulders, elbows, and wrists, so dumbbells can offer a more movement-friendly motion and help restore that mobility,” says Even-Esh.
As for freedom of movement, your hands are in a fixed position when using a barbell; you’re not able to rotate your wrists or change the orientation of your hands in any way during a set.Dumbbells, however, allow you to freely move your hands independently and rotate your wrists at any pointduring the movement. This is a key benefit if you have injuries that act up when you lift with a barbell. You may find that, because dumbbells allow your arms and legs to find their own best paths, you don’t experience the same joint pain you get from barbell lifts. So injury-prevention, rehabilitation, and all-around more joint-friendly strength training are all more possible with dumbbell work than with barbell.
ROM and freedom of movement can also be huge for helping you build more muscle, as compared tobarbell exercises.
“You can look at this as a sliding scale,” says Rusin. “Bodyweight training is the highest form of rotational requisite, where we can truly explore space. And then on the opposite side of the spectrum is machine training, where you literally lock yourself into position, have little to no freedom of movement, and you move a weight from point A to point B on a strict range of motion through a specific pattern.A barbell is closer on the scale to a machine, and dumbbell movements are closer to bodyweight exercises.Both pieces of equipment are very advantageous, but if the goal is to build muscle, especially working in that 8–12-rep hypertrophy range, dumbbell exercises are preferable.”
Another key benefit of using dumbbells is muscular balance from side to side (left to right). When doing a barbell exercise, your dominant arm can compensate for the weaker arm. This may help you get the weight up, but it will only exacerbate any imbalances you have, and could eventually lead to injury.With dumbbells, each side carries its own weight, so the stronger arm can’t make up for the weaker one.This comes into play even when doing bilateral dumbbell exercises (both arms lifting the weights at that same time), though unilateral exercises can be used to further isolate each side, particularly the weaker one.
Dumbbell training is a great way to identify a lagging side, and immediately begin to correct it. “Using dumbbells develops unilateral strength, which can help bring up your weaker side [usually your non-dominant side],” says Bill Shiffler, owner of CrossFit Renaissance in Philadelphia, and a competitive amateur bodybuilder (crossfitrenaissance.com). “This will be beneficial overall, and also translate into you being able to move more weight on a similar movement when you load up a barbell.For example, dumbbell bench presses can make your barbell bench press stronger.”
Dumbbells also accommodate countless isolation (single-joint) movements, likechest flyes, lateral raises for the delts, and triceps kickbacks. These moves can’t be done with a barbell, so if maximum muscle growth is your goal, you can’t train exclusively with a bar. These exercises often get bashed for not being “functional,” but even non physique-focused lifters should make some use of them. They’re highly effective for targeting specific muscles, and can play a role in overall performance and injury-resistance.
“There’s huge value and ROI to performing isolation movements, regardless of what your goals are,” says Shiffler. “Dumbbells can hit muscles in a way you simply can’t with barbells.”
Do Barbells and Dumbbells Use Different Muscles?
Let’s start with the most common question—are dumbbells better than barbells? In any exercise you do, you’ll hit the same target muscles whether you’re using a barbell or dumbbells. For example, both a barbell back squat and a dumbbell goblet squat are primarily hitting the quads, with some activation of the glutes andhamstringsas well. A barbell curl and a dumbbell curl can both be used forbiceps workouts. The degree of activation will vary, however, according to how your body moves, and, as already explained, you do move differently using dumbbells versus a barbell.
For instance, in the dumbbell goblet squat example, form dictates that your torso will be more upright than it would be doing a back squat. For many people, that involves the quad muscles to a greater degree, and de-emphasizes the glutes and hamstrings.When you curl dumbbells, you have the option to supinate (twist) your wrists outward as you bring the weight up, which you can’t do curling a straight bar.That can give you greater activation of the biceps and forearm muscles.
Apart from different movement paths and ranges of motion, dumbbell exercises differ from barbell moves in one major way:they utilize more “stabilizer” muscles than barbell variations, due to the greater ROM and freedom of movement involved.When coaches and trainers talk about stabilizers, they’re usually referring to relatively small muscles—the rear delts, rotator cuff, serratus anterior, and levator scapula in the upper body, or gluteus minimis and piriformis in the hip region.
Generally speaking, the less you have to rely on stabilizers for an exercise, the more weight you’ll be able to move, since stabilizers are smaller and weaker than prime movers like the pecs, lats, quads, and glutes. As the saying goes, you’re only as strong as your weakest link; thus, your stabilizers are the limiting factor when doing a given movement with dumbbells versus a barbell.
It can be said, then, that dumbbell exercises activate more muscles (big ones and small ones combined), while barbell exercises get the most out of the larger muscles.Yet this doesn’t mean the latter is best for gaining size. So dumbbell vs. barbell battle has no real or clear winner, and the choice between the two depends on personal preference and your workout goals.
“I’m really not a huge believer that the barbell deadlift, squat, and bench press are really best to build muscle, just because of the way they fit on the body,” says Rusin. “These exercises lock you into position, giving you less natural rotation through space [freedom of movement], which is where we tend to get better peak targeting of muscles and a stronger mind-muscle connection. When we lock that rotation, we tend to shift thefocusnaturally to a strength emphasis pattern, where the goal becomes more global in terms of moving a load from point A to point B.”
As implied, Rusin favors dumbbells over barbells for building muscle, with his rationale focused on movement quality.
“I tend to not program barbell moves for anything over around 6 repetitions,” he says. “The barbell has the most loading capacity, but the biggest limiting factor for getting into extended rep ranges is a lack of movement quality. People tend to break down at the midsection on big barbell lifts, and the trunk is the first thing to fatigue and create a weakness, typically after you get past around 6 reps. You can build muscle in any rep scheme, but working in that 8–12 rep range is important because, one, you have enough weight to create mechanical tension, and two, the sets are long enough to keep the muscles under tension for the time it takes to create great metabolic stress in the tissue—another factor for growth. That’s what really creates the so-called perfect stimulus for hypertrophy [muscle gain].”
In other words, to create the perfect storm for muscle gain, do some barbell work for low reps, and dumbbell work for higher reps.
Juan Leija, a coach at Onnit Gym in Austin, TX, recommends the following barbell exercises to build overall strength and stability. Practice them for sets of 6 reps or fewer to start, using light weight until you’ve mastered form.Follow Leija on Instagram,@juannit_247.
Deadlift
Many coaches and lifters consider the deadlift to be the best exercise you can do with a barbell, and the best test of total-body strength. It’s particularly good for building strength in the hips, lower-back, and grip.
Step 1.Stand behind the bar with feet between hip and shoulder-width. Draw your shoulder blades together and downward—think, “proud chest.” Now bend your hips back, as if trying to touch your butt to the wall behind you. Your head, spine, and pelvis should form a straight line.
Step 2.Grasp the bar overhand, and take a deep breath into your belly. Make sure your shoulders are pulled back and down again, and brace yourcore. Begin to push your heels into the floor to lift the bar off the floor. Come up until your hips are locked out and you’re standing tall.
Floor Bridge Press
Pressing from a bridged position involves the lower-body in the lift, making for a more athleticbench pressexercise. Glutes are often a weaker muscle group, because most people spend so much time sitting, and don’t train the glutes directly. This exercise helps to bring them up while training upper-body power and strength.
Step 1.Set the bar on a power rack, low to the floor. Lie on your back on the floor and bring your feet in close to your butt. Tuck your pelvis so that it’s in line with your spine, and brace your core. Drive through your heels to lift your butt off the floor (keep your core braced so you don’t hyperextend your lower back).
Step 2.Grasp the bar with hands just outside shoulder width. Pull the bar out of the rack and hold it above your chest. Take a deep breath into your belly, and lower the bar until your triceps touch the floor. Pause a moment, and press the weight back up. Maintain your bridge position the entire time.
Offset Overhead Press
Learning to stabilize an uneven load helps prepare your body for movements in sports and in life, which are often asymmetrical. Keeping the bar straight on an overhead press that’s unevenly loaded will develop stability in the shoulders. Complete your reps on one side, and then switch sides and repeat. (Rest between sides if you feel you need to.)
Step 1.Load only one side of the bar. Beginners (and those new to the movement) should start with only 10–25 pounds. Grasp the bar with hands at shoulder width, and take it out of a power rack, or, clean it up from the floor while keeping your lower back flat. The bar should be just below your chin, and held perfectly straight. Stand with feet shoulder-width apart, and tuck your pelvis under so it’s level with the floor. Take a deep breath into your belly, and brace your core.
Step 2.Press the bar overhead while keeping it as level as possible. Note that you’ll need to lift it slowly to maintain control. Lower the bar back to chin level.
Pendlay Row
Named for the late Olympic weightlifting coach Glenn Pendlay, this rowing variation targets the upper back, lats, and lower back with a strict movement. No bouncing the weight up or using momentum here.
tep 1.Stand behind the bar with feet between hip and shoulder-width. Keeping your head, spine, and hips in a straight line, bend your hips back as if you were trying to touch your butt to the wall behind you (allow your knees to bend as needed). Grasp the bar outside shoulder width and take a deep breath into your belly. Draw your shoulder blades down and together (think, “proud chest”), and extend your spine so it’s long and straight.
Step 2.Explosively row the bar from the floor to your sternum. Lower it back down and let it come to a dead stop on the floor before you begin the next rep.
Suitcase Deadlift
Similar to the offset overhead press, the suitcase deadlift challenges your body with asymmetrical loading in a movement you’re probably not used to doing unilaterally. It’s also killer for the core and grip.
Step 1.Stand to the side of the bar, as if it were a suitcase you were about to pick up. Place your feet between hip and shoulder-width, and bend your hips back to reach down and grasp the bar in the middle. Square your shoulders and hips with the floor, and draw your shoulders back and down as much as you can. Your head, spine, and pelvis should form a long, straight line. Take a deep breath into your belly and brace your core.
Step 2.Drive through your heels to stand up, raising the weight off the floor and to your side. Try to keep the bar as level as possible as you lift it—squeeze it tightly—and avoid bending or twisting your torso to either side. Complete your reps on that side, and then switch sides and repeat.
Landmine Row To Press
Once you’ve gotten familiar with basic lifts like the deadlift, row, and press, combining them into one movement can help you better mimic the demands of life outside the gym. The landmine row to press has you lifting the bar off the floor and overhead explosively, building total-body strength and power—but in a more user-friendly movement that’s also easier on the joints, thanks to the arc of motion provided by the landmine.
Step 1.Load a barbell into a landmine unit, or use the corner of a room. Stand to one side of the bar with feet shoulder-width apart. Draw your shoulder blades together and downward—think, “proud chest.” Bend your hips back, as if trying to touch your butt to the wall behind you. Your head, spine, and pelvis should form a straight line. Grasp the end of the barbell’s sleeve with one arm.
Step 2.Explosively deadlift the bar up while rowing it and twisting away from it. As your free hand comes toward the bar, use it to take the bar from the rowing hand, and allow the momentum to help you follow through and press the bar overhead along the arc that the landmine provides. Start extra light so that you can master the movement in one fluid motion. Complete your reps on one side, and then repeat on the other side.
We like the dumbbell exercises below because they offer distinct advantages over their barbell counterparts, including safety, muscle balance, and freedom of movement. All of these exercises can be performed with kettlebells as well, but doing so can be awkward in some cases (due to thekettlebell’s offset handle and ball structure). Kettlebells also provide fewer loading options, as they don’t come in the same weight increments that dumbbells do. The snatch lends itself well to a kettlebell, but you may do better with dumbbells on the other moves until you’ve mastered them.
Dumbbell Snatch
The barbell snatch is possibly the most complex and intricate barbell exercise there is, but its dumbbell counterpart is relatively easy to learn, and offers similar benefits in terms of power. It’s also great for your core.
Step 1.Hold a dumbbell with one hand and stand with feet slightly wider than shoulder-distance apart. Draw your shoulders back and downward (think: “proud chest”). Press your hips back while keeping a long spine—your head, spine, and pelvis should maintain alignment as you hinge at the hips. Bend your knees as needed. Your chest and shoulders should be level with the floor and remain facing forward. Breathe into your belly, and engage your core. Allow your free arm to hang at your side.
Step 2.Powerfully extend your knees, hips, and ankles, drawing the dumbbell straight up and close to your body. The movement should be powered by your lower body, not your shoulders. Your feet may or may not rise off the floor for a moment.
Step 3.Shrug the shoulder that’s holding the weight, driving your elbow up high and backward. The dumbbell should travel in a straight line up in front of you. Think about pulling your whole body under the weight as it rises.
Step 4.When it reaches its highest point (above shoulder level), turn your elbow under the dumbbell. Catch the weight overhead with arm extended as it continues upward.
Single-Arm Dumbbell Row
“This is probably my favorite dumbbell move,” says Rusin. “It targets the upper back and core. You can get your hips involved if you add rotation. It’s killer in terms of metabolic capacity, and will ramp up your heart rate. You can go heavy with low reps, or go lighter with high reps. There are so many different ways you can do it.” The basic one-arm row, in which you get in a stable stance and pull to your hip, is described below.
Step 1.Hold a dumbbell in one hand and stagger your legs. Bend your hips back so that you can rest your free arm on your front knee for support. Your body should form a straight line from your head to your heel.
Step 2.Row the weight to your hip, drawing your shoulder blade down and back. Your upper arm should end up in line with your torso. Complete your reps, and repeat on the opposite side.
Arnold Press
It’s not clear if this movement got its name from Arnold Schwarzenegger, but there’s ample evidence that the Governator—and lots of other famous bodybuilders—used them successfully. Instead of pressing the weight straight overhead, you rotate your wrists and elbows outward. This limits the weight you can use, but it activates more of the lateral head of the deltoid, and can be a good strategy for working the shoulders while lessening the risk of injury. If your shoulders are banged up from years of sports or other activity, performing lighter Arnold presses may be the best way to work them in an overhead pressing motion.
Step 1.Stand with feet shoulder-width apart, and hold the dumbbells at shoulder level with palms facing you.
Step 2.Press the weights overhead, and rotate your wrists outward as you lift, so that your palms face forward at the top of the movement.
No surprise here. You’ve probably done these already, along with everyone else who’s ever gone to a gym wanting to get a pump. But there’s no wonder as to why (nor is there any reason to stop doing them). The dumbbell bench press trains the pecs through a full range of motion, and can be effective for size and strength in any rep range. If chasing a big barbell bench press number has left you with sore shoulders, switching to dumbbells can provide some relief while offering even more stimulus to your pec muscles.
Step 1.Hold a dumbbell in each hand and lie back on a bench. Position the weights at shoulder level.
Step 2.Press the weights over your chest, squeezing your pecs as you come up. Lower your arms with elbows pointing 45 degrees from your sides.
Strong glutes, hamstrings, and spinal erector muscles are crucial for being able to run fast,jumphigh, and lift a lot of weight. Any version of the RDL will accomplish that, but the dumbbell variant gives you a bit more range of motion, and the option to alter your technique for the sake of emphasizing one muscle over another. For instance, Rusin says you can hold the weights at the sides of your legs instead of in front to get more glute involvement.
Step 1.Hold a dumbbell in each hand and stand with feet hip-width apart. Twist your feet into the floor to generate tension in your hips.
Step 2.Tilt your tailbone back and bend your hips back as far as you can. Allow your knees to bend as needed while you lower the weights until you feel a stretch in your hamstrings. Keep your spine long and straight throughout. Squeeze your glutes as you come back up to lock out your hips.
The History of Barbells and Dumbbells
Although historical records are limited, dumbbells seem to have first appeared in a rudimentary form in ancient Greece, as early 700 BC. Halteres, as they were called then, weresmall stone implements used by long jumpers. Athletes would swing the weights backward, and then forward before takeoff,to create greater momentum and thrust for their leaps.
Now fast-forward more than two thousand years. In the 1700s, church bells began being used for exercise. To silence them,the clappers were removed, and so the name “dumb” bell was born.By the early 1800s, the dumbbell better resembled the form we know now (handle in the middle, equal weight on both ends), and was being used in European schools and exercise classes, as well as in the military. (Interestingly, “Indian clubs,” the forerunner tosteel clubs, were just as popular, if not more, at the time in Europe and Asia.) By the end of the 19th century, gyms in both Europe and America were equipped with dumbbells.
Barbells actually became popular after dumbbells did, reportedly in the mid-1800s. But they caught on quickly. The vintage “globe” barbell came first (the weights on the ends looked like planets), followed by the plate-loaded barbell.In 1896, weightlifting officially became an Olympic sport, with both dumbbells and barbells used in competition.Then, in 1928, a German named Kasper Berg introduced the revolving-sleeve barbell, which was more or less the modern Olympic bar we know today.
Through the rest of the 20thcentury, dumbbells and barbells continued to evolve as technology and sport science advanced, strength and physique competitions became more and more popular, and the public’s interest in health and fitness exploded. Today, dumbbells and barbells are as popular, and effective, as ever, and come in various forms to accommodate individuals of all levels.
The Different Types of Dumbbells
There are two basic types of dumbbells: fixed-weight dumbbells and adjustable dumbbells.
Fixed-weight dumbbells are the kind you see in commercial gyms, usually ranging (in pairs) from five-pound weights up to 100+ pounds, and typically in five-pound increments. The weights are fixed to the bar, and cannot be adjusted.
Adjustable dumbbells allow you to change load quickly, by sliding weight plates on and off the handle and clamping it, or by pulling a pin or turning a dial that locks and releases the plates. They, too, typically range from five to 100+ pounds, in increments of five pounds.Adjustable dumbbells tend to be a little more rickety than the fixed-weight kind (you better make sure the weight is secured, or it can fall off the handle during use),and can be a bit awkward to use (heavy weight often means lots of plates that make for a long dumbbell that can be hard to move around your body), but they’re cost-effective, space-efficient, and a solid choice for a home gym. (A full set of fixed-weight dumbbells is expensive and takes up a lot of room.)
The Different Types of Barbells
Like dumbbells, barbells can be fixed-weight or load-adjustable, though the latter is the more common type.
The standard plate-loaded Olympic barbell, the kind you see at any serious gym, weighs 45 pounds on its own and is approximately seven feet long. The middle part of the bar has knurling (rough grooves) to optimize traction, while the outer rotating “sleeves” (where you load the weight) are smooth and thicker, to fit standard Olympic weight plates.
Similar style plate-loaded bars also come in smaller sizes (25 pounds, and shorter), but these are less common than standard Olympic bars.
Fixed-weight barbells are typically found at large commercial gyms, and are stored on dedicated racks.They may range from 20–100+ pounds, and often in 10-pound increments.These barbells are considerably shorter than Olympic bars, and are designed for convenience on lighter-load exercises, as well as for beginners.
All of the barbells described above are straight bars. Other types of barbells offer different designs, including curves in them that help the lifter perform an exercise more efficiently or safely. The EZ-bar (typically used for bi and tri exercises) and trap bar (for deadlifts) are two examples.
Are Dumbbells Safer Than Barbells?
Dumbbells don’t allow you to use the same kind of crushing weight that barbells do, and they’re (arguably) less awkward to use. They also mostly lend themselves to less risky exercises. Both Even-Esh and Shiffler, for example, generally consider the one-arm dumbbell snatch a safer variation than the more complex Olympic barbell snatch. But that doesn’t mean dumbbell exercises are injury-proof.With improper form, you can hurt yourself just as easily on a dumbbell press, curl, ortriceps extensionas you can with the barbell version.“Thinking that dumbbells are an inherently safer implement to use in your program can be a mistake,” says Shiffler.
For instance, it’s not uncommon to pull or tear a pec by pushing the range of motion on adumbbell chest pressor flye too far. And simply setting up for those exercises—rocking back onto the bench to get into position, or rocking back to a seated position at the end of a set—can be tricky.
With that said, the barbell needs to be treated with more respect, generally speaking.“Any athlete and individual must earn the right to train with a barbell,” says Even-Esh.“Exercises like the squat, deadlift, military press, bench press, snatch, and clean require a solid baseline of strength and skill in moving properly. Before an individual can perform basic barbell lifts, I want to see a foundation of strength built throughcalisthenics, resistance-band work, sled work, dumbbells, and kettlebells.”
The barbell is simply a more unforgiving implement. With no room to adjust your hand/arm position during a set, the path of your range of motion is very limited.If your shoulders, knees, or lower back aren’t agreeable to it, you can get hurt. This is why there are far more back injuries fromback squatsand deadlifts than there are from the dumbbell versions of those lifts.
“I suggest staying clear of a barbell if you’re someone who already has a great deal of injuries, or if you have noticeable muscle imbalances, as a barbell can tend to make the imbalances more prominent,” says Jim Ryno, owner of Iron House, a home-gym design and remodeling company in Alpine, New Jersey (Iron-House.co). “I tend to lean toward barbell use for clients that are primarily looking for serious strength gains and want to engage in performing 1RM attempts.”
]]> https://www.onnit.com/blogs/the-edge/how-to-crush-5-5-workouts-for-huge-gains2025-07-10T10:55:20-05:002025-08-14T17:35:20-05:00How To Crush 5×5 Workouts For Huge GainsJeremy GottliebThe default set- and rep-scheme for most gym-goers seems to be three sets of 10. Why? Because it just works. But serious lifters know that five sets of five—abbreviated as 5×5—often works even better. The 5×5 method was popularized in the 1960s by Reg Park, a multiple-time Mr. Universe and idol to a then up-and-coming bodybuilder named Arnold Schwarzenegger, and it’s never been out of style since.
The following is an excerpt adapted from theMen’s Health Encyclopedia of Muscle, written by Onnit’s Editor-In-Chief, Sean Hyson, CSCS.For more workouts and training tips, pick up the book at Amazon.com.
Why Does 5×5 Work?
The beauty of the 5×5 system is that it’s almost impossible to screw up. Virtually any way you choose to interpret how to do five sets of five is sure to yield some progress. The reason why is the combination of load and volume. Low-rep sets imply pretty heavy weights, and five sets’ worth gives you enough exposure to challenging loads to drive muscle and strength gains.
The big question with 5×5 is just how much weight you should use. Honestly, your best guess is probably good enough. But looking at it scientifically, you can come up with a more refined strategy. Lifting a load that allows you only five reps equates to about 87% of your one-rep max (the heaviest load you can lift for one rep—an all-out effort). However, because you have to do five sets, you’ll need to leave a little in the tank on your first set.If you use the heaviest load that allows you ONLY five reps right away, you’ll have a hard time completing the four sets that follow.Therefore, the weight you choose must be lighter.
C. J. Murphy, a competitive powerlifter and strongman, and owner ofTotal Performance Sportsin Malden, MA, recommendschoosing a load that you can get seven or eight reps with.This means about 80% of your max. So, let’s say that you’re pretty sure that you cansquat225 pounds for one rep, if your life depended on it, and you want to do a 5×5 workout. Eighty percent of 225 is 180 pounds, so load 180 for your first set.“Most muscle adaptation occurs with 65 to 85% of your max,” says Murphy.Doing 5×5 this way puts you at the north end of that range, making it an excellent approach for building size, but also intense enough to boost strength.
The next question that comes up is whether to keep the same weight every set or add weight each set. The answer is both. “Form is more important than weight,” says Murphy. So, whether you keep the same load or bump it up by a few pounds on one set or every set, every rep should look crisp and smooth. “Most people’s best set is usually their third, fourth, or fifth one,” says Murphy, when the nervous system has been fully activated by the exercise but before fatigue sets in. “So, I might make a smalljumpin weight on the third set, if it’s going well.” (This could be five or 10 pounds, depending on the exercise.) You’ll have to monitor yourself.
What Exercises Are Used in 5×5 Workouts?
Five by five is typically done on classic multi-joint barbell lifts, such assquats, deadlifts, presses, and rows—exercises that activate great amounts of muscle and work big areas of the body.You shouldn’t attempt 5×5 with isolation movements such as curls, lateral raises, or leg extensions,as those exercises don’t lend themselves to the use of such heavy weights. Trying to curl a load that feels heavy for five reps can easily result in sore elbows or tornbicepsover time, so restrict the 5×5 method to your main lift of the workout. Also, as 5×5 is strenuous and can be time consuming, don’t use it for more than three exercises in any one workout.
How Long Does The 5×5 Workout Take?
The length of any strength workout really depends on how strong you are. It takes longer to work up to 365 pounds for squats than it does 225. It’s also important not to rush your sets. Because you’re working with heavy weights,you should allow yourself to recover fully between sets for the sake of safety as well as performance.This could mean two minutes, or longer, depending on the loads used and the complexity of the exercise you’re doing 5×5 on. With all that said, you can expect a workout with two or three exercises done 5×5 style to last anywhere from 30–60 minutes.
One popular method of employing 5×5 is to do three exercises in a session, using 5×5 to train the whole body. For example, you could squat, then bench press, and then finish with a bent-over barbell row. You could come back two days later and perform three similar exercises for another 5×5 session, and then, after another day off, finish the week with a third 5×5 workout. This is a highly-efficient way to train, which makes it good for beginners and those who are young, injury-free, and need practice with barbell lifts to master them. However,it may be too grueling for people over 35 years old, or those with injuries from years of heavy lifting.Murphy believes most people would probably be successful doing one or two 5×5 lifts in a session, and using the protocol for a month or so, and then switching to some other training method for a while.
Is the 5×5 Workout Effective?
The 5×5 workout has been around for at least a half-century, and probably much longer. It’s widely considered to be a good routine for beginners to follow because it’s simple to implement and provides a balance of heavy weights and increasing volume—two factors that areknown to produce muscle and strengthgains.
A 2016studyinBiology of Sporthad subjects perform workouts that alternated 5×5 and six sets of two reps. After five months, their strength gains on the bench press had increased significantly, but researchers determined thatthe heavier (6×2) regimen was no more effective than the 5×5, and that starting with lighter loads in a progressive long-term program may be the better strategy,as it leads to similar gains with less exertion. This idea fueled the way we prescribe 5×5 in the sample workouts below.
How To Stretch for a 5×5 Workout
Include the following mobility drills in your warmup before performing the sample 5×5 workouts below. Perform each move in sequence, completing 10 reps, and repeat for 3–5 total rounds. See a demonstration for each move in the video.
The following workouts represent our preferred way of performing the 5×5 method.
Do your first set of the 5×5 exercises with a weight that allows you eight reps. If your speed on the first two sets is fast, and your form is good,you may add weight on the third set(and fourth and fifth, if your technique holds up). If your reps move slowly or form breaks down on any set, stop the set there—no matter how many reps you have left—and reduce the weight. Each week, add a little weight to your 5×5 lifts. For upper-body exercises, add 2.5 to 5 pounds, and for lower-body, add 5 to 10.
Murphy recommends using the Rating of Perceived Exertion (RPE) scale to control your intensity. If a 10 represents an all-out effort, do your workouts as follows.
Week 1:7 RPE (you should have about three reps left in you at the end of every set)
Week 2:8 RPE (about two reps left)
Week 3:9 RPE (about one rep)
Week 4:7 RPE (back off this week to gather energy for next week—i.e., reduce the load by a few pounds so it doesn’t feel so difficult)
Week 5:10 RPE (increase the weight and go for it!)
You may perform the exercises as straight sets (complete all sets for one lift before moving on to the next) or, if you want to save a few minutes of workout time, alternate sets of any two 5×5 exercises in the workout. (Note that not every exercise in each workout uses this set and rep scheme.) Rest, as needed, between all sets of every exercise, and at least 90 seconds between sets of the 5×5 exercises.
There are three sample workouts here, and they can be done in sequence(for example, Workout I on Modnday, II on Wednesday, and III on Friday). Rest at least one day between each.
(See02:17in the video How To Crush 5×5 Workouts for Huge Gains above.)
Sets:5Reps:5
Step 1. Grasp the bar with hands shoulder-width apart and point your elbows forward so that you can position the bar over the tips of your fingers (palms face up). As long as you keep your elbows pointing forward, you will be able to balance the bar.
Another way to do it is to cross your arms in front of you, holding the bar on the front of your shoulders (left hand in front of right shoulder, right hand in front of left). To do the classic front squat with the bar on your fingertips, you need a reasonable amount of flexibility through your shoulders and wrists to position the barbell correctly. If you don’t have it, the cross-arm version may be the better option for you at the moment, but another option is to use wrist straps if you have them. Loop the straps around the bar and grasp the open ends with each hand, and then rest the bar on your shoulders (see the “How To Crush 5×5 Workouts For Huge Gains video above).
Step 2. Lift the bar out of the rack and step back, setting your feet between hip- and shoulder-width apart. Turn your toes out slightly. Without letting your feet actually move, try to screw both legs into the floor as if you were standing on grass and wanted to twist it up—you’ll feel your glutes tighten and the arches in your feet rise.
Step 3. Pull your ribs down and take a deep breath into your belly and brace yourcore. Your head, spine, and pelvis should form a long line—your pelvis should also be perpendicular to your spine, and not tilted toward the floor.Focus your eyes on a point straight in front of you.
Step 4. Squat as low as you can while keeping alignment and maintaining your upright torso position. Remember to point your elbows forward, and raise them up if you feel them slipping downward. Ideally, you’ll be able to descend to where the crease of your hips is below the top of your thighs.
Your knees must stay in line with your toes. Trying to push them out and actively root your feet into the ground will all but ensure this.
Step 5. Extend your hips and knees to return to standing, pushing through the middle of your feet and squeezing your glutes.
Step 1.Hang from a bar with your hands shoulder-width apart and your palms facing you. Pull your ribs down and keep your core tight.
Step 2.Draw your shoulder blades back and together and pull yourself up until your chin is over the bar. If your bodyweight isn’t challenging enough, attach extra weight with a belt, or hold a dumbbell between your feet.
Step 1. Hold a barbell with hands shoulder-width apart. You can take the bar off a rack, or, if you don’t have one, simply pick the bar up off the floor and clean it to shoulder level. Stand with feet shoulder-width apart and tuck your tailbone slightly so that your pelvis is parallel to the floor. Draw your ribs down and brace your core.
Step 2. Press the bar overhead, pushing your head forward as the bar clears it so that the bar ends up just behind your head in the lockout position.
Step 1. Stand with feet hip-width apart and tilt your tailbone back. Bend your hips back to reach down and grasp the bar with hands just outside your knees.
Step 2. Keeping a long spine with your head in line with your hips, take a deep breath into your belly, brace yourabs, and drive through your heels. Pull the bar up along your shins until you’re standing with hips fully extended and the bar is in front of your thighs. Keep the bar pulled in tight to your body the whole time with your shoulder blades pulled together and down (think “proud chest”).
If you can’t keep your lower back flat throughout the exercise, it’s OK to elevate the bar on some weight plates or mats.
Step 1: Set an incline bench to a 30- to 45-degree angle and lie back on the bench holding dumbbells at arm’s length above your chest.
Step 2: Lower the dumbbells until they are close to the sides of your chest. In the down position, your elbows should be at a 45-degree angle to your torso—not straight out to the sides.
Step 3: Press the dumbbells back up, flexing your chest as you push.
Step 1.Attach a rope handle to the top pulley of a cable station. Grasp an end in each hand with your palms facing each other. Step back to place tension on the cable.
Step 2.Draw your shoulder blades together and down as you pull the handle to your forehead, so your palms face your ears and your upper back is fully contracted.
Step 1.Lie on the bench and arch your back, pulling your shoulder blades down and together. Grasp the bar just wider than shoulder width, and pull it out of the rack.
Step 2.Take a deep breath, tighten your glutes, and lower the bar to your sternum, tucking your elbows to your sides at 45 degrees on the descent. When the bar touches your body, push your feet into the floor and press the bar up at the same time.
Step 1.Place a barbell on a rack set to hip level, or deadlift it off the floor. Grasp the bar with your hands at shoulder width and set your feet at hip width; hold the bar at arm’s length against your thighs. Take a deep breath, and bend your hips back—keep your head, spine, and pelvis aligned. Bend until your torso is nearly parallel to the floor.
Step 2.Draw your shoulder blades together as you pull the bar up to your belly button.
Step 1.Load a barbell on the floor. Lie with your upper back resting on a bench and your legs flat on the floor in front of you. Roll the bar into the crease of your hips (you may want a pad or towel to cushion it), and hold it on each side. Place your feet flat on the floor, hip-width apart, and turn your toes out slightly.
Step 2.Brace your abs and push your hips up, driving through your heels until your torso and hips are parallel to the floor.
]]> https://www.onnit.com/blogs/the-edge/the-best-chest-and-triceps-workouts-for-building-muscle2025-07-10T10:55:20-05:002025-08-15T06:52:54-05:00The Best Chest and Triceps Workouts for Building MuscleJeremy GottliebChest and triceps is a muscle pairing as old as the bench press itself, and for good reason. The pecs might be the prime movers in most pressing exercises, but the triceps are crucial synergists, or secondary movers. Hence, your progress on bench—as well as the growth of your pecs—can only go as far as your triceps will allow. That’s why you’ll never see a powerlifter with a big bench press or a bodybuilder with a huge chest that doesn’t have triceps to match.
The Best Chest and Triceps Workouts for Building Muscle
But if you’re following an old-school bodybuilding split rife with supersets for these two muscle groups, well, you’re doing it wrong. You won’t just hinder your progress, you’ll open yourself up to injury. And, as you may have suspected, it’s hard to get big with yourarmsin a sling. With a properly structured chest and triceps workout, however, you can reap big benefits in strength and size. Here’s how to do it right.
Why Work Out Chest and Triceps Together?
The triceps work hard during all press variations, so it makes perfect sense from an efficiency standpoint to hit them in the same workout, maximize the pump, and keep your triceps progressing at the same rate as your pecs.
However, John Rusin, D.P.T., C.S.C.S. (creator of theFunctional Power Trainingsystem), says you can’t pair these two muscle groups haphazardly.Specifically, lifters must be careful about using supersets—working two exercises back to back without rest—because fatiguing your triceps too early in the workout will only limit your pressing power.
“The golden rule of supersets is that they should make both movements better,” says Rusin, “not work to the detriment of both moves.” The problem is that a lot of guys will superset a lift like thedumbbell bench press with a triceps pressdown, which fatigues both the pecs and tri’s to the point where neither muscle group gets worked optimally. “In a pairing of five supersets like that,” says Rusin (which is typical in a bro split), “they’re shot after two. So they end up doing garbage volume”—sets that have no real training effect. “They have to use less weight, and their form goes bad.”
In short, if you’re going to train the chest and triceps together, the path to victory lies through straight sets of bothchest and triceps exercises. That is, do all your chest work, and then your triceps exercises. Still, limited use of supersets—particularly late in the workout—does have a place for advanced lifters, which you’ll see in the workouts below.
Training the triceps ahead of chest is also out of the question.
“Every workout should be built around a KPI, or Key Performance Indicator,” Rusin says. “That’s true whether you’re training for the Olympics or generalfitness.” In the case of a chest and triceps workout,the KPI would be a bench press or a pushup—a lift that you really need to get stronger on over time in order to see progress.Working triceps first would only limit your ability to do those lifts with your best effort andfocus, and with maximum weight. (Side note here: you might be more concerned with getting bigger muscles than with the amount of load you can lift, but do remember that gaining muscle is based on progressive overload—you need to get stronger over time to drive muscle gains.) Choosing to start the workout with an exercise like heavy skull-crushers, for example, would not only be limiting to your chest training, but could also aggravate your shoulders and elbows.
Moreover, getting your pressing done first allows the triceps to ease into the workout, getting warmed up as an assistance muscle in your chest training and then ramping up to a finale where you hit the triceps with higher reps and leave the gym with a monsterarmpump.
“From a sequencing standpoint, triceps training is very well tolerated late in a chest and triceps workout,” Rusin says. “The triceps have gotten maximalblood flowby that point,” and even though they’re a bit fatigued from locking out your elbows on pressing exercises, “you can use less weight to get the training effect.” According to Rusin,the main stimulus for growth in the triceps in a chest and tris session is the pump you get,not the mechanical stress of lifting heavy weights.
In short: By the time you’re done pressing, it won’t take much to push your triceps to the max, and that’s good news for your shoulders and elbows.
Chest and Triceps Anatomy
Here’s what’s under your skin in these two muscle areas.
Chest
– Pectoralis major.The largest muscle of the chest, pecs provide most of your pressing strength by drawing the arms forward and across your chest. The pec major has three portions that are sometimes thought of as being separate regions—the upper, middle, and lower pec—but they’re all one muscle. That said, certain exercises will stress one area over another to influence the pecs’ development.
– Pectoralis minor.Though it doesn’t have the visual impact of the pec major because it lies beneath the bigger pec muscle, it serves a stabilizing function and assists in scapular movement. It is best trained with dip variations.
– Serratus anterior.Located just below the pec major, these stabilizing muscles get their name from the fact that—on a lean, well-developed physique—they look like the edge of serrated knife.
Triceps
– Triceps brachii.As the name would imply, the triceps brachii is composed of three parts (but all are part of the same muscle): the long head, lateral head, and medial head. The long head and medial heads lie on the side of the arm that’s closest to the body, while the lateral head is on the outer side of the arm. All three heads work synergistically to extend the elbow and stabilize the shoulder joints, but the long head also helps to draw the upper arm down toward the body. As with chest, some exercises are better suited to work one head over the other, so you need variety in your triceps training.
The Best Chest and Triceps Exercises
Below are Rusin’s picks for the most effective movements for each muscle group (all of which he demonstrates in the workouts further down).
Best Chest Exercises
1. Pushup
“One thing that gets forgotten about, especially in old-school bodybuilding circles, is the pushup,” Rusin says. It may be unglamorous and old-fashioned, but Rusin says it’s “unbelievable for not only chest strength, but full-body functional strength.”
Unlike the barbell bench press,the pushup allows the shoulder blades to move freely, since they’re not pinned down by a bench. This adds a component of dynamic stability to the posterior (back) side of the body—something that can’t be done through pure isolation moves like flyes and cable crossovers, and helpsbuild a more functional chest and upper back. Most guys treat pushups as a finisher, doing them for high reps at the end of a workout to burn out their chests, but Rusin prefers to make them a priority. You’ll get more out of the pushup, he says, if you load it with chains, sandbags, or a weight plate, and do sets of 5–15.
2. Dumbbell Bench Press
This go-to favorite for lifters of all stripes allows a full range of motion at the shoulders for a maximum stretch of the pecs. This is great for building muscle, but the fact that dumbbell pressing also allows natural rotation at the wrist is key for long-term growth and staving off injuries. Unlike pressing with a barbell, your joints can move through a path that’s right for them, rather than the one pre-determined by the bar your hands are fixed to. “They’re also great for making the mind-muscle connection,” says Rusin. That is, your ability to concentrate on the muscles you’re working to best activate them.
You can reap these benefits whether you’re pressing on a flat bench, at a slight decline of 10–20 degrees (tuck one or two plates under the foot of the bench), or at an incline of up to 45 degrees.
“The mistake that people make is that they bench with the same grip on the same bar on the same flat bench every time,” Rusin says. You need some variety with your barbell benching to keep your chest growing and avoid overuse injuries.Modest incline and decline angles work wonders to accentuate stress on the upper and lower sections of the pecs.
Change your grip every so often. “Most people will do well with a slightly narrow grip,” says Rusin. “Think of where your grip is strongest, and move it in an inch on each hand.” For most guys, this would be with your index fingers on the spot where the knurling (the jagged, criss-cross pattern on the bar) meets the smooth part of the bar.
Rusin says beginners should change up the way they bench every month. Advanced lifters can change it up as often as every week.
Best Triceps Exercises
1. Rope Pressdown
It’s the most populartriceps exercise, and also highly effective. However, too many people lean over the weight and rock into it as they’re extending their elbows. This uses themassof the upper body to force the handle down and lift the weight up, which reduces activation of the triceps.This is why Rusin suggests doing pressdowns from a kneeling position.“There’s no hip involvement and no momentum,” he says. “Kneeling pressdowns isolate the triceps much more effectively.” Another tip: don’t just push down. “Drive your fists apart to get a little bit of shoulder extension,” says Rusin, “which targets the long head of the triceps.”
2. Overhead Triceps Extension
This move, done from a cable pulley set to head height, or with a band tethered to a power rack, places a maximum stretch on the long head of the triceps, which crosses both the shoulder and elbow, making it a key stabilizer for both joints.
3. Bench Dips
When done on a typical dip station with the body hanging between two bars and only supported by the arms, it’s natural to lean forward, placing most of the emphasis on the pecs and front deltoids. Dipping on a single bench is also a poor choice because of the stress placed on the shoulders. Instead,Rusin recommends setting up two flat benches parallel to each other—just far enough apart to fit your butt between them—and performing dips with a hand on each bench,feet on the floor, and your spine perfectly vertical (see the advanced workout below).
“Other dip variations can really piss off your shoulders,” Rusin says, “and it’s very hard to control spinal position between dip bars because there is no ground contact. But good things happen when the hands and feet are in constant contact.” Meaning: all the tension stays directly on the triceps. If you need external load to increase the difficulty, it’s easy enough to set a weight plate right on your lap.
How Many Chest and Triceps Exercises Should I Do?
It takes volume to grow, but total volume should be more of a function of frequency, or how many times you train in a week, than how many exercises, sets, and reps you can cram into a single training session.
“This is where bodybuilding splits fail,” says Rusin. “Becauseif you’re only hitting chest and tri’s once a week, I can almost guarantee you that you’re never going to optimally grow.Training once a week does little more than maintain.”
Training chest and triceps twice per week is a standard to which both beginners and advanced lifters should adhere. So if you train chest and triceps on a Monday, plan on hitting them again on Thursday or Friday. You can use the same exact routine, or employ some variables in grip, angle, and exercise selection each session.
Conversely, training chest and triceps more than twice per week—as some guys do to get ready for “beach season”—is just begging for a joint injury.You don’t need to do 20 different exercises for a muscle or hit it from every possible angle.Rather, says Rusin, “You need to get stronger at the KPI lift and you need to build in intelligent accessory volume.”
To that end, beginners should plan on doing four total chest and triceps exercises per session. Advanced lifters can aim for six to seven. Due to the triceps being active on pressing lifts (and the fact that they’re smaller muscle groups), you should generally do more chest work than triceps exercises.
How Many Sets and Reps Should I Do?
For just about every exercise of chest or triceps, Rusin likes 3–4 work sets (the real work you do, not warmup sets). But rep ranges fluctuate. You can go as low as 5 reps on heavy presses, and up to 15–30 reps for accessory work and isolation exercises—and possibly as high as 50 reps if you’re on your last set of the day.
As you approach your working sets on heavier lifts, Rusin prefers that ramp-up sets be in the same low-rep range you’ll use during the work set. He urges guys to resist the temptation to do more just because the weight is light. For instance, if you plan on using 90- or 100-pound dumbbells for work sets of 5 reps on the incline dumbbell bench press, you should warm up to it by doing a set using a pair of 30s for 5, and then a set with 65s for 5 (do two warm-up sets, bare minimum).The goal isn’t to engorge the muscle with blood before a heavy lift; it’s to train the movement pattern and prime your muscle fibersso that you can perform that pattern perfectly when exposed to a challenging weight. Strength coaches will typically refer to this as a “groove”—and you want to find the best one you can. Conversely, high-rep warmup sets will fatigue you and can reduce the amount of weight or reps you can handle on your main set of the day.
How To Stretch Your Chest and Pecs
Every workout should begin with a thorough mobility warmup that prepares your joints, tissues, and nervous system for the kind of training you’re about to do. Onnit Durability Coach Cristian Plascencia (@cristian_thedurableathlete) offers the following movements for prepping the chest and triceps.
How To Stretch Your Triceps
Beginner Chest and Triceps Workout Routine
Rusin likes to begin any chest session with an exercise that warms up the shoulders and upper back. The face pull will help set your shoulders for strong, safe pressing, so don’t skip it. After that, you’ll train the chest with low and high reps to recruit the widest range of muscle fibers, and finish off with a grueling triceps hit.
High-Angle Face PullSets:4 Reps:15 Rest:60 sec.
Step 1.Set a cable pulley to head height or tether a resistance band to a power rack at the same height. If using a cable, attach the rope handle to the pulley.
Step 2.Stand straight and, holding the rope attachment or band with both hands, pull toward your face. Squeeze for a second in the fully contracted position, and then return to the starting position.
2. Dumbbell Bench Press
Sets:3 Reps:5–8 Rest:60 sec.
Step 1.Lie on a flat bench holding a pair of dumbbells at your shoulders. Your palms can face toward your feet, or in toward your sides, if that feels better for your shoulders.
Step 2.Press up to a full extension of your elbows, squeezing your pecs as you lift. Make sure that, when you lower the weight to the bottom position, you feel a stretch on your pecs at the bottom.
3. Loaded Pushup
Sets:3–4 Reps:10–15 Rest:30–45 sec.
Step 1.Get into pushup position with your hands shoulder-width apart and legs extended straight behind you at hip-width. Tuck your pelvis slightly so it’s perpendicular to the floor and brace your glutes andabs. Have a partner place a weight plate, chain, orsandbagon your back for added resistance.
Step 2.Lower your body toward the floor, tucking your elbows close to your sides as you descend.
Step 3.When your chest is an inch above the floor, press back up, spreading your shoulder blades apart at the top.
4. Kneeling Rope PressdownSets:3–4 Reps:15–30 Rest:20–30 sec.
Step 1.Attach a rope handle to the pulley of a cable station. Grasp the ends of the rope and kneel on the floor facing the station.
Step 2.Keeping your elbows close to your sides, extend your elbows and drive your fists apart at the bottom of the rep as you squeeze your triceps hard. Hold for a moment, and then lower the weight. Allow your elbows to drift forward a bit at the top of the movement to put a stretch on your triceps.
Advanced Chest and Triceps Workout Routine
More experienced lifters need to warm up even more thoroughly than beginners, so Rusin prescribes a three-exercise shoulder blast first thing in the session to prep your pressing muscles. Then it’s on to some heavy benching and triceps supersets to flood the back-arms with blood.
1. Rusin Banded Shoulder Tri-set
Sets:3 Reps:10, 10, 10 Rest:30–45 sec. (after the third exercise)
A tri-set is a series of three exercises. Do one set of 10 reps for each in sequence before resting.
A) Band-Over-And-Back
Step 1.Hold the ends of a resistance band in each hand. Move your hands away from each other so there is no slack in the band.
Step 2.Keeping your elbows extended, lift your arms overhead and behind your body so that the band touches your lower back. Then bring the band back in front of you. That’s one rep.
B) Face Pull
See the beginner’s workout above.
C) Band Pull-Apart
Step 1.Hold a resistance band straight out in front of you with your hands shoulder-width apart.
Step 2.Keeping your elbows straight, stretch the band by moving your fists out 90 degrees to the sides of your body; the band should stretch across your chest.
2. Incline Barbell Bench Press
Sets:3–4 Reps:5 Rest:60–75 sec.
Step 1.Set an adjustable bench to a 30- to 45-degree angle and lie back on it. (Set up in a power rack if you’re training alone, so you can set the spotter bars to just below your chest to catch the barbell if you can’t press it up.) Place your hands about shoulder-width apart on the bar.
Step 2.Lower the bar to the upper half of your chest, tucking your elbows 45-degrees on the descent.
Step 3.Press the bar to lockout.
3. Decline Dumbbell Bench Press
Sets:3–4 Reps:12–15 Rest:45–60 sec.
Step 1.Create a slight decline by resting the foot of the bench on one or two weight plates. Lie back on the bench holding dumbbells at your shoulders.
Step 2.Press the weights to full extension of your elbows. Lower them back down until you feel a stretch in your pecs. Though the video above doesn’t depict it, Rusin suggests putting your feet on the bench to avoid an extreme arch in your spine. This can be dangerous if you’re a taller individual and place your feet on the floor.
4. Superset
Perform a set of the overhead triceps extension and then the loaded pushup before resting 45 seconds. Repeat for four total supersets.
A) Overhead Triceps Extension
Reps:15–20 Rest:0 sec.
Step 1.Attach a rope handle to a cable pulley set to head height, or use a resistance band set to the same height. Hold the rope or band with both hands and face away from theanchorpoint. Step one foot forward and bend your hips slightly, angling your torso forward and allowing your arms to raise over your head with your elbows pointing forward.
Step 2.Without moving your upper arms, extend your elbows to full lockout. Lower the weight, getting a stretch on your triceps in the bottom position.
B) Loaded Pushup
Reps:15–20 Rest:45 sec.
See the beginner’s workout above.
5. Dip Between Benches
Sets:3–4 Reps:15–20 Rest:45 sec.
Step 1.Set two flat benches just far enough apart so that your butt can fit between them. Sit between the benches so that your hands can hold the edge of each bench without reaching backward, which would cause undue stress on your shoulders. Bend your knees and plant your feet flat on the floor.
Step 2.Lower your body between the benches until you feel a stretch on your triceps. Press up to a full lockout. For a greater challenge, you can load the exercise with a weight plate, sand bag, or chains on your lap.
]]> https://www.onnit.com/blogs/the-edge/get-more-reps-how-beta-alanine-helps-build-work-capacity2025-07-10T10:55:20-05:002025-08-15T09:27:05-05:00Get More Reps: How Beta-Alanine Helps Build Work CapacityJeremy GottliebFor the past quarter-century,creatinehas been the most popular supplement for helping to promote performance during strength training. By recharging your muscles’ ATP stores, it allows you to maintain high-intensity activity—lifting, sprinting, etc.—past the point where you’d normally need to slow down or rest. However, if your goal is to maximize your strength and power training, there’s another amino acid you should consider supplementing with as well:beta-alanine.
Get More Reps: How Beta-Alanine Helps Build Work Capacity
While it works via a different mechanism than creatine,beta-alanineoffers similar benefits, including supporting your ability to train more intensely and produce explosive power.Simply put, beta-alanine can help you go harder for longer,whether that means getting more reps on your weight-training sets, more takedowns on your opponents during MMA practice, finding a second wind when you’re finishing a sprint race, or standing on the pedals another 10 seconds at spin class.
Here’s everything you need to know about this underrated muscle supplement.
What Is Beta-Alanine?
Anyone who’s ever worked out hard knows about the “burn.” When you lift weights, run, swim, or do any other strenuous activity that lasts more than a few seconds, lactic acid builds up in your muscles. Lactic acid is a byproduct of the muscles burning carbs for fuel, and consists of a molecule called lactate and hydrogen ions. The lactate goes back to your liver and is recycled as an energy source to keep you working hard,but the hydrogen ions stay in your muscles, making them sting and ache.Not only is it an uncomfortable feeling that may make you want to quit what you’re doing, butresearchfrom the University of Utah shows that hydrogen ion buildup actually works to shut your muscles down so you have to stop and rest. This hinders performance, and, ultimately, your ability to make gains.
Beta-alanine is a precursor to the amino acid carnosine, which is found naturally in animal foods.Carnosine acts as a lactic acid buffer, helping the muscles defend against the buildup of hydrogen ions in your muscles,and therefore the burn you feel during a workout. Consumingsupplemental beta-alaninehas beenshown to help boost levels of carnosinein the body, blocking lactic acid and supporting anaerobic performance.
What Are The Benefits of Beta-Alanine?
As with creatine, an abundance ofresearchhas demonstrated that taking beta-alanine can aid high-intensity, short duration exercise performance. Specifically, beta-alanine’s effect on carnosine levels translates to better workouts in the following ways.
Boosts Work Capacity
AstudyinNutrition Researchlooked at college football players taking beta-alanine for 30 days. Their training volume across all strength workouts ended up being higher than that of the control (placebo) group, andthe total amount of weight they lifted on the bench pressin particularwas significantly greater.Researchers also observed a trend toward lower rates of fatigue in the athletes during anaerobic power tests, and the players themselves reported feeling less fatigued.
Interestingly, when taking beta-alanine,improvements in work capacity may be possible independent of exercise.AstudyinAmino Acids had subjects use the supplement without following a training program. Muscle carnosine levels increased by a whopping 58.8% after four weeks, and 80% after 10 weeks, and the subjects saw significant improvements on work capacity tests administered at both times.
Promotes Power Output
A 2013studyfollowed jiu-jitsu and judo competitors who used beta-alanine. Before and after four weeks of supplementation, they were tested on four different anaerobic power tests lasting 30 seconds each. The martial artists’ performance scores significantly improved in the second and third tests, and tended to improve in the fourth, showing that not only did the players see gains in power, but their ability to produce it in a fatigued state (after previous power tests) also improved.
Aids Body Composition
Atrialpublished inThe Journal of the International Society of Sports Nutritionshowed that subjects who took beta-alanine got better results from high-intensity interval training (HIIT), gaining more lean bodymassandendurancecompared to placebo.
Can I Get Beta-Alanine From Food?
Beta-alanine is a component of carnosine, which, like all amino acids, is present in meats. Interestingly, someresearchsuggests that the amount of physical activity an animal gets in its lifetime can determine how much carnosine it stores in its muscles. Therefore,game animals such aselkand bison could offer greater carnosine levelsthan more popular fare like beef and poultry.
Nevertheless, you needa significant intake of beta-alanineto reap the performance benefits (see “Do I Need To Load Beta-Alanine” below), so your best bet is to consume it in a concentrated supplement form—as a tablet or powder. This is even more important for those who eschew animal foods.The European Journal of Applied Physiologyreports that vegetarians often have lower levels of carnosine than those who eat mixed diets.
Do I Need To Load Beta-Alanine?
Like creatine, beta-alanine has to build up in your system to be maximally effective. “Athletes should follow a loading phase of two to five grams daily,” says Shannon Ehrhardt, R.D., a performance dietitian with EXOS, Onnit’s partner in performance nutrition. (The larger the person, the more he/she will need to saturate the muscles, so you may need to experiment with your intake to find the right amount.) At that point, you can cut back to a maintenance protocol of two to three grams daily.
When Should I Take Beta-Alanine?
While it’s a common ingredient in many pre-workout products,beta-alanine doesn’t have to be taken at any specific time.Once levels reach four to six grams in your body, you should be able to see the difference in your workouts.
Is Beta-Alanine Safe?
You’ve probably heard of or experienced what many athletes describe as a tingling sensation from products that contain beta-alanine. The reason for this is unknown, but scientists think it may be beta-alanine acting on parts of the nervous system that end in the skin, and the effect is similar to the pins-and-needles feeling of when a hand or foot falls “asleep.” Assuming you’re healthy, this feeling is temporary and harmless.
In theInternational Society of Sports Nutrition’s officialposition standon beta-alanine, it stated the following:“To date, there is no evidence to support that this tingling is harmful in any way.[The tingling side effect] is typically experienced in the face, neck, and back of hands. Although not all individuals will experience [it], it is typically dose-dependent, with higher doses resulting in greater side effects.”
If you want to do all you can to avoid the tingling sensation, you can take smaller amounts of beta-alanine at each serving, or look for a brand that offers a more sustained-release formula so it absorbs more slowly duringdigestion.
]]> https://www.onnit.com/blogs/the-edge/the-ultimate-chest-biceps-workouts-for-building-muscle2025-07-10T10:55:19-05:002025-08-15T07:08:44-05:00The Ultimate Chest & Biceps Workouts for Building MuscleJeremy GottliebChest training makes you look like you’re wearing a suit of armor on your torso, andbicepscurls are a must for filling out your shirtsleeves, but apart from the fun and glory of training these two body parts together, the combination is also a pretty good way to organize your workouts, despite being less popular than other workout splits that train the pushing and pulling muscles separately. We looked at the research and consulted a veteran bodybuilder and coach to bring you the best chest and biceps routines for any experience level.
Why Do People Usually Work Out Back and Bis or Chest and Tris?
Back and biceps is a common workout pairing, as is chest and triceps… so what’s with this chest and biceps idea? To understand why these are popular options, let’s back up a bit and look at the whole idea of workout splits.
A workout split is the way in which you break up the muscle groups you train over the course of a week. One of the most common splits among lifters of any kind (regardless of their goals) is the push-pull, wherein you train the muscles that perform pushing movements one day and pulling movements on another. A push day, for instance, could train the chest and triceps together—or chest, shoulders, and triceps—because all of these are involved in pressing exercises of any kind.
A pull day would target the back and biceps directly, and may also include some extra work for the rear delts and forearms as well, since all these muscles are recruited for row and pulldown movements. (Legs may be trained on a third workout day, or they may be split up and added to the push and pull days. For example, you could train quads and calves on the push day andhamstringsand glutes in the pull workout.) There are many benefits to this kind of programming.
For one thing, training two or three body parts at a time allows you tofocuson just a few areas, as opposed to the whole body, which saves you energy and time, and it lets you direct more effort into each exercise and muscle group. For another, each workout works totally separate muscles, so you don’t have to worry about training a body part again (however inadvertently) the day after you just worked it—for example,it’s not a great idea to train triceps the day after chest and/or shoulders, because the triceps will still be recovering from the pressing you did.
The push-pull split is also a very convenient, intuitive way to train. On push day, for instance, you’d typically start by training the biggest muscles first, and work your way down to the smaller ones. So you could do bench presses for chest, overhead presses for the shoulders, and finish with triceps extensions for the tris. The chest exercises warm up your shoulders and triceps, so the rest of the workout flows smoothly. You won’t need many warmup sets by the time you get to your triceps exercises.All the muscles that perform related functions get worked on the same day,and therefore don’t need to be worked again for a while. (I.e., you don’t need separate days for chest, shoulder, and triceps training.)
The same goes for back and bis. Back exercises work the biceps and forearms automatically, so you might as well finish the workout with some directarmwork while those smaller muscles are warmed up and ready.
Why Train Chest and Biceps Together?
Push-pull splits are perfectly fine, but, like any split, they can have their drawbacks. One argument against the push-pull split is that, because the shoulders work to support the chest and the triceps are trained in all pressing movements, the delts and tris can get fatigued from the chest work, limiting your ability to train them with the heaviest possible weight and the greatest focus.
In other words, by the time you get to triceps, you’re tired, and not able to train them as hard as if you were fresh. The same goes when biceps are trained after back. If your goal is to drastically increase your strength or muscle in these areas because they’re lagging, the push-pull split may not be ideal, particularly if it’s the only split you’ve followed for years.
Pairing the biceps with chest eliminates any carryover fatigue.Since the biceps really aren’t involved with pressing exercises (well, they are as a stabilizer, but not to a degree that causes real fatigue), you can train them when they’re very fresh. “I think a great change of pace is to group together muscles that are not synergistic,” says Jonny Catanzano, CES, an IFBB pro bodybuilder and coach to physique competitors as well as recreational lifters (@jonnyelgato_ifbbpro).
Catanzano points out that since the pecs and biceps don’t compete at all, you can do sets of each in alternating fashion. (Note: this is sometimes called supersetting.) For instance, do a set of bench presses, rest briefly, or not at all, and then a set of curls.Your chest can rest while you work your biceps and vice versa, so your workout moves along at a brisker pace while each muscle gets a little extra time to recover.
Astudyin theJournal of Strength and Conditioning Researchfound that, when lifters alternated sets of unrelated muscle groups, they saved workout time and were able to lift more overall weight. “Practitioners wishing to maximize work completed per unit of time,” said the study authors, “may be well advised to consider [paired set] training.”
If you train chest and biceps together, it would make sense then to have a back and triceps day, or do a shoulder and triceps day and train back by itself on a third upper-body day in the week.“This kind of split is a good idea for anyone who considers theirarmsto be a weak point,”says Catanzano. The biceps will be fresh when you train them with chest, and thetriceps will be able to handle more load if worked with backor shoulders, so the extra stimulus should produce gains.
One caveat here is that while the biceps don’t compete with the pec muscles, they do overlap with back—remember, any back work you do will work the biceps to a degree by default.So it’s best not to train back the day before or after a chest and biceps workout.You shouldn’t do triceps a day before or after either, because you’ll have worked them when you hit chest.
Dorian Yates, a six-time Mr. Olympia and widely considered one of the cleverest bodybuilders when it came to program design, used this very split himself (as laid out in his book,Blood and Guts). Yates trained delts and triceps on Monday, back on Tuesday, and took Wednesday off. He then did chest and biceps Thursday, legs on Friday, and took Saturday off. On Sunday, the cycle repeated. (Notice how Yates spaced out the chest and biceps day in his training week.)
Such a training split will probably require you to take a day off every third day or so, as Yates did, but that’s OK. You won’t be able to train each muscle group quite as frequently as you would following the classic push-pull split, but it will be frequent enough to elicit growth.
In its 2021position standon muscle-growth training, the International Universities Strength and Conditioning Association reported thatthe training frequency needed for a muscle to grow may be only one session per week—provided that a minimum of 10 working sets (not including warmups) are performed for the muscle area. As 10 hard sets can be difficult to achieve in one workout, many coaches recommend training a body part twice every seven days to get adequate volume—so chest and biceps workouts as prescribed in the split above (repeated every 6 days) would suffice just fine.
The Science of Chest and Biceps Training
“When approaching chest training, I try to focus on different angles to place tension on the different heads of the pec major muscle,” says Catanzano. Flat pressing, or exercises where your arms reach straight out in front of you, will emphasize the sternal section of the pec muscles (“middle chest”), while incline movements and an arm path that reaches upward at an angle will target more of the clavicular heads (“upper chest”).
Decline pressing, where the arms move downward at an angle, targets the costal heads of the pecs, or the muscles’ bottom-most division.“You don’t need to work all the parts of the pecs in one workout,”says Catanzano, but a complete program should attack one or two of these areas each session. He emphasizes the upper pecs in the workouts he designed below, because it’s such a common weak point in most physiques.
For biceps, Catanzano likes to stress the muscles at different lengths, which is accomplished by curling with the arm in different positions. Curls done with the elbows in front of the body make the biceps work hard in their most shortened position, while just the opposite is true of incline curls and stretch curls. (Standard curls with the elbow in line with the torso work the muscle most at its mid-range.) As with chest training, playing all the angles, so to speak, leads to the greatest development, forcing the muscles to get stronger no matter what their leverage advantage (or disadvantage).
How To Stretch Before Your Chest and Biceps Workout
The shoulders are the most mobile joints in the body, and that means they’re also the most unstable, which makes them susceptible to injury. When you’re doing a chest and biceps workout, remember also that the biceps get trained after chest, and chest pressing and flyes don’t do much to pump blood into the biceps muscles. Your biceps can be nearly cold when you go to do your first set of curls, and that’s not ideal from the standpoint of preventing injury (it’s not ideal for promoting good performance either).
Shane Heins, Onnit’s Director ofFitnessEducation, put together a sequence of mobility drills that will warm up your shoulder joints, chest muscles, elbows, biceps, and forearms, preparing your body to lift heavy weights and stimulate the muscles you’re training safely. They’re also great for maintaining flexibility in these areas, which can diminish if you add a lot of muscle size but fail to balance it with mobility training (and what good is being big and strong if you don’t have the athleticism to use these qualities?).
DIRECTIONS
Perform the exercises as a circuit, completing one set of each in sequence.Do 10 reps for each exercise, and repeat the circuit for 4 total rounds.
Step 1.Get on all fours with your hands under your shoulders and your knees under your hips. Brace yourcore.
Step 2.Squeeze your shoulder blades together so that your chest lowers toward the floor, and then spread your shoulders apart so that it rises back up. Your arms do not bend—keep the movement at your shoulders. That’s one rep.
Step 1.From the same quadruped position as the scap pushup (all fours), turn your elbows to point out to the sides and then bend them, lowering your body to the bottom of a pushup.
Step 2.Turn your elbows toward your body and extend your arms to return to the starting position. That’s one rep.
Step 1.Sit on the floor and place your hands by your hips, fingers pointed out to the side.
Step 2.Press your hands into the floor as you extend your hips until your torso is parallel to the floor. Be careful not to extend your hips above your shoulders—that would mean you’re hyperextending your lower back.That’s one rep.
Step 1.Sit on the floor as you did for the mobile table, and let your knees fall to your left side. Reach your left hand behind you and plant it on the floor behind your tailbone.
Step 2.Press your hand into the floor as you extend your hips and reach upward with the opposite arm. Keep your core braced so you don’t overextend at the spine. Spread your shoulders apart as wide as possible, allowing the rotation to open your upper back.That’s one rep.
At-Home Chest and Biceps Workout
Forget the heavy bench presses, fancy chest machines, and variety of curl bars—you don’t need more than a few pairs dumbbells and some resistance bands to work your chest and biceps at home, or in a bare-bones gym. The following workout, designed by Catanzano, should take about 45 minutes and can be done almost anywhere.
DIRECTIONS
The exercises in the workout are organized into pairs, marked A and B. Perform a set of the A exercise, rest, then perform a set of the B exercise, rest again, and repeat until all sets are complete for each move in the pair. Then go on to the next pair and do the same thing. Rest 2 minutes between sets.You’ll do 3 sets of 15 reps for each exercise.
Pushups work your chest, but when you elevate your feet on a bench or boxes, you recruit more of the upper-chest muscle fibers, the same way you do if you were performing an incline bench press.
Step 1.Get into pushup position with your hands shoulder-width apart, and rest your feet on a bench or boxes so that your body is angled toward the floor.
Step 2.Keeping your body in a straight line and your core braced, lower yourself until your head is just above the floor, and then push back up. That’s one rep.
Curling with a band that pulls from behind you puts more tension on the biceps in their lengthened position, an effect you don’t get from conventional barbell and dumbbell curls.
Step 1.Anchora resistance band to a sturdy object behind you and hold the free end in one hand, allowing the band to pull your arm behind your torso. Stagger your stance for balance.
Step 2.Without moving your upper arm forward, curl the band until your biceps are fully contracted. Complete your reps on that arm, and then switch arms and repeat.
Here’s some more work for the upper part of the chest, and you don’t even need an incline bench to do it.
Step 1.If you have an adjustable bench, set it to a 30 to 45-degree incline. If you don’t have a bench that inclines, elevate the head of a flat bench on some mats or weight plates. Hold a dumbbell in one hand and lie back on the bench with the weight at shoulder level.
Step 2.Press the dumbbell over your chest. Complete your reps on that arm, and then switch arms and repeat.
You can use a flat bench here, or really any sturdy, flat, object to sub for a preacher curl bench. Just elevate it so that your armpit can rest at the top. The preacher curl stresses the biceps in their shortened position and makes for a very strict movement.
Step 1.Incline your bench or elevate the surface you’re using so you can brace the top of your arm against it. Check that your forearm won’t be completely vertical at the top of the movement—that would mean your wrist and elbow are stacked and there’s no tension on the biceps.
Step 2.Hold a dumbbell and curl the weight with strict form. Complete your reps, and then repeat on the other arm.
This move mimics a cable press exercise. An advantage here over pressing with free weights is that the bands keep tension on the pecs at the end range of motion, rather than letting the tension drop off, which is what happens when you reach lockout on dumbbell and barbell pressing.
Step 1.Attach resistance bands to a sturdy object at about waist height and grasp the open ends in each hand. Sit with your back braced against a bench or a sturdy chair. You can also do the exercise standing if you don’t have a bench.
Step 2.Press the bands as if they were dumbbells, but bring your hands together to meet in front of your chest in order to fully shorten the pec muscles.
This is an old-school move we all owe the Governator, Arnold Schwarzenegger, for popularizing. The concentration curl really lets you stretch the biceps in the bottom position, and allows you to focus your mind on the muscle while you’re training it.
Step 1.Stand and hold onto a bench or other sturdy object for stability. Hold a dumbbell in your other hand, and bend at the hips. Allow your working arm to hang.
Step 2.Without moving your upper arm much, curl the weight to a full contraction and control its descent back down. Complete your reps, and then repeat on the opposite side.
The Best Intermediate Chest and Biceps Workout For Getting Stronger
If you’ve been training a year or more, try this chest and biceps routine from Catanzano (who also demonstrates it in the video below). It uses dumbbells and cables (or resistance bands), and will work the muscles from some angles and positions you probably haven’t tried before. It should only take you about 45 minutes to complete.
DIRECTIONS
The exercises in the workout are organized into pairs, marked A and B. Perform a set of the A exercise, rest, then perform a set of the B exercise, rest again, and repeat until all sets are complete for each move in the pair. Then go on to the next pair and do the same thing. Rest 2 minutes between sets.You’ll do 3 sets of 12 reps for each exercise.
Curling with a cable or band while your elbows are in front of your body stresses the biceps in their shortened position.
Step 1.Attach a handle to the low pulley of a cable station and grasp it with your palms facing up, hands at shoulder width. You can also use resistance bands.
Step 2.Curl the weight, allowing your elbows to move forward in order to fully shorten the biceps. That’s one rep.
The incline press done with cables or bands keeps tension on the upper pec muscle fibers throughout the range of motion, and particularly as you reach lockout with your elbows.
Step 1.Set a bench at a 45- to 60-degree angle and place it between two facing pulley stations. You can also use resistance bands. Set the cables or bands to a height that will allow them to line up with your upper chest fibers—around waist height or below when you’re sitting on the bench should work. Lie back on the bench and hold the cables or bands at shoulder level at your sides. Make sure there’s tension on the cables or bands in this bottom position.
Step 2.Press the cables or bands over your chest to lockout. That’s one rep.
Curling with a band that pulls from behind you puts more tension on the biceps in the fully contracted position, an effect you don’t get from conventional barbell and dumbbell curls.
Step 1.Anchor a resistance band to a sturdy object behind you at or below knee height, and hold the free end in one hand, allowing the band to pull your arm behind your torso. Stagger your stance for balance.
Step 2.Without moving your upper arm forward, curl the band until your biceps are fully contracted. Complete your reps on that arm, and then switch arms and repeat.
The flye motion can be done with dumbbells, cables, or bands. It isolates the pecs better than pressing does, and, if you’re using bands, they’ll give you more tension in the top position (where it usually drops off with free-weight exercises).
Step 1.Set a bench at a 45- to 60-degree angle. Lie back on the bench and hold the weights over your chest.
Step 2.Lower your arms out to your sides, bending your elbows as you go to take tension off the shoulders. Your elbows should be bent 45 to 60 degrees in this bottom position. Bring your arms back in front of your chest again as if you were hugging somebody, straightening your elbows as you do. That’s one rep.
This move puts more focus on the shorter head of the biceps, contributing more to a biceps peak.
Step 1.Hold a dumbbell in each hand and turn your palms inward to face your body.
Step 2.Curl the weight in one hand in the direction of your opposite shoulder. Lower it, and repeat on the other arm. One curl on each side equals one rep.
The Best Advanced Chest and Biceps Workout For Getting Stronger
If you’ve been training for a few years and feel you’ve hit a plateau in your gains, try this routine from Catanzano to break through. It has a finisher at the end that combines three exercises with little to no rest in between. Called a tri-set (or giant set), it’s an advanced training technique used by bodybuilders to completely exhaust a body part and force as much blood into the area as possible.
DIRECTIONS
Most of the exercises in the workout are organized into pairs, marked A and B. Perform a set of the A exercise, rest, then perform a set of the B exercise, rest again, and repeat until all sets are complete for each move in the pair. Then go on to the next pair and do the same thing. Rest 2 minutes between sets.
You’ll do 3 sets of 10 reps for each exercise.The last three exercises are done as a tri-set. So you’ll do one set of 4A, then 4B, and then 4C before resting 2–3 minutes.
Even though you’re not lifting on an incline bench, this exercise targets the upper chest in the same way, but puts more tension on the muscle in its fully contracted position.
Step 1.Set a cable or resistance band at around knee height and grasp the handle or open end, holding it at shoulder level. Stagger your stance for balance, and rest your free hand on a bench or other sturdy support in front of you for extra stability.
Step 2.Bring your arm up and across your body so you feel a full contraction in your working pec. Complete your reps, and then repeat on the opposite side.
Curling against the knee pads of a lat-pulldown station may seem strange, but it’s one of the strictest movements you can do for the biceps. The stability that the pads provide lets you really isolate the biceps, avoiding any momentum from swinging the arms.
Step 1.Sit at a lat-pulldown station with your back to the machine. Hold dumbbells and brace your arms against the knee pads.
Step 2.Curl the weights using the pads to keep your arms stationary and stable. Note: if there are people waiting to use the lat-pulldown for actual lat-pulldowns, be considerate and pick a different biceps exercise!
Bringing your arms together in front of you fully shortens the pec muscles, an effect you can’t get from dumbbell and barbell pressing while keeping tension on the muscles. A converging press done with cables or bands does it perfectly.
Step 1.Attach handles to the pulleys of two facing cable stations, or, use resistance bands set to knee height. Bend your elbows up to 90 degrees in the bottom position to take pressure off your shoulders.
Step 2.Press the cables or bands in front of your chest, bringing your hands together in front of you.
The preacher curl stresses the biceps in their shortened position and makes for a very strict movement. You can perform it one arm at a time, or, if you have a preacher bench, you can train both arms at the same time.
Step 1.Incline your bench or use a preacher bench and brace the top of your arm against it. Check that your forearm won’t be completely vertical at the top of the movement—that would mean your wrist and elbow are stacked and there’s no tension on the biceps.
Step 2.Hold a dumbbell and curl the weight with strict form. Complete your reps, and then repeat on the other arm.
The decline press targets the costal head of the pectoral muscles—“lower chest” in layman’s terms.
Step 1.Set a bench to a 15 to 35-degree decline. If you don’t have one that adjusts to a decline, elevate the foot of a flat bench on some weight plates or mats.
Step 2.Lie back on the bench holding dumbbells at chest level, and press the weights over your chest.
More work for the upper chest here. If you don’t have a landmine unit, you can wedge a barbell into a corner.
Step 1.Load a barbell into a landmine and hold the opposite end with both hands at chest level. If you have the V-handle from a cable row machine, use that on the bar to give yourself a better grip. Stagger your stance for balance and lean forward so your weight is on your front foot.
Step 2.Press the bar up—it will move on an angle, similar to the path your arms travel when you’re performing an incline press.
This move puts more focus on the shorter head of the biceps, helping to develop the biceps peak.
Step 1.Hold a dumbbell in each hand at your side, and turn your palms inward to face your body.
Step 2.Curl the weight in one hand in the direction of your opposite shoulder. Lower it, and repeat on the other arm. One curl on each side equals one rep.
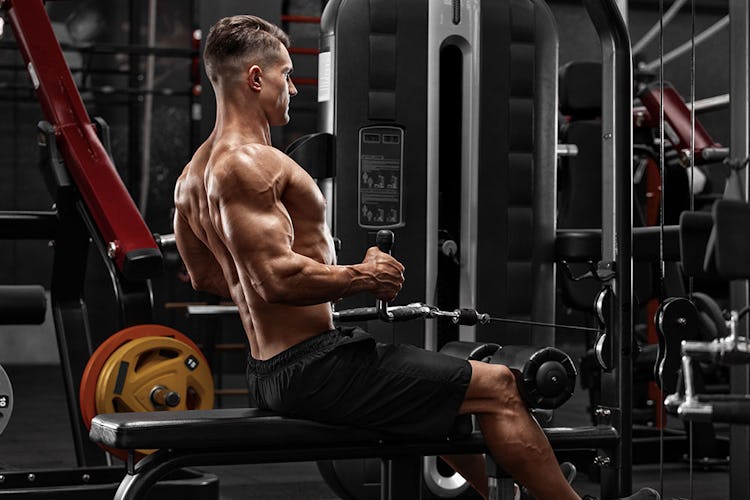
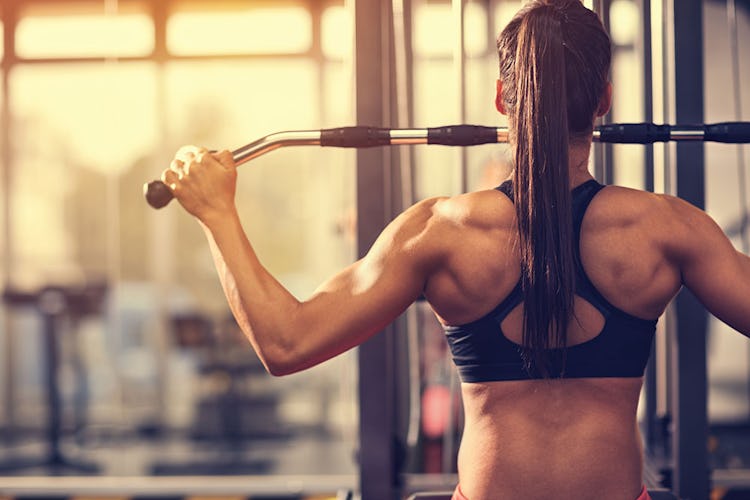
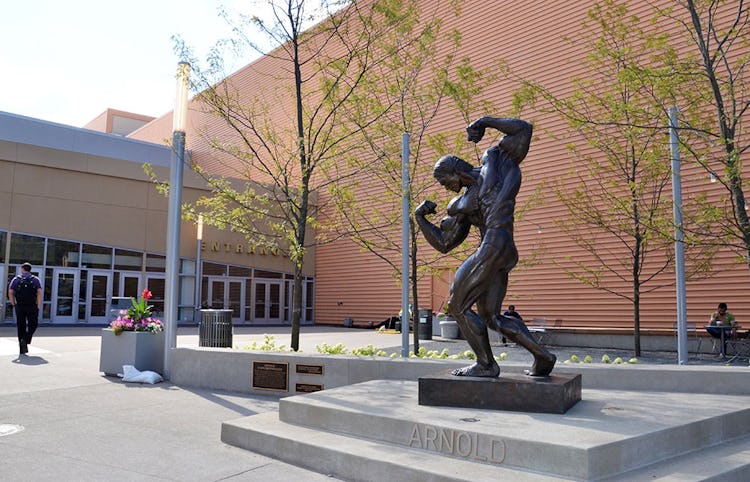
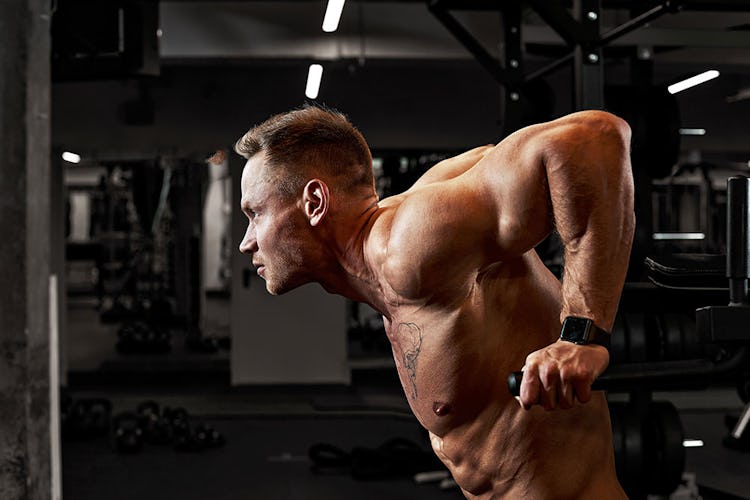
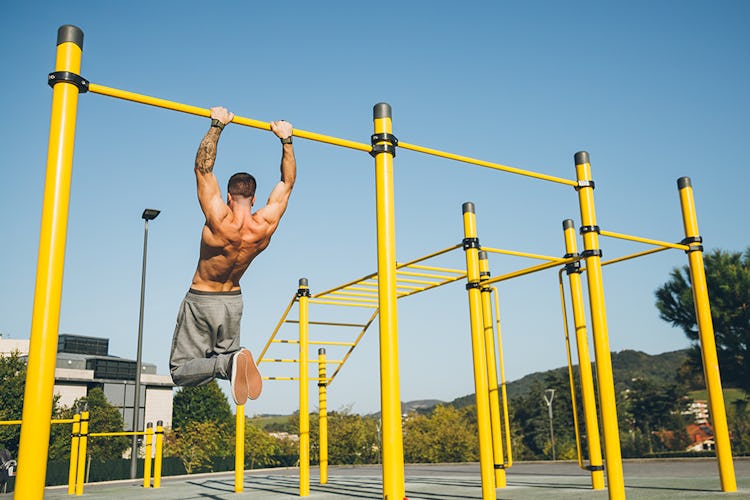
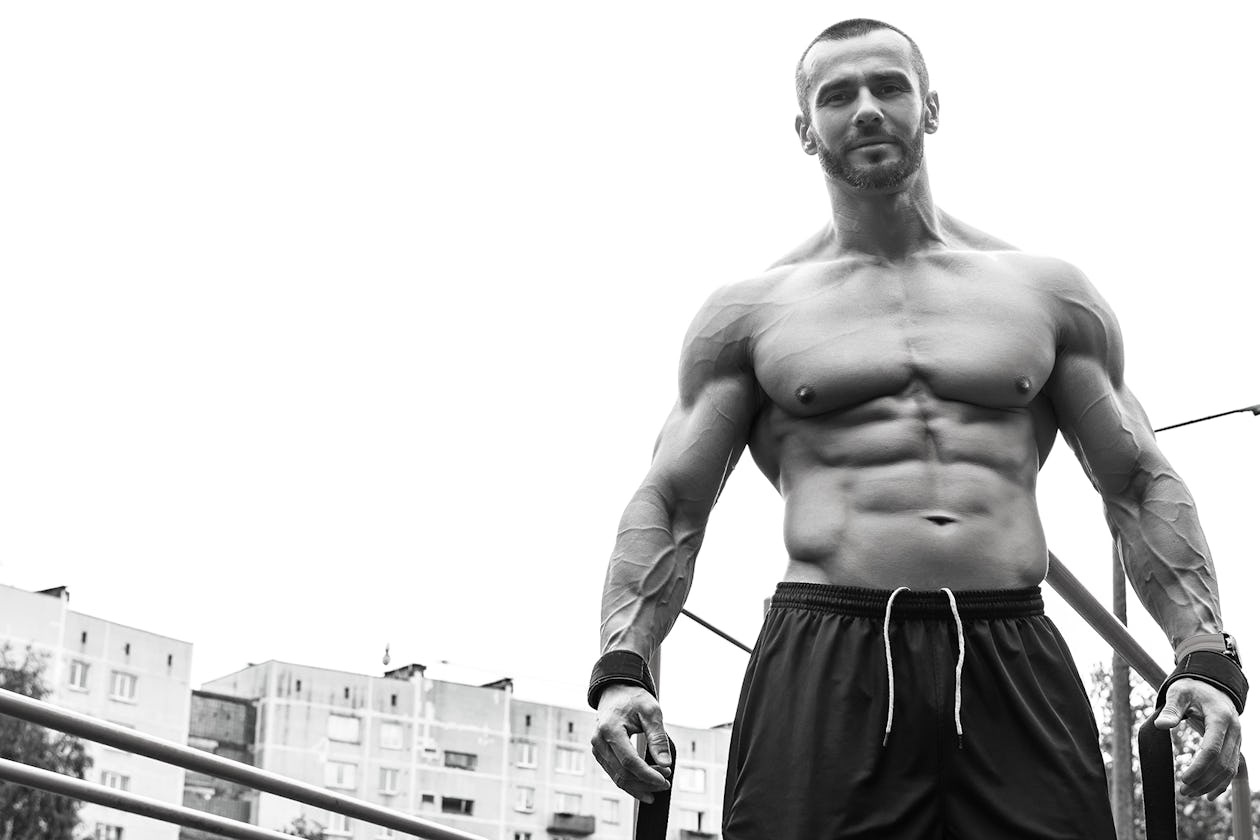
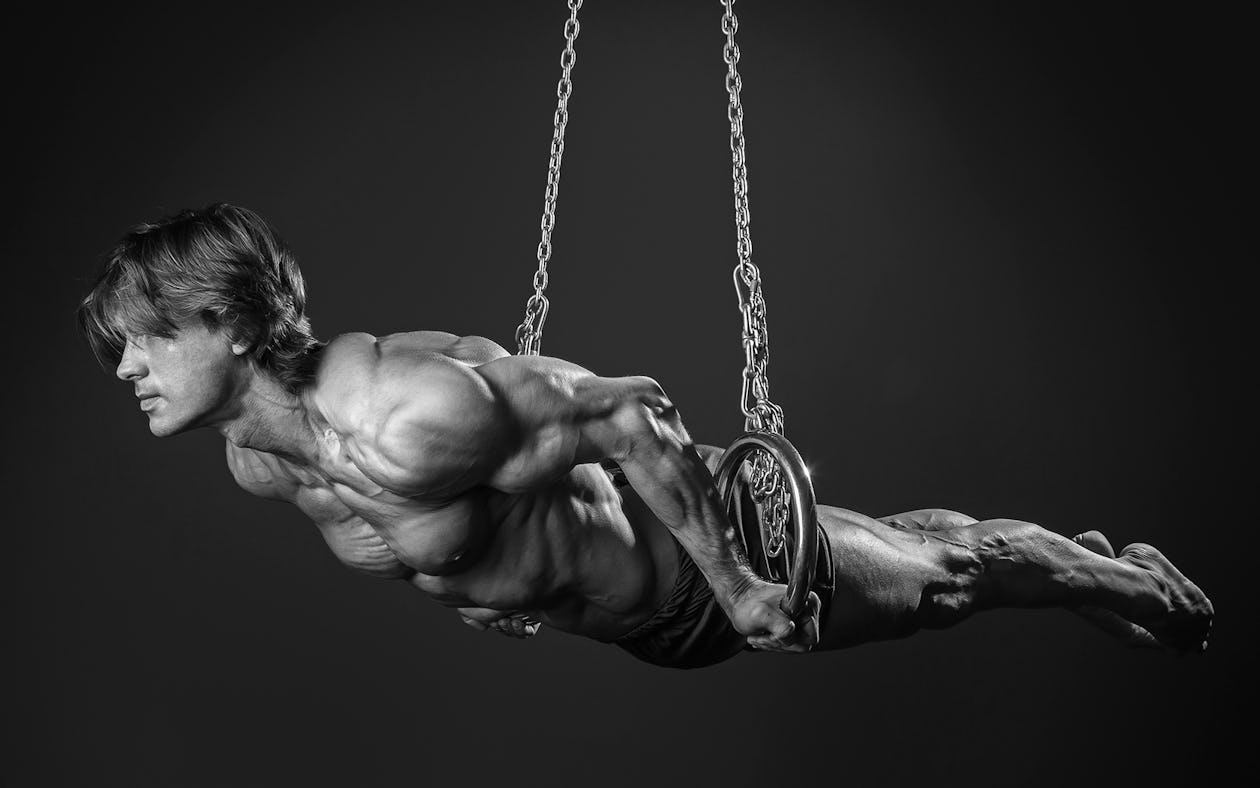
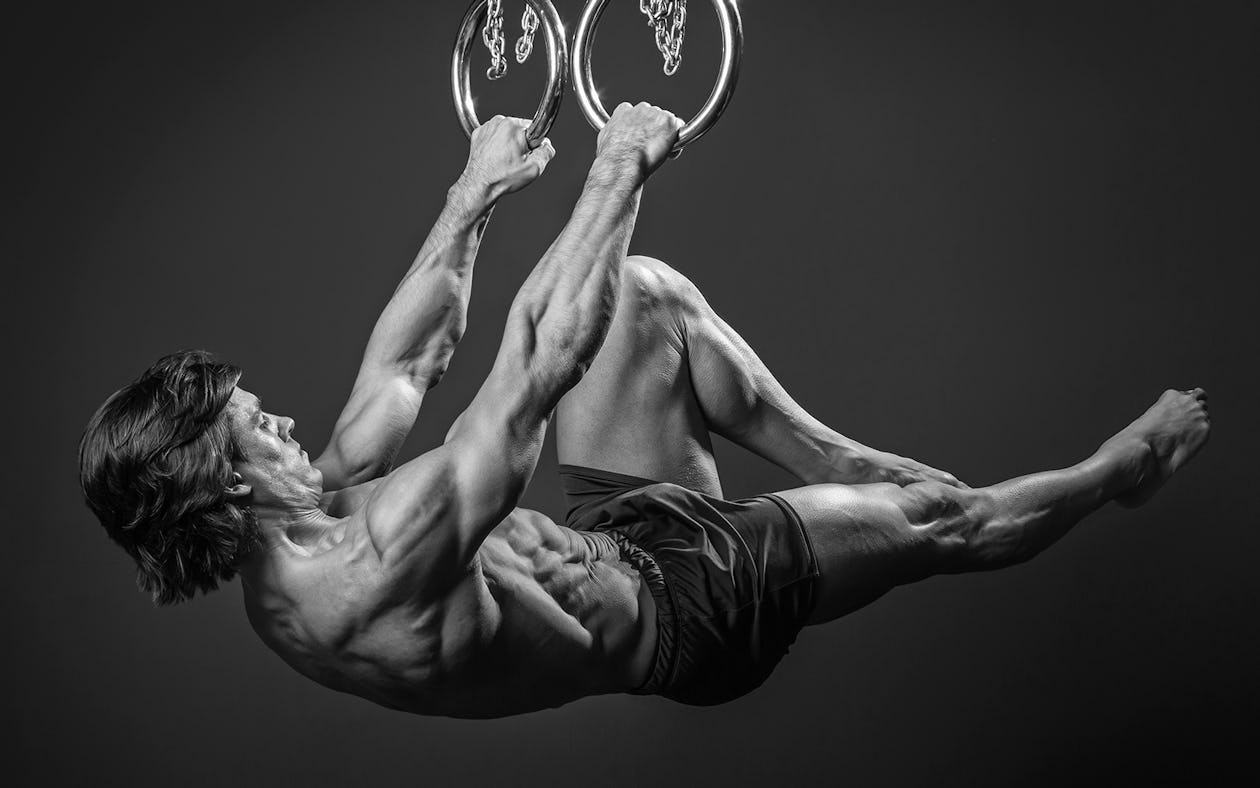
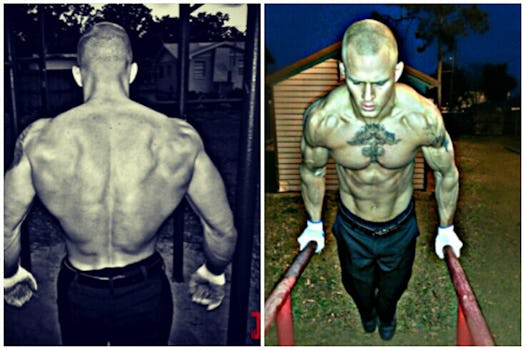


 You can perform B-stance RDLs with a barbell, dumbbells,
 B-stance RDLs will primarily target the gluteus maximus, your main butt muscle. But they will also hit your hamstrings and spinal erectors (the muscles in your lower back). Your core, of course, has to brace your spine throughout the whole movement, so you could argue that any RDL is an ab workout too.


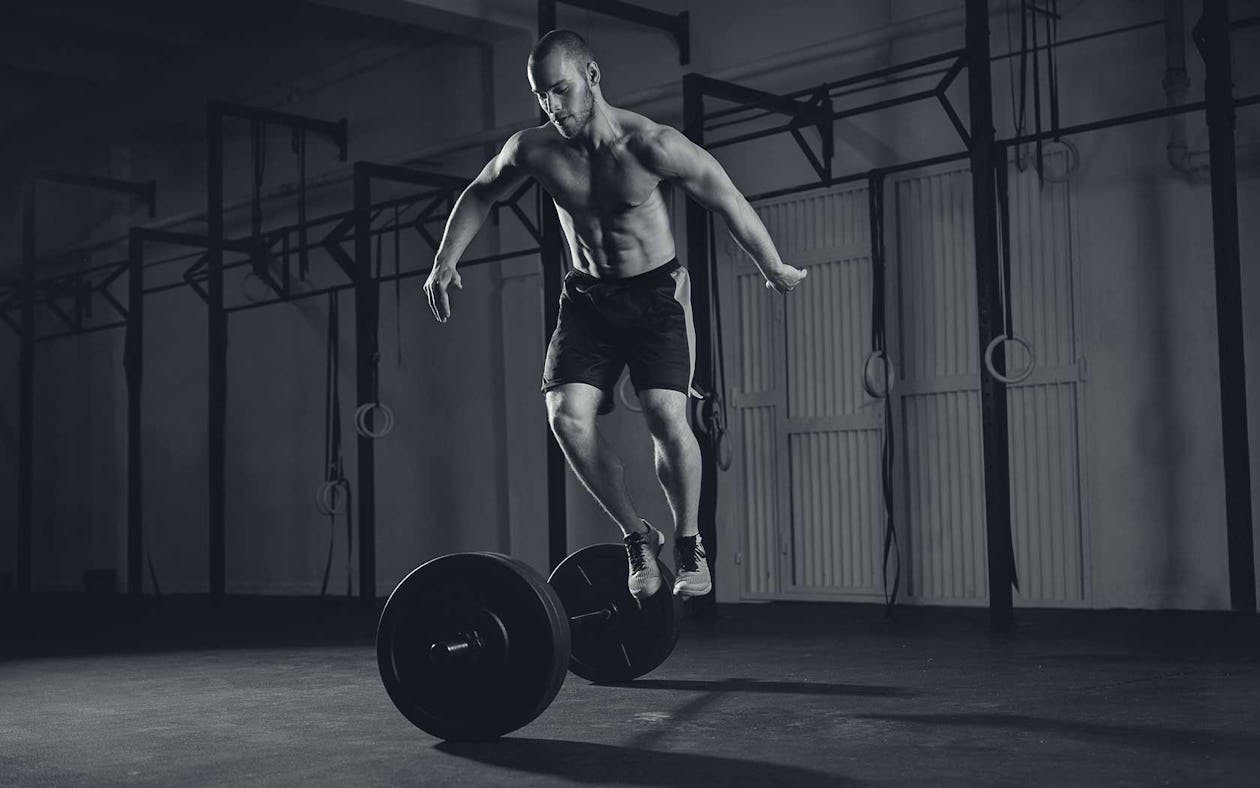
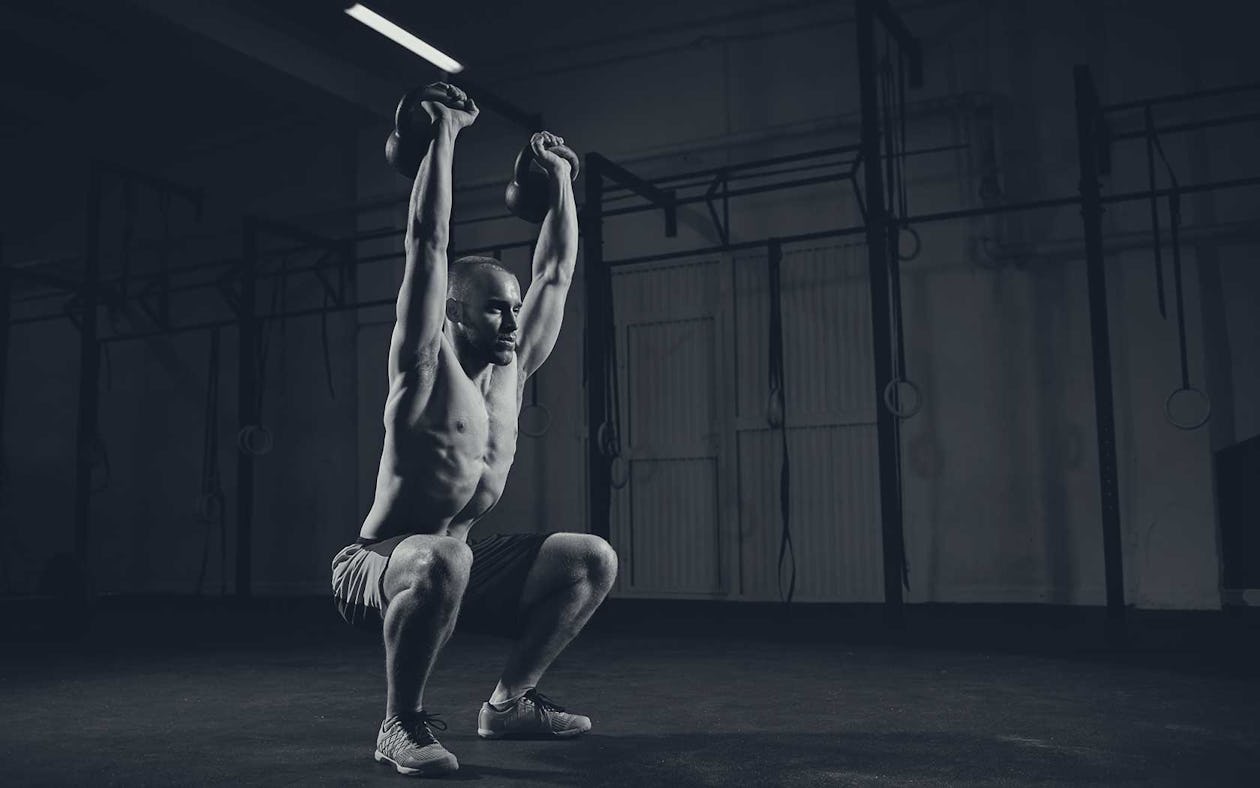


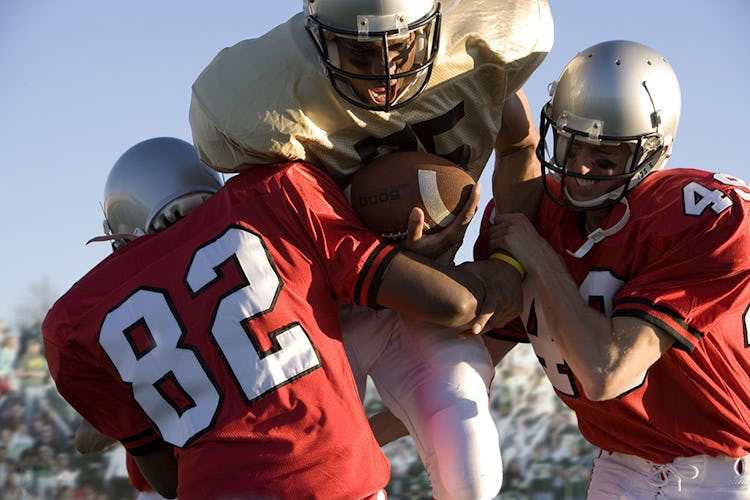


 Five by five is typically done on classic multi-joint barbell lifts, such as
 The 5×5 workout has been around for at least a half-century, and probably much longer. It’s widely considered to be a good routine for beginners to follow because it’s simple to implement and provides a balance of heavy weights and increasing volume—two factors that are