https://www.onnit.com/blogs/the-edge.atomOnnit - The Edge2025-07-15T17:22:41-05:00Onnithttps://www.onnit.com/blogs/the-edge/the-kettlebell-around-the-world-exercise-explained2025-07-10T10:55:28-05:002025-08-20T14:32:35-05:00The Kettlebell Around The World Exercise ExplainedJeremy GottliebAt first glance, thekettlebellaround the world exercise might seem simple, and maybe even goofy: you pass a kettlebell around your body in a circular motion. Heck, you say, a child could do that. But when you try it, you’ll see that it works muscles you never thought of in ways you never have, and it’s a necessary stepping stone to flashier, more sophisticated training like kettlebell flows and complexes.
Here’s a complete guide to the kettlebell around the world, from how to master to the movement to the whole world of movement it can unlock for you.
What Is The Kettlebell Around The World?
The kettlebell around the world, also called a hip halo by some coaches, has you moving a kettlebell around your body in a circular pattern, switching from one hand to the next. You’re allowed to use momentum so that the kettlebell flows smoothly through the transitions, but you have to control it—the weight can’t touch any part of your body (aside from your hands).
Step 1.Stand very tall holding a light kettlebell (about 4–7 kilos/8–16 pounds) in one hand.Hold the bell at the far edge of the handle so you leave space for the other hand to grasp it easily.Retract your neck and tuck your chin, draw your shoulders back so your chest is proud, and tuck your tailbone under slightly so that your pelvis is level with the floor. You should feel like your posture is perfect. Now brace yourcoreand hold this position throughout the exercise.
Step 2.Set the kettlebell in motion around your body (either direction, clockwise or counter-clockwise, is fine). When the kettlebell is directly in front of your body, switch it over to the other hand, and when it comes around directly behind your body, switch back. Move fast enough that you get some momentum going, but don’t try to rush it—set a steady rhythm.
Keep yourarmsstraight the whole time.“Allowing bend in the elbows will cause your arms to get tired,” says Shane Heins, Onnit’s Director ofFitnessEducation.
It’s important to maintain your posture and balance throughout the movement. As you get more experienced and graduate to biggerkettlebells, this will become more challenging, sofocuson staying tall and braced from the very beginning.Heins suggests placing a small box or other object between your feetand squeezing it in order to train you to keep your thighs tense—this will help you maintain stability.
You can perform the around the world for reps or time (for example, 30 seconds straight), but make sure you work it in both directions. So if you do 5 reps clockwise, immediately follow up with 5 reps counter-clockwise, so you build balanced strength.
Around The World Kettlebell Benefits
That circular motion accomplishes much more than meets the eye, and you’ll feel it all as soon as you start doing the movement (correctly, that is). Controlling the kettlebell’s path and momentum while keeping good posture trains the core and a bunch of other stabilizer muscles hard. (What else is going to keep you from bending or twisting as the weight travels away from your center of gravity?) Your wrist and forearm muscles have to clench the handle to prevent the weight from slipping away, so the around the world works your grip strength too.
On top of that, the centrifugal force you generate with the around the world creates a pulling effect thattractions out the shoulders, elbows and wrists.This really feels great, especially if you have years of heavy, joint-compressive lifting under your belt, and can arguably help to prevent injury and speed recovery from other strength-training workouts. Decompressive weight training, Heins says, is often overlooked and very valuable: controlling a weight as it pulls on your joints strengthens them, just as lifting a weight that compresses your joints does.
If you have athletic ambitions, or just want to get good at more advanced kettlebell training, the around the world should be a staple in your programs, asit works eye-hand coordination and balance.Over time, you’ll develop a better sense of where the kettlebell is in space around you, and you’ll be able to make the hand offs quicker and more smoothly.
Sophisticated kettlebell routines require you to change direction quickly and express strength in all the different planes of motion. Kettlebell flows, where you transition from one exercise to another, such as a clean to asquatand then rotational press, are an example of this.The kettlebell around the world lays the groundwork for this level of skill, helping you get comfortable with moving a weight 360 degreesaround your body. You’ll have a hard time getting the hang of cleans, snatches, and twisting motions without mastering the around the world as a pre-req.
What Muscles Do Kettlebell Around The Worlds Use?
To list them all would take more words than we have the patience to write (and, presumably, more than you’d have the patience to read), but take our word that the deltoids, core (rectus abdominis, olbiques, transversus abdominis), wrist flexors and extensors, spinal erectors, quads, glutes, and various muscles in the hips on down will be engaged in every revolution of the around the world.
What Weight Kettlebell Should I Use?
When you’re starting out with the around the world, go light to get the form down. A 3–7 kilogram bell (8–16 pounds) is perfect. Once you’ve mastered the technique, you can still get a lot out of light weight, but you’re also welcome to increase the load if you want to make the exercise more of a core and grip workout. A 24–28 kilo bell (53–62 pounds) will be very challenging.
The around the world can serve many different functions and fit into your workouts in several ways. You can use a light bell in your warmup to jumpstart your core and hips, activating those muscles for better firing during the heavier or more explosive training to come. You can also add the around the world to a mix of other exercises for a battery that zeroes in on the core—do this at the end of a session for some extra work, or on an “off” day.The around the world can also be done between sets of kettlebell or conventional strength exercises for some active recovery.Think: you’re giving your muscles and nervous system a rest, but you’re still doing a little work to burn more calories, keep your heart rate up and build some conditioning, and stay warm. Heins particularly likes the around the world between sets of overhead pressing, as it will decompress your shoulders and elbows, and single-leg work.
Light around the worlds should be done for3 sets of 20 reps, or 30 seconds in each direction,while a heavier bell can be used for 5 sets of 4–6 reps each direction.
How To Stretch Before Exercising?
Use the following mobility sequence from Heins (demonstrated in the video below) to prepare your hips for the around the world, or any other lower-body focused workout you have planned. Perform the movements as a circuit, completing one set for each in sequence and then repeating for 2–3 total rounds.
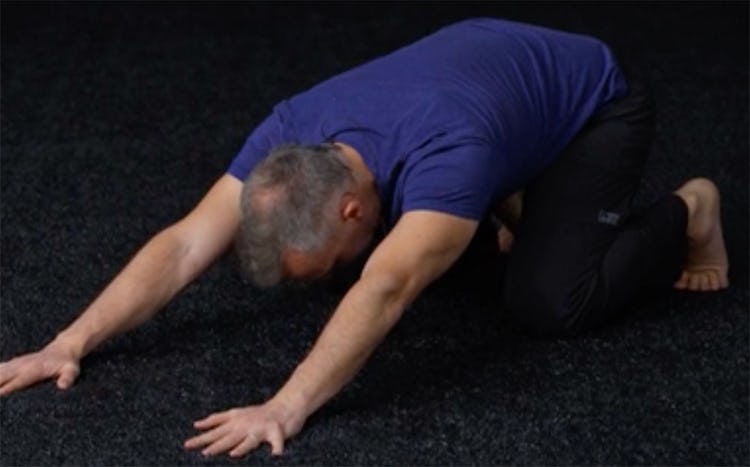
1. Kneeling Hip Flexor Stretch,12 reps per side
2. Standing Knee Circle,5 reps each direction, each leg
3. Spit-Stance Hip Coil(no weight), 12 reps each side
4. Ankle Spring Primer,5 reps each side
BONUS:Thai Chi Knee Twist,60 seconds each direction
Kettlebell Exercise Alternatives
You’ll be able to better see how the around the world translates to fancier kettlebell movements and sports when you move on to its progressions. As soon as you have the basic around the world down, try one of these variants.
Around The World With Hand Catch
(See01:56in the Kettlebell Around the World video)
This move takes the rotation from your hips up to your shoulders, making it a great exercise for full-body power.It mimics the mechanics of throwing a punch or a shotput,training you to coil through your core and stabilize your body with your hips.
Step 1.Perform the around the world as normal to get some momentum. Then, when you’re ready, bend your workingarmto lift the kettlebell up to your opposite shoulder.
Step 2.Catch the bell with your free hand, bracing your core so you absorb the force. If you’re using a bigger kettlebell, you may have to allow your torso to rotate a bit in order to slow the kettlebell down on the catch—that’s OK, as this is how you move in real life. Now redirect the force by gently pushing the kettlebell back down and circling your body in the opposite direction.
Once you’ve got the hang of that, you can alternate catches on each rep. That is, circle your body clockwise and catch with the right hand, and then immediately circle counter-clockwise and catch with the left.
If you watched the video on how to warm up above, you recognize this exercise already. Here, it’s done with the kettlebell for strength and power (where as, done unloaded, it’s just a really great mobility drill). The step-back hip coil progression keeps the movement of the around the world at your hips but really allows you to practice transferring power between legs.It looks like a speed skater pushing off from one leg on the ice, loading up for a puck pass in hockey, or any number of other movementsthat require lower-body power.
Step 1.Perform the around the world as normal. Let’s say you’re moving counter-clockwise with the kettlebell in your right hand. As you transition the bell to your left hand, step back with your right leg and create a long line from your leg through your spine to the top of your head as you bend slightly at the hips (you can keep your heel elevated and only touch down with the ball of your foot). This will help you decelerate the kettlebell. Make sure your lower back stays neutral and does not round forward as you bend at the hips.
Step 2.Step forward again as you reverse the direction of the kettlebell and repeat on the other side. As with the around the world with hand catch, you can take your time doing a few revolutions with the bell before you coil on the other side.
Heins notes that the step-back hip coil works your hip in internal rotation, which is an oft-neglected movement pattern andvery important for overall hip and lower-back health.An inability to move your hip well internally can cause the lower back to take over some movements, and that can lead to pain, so the step-back hip coil doubles as a prehab exercise.
]]> https://www.onnit.com/blogs/the-edge/7-great-serratus-anterior-posterior-exercises2025-07-10T10:55:27-05:002025-08-14T14:16:59-05:007 Great Serratus Anterior & Posterior ExercisesJeremy GottliebWe all have one muscle that we think is the true mark of a great physique. Many will say it’s six-packabs, while others will argue it’s a big set oftraps. There’s another muscle group, however, that’s not often called out by name or brought up in conversation, but, when you point to it, everyone seems to agree that it’s common to the best bodies in the world. It also happens to be the key to shoulder health and upper-body power¦ Give up? It’s the serratus anterior.
To the untrained eye, the serratus anterior muscle may appear to be an extension of the obliques, but it’s a muscle all its own, and its function is very different. Together with its twin on the back side of your body, the serratus posterior,the serratus musclesanchorthe shoulders, allow you to breathe, and, when well-developed on a lean physique, show the world you’re a finely-tuned athlete.
We broke out our anatomy books and talked to an expert to bring you the definitive guide to training the serratus muscles for aesthetics, performance, and injury prevention.
What Are Your Serratus Muscles and Why Train Them?
There are three sets of serratus muscles. The best known of the group is the serratus anterior (SA)—it’s those finger-like muscles under your pec that pop out when you raise yourarmoverhead (that is, if you’re lean enough to see them). The other, lesser-known two are the serratus posterior (SP) superior and inferior. As the name implies, they lie on the back of your torso.
Serratus Anterior (SA)
The SA muscle originates at the first to ninth ribs and inserts on the inner side of the front of the scapula (shoulder blade), close to the spine. It has a fan shape with serrated, sawtooth-like attachments on the ribs, which gives it its name.The SA works to protract the shoulder blade—that is, roll your shoulder forward when you reach your arm in front of you—as well as rotate the shoulder blade upward when you raise your arm overhead, stabilize the scapula, and lift the ribs during inhalation. Since it works to pull the shoulder forward when you’re throwing a punch, the SA has been nicknamed the boxer’s muscle.
Serratus Posterior (SP)
The SP consists of two distinct wing-shaped muscles that mirror each other on the back of your torso. The SP superior lies between your shoulder blades, under your trapezius, on the upper back. It originates on the ligaments of the upper spine, and the cervical and thoracic vertebrae, and it inserts on ribs two through five. Meanwhile, the SP inferior rests on your lower back, under your lats. It starts on the ligaments of the lower spine and the lumbar and thoracic vertebrae and reaches upward to insert on ribs nine through 12.
Scientists aren’t certain they know all the actions the SP can perform, but it’s pretty clear that the superior portion helps raise the upper ribs when you breathe in, while the inferior draws the lower ribs downward and backward when you breathe out.
Training the SA and SP
The serratus anterior plays a crucial role in the shoulder’s health and durability. Because it helps control movement of the shoulder blade, and even anchors the scapula to the rib cage,it’s vital for performing any kind of press, push, throwing action, or upper-body martial arts strike.“Think of your body as a sailboat and your upper arm as the sail,” says Alexander Friel, DC, a care provider atAirrosticlinic in Dallas, TX. “In order to get the boat moving, you have to hoist the sail. Your serratus anterior is the rope that lifts the sail.”
When someone’s SA is not functioning properly, it is very easy to see. The shoulder blade will not slide smoothly forward around the ribs. It will actually flare off the back, separating from the rib cage—a condition called scapular winging, which can result in shoulder injury.
The serratus anterior can be trained with a number of pushing and pressing exercises—basically, anything that involves the shoulder blades, says Friel.The serratus posterior muscles, on the other hand, really can’t be isolated and trained directly.Since they work when you breathe—particularly when you inhale and exhale forcefully—you can rest assured that they’re getting trained when you perform other exercises and activities that make you breathe hard. Furthermore, unlike the SA, the SP are invisible from the outside, so they don’t contribute to the aesthetics of your physique.
How To Stretch The Serratus Muscles
Activities that involve repetitive overhead shoulder motions can bring tightness and injury to the serratus anterior. These include swimming and tennis, as well as weight training—particularly, lifting heavy on bench and overhead presses. Poor posture (slouching) can also lead to tight muscles around the shoulders and ribs. The following stretches may provide some relief.
Serratus Anterior
SA Stretch On Bench
[See 0:28 in the video above]
Friel recommends this stretch, which you’ll also likely feel in your lats and triceps.
Step 1.Hold a yoga block or light dumbbell with both hands, and kneel on the floor perpendicular to a bench. Bend your elbows 90 degrees and rest them on the bench; bend your hips and knees 90 degrees, and brace yourcore.
Step 2.Gently press your chest toward the floor while you bend your elbows back toward you, stretching your serratus. Hold the stretch 15–30 seconds.
That’s one set. Perform 3 sets.
The late Chris Jarmey, D.S., author ofThe Concise Book of Muscles, a comprehensive guide to anatomy, now in its fourth edition, also suggests stretching one side of the serratus at a time.
Chair Stretch
[See 0:57 in the video]
Step 1.Sit in a chair with a back support and turn your body to the right 90 degrees. Let your arm hang over the back of the chair, and grasp the bottom of the chair for stability.
Step 2.Gently turn away from the back of the chair until you feel a stretch in your rib cage. Hold 30 seconds.
Alternate sides until you’ve stretched both for 3 rounds.
In addition to the above, stretches that target the pec and deltoid may stretch the SA involuntarily as well, so include them in any program with the goal of lengthening the serratus anterior.
Serratus Posterior
Dr. Friel calls the serratus posterior a “small, controversial muscle,” because its full purpose isn’t certain, and it can’t be targeted and isolated like other muscles. However, the following stretch will help to lengthen it, as well as the muscles in your hips and the back side of your body.
Step 1.Place two heavykettlebellson the floor, shoulder-width distance apart. (Or, elevate some dumbbells on a mat or blocks so they’re a few inches above the floor.)
Step 2.Stand behind the kettlebells with feet hip-width apart and hinge at the hips, driving your butt back, as if doing aRomanian deadliftor bent-over row. Continue until your torso is nearly parallel to the floor, or as close as is needed for you to be able to reach the kettlebells. Keep a long spine so that your lower back is flat.
Step 3.When you can reach the kettlebells, grasp the handles and hold the position. You should feel a stretch on your back between your shoulder blades—the serratus posterior will be stretching along with your other upper back muscles. Hold the position for 30 seconds, breathing slowly and deeply to increase the stretch. That’s one set.
Perform 3 sets.
3 Serratus Anterior Exercises
Friel suggests the following to build up your SA.
1. Pushup Plus
[See 2:12 in the video]
Step 1.Get into a pushup position on the floor with hands slightly wider than shoulder width. Think “long spine,” so your body forms a straight line from your head to your heels. Draw your ribs down, and tuck your pelvis slightly so that it’s perpendicular to the floor. Brace your core.
Step 2.Keeping your elbows locked, actively lower your upper body toward the floor by squeezing your shoulder blades together. The range of motion is small.
Step 3.Drive your hands into the floor like you’re doing a pushup, but keep yourarmsstraight, and move only at the shoulders. Think about spreading your shoulder blades apart so your upper back moves toward the ceiling. Another cue is to think about pushing the floor away from you, rather than the other way around. Go as high as you can without losing your straight body position, and hold the top position for a second. That’s one rep.
Perform sets of 8–15 reps.
If the basic pushup plus is too easy, wrap an elastic exercise band around your upper back for extra resistance. If it’s too hard, you can perform the same movement on your knees, or on an elevated surface, such as a countertop.
2. Pullup Plus
[See 3:15 in the video]
Step 1.Hang from a pullup bar with hands just outside shoulder width and palms facing forward. Draw your ribs down and tuck your tailbone so that your pelvis is level with the floor. Brace your core.
Step 2.Drive your shoulder blades down and together, so that your body lifts higher toward the bar, but keep your arms straight so that the movement is only at the shoulders.
Step 3.Lower your body back down, allowing your serratus to stretch at the bottom, but don’trelaxcompletely. Perform as many reps as possible.
3. Farmer’s Walk
[See 3:46 in the video]
Step 1.Pick up a pair of heavy dumbbells and draw your shoulder blades back and down. Walk briskly for as far as you can while Keep good posture—chest proud, standing tall and straight.
1 Serratus Posterior Exercise
[See 4:00 in the video]
The best way to work the SP is simply by maintaining perfect posture and breathing. “Keep your pelvis tucked under you,” says Friel, which means it will be level with the floor. “Stand up and squeeze your glutes and abs—you’ll feel your pelvis stabilize underneath you.” At the same time, pretend you have a fishing line attached to your sternum (your breastbone) that’s pulling straight upward. Standing tall with a level pelvis is perfect posture.
Practice breathing in this position. Do a set of 20–25 deep breaths, drawing the air into your abdomen. This means expanding your belly 360 degrees, rather than letting your shoulders rise and fall. Take 8–10 seconds for each inhale and 6–8 seconds on every exhale.
Great Complementary Exercises For Your Workout
Remember that any exercise that has the shoulder blades moving is going to activate your serratus anterior to a large degree. The following moves not only hit the SA hard but they train many other muscles as well, and are particularly popular for physique development. The ab rollout doubles as a core/six-pack exercise, the pullover as achest and backhit, and the overhead press as a shoulder, tricep, and overall strength-builder.
Ab Rollout
[See 4:35 in the video]
Step 1.Kneel on the floor and hold an ab wheel beneath your shoulders. Draw your ribs down, tuck your tailbone, and brace your core, so that your head, spine, and pelvis form a straight line.
Step 2.Roll the wheel forward until you feel you’re about to lose tension in your core and your hips might sag. Roll yourself back to the starting position.
Dumbbell Pullover
[See 4:56 in the video]
Step 1.Hold a dumbbell by one of its bell ends and lie back flat on a bench. Press the dumbbell up and hold it directly over your chest with your elbows pointing out to the sides. Tuck your pelvis under so that your lower back is flat on the bench and brace your core.
Step 2.Keeping your elbows as straight as possible, lower your arms back and behind you until you feel a strong stretch in your chest.
Step 3.Pull the weight back up and over your chest.
Performing the movement with bands or a cable would be even more effective than using a dumbbell or barbell, as the band/cable tension would force the pecs to work harder as they get closer to the chest (which is where the resistance drops off with free weights).
Kettlebell One-Arm Overhead Press
[See 5:22 in the video]
Step 1.Stand tall, holding the kettlebell in one hand at shoulder level. Root your feet into the floor as if you were preparing for someone to push you. Draw your shoulder blades down and back—think, “proud chest”— pull your ribs down, and brace your core. Take a deep breath into your belly.
Step 2.Exhale as you press the weight overhead with your forearm vertical. Your elbow will naturally move away from your side and the press will feel like an “around the world” motion—that’s OK. Note that your chin should be pulled back so that weight has no trouble clearing it.
Step 3.To lower the kettlebell, pull it back down into position—as if you were performing a pullup. Complete all your reps on that side, and then repeat on the other side.
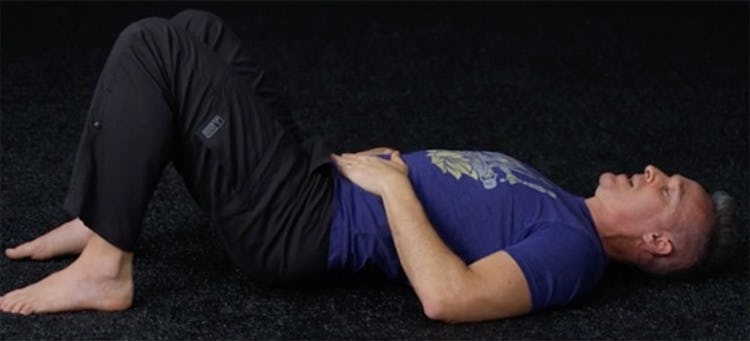
]]> https://www.onnit.com/blogs/the-edge/how-to-do-the-single-leg-glute-bridge-like-a-pro2025-07-10T10:55:27-05:002025-08-14T14:25:06-05:00How To Do The Single-Leg Glute Bridge Like A ProJeremy GottliebThe single-legglute bridgeis a progression of the two-legged glute bridge, where you lie on the floor and raise your hips up to full extension. Because the single-leg bridge works one leg at a time, it’s much more challenging than the basic glute bridge and requires a lot of stability through your hips andcore. This makes it a great move for building functional strength and balance. Running, jumping, and most sports activities require you to stabilize your body and produce force on one leg at a time, and the single-leg glute bridge will train you to do that. It’s also good for improving range of motion in the hips, which can help relieve lower-back pain.
Keep scrolling, and you’ll learn how to perform the single-leg glute bridge correctly, when to use it, and what to do instead if you find it too challenging (or too easy).
What Is The Single-Leg Glute Bridge?
In any glute bridge exercise, you lie on your back on the floor and use your glutes to extend your hips. In the single-leg version, just one leg works at a time while the other is tucked near your chest. Supporting your bodyweight on one leg is very challenging—your hips will have a tendency to tilt, and your lower back may want to take over the movement to compensate for your glutes (if they’re weak).Therefore, the single-leg glute bridge is not a beginner’s movement.If you’re new to glute training, or bridging specifically, you should start with the two-legged version (and we’ll go over it below).
The single-leg glute bridge doesn’t offer as much range of motion as other glute exercises, such as the hip thrust orRomanian deadlift. It works the glutes in a more shortened position, focusing on the lockout of your hips to extension. For this reason, it serves as a nice complement to other glute exercises. It can also bea good option for when you’re traveling, or other times that you don’t have access to heavy weightsor other gym equipment. For most people, their bodyweight alone makes for a challenging workout and will only allow them a handful of reps.
Step 1.Lie on your back on the floor and set up to do a regular, two-legged glute bridge. Place your feet flat on the floor close to your butt so your shins are nearly vertical. Tuck your chin toward your chest. Bend your elbows and make fists with both hands, actively driving yourarmsinto the floor. This will help brace your upper body. At the same time, tighten your core, pulling your ribs down.
Step 2.Push through your feet to raise your hips up to full extension and squeeze your glutes as you come up. It’s important that you don’t hyperextend your lower back at the top of the movement, so keep yourabsbraced (think: “ribs down”) andfocuson pushing your feet hard into the floor rather than trying to drive your hips up as high as possible.
Step 3.Lower your hips back to the floor with control.
Do a few practice reps and think about how it feels.If you feel the exercise more in yourhamstringsthan in your glutes, move your feet in a little bit closer to your butt.If you feel it more in your quads or knees, move your feet further away from you. You may also want to experiment with where your toes point and how wide your stance is. When you find a comfortable position where you feel like you’re balanced and working mostly glutes, you’re ready to do the exercise with a single leg.
Step 4.Raise one leg off the floor and bend that knee 90 degrees. “Your single-leg glute bridge stance should look like your standard glute bridge stance,” says David Otey, CSCS, a trainer, gym consultant, andfitnessbook author (OteyFitness.com). Some people like to keep the non-working leg extended straight from the hip, butOtey says this makes the exercise unnecessarily harder, turning it into more of a balancing actwhen you really just want to focus on glute bridging. So keep the non-working leg bent.
Step 5.Drive through the foot that’s flat on the floor to raise your hips up. Your shoulders, hips, and working knee should all move in alignment. Now control the way back down.
Many coaches suggest pushing through the heel of your foot as you bridge, and sometimes even letting your toes raise off the floor, but Otey recommendsthinking of your foot as a tripod and pushing through the heel, ball, and pinkie toe knuckle.“To develop the glutes, hamstrings, and the rest of the posterior chain muscles in a way that will translate to your other activities,” says Otey, “your body has to learn to push with full foot contact. That gives you the most stability and activation.When you do athletic movements, you can’t sit on your heels, so learn to press through the ground.”
Otey also suggests wearing flat-soled shoes, or no footwear at all, to facilitate stable contact with the floor. “Fluffy shoes like running shoes or other types with a big heel or padding will make it harder,” says Otey.
You’ll immediately notice how much more unstable the single-leg bridge is than the double-leg, so be extra careful to drive with your elbows and keep your core braced.Your hips shouldn’t tilt or twist.
Aim to do as many reps as you can, which may be a lot or only a few. That makes the single-leg glute bridge both a good strength exercise to do if you don’t have weights as well as a good high-rep burnout exercise for the end of a lower-body workout.
What Muscles Do Single-Leg Glute Bridges Work?
The single-leg glute bridge works (surprise!) the glutes, but Otey notes that it engages the glute medius and minimus more than most other glute drills. These muscles act as stabilizers for the pelvis and keep the head of the femur in the hip socket.
Your back extensor muscles and core have to work as well to keep your pelvis level throughout the motion, and your upper back has to engage to prevent your torso from collapsing.
Further down the chain, the hamstrings, calves, and anterior tibialis (the muscle on the front of your shin) can’t help but get involved too.
Difference Between A Single-Leg Glute Bridge and A Regular Glute Bridge?
Again, the regular glute bridge is done with two feet on the floor while the single-leg bridge uses one leg at a time. Since it’s more stable,the regular glute bridge will allow you to add more external load (such as a barbell) when you’re ready to progressit, whereas the single-leg bridge requires more balance and may be challenging enough for you with bodyweight alone. Both exercises train the glutes, but the single-leg glute bridge is a more advanced progression, and the better choice for developing the smaller glute muscles that provide stability for everyday life activities like running and jumping.
“It’s important to do single-leg movements,” says Otey. “It benefits smaller muscle groups that support a limb when it’s working on its own.When you do bilateral [two-legged] exercises, it’s like doing a group project in school: one or two kids do all the workand the others coast. But when you do single-leg stuff, every muscle has to do its job or the movement will fail. If you force the body to use weaker muscles, it will use them, and make them stronger.”
Because of its benefits to balance, Otey says the single-leg glute bridge is good for kids as well as people in their 90s who are trying to stay active.It can also improve range of motion in the hips, which is helpful for relieving or preventing lower-back pain.The more your hips can move, the less the lower back will involve itself in various exercises, and that takes pressure off the spine.
Difference Between a Glute Bridge and a Hip Thrust?
The glute bridge and hip thrust are two distinct exercises that are often confused. Glute bridges are always done with the back on the floor, and that means their range of motion is fairly short.A hip thrust is done with the upper back supported on a bench (shown in the photo above), and that allows you to sink your hips to the floorand then extend them to the height of the bench. This takes the glutes through their full range of motion, so many coaches argue that the hip thrust is a better glute exercise for glute muscle gains than a glute bridge.
However, because the hip thrust’s range of motion is so wide, it does recruit somehamstringand quad muscle as well, and can be done to bias those areas even more depending on how you set it up. For those reasons, some coaches counter that the glute bridge is a better glute exercise, as it isolates the glutes to a greater degree.
The truth is, both the glute bridge and hip thrust should be done for complete, balanced glute development, and that includes their single-leg versions.
Kas Glute Bridge vs. Hip Thrust vs. Single-Leg Glute Bridge
The Kas glute bridge is yet another glute exercise that often gets spoken of interchangeably with hip thrusts and glute bridges, but it’s really a separate exercise entirely. Named for the coach who popularized it, Kassem Hanson, founder ofN1, an online trainingeducationcourse,the Kas bridge is a hip thrust with a shortened range of motion.(If you’ve been paying attention, you know by now that the term “bridge” implies that you do it on the floor, but this is NOT the case with the Kas glute bridge.)
You set up on a bench (usually with a barbell in your lap) and start with your hips locked out;then lower your hips about a third of the way down to the floor (or until your knees start to drift backward), and lock out again.This keeps the tension of the exercise squarely on the glutes, rather than involving the hamstrings and quads, as the basic hip thrust does.
You can perform the same movement with one leg (a single-leg Kas glute bridge), but the single-leg bridge on the floor achieves mainly the same thing.
The single-leg glute bridge is a lot harder than the two-legged glute bridge, so if you find that you can’t bridge up all the way or keep your balance, take it down a notch with a simpler exercise. One option is the B-stance glute bridge, which uses your non-working leg like a kickstand, providing a little more stability but still allowing you to work one side of the hips at a time.
Step 1.Set up as you did for the single-leg glute bridge and slide your non-working leg forward until the heel of that foot is even with the toes of the working foot.
Step 2.Now bridge up as you did for the single-leg glute bridge. The heel of the non-working leg shouldn’t really push into the floor—it’s just there to help your balance. Try to keep most of your weight on your working leg when you bridge.
Another alternative to the single-leg glute bridge that’s a little easier is the glute march. Here, you’ll bridge up with both legs and, keeping your hips elevated, raise one leg at a time like you’re marching your feet. When you master this move, you should be able to do the single-leg glute bridge with no problem.
Bret Contreras, PhD, a coach and world-renowned expert on glute training (@bretcontreras1on Instagram) uses glute marches as his preferred regression of the single-leg glute bridge.In his textbook,Glute Lab, a comprehensive guide to glute training, he says that he often has clients do this movement as a warmup before they attempt the single-leg glute bridge, performing 2 sets of 20 reps (10 on each leg).
A third option is to bridge up with both legs and then raise one leg off the floor and lower your body back down with the other leg. This will help you build control in your hips and set you up for a full-range single-leg glute bridge down the line.
When you feel like you’ve mastered the single-leg glute bridge, Otey recommends you try the single-leg hip thrust, which increases the range of motion by resting your shoulders on a bench.
Step 1.Rest your upper back on a bench with your body perpendicular. The bottom of your shoulder blades should line up with the edge of the bench. Place your feet in front of you and find your comfortable stance. Bend your elbows and dig your arms into the bench for stability, making fists with your hands. Raise one leg off the floor and bend that knee, bringing it toward your chest.
Step 2.Push your working foot into the floor and raise your hips until they’re roughly in line with your working knee and your shoulders.
]]> https://www.onnit.com/blogs/the-edge/the-pro-s-guide-to-upper-ab-exercises-workouts2025-07-10T10:55:26-05:002025-08-15T06:24:02-05:00The Pro’s Guide To Upper-Ab Exercises & WorkoutsJeremy GottliebBy now, you’ve probably heard enough conflicting opinions about ab training to give you a stomach ache. These range from, “You have to do 100 crunches a day,” to “ab work isn’t necessary at all; you can see the muscles by simply dieting off the fat that covers them.” You’ve been told you should treat your midsection like two different muscles, doing “upper-ab exercises,” and then a different set of movements to develop the lower part, and heard elsewhere that situp and crunch motions will hurt your lower back, so don’t do them at all anymore.
What’s the whole truth, bottom line, and final answer onabs? We’re about to clear up all the misconceptions. Consider the following your tome on ab training.
What Muscles Make Up The Abs?
The term “abs” can refer to all the muscles of the midsection, ranging from the deepcoremuscles that stabilize your spine to the obliques on the side of your torso that help you twist your shoulders and hips and bend to each side. But when most people say abs, they mean therectus abdominis, more popularly known as the six-pack muscle.
The rectus abdominis originates on the pubic bone and stretches up to the xiphoid process (the bottom of the sternum), as well as the cartilage between the fifth, sixth, and seventh ribs.It works to bend the lumbar spine forward (spinal flexion), pull the rib cage down, and help stabilize the pelvis when you’re walking.When an individual is very lean with well-developed musculature, the rectus abdominis can appear to be six distinct muscles, but it’s only one. The six-pack look is due to a web of connective tissue that compartmentalizes the muscle. Whether someone has a six pack or an eight pack comes down to genetics alone—it’s the way nature shaped their abs—and has nothing to do with training or diet. (For all his gargantuan muscles, Arnold Schwarzenegger’s abs were always comparatively less impressive; he famously sported only a four pack!)
How Is Working Your Lower Abs Different From Upper Abs?
Bodybuilders have long believed that exercises that bring the ribs toward the pelvis (crunch variations, for example) work the upper portion of the rectus abdominis, while movements that do the reverse—lifting the pelvis toward the ribs—train the lower portion. Scientists and some trainers, however, have disputed this, arguing that, since there’s only one rectus abdominis muscle and its function is pretty simple, any movement that brings the ribs and pelvis closer together is going to work the whole muscle.
So who’s right?
Astudyfrom theJournal of Strength and Conditioning Researchmeasured rectus abdominis activation across six different ab exercises, concluding that, while some of the moves worked the muscle more than others,none showed much of a difference in which part of the abs (upper or lower) was activated.Still, other research has shown the opposite. Onetrialfound that the old-school curlup worked the upper portion of the muscle to a greater degree, and the posterior pelvic tilt (basically a reverse crunch, in which the tailbone is tucked under, lifting the pelvis toward the upper body) favored the lower abs—just as the bodybuilders have claimed for years.
So far, the correct answer seems to be a little from Column A and a little from Column B. In his 2021 book,Science and Development of Muscle Hypertrophy, Brad Schoenfeld, PhD, CSCS, the world’s foremost muscle-growth researcher, concludes that while the entire rectus abdominis will be worked during exercises that target it,it is also possible to emphasize recruitment of the upper abs over the lower abs, and vice versa.
He writes: “Although somewhat speculative, there is a sound rationale for performing traditional crunch variations to target the upper abdominal region and performing reverse crunch variations to develop the lower aspect of the muscle… Not only do the tendinous intersections [of the rectus abdominis] suggest some degree of functional independence of the muscle, but its upper and lower aspects are segmentally innervated by the ventral rami of the lower six or seven thoracic nerves, providing a further mechanism for selective activation.”
Schoenfeld goes on to cite pro tennis players whose abs are bigger on their non-dominant side, which he says indicates thatpeople can, to some degree, recruit not only the upper and lower abs selectively, but also the sides of the muscle.
Long story short: you can target different areas of the abs to shape them according to your goals, but you’ll never be able to isolate any one area of the muscle completely while turning off another one.
What’s The Difference Between Situps and Crunches?
Before we go any further, we should clarify some terms. If ab training really comes down to situp and crunch-type movements, let’s define what these are.
For many years, the situp was the primary ab exercise. You lie on your back with knees bent, and raise your upper body off the floor and up to your knees. This works the entire abdominal area, but it also recruits the legs and hip flexors, and it can be hard on the lower back (as we’ll examine in the next section). In the past few decades, trainers began recommending crunches in place of the situp—a more isolated movement for the rectus abdominis that requires you only lift your head and shoulders off the floor.It’s the safer, more targeted ab workout option between the two, but crunching alone won’t get you a six pack.These days, it seems best to favor crunches over situps, but perform them with different tools—such as a cable machine, stability ball, or inclined bench—to get more muscle activation without sacrificing safety.
Is It Safe To Do Situps and Crunches?
Whether you’re trying to work upper abs, lower abs, or both, the standard prescription is to perform some kind of spinal flexion exercise—i.e. situps or crunches—because bending the spine is a major function of the rectus abdominis.
In recent years, however, some athletes and trainers have contended that repeatedly bending the spine over time can lead to lower-back injury, including disc prolapse or herniation.The idea is that bending the spine pinches the intervertebral discs, gradually pushing them backward until they bulge out and press against a nerve, causing pain.While situp and crunch exercises may not cause back problems entirely on their own, they could throw gas on a fire that’s already burning in many athletes and recreational lifters. If you’ve been following a program that includes regular backsquatsand deadlifts, which compress the spine, and your lifestyle includes a lot of sitting and slouching (spinal flexion), you can understand how the concern arose.
For these reasons, some experts recommend developing the abs using only variations of the plank exercise, where the ribs and pelvis are held still and the rectus abdominis, along with the other core muscles, contracts isometrically. Schoenfeld agrees that well-chosen plank exercises can effectively train both the upper and lower abs, but argues that there’s nothing inherently dangerous with spinal flexion exercises either, assuming you’re not already contending with a back issue. In areviewhe co-authored, Schoenfeld determined that, if an individual has no pre-existing back problems,spinal flexion exercises are not only safe when done as normally prescribed, but probably necessary for maximizing development of the rectus abdominis.If you have aspirations of competing in a physique show, where your opponents will surely have well-defined abs, you’ll probably have to do some spinal flexion exercises to get the ab development needed to keep up with them.
For abs that look great and perform well, including having the ability to protect your back, healthy people should probably perform both planks and spinal flexion. Schoenfeld and spinal-flexion critics do agree, however, that too much spinal flexion isn’t good for anyone.If you’re old-school and think that 100 crunches or situps every day is the only way to see results, you could be setting yourself up for injury.Whatever the ab exercises you choose, they should be performed with moderate sets and reps like training any other muscle, with time off for recovery afterward. (We’ll give more specific recommendations below.)
Tips for Isolating Your Upper Abs
Just to recap, you can’t completely isolate your upper or lower abs, but you can emphasize one section over the other with different exercises and careful technique. To lock in on the upper abs, “You want exercises that are going to bring your ribcage down toward your hips,” says Jonny Catanzano, an IFBB pro bodybuilder and owner of Tailored Health Coaching, afitnesscoaching service (@tailoredhealthcoachingon Instagram).
This means crunch/situp motions of all kinds, generally starting with your spine straight and finishing where it’s fully flexed at the lumbar. Yes, that means you’ll be rounded in your lower back, which is a major no-no for most loaded exercises such as squats and deadlifts, where the spine has to be kept neutral for safety’s sake. But to fully activate your abs, you have to take them through a full range of motion, and that means crunching your body into a tight ball.If you have lower-back pain, you may want to skip these kinds of exercises and do plank variations (we have a good one for you below),but otherwise, a few sets done two or three times a week shouldn’t present a problem.
Perform your crunch exercises formoderate sets and reps (2–4 sets of 6–15, generally speaking);don’t train them heavy. This will help to prevent placing unnecessary stress on the lower back.
To get the most out of your upper abs, “Squeeze your glutes to tilt your pelvis back, so your tailbone tucks under you when you begin a rep,” says Catanzano. Called a posterior pelvic tilt, this helps take your hip flexor muscles out of the exercise, so that your abs do the majority of the crunching.
Astudyby the American Council on Exercise showed that, out of 15 exercises tested, crunches done on a stability ball—as well as reverse crunches done on an inclined surface—both worked the upper abs the hardest,and nearly equally. (Incidentally, the reverse crunch on the incline also ranked highest for lower-ab activation.)
But don’t take these findings as gospel. Only 16 subjects participated, and two of them weren’t counted because they didn’t complete the study. Still, the results do suggest that you’d be smart to include crunches done on both a stability ball and an inclined bench in your program, provided you can do them safely.
In addition to those two moves, Catanzano recommends the following.
This exercise isolates the upper abs as much as possible, and the cable ensures that there’s tension on the muscles even when the spine is extended (where they would normally rest in a crunch done on the floor). The cable stack also makes it easy to increase the load as you get stronger. Use a V-grip to go heavier, or a rope handle for greater range of motion.
Step 1.Attach a V-grip or rope handle to the top pulley of a cable station, and grasp it with both hands. Kneel on the floor a foot or so in front of the cable so that you have to reach forward a bit with your hands to grasp the handle, and you feel a stretch on your abs. You may want to place a towel or mat under your knees for comfort.
Step 2.Squeeze your glutes and tuck your tailbone under so your lower back rounds a bit and you feel your abs engage. Crunch down, pulling the cable down behind your head as you bring your ribs to your pelvis. When your abs are fully contracted, that’s the end of the range of motion. Slowly return to the starting position. That’s one rep.
Don’t get carried away with the weight you’re using. It should never be so heavy that it pulls you up off the floor at the top of each rep.
Performing a cable crunch on a lat pulldown machine may be a more comfortable option than the kneeling cable crunch, as it makes it easier to keep your hips stable.
Step 1.Attach a lat-pulldown bar to the pulley of a lat-pulldown station and sit on the seat facing away from the machine. Reach overhead and grasp the bar with hands shoulder-width apart and palms facing behind you.
Step 2.Squeeze your glutes and tuck your tailbone under so your lower back rounds a bit and you feel your abs engage. Crunch down, pulling the cable down behind your head as you bring your ribs to your pelvis. When your abs are fully contracted, that’s the end of the range of motion. Slowly return to the starting position. That’s one rep.
The pelvis flexes toward the ribs on this one, so it’s a good lower-ab move too, but it will hit the upper part of the rectus abdominis as well. Doing the movement with legs extended creates a longer lever and puts more tension on the muscles, but that will be too advanced for many people. If that’s the case for you, performing the motion with knees bent (a hanging knee raise) is a good modification. In either case, Catanzano warns that you don’t just lift your legs/knees. “That just works the hip flexors,” he says. “Make sure you bring your hips all the way up,” rounding your back as you do so.
Step 1.Hang from a pullup bar with your palms facing forward or toward each other. You may want to use lifting straps to reinforce your grip, so your hands don’ttirebefore your abs do.
Step 2.Tuck your tailbone under and raise your legs up, keeping your knees as straight as you can until your abs are fully contracted. Control the motion as you lower your legs back down. That’s one rep.
For the hanging knee raise, perform the same movement, but keep your knees bent 90 degrees the whole time. On either exercise,be careful not to swing your legs up or let them swing behind you at the bottom.You want your abs to do the lifting, not momentum, and swinging can strain your lower back.
Here’s an upper-ab exercise that also hits the obliques, the muscles on your sides that help you bend and twist.
Step 1.Lie on your back on the floor with yourarmsextended 90 degrees from your sides. Raise your right leg straight overhead, and then twist your hips to the left, resting your right leg on the floor. Cup the back of your head with your right hand.
Step 2.Crunch your torso off the floor and toward your right leg. Hold the top position for a second, and then return to the floor. That’s one rep. Complete your reps, and then repeat on the opposite side.
If crunching movements aggravate your lower back, try plank exercises instead. Catanzano likes the classic yoga plank done a little differently—with the tailbone tucked under and knees bent to work the rectus abdominis more.
Step 1.Get into pushup position. Squeeze your glutes and tuck your tailbone under to activate your abs. Bend your knees and arms a bit so you feel like your midsection is hollowed out—abs braced, preventing your lower back from sagging.
Step 2.Hold the position for time. Aim for 30 seconds to start.
Your upper abs may get sore just from reading all this, but don’t make the mistake of thinking that training alone will produce a six pack.Exercise builds the ab muscles, but only a healthy diet can lower your body fat levels enough to reveal them,so if your belly currently hangs over your belt line, cut calories from your meals. Catanzano says that most men aren’t able to see ab definition until their body fat is in the range of 8–12%, and women need to be 14–18%.
Catanzano offers the following mobility drills for preparing your midsection for a session of ab training. Perform 10–12 reps for each exercise in turn, and repeat for 2–3 total sets of each.
Walking Knee Hug
Step 1.Stand tall and take a step forward, raising one knee to your chest as high as you can. As the knee rises, grab hold of your shin with both hands and pull it into your chest for a deep glute and inner-thigh stretch. Avoid slouching or bending forward as you do. Try to keep the support leg straight as well.
Step 2.Release the leg, plant your foot, and repeat on the opposite leg, walking forward with each rep.
Bird Dog
Step 1.Get on all fours with your hands under your shoulders and your knees under your hips. Tuck your tailbone so that your pelvis is perpendicular to your spine, draw your ribs down, and brace your core.
Step 2.Extend your rightarmand left leg at the same time while maintaining your tight core. Don’t let your back arch. (Think about reaching forward with the arm and leg, not just raising them up.) Lower back down, and repeat on the opposite side. Each arm and leg raise is one rep.
Prone Scorpion
Step 1.Lie facedown on the floor and reach your arms out to your sides. Tuck your tailbone so that your pelvis is perpendicular to your spine, draw your ribs down, and brace your core.
Step 2.Raise your right leg up and reach it across toward your left arm. Reverse the motion and repeat on the other side. A touch on each side is one rep.
Prone Cobra
Step 1.Lie facedown on the floor with your hands on the floor at shoulder level, as in the bottom of a pushup.
Step 2.Press your hands into the floor as you extend your spine and raise your torso off the floor. Hold the top a second, and then return to the floor. That’s one rep.
Windmill Lunge
Step 1.Step forward and lower your body into a lunge. Extend your arms 90 degrees out to your sides.
Step 2.Twist your torso away from the front leg until it’s 90 degrees, with one arm reaching in front of you and the other behind. Come back to the starting position, and then repeat on the opposite leg, twisting and reaching in the other direction. Each lunge is one rep.
The Ultimate Upper-Ab Workout
Below are two sample ab workouts, courtesy of Catanzano, that you can add at the beginning or end of your current sessions, or on an off day. Alternate between the two workouts (A and B) for no more than three total ab workouts in a week. They’ll both work the entire abdominal region, but will emphasize the upper part of the rectus abdominis.
Workout A
1. Kneeling Cable Crunch
Sets:3 Reps:12–15
2. Hanging Leg or Knee Raise
Sets:3 Reps:6–12
3. Pushup Plank with Tailbone Tucked
Sets:3 Reps:Hold 30 seconds
Workout B
Perform exercises 2A and 2B as a superset. So you’ll do one set of 2A and then one set of 2B before resting. Rest, and repeat until all sets are completed for both exercises.
1. Crossover Crunch
Sets:3 Reps:12–15
2A. Hanging Knee Raise
Sets:3 Reps:12
2B. Pushup Plank with Tailbone Tucked
Sets:3 Reps:Hold 30 seconds
3. Seated Pulley Crunch
Sets:3 Reps:12–15
]]> https://www.onnit.com/blogs/the-edge/plank-jacks-how-to-do-them-why-your-workout-needs-them2025-07-10T10:55:25-05:002025-08-15T07:43:54-05:00Plank Jacks: How To Do Them & Why Your Workout Needs ThemJeremy GottliebAplank jack sounds like something you might find in aisle 33 at Home Depot, but it’s actually a potent exercise that’s becoming increasingly popular inHIIT,core, and circuit training classes. It’s time you found out how to do a plank jack, the muscles it works, and how you can fit it into your workouts for better core strength and greater conditioning.
What is a Plank Jack?
The plank jack is a combination of two very common exercises: the plank and (big surprise) the jumping jack. You get on all fours in a plank position, and then hop your feet outward and inward while trying to keep your spine and pelvis aligned. The plank jack first started to hit the pages offitnessmagazines in 2014, when it was offered up as a more advanced alternative to the standard plank—a longtime staple of core workouts because of the total-body stability it demands.
Celebrity trainers like Tracy Anderson, Anna Kaiser, and Erin Oprea started including plank jacks in their programming for ab/core workouts, and that catapulted the humble plank jack into the fitness mainstream. Whether you train at a big box gym, a boutique studio, or work out at home with a fitness plan you found online, you’re likely to come across the plank jack.
What are the Benefits of Doing Plank Jacks?
Plank jacks are similar to themountain climberexercise, in that you try to stabilize the hips and spine while moving the lower limbs. Because pretty much the whole body is active, there’s a great demand placed on your heart, so plank jacks build cardio capacity while also developing strength and stability.“Plank jacks get your heart rate up quickly, and are lower-impact than exercises like high-knees or burpees,”says Carmen Morgan, a Houston-based trainer (@mytrainercarmenon Instagram). “So they’re suitable for a wide range of clients. The hopping component of the exercise allows you to feel your core engage more than when doing a regular plank, and most people seem to enjoy the plank jack more, too.”
What Muscles Do Plank Jacks Use?
Plank jacks require some muscles to maintain the isometric hold of the plank while asking others to generate motion in the hips and legs. First, they call the internal and external obliques, rectus abdominis, transversus abdominis, and other core muscles into action to keep your body straight. On the other side of the body, plank jacks activate the muscles of the posterior chain to help you remain stable.These include thehamstrings, glutes, spinal erectors, rhomboids, rear delts, and lats.Since you’re elevated off the floor, plank jacks activate the forearms,biceps, triceps, front deltoids, and pecs to help you retain a stable plank position.
Then there’s the dynamic portion of the exercise. Your abductors pull your legs away from you when you hop, and the adductors draw them back toward your midline as you return to the starting position. Meanwhile, the calves (gastrocnemius and soleus) and quads also contribute to the explosive hop.
Wow¦ that’s quite the list, isn’t it? If you thought the plank jack was a basic bodyweight movement, you can see that there’s a lot more to it. It may be used to target the core, primarily, but it’s really a total-body exercise.
How To Do a Plank Jack
Carmen Morgan demonstrates the plank jack
Step 1.Kneel down on the floor and place your hands on the floor. Bend your elbows so that your forearms rest on the floor. Your elbows should be directly beneath your shoulders.
Step 2.Extend your legs behind you and tuck your tailbone slightly so that your pelvis is perpendicular to the floor. Squeeze your glutes and brace your core. Your body should be in a straight line, your back flat.Focusyour eyes on the floor.
Step 3.Keeping your body in a straight line, slightly bend at the knees and hop both feet out to the sides as if doing a jumping jack.
Step 4.Land on your toes, allowing your knees to bend slightly again, and then hop your legs back to the starting position.
The movement should look like a jumping jack performed from a plank position.Make sure you keep your belly button pulled in (core engaged) so you don’t let your hips drop.“That will prevent you from feeling all the bouncing in your lower back,” says Morgan.
Also, be careful not to move your feet out too wide with each hop. Morgan adds that, “Some people go a lot wider than is needed, which means they move slower and do fewer reps than they’re capable of.” Instead, hop your feet out just three or four inches from the starting position.
How Many Reps Should I Do?
Morgan advises performing reps for 20 seconds at a time, because “most people get gassed pretty quickly doing plank jacks.” The longer your set goes, the more likely you’ll fatigue and break form, and sloppy plank jacks where your hips bounce up and down aren’t good for anything.
When programming forHIIT workoutsor bootcamps, Morgan usually includes three to four sets of plank jacks, and only prescribes them once her clients have thoroughly warmed up. “If you’re pushed for time and want to do a quick workout at home,” says Morgan,“you could do three sets of plank jacks by themselves to get your heart rate upand challenge your core strength.”
If you want to do plank jacks as part of a fat-loss circuit, Morgan typically sandwiches the exercise between renegade rows and floor presses. “It’s a quick and easy transition into and out of plank jacks when you combine them with other floor-based exercises,” she says. You can also use plank jacks as a finisher. Morgan often pairs them with regular planks. Try ending your workout with a superset in which you do 10 seconds of plank jacks followed immediately by 20 seconds of a plank hold. Rest 30–60 seconds, and repeat for three rounds.
Alternatives to the Plank Jack
Like all good exercises, the plank jack can be modified based on your experience level. The following are options you can use to regress or progress the plank jack as needed.
Regression
Can’t do a full plank jack? Don’t despair. Just work on mastering the regular stationary plank, which will help you improve head-to-toe stability before adding in the dynamic movement component.Perform three sets, holding the position as long as you can.When you can hold one set of the plank for two minutes, you should have ample stability to move on to a tougher plank variation.
When you’re ready to add a little motion to your plank,start with the plank jack toe tap (see the video below).While in the plank position, slowly move your right leg out to the side by a couple of inches and, as the name suggests, tap your toes lightly on the floor. Pull your leg back to the starting position and then repeat on the other side. Continue for 20 seconds, rest for a minute, and then do another set. Do this twice a week until it feels comfortable, and then try the full plank jack.
Plank tap
Progression
As you become more confident in and competent with the plank jack, you can increase your speed, the length of your sets, or do it in conjunction with other exercises, such as pullups, pushups, or jumping rope, as well as the movements Morgan suggested earlier.
If you want another exercise that combines a similar level of stability and motion, you can perform mountain climbers, particularly thehip-opening version, to improve your mobility.
]]> https://www.onnit.com/blogs/the-edge/so-you-want-to-do-a-human-flag2025-07-10T10:55:25-05:002025-08-14T17:41:46-05:00So You Want To Do a Human Flag?Jeremy GottliebIt’s a showstopper for sure! Pull one of these puppies out on a busy city corner intersection and watch all the whistles and atta boys you get! Perhaps not as hard as front or back levers, but it’s an exercise that requires enormous strength where the shoulder girdle meets the torso and a rock solid controlledcorethat has the tensile strength of an I-beam.
It’s convenient as well, because any medium diameter street sign or piece of playground equipment will do!
What benefits do you get from performing the flag? Great grip strength, shoulders lats, obliques and quadratus lumborum all get an outstanding work out.
The only problem is the taller you get, the harder it is! Longer legs? Harder! Longerarms? Harder!
I am 51 years young, 6’ 1” 164 pounds. It took me 3 months from being in good condition to pull off the flag using this program. I have seen a 6’3” 215 lb. man do it. If you are taller than that, don’t let this dissuade you from doing the flag. Remember it’s about the journey and not the destination. You will be the better for it!
OK, let’s get down to the nuts and bolts of the process. This will be a 3-part series in taking a rank beginner inbodyweight training to create the endurance and strengthto pull off the human flag in 3-6 months depending on what kind of shape you are in when you start. Some may take longer, some shorter.
I would also like to add that this aspect of training helped me to heal my back pain after years of over emphasizing my lower back muscles deadlifting. What a nice side effect!
Prerequisites to Start Human Flag Training
A.Singlearmhang for 30 seconds B. 10 pullups for 4 sets C. Side plank 45 seconds
Let’s get started!
Human Flag Training Phase 1: 5 Basic Core and Shoulder Strength Exercises
1. Basic Side Plank on Elbow
Hold as long as possible then switch sides. 45 seconds rest. Repeat for 5 sets.
2. Side Plank With a Reach
Hold as long as possible, then switch sides. Rest for 45 seconds. Repeat for 5 sets.
3. Inclined Side Plank
Hold as long as possible, then switch sides. Rest for 45 seconds. Repeat for 5 sets.
4. Hanging Hip Hiker
Hang from a bar and fire your lower back so your legs come out to either side. 5×5 each side hold for about 4 seconds each side.
Strong lats and shoulders are also necessary, so you need to be able to do perfect, chin above bar, strict pull ups (do not kip, cross your legs, or swing. In other words, do not cheat.) You need to be able to pull off 5 sets of 15-20 reps. Take a 1-minute break between efforts.
5. Piked Shoulder Push Ups
15-20 reps. 30 seconds rest between sets.
You will be ready to move on to the next phase when you can do this workout 2 to 3 times a week and hold all the planks for 2 minutes and complete all the sets of pull ups and piked push ups for 15-20 reps.
Good luck on your progress. I look forward to you joining the eliteclubof folks who can pull off the human flag. This one will take time. Patience will be rewarded with diligent training.
Everyone wants a quick fix; that’s human nature, right? People tend to be lazy. They want to do something the easy way and expect to see great results. Well too bad! If you want to have low body fat and a lean looking body, you probably need to make a lifestyle change.
I can’t tell you how many people have come to me and said, “I lost 50 pounds last year when I was on the “blah blah” diet, but then gained it back after a year.”
I don’t want to get into any trouble by listing the diet companies out there that rely on calorie counting and point systems, but these are the stories that I hear day in and day out.
When someone attempts a calorie-obsessed and counting diet, they will most likely lose some weight in the beginning. However, the failure rate over time is around 95%, with most of those people gaining all the weight back and sometimes more.
“I feel like a broken record, but I don’t think that people are getting the concept of “dieting.”
One client said to me, “I liked such-and-such diet because I was able to eat whatever wanted. I just had to be conscious of calories. The down part was that I was hungry all the time and sometimes I wasn’t able to control my appetite.” That is no way to live in my book.
It’s tough to go around starving all the time, especially with the amount of tempting food that surrounds us every day. It is human nature to not only succumb to the temptations but to over indulge. This overindulgence makes you feel like a failure, which in turn causes people to give up entirely.
If a calorie-obsessed, point system or extreme diet is what you want to be on, then I suggest you stop reading this article (if you’ve miraculously made it this far) and I wish you the best of luck.
How to Achieve a Healthy, Lean Body
Having been a Nutritionist actively working in thefitnessindustry for over ten years, I have had the privilege of helping hundreds of people change their eating habits by merely educating them. Not only have these people lost weight, but they have managed to keep it off.
They feel great, hardly get sick anymore, and are stronger and leaner. The weight they lose stays off, they don’t feel like they’re starving all the time, and they can indulge from time to time.
People should be striving towards implementing this type of nutrition into daily life; forget about portion control and eating the 100 calorie packets of cookies or eating aprotein barthat’s full of highly heated, cheap, protein fillers that don’t even absorb properly and have artificial sweeteners added. “But Lauren, I know they’re cookies, but it’s only 100 calories. But Lauren, there are zero carbs in that bar and 20 grams of protein.”
“Eating a high processed cookie made from refined flour, sugary corn syrup, and other additives will set something off in your brain. Every time they eat those foods, it strengthens their neuro-circuitry to eat that food again.”
That’s great, but soon you’ll be craving other junk foods since your brain naturally becomes addicted to the sugary, processed foods once you’ve eaten them. According to Dr. David Kessler, former Head of the FDA, there are documented studies that show that when eating a particular combination of sugar, fat, and salt, your brain will trick you into wanting to eat more, even if you aren’t hungry.
Eating a high processed cookie made from refined flour, sugary corn syrup, and other additives will set something off in your brain. “Every time they eat those foods, it strengthens their neuro-circuitry to eat that food again,” says Dr. Kessler. You might feel satisfied temporarily after your craving is met, but chances are you will make up for it later by eating more for dinner than you would normally have.
The same goes for ingesting artificial sweeteners. Your brain is expecting to get sugar when you are tasting that sweet protein bar filled with sugar alcohol. Therefore, your body will end up craving sugar later which will result in eating an increased amount of food that your body doesn’t need.
So let’s get to what we SHOULD be eating to achieve a healthy, lean body. I am going to lay out a sample day of eating that consists of foods that don’t take long to prepare. In this busy day and age, with everyone racing against the clock, I feel it’s important to have healthy choices which can be prepared quickly.
For those of you who do have ample time to prepare your meals and enjoy cooking everything from scratch, then that’s better. For the sake of this article, I will just provide sample meals and snacks that don’t take too long. In the sample day below, take note that I refer to breakfast as “Meal 1” and lunch as “Meal 3.”
I prefer to call them meals since I don’t believe in feeding yourself if you have no desire to eat just because it’s supposed to be “lunch time.” Some people do better without even eating lunch and having just a snack instead. Everyone is different, so follow your hunger. Turn to a snack if your body isn’t telling you to eat one of the larger meals. The following diet also provides two options per meal.
The diet outlined below is not an exact nutrition plan for you to follow but merely a template. For some, it may be too much food for others not enough. Use the following diet as a guideline to give you an idea how you should outline your 2017 nutritional lifestyle.
The No Nonsense Shredded Diet Plan
Meal 1
2 Organic Free Range Eggs Omelette Handful of Spinach 1 tsp of Hummus 1 tsp of Roasted Tomato Salsa ¼ cup of Oatmeal (Optional)
or
Hemp Protein, SproutedRiceProtein orGrass Fed Whey Protein 1 cup of Organic Blueberries 1 Tbs of Flaxseeds or oil 8oz of Water
Meal 2
Handful of Raw Almonds and Walnuts 1 small Organic Apple
or
Organic Full Fat Greek Yogurt 1 tsp of Flaxseed oil ½ cup of berries
Meal 3
2-3 Cups of Organic Mixed Greens topped with Green Onions, Tomatoes, Cucumbers 3-5oz Chicken Slices of Avocado
or
1 serving of Quinoa 3-5oz Chicken or Turkey 2-3 cups of chopped Cucumbers, Tomatoes, and Avocado 1-2 Tbs of Olive Oil and Balsamic Vinegar
Sweet Craving or Afternoon Pick me up (If NEEDED)
1-2 Squares of Dark Chocolate of greater than 73% Green or Herbal Tea
Meal 4 or Pre/Post Workout Snack
2 Scoops Grass Fed Whey Protein ½ banana 6-8oz of Cold Water
or
1 or 2 Hard Boiled Eggs Organic Pear
Meal 5
5-6oz Baked Wild River Salmon Half a bunch of Grilled Asparagus Fist Size portion of Quinoa 1-2 Tbs of Balsamic Vinaigrette 1 serving of Rice or Almond Crackers (if desired)
or
Veggie Tacos ½ cup Low Sodium Black Beans Roasted Tomato Salsa 1/3 Avocado smashed placed in Corn Tortilla with Grilled Zucchini and Peppers
Evening Snack (if still hungry)
Herbal Tea such as Chamomile or Bed Time tea Apple Sauce with Cinnamon or Lightly Popped Low Sodium Popcorn
]]> https://www.onnit.com/blogs/the-edge/burn-belly-fat-with-these-3-great-hiit-workouts-for-women2025-07-10T10:55:23-05:002025-08-08T17:04:17-05:00Burn Belly Fat With These 3 Great HIIT Workouts For WomenShane HeinsFor years, the word “cardio” meant one thing to people: running. Usually on a track or a treadmill, for an hour or more at a time. And it didn’t matter if running bored you out of your mind or made your knees and back hurt—if you wanted to be in shape or lose fat, you had to do cardio!
Nowadays, thefitnessindustry defines cardio more broadly, and while you’re still welcome to do long jogs if that’s your thing, you have another option as well: high-intensity interval training—often calledHIIT. Interval workouts can use any type of exercise, from cardio machines to bodyweight to free weights, so you can customize your workout to your own needs.
Burn Belly Fat With These 3 Great HIIT Workouts For Women
Here’s how HIIT works:you alternate fast, intense periods of exercise with bouts of light activity or complete rest. While it takes a fraction of the time a traditional aerobic workout does, HIIT can be just as effective for reshaping your body—and many people (including yours truly) think it’s a lot more fun and challenging.
HIIT may be the perfect kind of cardio for busy moms or women who can’t (or won’t) run anymore, as well as those who don’t have access to a gym. In fact, low-impactHIIT workouts are the number-one request I get from my clients and female Instagram followers.HIIT can be tailored to your experience level and the equipment you have available, including if you work out at home.
What Are HIIT Workouts?
There are many ways to do high-intensity interval training, but the concept is always the same: work hard for a few seconds to get your heart rate up, and then take it easy to recover. Repeat for rounds. Unlike traditional cardio (jogging, swimming, cycling, etc.), where you work at a moderate and steady pace for long periods (usually 30 minutes or more),HIIT workouts are anaerobic—they don’t use oxygen as their primary energy source.Instead, they rely oncreatinephosphate to provide the power for explosive, rapid-fire activity, which means HIIT has more in common with weight training than it does jogging. So if you love to lift as much as I do, chances are you’ll enjoy HIIT more than steady-state cardio!
Because HIIT workouts are so intense, you simply can’t perform them for long (just as you can’t lift weights steadily for minutes on end). Work intervals are usually much less than 60 seconds (rest intervals may be longer or shorter, depending on how hard the work bouts are), and the whole workout typically lasts 20 minutes or less.
How Females Can Benefit From HIIT Workouts
HIIT workouts may not last long, but they can provide just as good a workout as sessions that take much more time. According to theAmerican College of Sports Medicine(ACSM), HIIT workouts can burn more calories per minute of exercise than aerobic training does, making it the better cardio option when you’re short on time.
The other big benefit of HIIT is the effect it has on your metabolism. Like weight training, HIIT increases post-exercise oxygen consumption (EPOC). Says the ACSM: “This is generally a two-hour period after an exercise bout where the body is restoring itself to pre-exercise levels, and thus using more energy. Because of the vigorous contractile nature of HIIT workouts,the EPOC generally tends to be modestly greater, adding about six to 15% more calories to the overall workout energy expenditure.”In other words, HIIT has you burning more calories—including more fat—when you’re recovering after the workout. That means you’ll actually be getting leaner when you’re hanging out around the house, watching TV, and sleeping! You don’t get this same effect with aerobic training.
Since HIIT has the muscles working hard, it also has the potential to boost muscle growth. Look at power athletes such as sprinters and sprint cyclists—their workouts are variations of HIIT, and they typically have ripped bodies to show for it.
How Many Times Per Week Should You Do HIIT Workouts?
As with lifting weights, HIIT is stressful to the body and requires recovery time. You can’t do it every day. I generally recommend that my clients do two or three HIIT sessions per week, done either on the same day that you lift (preferably right afterward or several hours apart) or on days in between.
For as many advantages as HIIT has over steady-state cardio, it’s still important to fit some long-duration aerobic training into your week if you can. I’ll jog orjumprope at a light pace at least one day per week, and for a minimum of 15 minutes. Steady-state cardio builds an aerobic base that your body can use to fuel all its other activities, and it’s good for your heart, as well as burning extra calories.
Beginner HIIT Workout For Women
If you’re new to HIIT, or working out in general, this routine is a perfect place to start. You’ll use only yourbodyweight, and every move is low impact—so if you’re overweight, or have back, knee, or shoulder problems, these exercises shouldn’t aggravate them.
Directions:Perform reps of each exercise in turn for 30 seconds, resting 15 seconds between sets. After you complete one round, rest about a minute (more if you need to), and then repeat for 3 to 5 rounds.
Step 1.Stand with feet between hip and shoulder-width apart and cross yourarmsin front of your chest to help you balance. Twist your feet outward and into to the floor (as if you were standing on turf and trying to twist it up beneath your feet), but without moving their position—you just want to create tension and feel your hips and glutes fire up. You should feel the arches in your feet rise.
Step 2.Begin to lower your body, pushing your knees apart and sitting back as if into a chair. Go as low as you can while keeping your head, spine, and pelvis in a long line. If you feel your tailbone is about to tuck under, stop there.
Step 3.Come up out of the squat and twist your torso to the left, raising your left knee into the air 90 degrees. Squeeze yourabs. Reverse the motion and repeat the squat, twisting to the opposite side.
2. Reach and Crunch
Step 1.From standing, pull your ribs down and tuck your tailbone slightly so that yourcoreis braced. Raise your arms straight overhead—keep your core tight so that your ribs don’t flare out and your back doesn’t hyperextend.
Step 2.Twist your torso to the left as you bring your left knee up and pull your arms down, as if delivering a knee strike. Crunch your abs, trying to bring your ribs and hips together.
3. Shuffle Punch
Step 1.Stand with feet together and your arms chambered at your sides, ready to throw straight punches.
Step 2.Shuffle your feet to your left and land in a deep squat with feet outside shoulder width. As you drop into the squat, punch your rightarmstraight out, and then shuffle to the right and punch with your left arm.
4. Squat and Reach
Step 1.Perform a squat as you did in the squat twist above, but start with your arms bent in front of you, as if you had just curled a barbell. Squat until your elbows touch your knees.
Step 2.Come out of the squat quickly so the momentum makes you come up on the balls of your feet. Reach your arms overhead while keeping your ribs pulled down and core engaged.
5. Side-To-Side Knee Drivers
Step 1.Stand with feet outside shoulder width and reach your arms overhead and slightly to the left.
Step 2.Draw your arms down while driving your right knee up and to the left, as if delivering a knee strike. Repeat on the opposite side.
6. Mountain Climber
Step 1.Get into the top of a pushup and then drive your right knee to your chest while keeping your hips level with the floor.
Step 2.Replace your right foot and raise your left knee to your chest. Continue alternating sides at a brisk pace.
7. Table Top Reach and Lift
Step 1.Sit on the floor with feet planted in front of you and hands underneath your shoulders. Brace your core.
Step 2.Push through your heels to raise your hips off the floor. Raise your left leg straight out in front of you and reach for it with your right arm. Lower your hips and repeat on the other side.
Step 3.Raise your hips into a full table-top position, tucking your pelvis under slightly and bracing your core so that your lower back doesn’t hyperextend in the top position.
Advanced HIIT Workout For Women
When you’re ready to take it up a notch, try this HIIT routine, which employs some light plyometric exercises—jumping moves that train explosive power. Not only do they get your heart rate up and challenge your muscles, but they’re fun to do. You’ll feel like an athlete again (or, if you didn’t play sports in school, for the first time—it’s never too late!)
Directions:You’ll need a small box, step, or other platform. Perform reps of each exercise in turn for 20 seconds, resting 10 seconds between sets. After you complete one round, rest about a minute (more if you need to) and then repeat for 3 to 5 rounds.
Workout duration:12–20 min.
1. Toe Tap
Step 1.Set a box or step that’s about a foot high in front of you. Quickly raise one leg and tap the top of the box with your foot.
Step 2.Return your foot to the floor and repeat on the opposite leg. Get into a rhythm that’s like you’re running, tapping the box quickly with each foot and staying light on your feet.
2. Explosive Hop Up
Step 1.Sit on the box with feet on the floor at hip width. Raise your arms up in front of you.
Step 2.Swing your arms back as you jump off the box as high as you can. Land with soft knees and lower yourself back onto the box. Reset before you begin the next rep.
3. Hop Over
Step 1.Stand to the right side of the box and place your left foot on top of it.
Step 2.Push off the box to hop over it laterally, landing with your right foot on the box and your left foot on the floor. Immediately repeat to the right side and continue performing reps in a rhythm.
4. Quad Hop
Step 1.Stand behind the box and place your left foot on it.
Step 2.Press through your foot to hop up into the air. Swing your left arm forward as you come up to increase the height of your hop. Land softly and repeat immediately. After you’ve spent 20 seconds on your left side, rest, then switch sides, and repeat.
5. Hands-On Climber
Step 1.Place your hands on the box and get into a pushup position.
Step 2.Perform mountain climbers as described in the beginner’s workout above.
6. Feet-On Climber
Step 1.Rest your feet on the box and get into pushup position.
Step 2.Perform mountain climbers as you have above, alternating each knee to your chest, but move more methodically, being careful to replace each foot on the box before you lift the other one.
7. Single-Leg Switch
Step 1.Sit on the box and extend your right leg straight out in front of you. Reach your arms forward to help you balance.
Step 2.Stand up from the box using only your left leg and then quickly hop onto the right foot and sit back down. Now stand up on the right leg. Get into a rhythm.
HIIT Workout You Can Do At Home
HIIT doesn’t need to be done in a gym. All you need is some light dumbbells (even a pair of three-pounders will do) and a few feet of open floor space.
Directions:Perform reps of each exercise in turn for 30 seconds, resting 15 seconds between sets. After you complete one round, rest about a minute (more if you need to), and then repeat for 3 to 5 rounds. To make your glutes work harder, wrap an elastic exercise band just above your knees so that it resists your legs (optional).
Workout duration:20–30 min.
1. In/Out Squat Jump Press
Step 1.Stand with feet close together, holding a pair of light dumbbells at your sides with elbows bent 90 degrees.
Step 2.Jump and spread your legs, landing in a deep squat at the same time you press both weights out in front of you at arm’s length. Jump back to the starting position.
2. Alternating Kickback Press
Step 1.Stand holding dumbbells at shoulder level with feet closer together.
Step 2.Extend your left leg behind you with knee straight as you press the dumbbells overhead. Return to the starting position and repeat on the opposite leg.
3. Jumping Jack Press
Step 1.Hold dumbbells at shoulder level and stand with feet close together.
Step 2.Dip your knees quickly to gather momentum, and then jump your legs to outside shoulder width as you press the weights overhead. Land with soft knees.
4. Squat Press
Step 1.Hold dumbbells at shoulder level and squat.
Step 2.As you come up, press the weights overhead.
5. Lunge Press (right leg)
Step 1.Hold dumbbells at shoulder level and step back into a staggered stance so your right leg is front. Lower your body so that your left knee nearly touches the floor and your right knee is bent 90 degrees.
Step 2.Stand straight up from the lunge position and press the weights overhead.
6. Side-To-Side Squat Front Raise
Step 1.Stand with feet together and dumbbells at your sides.
Step 2.Step out to your left side and squat as you raise the dumbbells up to shoulder level in front of you. Step back to the starting position and then repeat to the right side.
7. Lunge Press (left leg)
Perform the lunge press again but with the left leg in front.
8. No-Jump Jack
Step 1.Hold dumbbells at your sides with palms facing forward, and stand with feet together.
Step 2.Step to your right side as you raise the weights overhead in an arcing motion, as if doing a jumping jack. Repeat to the opposite side.
How To Create Your Own HIIT Workout
Once you’ve gotten the hang of HIIT, feel free to make up your own HIIT workouts to keep your training fun and challenging. Here are some guidelines to remember.
1. Choose exercises you can do in one place (more or less).Because the work and rest intervals tend to be brief, you don’t want to create a workout that has you running around your gym from station to station. Keep your equipment and setups simple.
2. Alternate really hard exercises with easier ones.If you squat with weights in one interval, you probably shouldn’t do burpees in the next one. The point of HIIT is too work hard, but not so hard that you burn yourself out early and can’t finish the workout with intensity. Another tip: play with your work-to-rest ratios. You may want to use shorter work intervals and longer rests when you’re just getting started, and add work and subtract rest as you get fitter.
3.You can make HIIT workouts withmobilityexercises.If you want to spend more time opening your tight hips or stretching yourhamstrings, use mobility drills like thehip-opening mountain climberandtwist and sit-kneein your HIIT sessions. You can alternate them with tougher bodyweight or weight-training moves, or use mobility exercises exclusively. You may be surprised how fast mobility moves done withfocusand precision can raise your heart rate.
]]> https://www.onnit.com/blogs/the-edge/top-10-core-exercises-for-mma-fighters2025-07-10T10:55:22-05:002025-08-15T07:53:32-05:00Top 10 Core Exercises for MMA FightersJeremy Gottlieb
Coredevelopment is an essential physical attribute for any MMA, martial artist, combat, or sports athlete. Dedicated fighters understand its importance in increasing explosive power, improving overall strength, maximizing mobility, reducing stress on the body, and minimizing your injuries.
The unfortunate thing is that core training is often overlooked by most combat athletes or they minimize core training to basic plank exercises. If you want to achieve superiorfitnessand improve overall athletic performance then you need to prioritize exercises designed specifically to build a stable core into your strength and conditioning program.
In this article we will look at what the core is, its function, and benefits to combat fighters and athletes using the best bodyweight core exercises that you can introduce into your workouts immediately.
What is the Core?
The core is a collection of muscles, which stabilize, rotate and move the spine. Close to the spine and deep inside the abdomen is the inner core, which is composed of the diaphragm, pelvic floor, multifidi, deep cervical flexors, and transverse abdominis. These strange-sounding muscles engage first during movement or breathing to protect the spine.
The outer core muscles are also responsible for stabilizing and protecting the spine, and include the lats, spinal erectors, glutes complex, and hip flexors. The anterior muscles (abdominals) are the most well known members of the outer-core assembly.
The Function of Core Exercises for MMA Fighters
The core works as one unit, stiffening to protect the body and to transfer force from our lower body to our upper body during athletic movements. The core is also the most important factor for transferring explosive power. When your core muscles are weak, then your nervous system puts a HALT to any explosive movement as a protective mechanism to support the spine.
This means if you are throwing a strike or a kick, your energy will not make it into your strike. Also, when you have insufficient core stability, it will set you up for injury and limit your mobility.
If your core is strong when your fist lands, the force of your strike will transfer through your opponent. Generating a knockout punch, thanks to the strength of a stable core. The force generated from the legs and through the core during a Judo throw, is one example of this.
A strong and stable core also allows the body to function as an integrated unit and compete the throw with force. If the core is weak, the bridge will collapse and the extremities will, in turn, be weak.
A Muay Thai clinch is another move where core stability is vital. Your goal being to deliver knees, elbows, and throws to keep your opponent in check. You need to develop your core stabilization strength to better take advantage of this position.
Having good rotational and anti-rotational core strength is important as well. Let’s take grappling for example, when your opponent wants to pass your guard by throwing your legs to the side, if you have good core strength, it can help you repulse the guard pass.
Rotational strength will also help with striking when you rotate from your hips and shoulder to add extra speed. A Strong Core Improves Athletic Performance.
The muscles of the trunk and torso stabilize the spine from the pelvis to the neck and shoulder, they allow the transfer of power to thearmsand legs. All powerful movements originate from the center of the body out, and never from the limbs alone. You need to develop a stable spine defore any powerful, rapid muscle contractions can occur in the extremities.
Basically, every athletic movement that a combat athlete needs to perform needs the use of a strong core.
Core Exercises that Improve Athletic Performance
Now that you understand the importance of developing a strong core, let’s take a look at the type of exercises that will help you to achieve this. I am going to show you the top bodyweight core exercises so you can see that you don’t need any fancy pieces of equipment or weights to achieve a rock solid core.
Anti-Flexion and Core Stability Exercises
The goal of anti-flexion exercises is to resist flexion or bending through the lumbar spine. The key when performing these movements, however, is to keep your low back neutral and squeeze your glutes at the midpoint of the movement. Exercises likePlanksand Back Extensions can help.
Anti-Extension Core Exercises
The goal of anti-extension exercises is to resist extension through the lumbar spine. You must keep the spine neutral and do not allow your lumbar spine to overextend. Exercises such as theAb Wheel, Stability Ball, and Bodyweight Roll Outs are good examples.
Anti-Lateral Flexion Core Exercises
The goal of anti-lateral flexion actually is to resist lateral flexion, or side bending, through the lumbar spine. The key is to lock your spine into place and not move it.Using exercises likeSide Planks, Farmers Walks, or just holding a dumbbell in one hand for time without allowing side bending is great.
Anti-Rotation – Rotational
With anti-rotation exercises, the goal is to resist rotation through the core and lumbarspine. The key here is to lock the core down and not allow any rotation through the core and lumbar spine. Exercises like the Pallof press or Anti-Rotation bag holds are great exercises. For rotational exercises the goal is to rotate through the thoracic spine. These movements can help with general mobility and striking power. Exercises like Medicine Ball Throws, Band Rotations or Tight Rotations are great.
Hip Flexion
Hip flexion exercises need to be done with a neutral spine, without rounding the lower back. The goal of these exercises is to keep your core and low back in a neutral position, while simultaneously flexing your hips. Performing exercises like Jackknifes on a stability ball and Hanging Leg Raises can help.
What Are the Best Bodyweight Core Exercises?
Core exercises are most effective when they engage many muscles throughout the torso that cross several joints and work together to coordinate stability.
Core muscles need to work as a unit, contract at the same time, across different joints in order to stabilize the spine. Some of the best core exercises are simple bodyweight exercises.
Not everyone has access to equipment that many core exercises and movements are used with. But you can get incredible results from just using your bodyweight and the right core exercises to develop strength and stability. Start all exercises with your bodyweight and then progress to resistance, advanced, or unconventional exercises.
Check the 10 Best Bodyweight Core Exercises for Athletes and non-athletes a like. If you want to develop a solid core structure to help improve performance, increase power, and develop overall strength, then start implementing this exercises into your weekly training.
Bodyweight Hand Walk Outs - Anti-Extension Exercise
Push Up Plank Alternating Shoulder Touch - Anti-Flexion and Core Stability Exercises
Short Back Bridge – Core Stability and Hip Flexion
Tight Rotations - Anti-Rotation – Rotational
Bird Dog Variations - Anti-Lateral Flexion Exercises
Side Bridge or Side Plank - Anti-Lateral Flexion Exercises
Plank Bodysaw– Anti Extension
Dead bugs – Anti Extension
Hip Thrusts – Hip Flexion
Hanging Leg Raises - Hip Flexion
So now you have an understanding of how important core training is to your overall athletic performance as a combat athlete, start dedicating core training session into your overall strength and conditioning program.
]]> https://www.onnit.com/blogs/the-edge/new-year-all-you-12-week-fat-loss-nutrition-plan-part-12025-07-10T10:55:22-05:002025-08-15T12:35:01-05:00New Year All You: 12-Week Fat Loss Nutrition Plan, Part 1Jeremy GottliebHappy New Year!
OK¦ If you woke up and looked in the mirror this morning to see a painful reminder of all your holiday season overindulgences firmly attached to your waistline, the last thing you might be feeling right now is “happy.”
But what if I told you that in 12 weeks you could not only get back to fighting form—ripped even, beyond where you’ve ever taken your body before—and you wouldn’t have to count a single calorie or give up your favorite foods to get there?
No, I’m not promising a quick, easy fix. I’m not telling you that you can keep eating and drinking the way you did over the holidays (or the past few years) and expect a different result.But I do have a foolproof plan to knock the weight you’ve added to your belly/ass/thighs off of you and get you a beach-ready body by the start of spring.And it doesn’t require you locking yourself in at night and subsisting on lettuce and protein powder. In fact, you’ll be amazed at how taking the most basic of steps will yield significant results in just the first four weeks alone.
Begin following the first month-long phase of this 12-week program as outlined below, and then see the next two parts, linked at the bottom. Combine these nutrition guidelines with any Onnit 6 or Onnit in 30 program, you’ll have both the fuel and the fire to transform your physique and performance.
Ready? Then without further ado, Onnit and I proudly present the 12-Week Fat Loss Nutrition Plan.
The First 3 Rules of Eating For Rippedness!
#1 Only Eat When It’s Time To Eat
Losing weight is primarily about controlling calories. The easiest way to start doing that—without having to count your calories or weigh your food—is to simply stick to planned, structured meals. I.e., breakfast, lunch, and dinner.
“But wait, I thought small, frequent meals were best for getting ripped. That’s what all the bodybuilding magazines say.”
Yes, they do, and that’s an approach that can work. But I’d rather you keep it simple. Looking at it logically,the more times you sit down to eat, the more calories you’re likely to take in.Plus, the frequent-eating approach means taking the time to plan and cook your meals well in advance, which I know many of you just won’t have the time to do. And let’s face it, it’s also a hassle. Think of spending your Sunday grilling chicken breasts instead of watching football. It could also mean having to grab food on the go every couple hours when you’re working or running errands. It’s not practical for most people who have busy lives (or, ahem, lives they’d like to enjoy).
“What about fasting?”
If eating often leads to taking in more calories, then it stands to reason that skipping a meal entirely, or at least going a long time without one, would mean you’d eat less food. So, if you think that will be the case for you, then go ahead and fast.Most people who like the intermittent fasting style of dieting prefer to skip breakfast, which usually gives them about 16 hours without food.This can work very well, provided that you’re not the type who goes mad with hunger and overeats at their next meal, whichresearchhas shown is a possibility. Ultimately, the frequency with which you eat comes down to a matter of preference, but I recommend sticking to three normal meals a day for simplicity’s sake. It’s the easiest schedule for most people to stay on.
Cut out all snacking. No more pretzels from the vending machine, lattes on the way to work, or late-night brews. This may sound brutal at first, like you’ll starve, but in Rules #2 and #3 I’ll show you how to fill up on healthy food so you don’t have these cravings anymore.
And, like most rules, there are some exceptions.If you normally work out after dinner, you can (and should) have a snack afterward so you don’t go to bed on an empty stomach(more on what this should be later). Or, if you typically eat lunch at noon, work out mid day, and won’t be eating dinner until later that evening, a post-workout snack should be added as well. Heck, even if you don’t plan to work out mid-afternoon, if you eat an early lunch and can’t have dinner until 8 or 9 p.m., you should have a snack sometime in between to tide you over.
What exactly is a snack?
â Veggies and hummus? Great. â Berries and nuts? Yep. â Apple andpeanut butter? Perfecto.
Almost any combination of protein, fiber, and whole-food fat is a winning trio. Chips, dip, soft drinks or sugar-bomb lattes? No.
Apart from these snacks, don’t eat anything unless you’re sitting down for breakfast, lunch, or dinner. When you’re done with your meal, the kitchen is closed.
One of the biggest obstacles to weight loss is eating out of sheer boredom, not physiological hunger. Maintaining the “kitchen closed” policy will help break that cycle.
#2 Control Portions With Your Hands
All of your meals should be structured the same way.They should contain at least one handful of protein, a minimum of two handfuls of vegetables (or one piece of whole fruit and one handful of veggies), and one handful of starchy carbohydrates.
Protein, if you weren’t sure, is any type of meat or fish. A handful-size chicken breast or a hamburger patty isone serving of protein. The same goes for whole cuts of beef, turkey, pork and salmon or tuna fillets. Similar amounts of eggs, cottage cheese, Greek yogurt (no sugar added), andprotein powder supplementsare also good sources.
Fatty, processed foods like hot dogs and bacon are permissible in this first four-week block, but use common sense and avoid them most of the time. If you’re at a football game and can’t get a lean chicken breast, a ballpark frank is better than starving (unless you prefer to fast), but don’t convince yourself that you don’t have better options most of the time.Because protein is filling and it supports muscle growth, I’m not putting a firm limit on it.Have at least a handful in every meal, but if two or three handfuls is what it takes to keep you full and feel like you’re recovering from workouts, then go ahead. Again, the leaner and plainer the protein source the better. Think meat and fish, not In-N-Out Burger, even if you do toss the bun.
Starches include potatoes, sweet potatoes, beets, beans, and whole grains likerice, oats, and quinoa. A slice of whole-grain bread like Ezekiel is great too.
Beyond just making your meals easier to control and stick with, there is some solid nutritional science behind my recommendations.A palmful of protein, regardless of the source, will usually give you 25–35 grams of the stuff (depending on the size of your hand).
Vegetables and fruits are foods you can eat liberally. Fruits don’t rank quite as high as veggies since some are higher in sugar and calories, butno one ever gained weight because they couldn’t stop eating fruit.As long as you’re eating whole fruit—say, a peach as opposed to canned peaches that have marinated in a pool of syrup—you can count on its fiber slowing down thedigestionof the sugar, keeping your energy steady and your belly full.
In fact, if in the first few weeks you find yourself absolutely unable to adhere to the “eat only at breakfast, lunch, and dinner” rule, there’s no harm in breaking it with veggies and fruit and more protein as well. I’d still prefer you eat three meals a day and that’s it, but if you’re going to fall off the wagon, I’d rather you crashed into a bed of celery, carrot sticks, and a hamburger patty than a pile of potato chips or bowl of ice cream. Overeating with natural, healthy food always trumps gorging on more calorie-dense junk. Make sense?
Veggies in particular are naturally low in calories and high in fiber—not to mention numerous essential vitamins andminerals—so they help your weight loss in multiple ways. When I say to serve yourself a “handful” in this case, it’s just for the sake of practicality. Don’t feel you need to limit your intake of greens in any way. If you’re using tongs to serve yourself veggies at a salad bar, feel free to squeeze as many between the claws as possible.
Because starches contain a fair amount of calories and raise blood sugar, they need to be contained—but not cut out, because they supply energy.A handful of starch is the amount that would fit in your cupped hand(in the case of potatoes, it’s typically one potato, and for bread, it’s one slice).
We’ll worry about maximizing the quality of what you’re eating in later installments of the program, but for the time being, it’s enough to just get in the habit of eating less and with balanced portions.
If your eating habits are so out of whack that you’re consuming Big Macs on a daily basis¦ Well, one Big Mac is better than two.It’s still more important that youfocuson eating your meals—however imperfect they may be—according to the formula herethan trying to make massive, sweeping changes that you can’t possibly sustain. I’d love for you to start eating lean chicken and broccoli every day, but if you’ve been eating fast food three times a day for years, I don’t expect you to make the switch overnight.
#3 Start Each Day With Protein
Studieshave shown over and over that protein helps fill you up so you don’t overeat. It also helps you build and repair muscle, and burn more calories throughout the day—because it takes so much energy to digest.
Most people eat no protein in the morning and not enough throughout the day, so simply resolving to eat ahigh-protein breakfastcan make a huge difference—and it doesn’t have to take long. The following are a few examples of protein-rich starters that you can make in minutes and take with you, or simply grab off a shelf in a deli or gas station.
â 1 cup plain Greek yogurt â 1 cup cottage cheese â 4 whole eggs (or a few whole with a few whites, if you prefer) â 2 whole eggs and 2 oz of steak or chicken â 1 handful smoked salmon â protein smoothie made with 1 scoop protein powder
Each of these counts for about one serving of protein, and should be balanced with veggies/fruit and a starch. The next time you rush off to work in the morning, think about grabbing a yogurt, one piece of whole fruit, and a slice of toast, or a single-serving package of instant oatmeal.
One Perfect Day of Eating
Use the following sample menu as a guide for how to eat over the next four weeks. Note that this plan does not need to be followed verbatim every day, but is an example of how to portion your meals and choose your foods. Adjust it to your own tastes—if you don’t enjoy the process, you won’t stick with it.
Breakfast
Egg Scramble and Oatmeal
â 2 whole eggs â ½ handful smoked salmon â 2 large handfuls of spinach (cooked into the eggs) â 1 small handful of cheese* (melted on the eggs) â 1 handful oats (cooked as oatmeal) â 1 handful berries (fresh or frozen)
*I don’t recommend you eat cheese by itself, but a handful (just enough to fill your palm, not all the way up to your fingers!) can be added occasionally to round out your protein serving.
Lunch
Tuna Salad
â 1 can tuna â 1 tbsp balsamic vinaigrette* â 1 handful cherry tomatoes â 1 handful mixed greens â 1 cup brown rice (tip: you can buy packs of brown rice that can be microwaved and are done in 90 seconds)
Mix all ingredients and enjoy
*Seasonings and condiments that contain sugar and fat should be limited to the serving size recommended on the container.
*This is optional, and you should only consume a snack if it’s going to be several hours before you have dinner and you know you’ll feel like you’re starving otherwise. Additionally, you can have a snack if you’ve just worked out.
Dinner
â 1–3 handfuls portion of rotisserie chicken (from any grocery store) â 2 large handfuls of arugula â 1 large handful mixed, colorful veggies (picked up from the salad bar at your grocery store to make it easy) â 1 cup black beans â 1 tbsp oil â 1 tbsp vinegar
Post Workout*
â 1 cup Greek yogurt â 1 cup berries â Protein shake blended with a banana
*Only have this snack if you work out after dinner.
Alcohol and Dessert
We won’t ban these in this stage of the plan but, as with obviously sub-par protein choices like hot dogs, we have to limit them. Here’s the rule:you can enjoy booze, cookies, soda, etc. only when you’re with other people at a social event.You will never consume them alone.
Not going out Friday night? That doesn’t mean you can stay in and throw a party for yourself. And when you do go out, give yourself a maximum oftwo alcoholic drinksor servings of junk food. No more than two nights per week also.
There you go. Get on it (er, Onnit!), and check out the next two installments when you’re ready!
]]> https://www.onnit.com/blogs/the-edge/fat-burning-battle-ropes-hiit-workout2025-07-10T10:55:21-05:002025-08-15T08:54:04-05:00Fat Burning Battle Ropes HIIT WorkoutJeremy Gottlieb
The Fat Burning Battle Ropes HIIT Workout can be used as a finisher or just a stand alone workout if you are crunched for time.
For those who do not know, HIIT stands for High-Intensity Interval Training, and the fat burning battle ropes HIIT workout is a sure fire way to strip the last bit of fat off for summer.
Not only will the Fat Burning Battle Ropes HIIT Workout build work capacity and aerobic conditioning, it will also increase muscleendurancein the upper and lower body.
Try this workout as soon as possible, all you need is a single Onnit battle rope and a small area to whip yourself into shape!
Perform as many waves as possible in 30 seconds. Once finished rest 30 seconds, move onto the next exercise in the group and repeat. Once finished with the entire round. Rest for two minutes and repeat for a total of 6 rounds.
For the Circle Wave and Low to High Chop, alternate which direction you perform the movement every round.
A1:Battle RopeJumpSlam – 6 rounds x 30 sec A2:Battle Rope Alternating Wave withSquat– 6 rounds x 30 sec A3:Battle Rope Alternating Wave with Side Lunge – 6 rounds x 30 sec A4: Battle Rope Circle Wave – 6 rounds x 30 sec A5: Battle Rope Low to High Chop – 6 rounds x 30 sec A6: Battle Rope Kneel to Stand Wave – 6 rounds x 30 sec
]]> https://www.onnit.com/blogs/the-edge/the-best-kettlebell-ab-exercises-workout-to-get-lean2025-07-10T10:55:19-05:002025-08-15T08:15:37-05:00The Best Kettlebell Ab Exercises & Workout To Get LeanJeremy Gottlieb
Kettlebellsare renowned for their ability to strengthen the entire body with numerous functional exercises, but many people don’t think of them for ab training to build a summer-ready body. Sure, bodyweight exercises like situps and crunches can help get you there, but kettlebells can carve up yourcorejust as quickly, and they offer a lot of other benefits at the same time that you can’t get with direct ab work alone.
If you’ve got only one moderate-weightkettlebellat home, you have more than enough to get an outstanding six pack. Allow us to present some of our favorite kettlebell ab exercises, and a workout that puts them all together.
If you’ve ever trained with kettlebells, you learned one thing very quickly—EVERY exercise you do with a kettlebell is automatically a core exercise too. Due to the offset nature of the load—that is, the distance from the kettlebell’s center of gravity (the middle of the bell) to the weight’s handle, as well as your body—kettlebells are hard to control and require your whole body to stabilize every movement. Creating that stability causes your abs to brace hardcore—no pun intended—so, to a large degree, you’re getting great core training with virtually any kettlebell exercise you perform, be it an overhead press, a clean, a swing, or anything else.
Astudyin theJournal ofFitnessResearchfound that subjects training with kettlebellsincreased their core strength by 70% following an eight-week program.(One of the exercises used was the Turkish getup, which we’ll show you below.)
With all this said,you can also target the abs with certainkettlebell exercisesthat put tension on the ab muscles more directly,resulting in greater muscle size gains in your six pack. That will help to make your abs visible—assuming, that is, that your nutrition is on point so that your body fat is low. Before we go any further, understand this: no matter how strong and muscular your abs are,you won’t see them if they’re covered in body fat.Aim to get yours under 10% if you want to see your abs pop to their full potential. (If you need help setting up a diet that allows you to do this, see our article,How To Set Up Your Diet for Fat Loss or Muscle Gain.)
Five Amazing Kettlebell Ab Exercises
We asked Shane Heins, Onnit’s Director of FitnessEducation, and a veteran kettlebell coach, for his five favorite kettlebell moves for the core, and he suggested the following.
The windmill works hip flexibility, shoulder stability, and core strength at the same time, making for one seriously challenging movement.
Step 1.Hold the kettlebell in your right hand at shoulder level. Your elbow should be tight to your side and your forearm vertical (this is called the rack position). Angle your feet 45 degrees to the left. Press the kettlebell straight overhead.
Step 2.Brace your abs like you’re about to take a punch to the gut. Kick your right hip out to the side so you feel a stretch on the back of your right leg. Bend both knees slightly.
Step 3.Turn your head to look up at the kettlebell and keep your eyes on the weight as you bend your hips back to the right and lower your torso toward the floor. Allow your leftarmto slide down the inside of your left thigh as you descend. Go as low as you can control, and then come back up.
Many exercise scientists argue that the abs’ main function is to brace the spine while the limbs move around, and that’s exactly what this exercise has you doing. Can you keep your shoulders, back, and hips straight and braced while you drag the kettlebell back and forth across the floor beneath you? You’ll feel your back, shoulders, and legs burn on this one.
Step 1.Get on all fours and place a kettlebell to the outside of your left hand. Brace your abs and raise your knees off the floor so your weight is supported by your hands and toes. Your body should form a straight line from your head to your pelvis.
Step 2.Extend your left leg back until it’s straight. Reach your right hand behind your left to grasp the kettlebell and drag it across the floor to the outside of where your right hand was on the floor.Try to keep your shoulders and hips square to the floor as you do this.Turn the handle around so you can grasp it easily with the left hand on the next rep, and bring your left leg back up and lower both knees to all fours again.
Step 3.Extend your right leg, and pull the kettlebell through with your left hand.
While this move may look like a classic situp at first glance, there’s so much more going on. Heins says that while conventional situps and crunches shorten the core muscles, this exercise strengthens them while it lengthens them, forcing you to contract your abs hard while you extend your spine—the opposite of how most people train them.
Step 1.Sit on the floor holding a kettlebell upside down with both hands on the horns of the handle. Have your knees bent and your feet flat on the floor as if you were in the top position of a situp.
Step 2.Tuck your pelvis under and slowly roll your back down to the floor, beginning with your tailbone. To make this easier, hold the kettlebell a little further away from your body so it serves as a counterbalance.
Step 3.Keeping your tailbone tucked under and your core braced, reach the kettlebell over and behind your head—try to go to where yourarmsare straight.
Step 4.Bring the kettlebell back in front of your chest and slowly roll your body back up to the starting position.
Every kettlebell course in the world teaches this one. The getup is a full-body movement that builds strength, mobility, and conditioning all at once, but it’s your core muscles that tie it all together. This move may not have your abs burning like a set of crunches does, but you can rest assured it will target your six pack and obliques, and the addition of a twisting motion at the end will emphasize the latter even more.
Step 1.Lie back on the floor with the kettlebell in your right hand and your right leg bent with your foot on the floor. Extend your left arm at 45 degrees and plant your hand on the floor for stability. Press the weight overhead and curl your body off the floor, using your hand for assistance, until your weight is supported on your left forearm.
Step 2.Extend your left arm so your palm is your base. Press through your right foot so your hips rise and slide your left leg back underneath you so you can rest on your left knee. Now straighten your torso so you’re in a tall kneeling position with the kettlebell held overhead.
Step 3.Lower the kettlebell to the rack position and twist your torso to the right, extending your left arm as if you were throwing a punch with your left hand. Your fist should end up outside your right leg.
Step 4.Reverse the twist and bend at the hips to lower your torso. At the same time, press the weight up again. Plant your left hand on the floor, kick your left leg through so it’s straight and flat on the floor again, and lie back on the floor to return to the starting position.
The renegade row is another move familiar to kettlebellers everywhere, but this modification makes it even more challenging. As with the half-quad pull-through, the half-quad renegade row makes you stabilize on a small base of support while one arm lifts weight. It’s meant to be done with two kettlebells, but you can use one if that’s all you have, and rest your other hand on a block or step that’s about the same height as a kettlebell.
Step 1.Kneel on the floor and grasp two kettlebells. Turn their handles so they’re angled in about 45 degrees and press them into the floor. Raise your knees off the floor so your weight is supported by the kettlebells and your toes.
Step 2.Extend your left leg back, and shift your weight into the left-hand kettlebell. Row the right-hand kettlebell, retracting your shoulder blade as you lift it.
Step 3.Lower the kettlebell, switch legs, and repeat the row on the other side.
How To Stretch Your Core Before Working Out
You know that you should warm up and stretch out a bit before any workout, but how do you do that for abs? They’re not muscles that stretch like thehamstringsor pecs. Still, they can be trained for greater flexibility with movements that also warm up your whole body and prepare it for challenging training. Heins put together a prep routine that helps to activate your core while lengthening its muscles. If you spend most of the day slumped over a computer or a smartphone, your ab muscles get used to being in a shorter position and will tighten up accordingly. These exercises help to restore length while integrating the core’s many functions.
Follow the exercises listed below (and demonstrated in the video above, starting at 1:56), performing them as a circuit.Do reps of each exercise in sequence for 30 seconds each, and then repeat for 2 total circuits.
Get Shredded With This Balanced Kettlebell Ab Workout
After you’ve warmed up, perform the five kettlebell exercises we introduced above together as a circuit.Do 10 reps of each move (5 reps per side for unilateral exercises) in sequence, and then rest 60 seconds. Repeat for 3–5 total rounds.If you’re a lady, an 8 to 12-kilo kettlebell is probably appropriate (18–26 pounds). If you’re a dude, start with a 12 to 16-kilo bell (26–35 pounds).
The abs are a somewhat unique group of muscles in that they work to stabilize the spine in virtually any exercise you do, so you don’t need to hit them directly any more frequently than you would chest, legs, or any other muscle group to see gains. They’re also limited in their ability to grow like those other muscles are, so there’s no benefit in training them every day (like old-school bodybuilders used to) in order to make them “pop”.
You can work your abs directly with the routine we gave here up to twice per week,avoiding any other direct ab training for at least three days in between sessions. You can also incorporate one or two of each of the kettlebell ab exercises listed into your existing workouts for other muscle groups, doing some ab training in the beginning of the session (if you really want to prioritize the core), or at the end.
]]> https://www.onnit.com/blogs/the-edge/how-much-cardio-do-you-need-to-get-ripped-for-summer2025-07-10T10:55:19-05:002025-08-14T17:24:46-05:00How Much Cardio Do You Need To Get Ripped For Summer?Jeremy GottliebCardio. It’s good for your heart and it burns fat, and whether you love it or hate it, you know you should be doing some. But how much do you need to get lean in time for summer? And which kind should you do?
Before we answer these questions, let’s review what it takes to get ripped. First of all, you need to cut calories from your diet.
It doesn’t matter if you’re in the low-carb camp or you like to eat Froot Loops every morning (either approach can work); you need to create a caloric deficit to lose fat.
Secondly, you need to lift weights. Without strength training, dieting will leave you soft and weak—resistance exercise sends the muscles the message that they’re not allowed to burn up.
Plus, the more muscle you have, the greater your resting metabolic rate and the more calories you’ll burn daily, inside the gym and out.
That brings us to cardio. There’s aerobic (steady-state) work and interval training. Both are good adjuncts to your diet and lifting regimen, but neither contributes as much to a lean body as you probably think.
Cold, Hard Cardio Facts
Let’s look at how many calories aerobic training can burn, starting with one of the most efficient and probably the most popular form of steady-state cardio—jogging. According to research from Harvard, a 185-pound person running at an eight-minute mile pace can burn 555 calories in 30 minutes.
“Golly,” you say. “That’s a lot.”
Well, yes and no. It’s more calories than you’re likely to burn given the same amount of time lifting weights (266 calories), but, at some point in the day, you’re going to have to eat something. And that’s the problem, because it’s much easier to consume calories than it is to burn them off. Let’s say this 185-pounder follows up his run with a healthy, high-protein meal of eight ounces of skinless chicken breast, one cup of brownrice, and as much broccoli as he can fit on his plate, dressed with a mere one tablespoon of olive oil. The calorie total for that meal? Just under 600.
In other words, just one HEALTHY meal (most people don’t eat this well) pretty much cancels out the calories you burn in one intense aerobic session. Furthermore, you’re going to have to eat more than once in a day, but you’re not going to go back to the gym again and again, so it’s clear that eating even the “cleanest” foods can overwhelm your calorie-burning efforts.
“Shit,” you say. “That sucks.”
Indeed it does. But what about interval training? According to the American College of Sports Medicine (ACSM), alternating hard bouts of exercise with periods of light work or rest (which you probably know as high-intensity interval training, orHIIT) can burn more calories per minute of exercise than aerobic training. That makes it more time-efficient, but because interval sessions are more intense than aerobic ones, they can’t last as long, and that means you won’t burn more calories overall.
A study published in the American Journal of Human Biology compared steady-state training to HIIT. Subjects performed two protocols: they alternated sessions where they ran for 20 minutes straight, keeping their heart rates at a moderate level, with workouts in which they did multiple, all-out 20-meter sprints. After seven weeks, the total exercise time in the jogging workouts was naturally much greater, and so were the calories burned: approximately 4,410 calories from the steady state training versus only 907 for the HIIT.
You may have heard of a phenomenon called EPOC—excess post-exercise oxygen consumption. This is the period after a workout where your body is recovering from the session and burns calories at a faster rate compared to a resting state. Some trainers like to make a big deal about EPOC, arguing that it’s better than steady-state cardio because it allows you to burn calories when you’re not doing anything (similar to the effect that building muscle has on the metabolism). But the truth is, the effect of EPOC isn’t that dramatic. According to the ACSM, it’s actually quite “modest,” burning only about six percent more calories than you burned in the workout itself (more if you went extremely hard—harder than most people are capable of—but still not a lot).
So what are we saying? Is cardio a huge waste of time?
Of course not. It still burns fat and increasesenduranceand, more importantly for your health, it strengthens your heart, lowers blood pressure, helps you recover from weight training more quickly, and a host of other good things. But the fact remains that exercise of any kind—when done independently from diet changes—just doesn’t make much of a difference for weight loss. A study from the journal Obesity looked at obese women who either dieted, exercised, or combined diet and exercise to lose weight over the course of one year. Unsurprisingly, the exercise-plus-diet group lost the most weight at about 20 pounds (and nearly six percent body fat). But the women who dieted alone weren’t far behind with around 15 pounds lost (and four percent body fat). And the exercise-only group? A mere four pounds and a little more than one percent body fat.
All of this means that lifting weights and doing cardio is well and good, but unless you’re eating less food than you were last month, the only six-pack you’ll see will be from Budweiser.
For ideas on setting up an effective diet, clickHERE.
How Much Cardio You Need, and How To Do It
Now, to answer the questions at the beginning of this article (yes, we know that was a long time ago)¦
How much cardio do you need to get ripped? The answer: Not as much as you think.
And which kind should you do? The answer: All of it.
Let us explain.
Assuming you’re cutting calories and lifting weights three to four days per week (three is the minimum amount that most trainers say you need to see progress), you only need about three cardio days per week to see yourabs. That’s the recommendation of Don Saladino, a New York City-based trainer to celebrities like Ryan Reynolds and Blake Lively.
On each cardio day, do a different type of cardio. But wait, aren’t there only two kinds—steady state and intervals?
Actually, “there are three forms of cardio,” says Saladino. “You’ve got your steady state, your HIIT, and then there’s medium-intensity.” This last category is what most people think of as HIIT, but it really isn’t. “People tell me, ’I do HIIT training—I run for 30 seconds and then walk 30.’ And I say, ’No, you don’t. You do medium-intensity,’” which is the gray area in between true HIIT and aerobic work.
Medium-intensity intervals could be alternating fast runs with walking. They could be jumping rope, doing battle rope waves, running through a circuit of bodyweight exercises, or anything else that gets your heart rate up high and lets you sustain it for a little while, recover a bit but not fully, and go again.
This differs from textbook HIIT, which is work that is so demanding that you can only sustain it for four to six seconds. We’re talking a full-on sprint, battle rope slams, or pedaling on an Airdyne bike like a UFC fighter. Because it’s so hard on your nervous system as well as your muscles, Saladino says you should limit HIIT sessions to twice a week.
Finally, there’s steady-state cardio, where all you have to do is get your heart rate between 120 and 150 beats per minute and keep it there for 30–60 minutes. You could do this kind of training virtually every day if you wanted, but for the purposes of getting ripped, one day a week is enough when done in combination with HIIT and medium-intensity intervals.
Each cardio type trains a different energy system, so each is important to develop for well-roundedfitness, but none can replace weight training and diet when it comes to getting beach-ready abs. See the full directions on how to implement each cardio method below, and enjoy your summer.
HIIT
Frequency:1–2x per week Exercises:sprints, hill sprints, exercise bike sprints, Versaclimber sprints, battle rope slams How to do it:warm up, then work as hard as possible for 4–6 seconds. Rest until you feel ready to repeat the effort. Workout time:12–15 minutes
Medium-Intensity Intervals
Frequency:2–3x week Exercises:fast treadmill jogs, rope jumping, body-weight circuits, sled pushes, battle rope waves How to do it:make up your own intervals. Any hard but not maximal pace for the work interval will do. Alternate that with active recovery. For example,jumprope for 60 seconds and stretch your hip flexors for 30 seconds. Workout time:15–30 minutes
Steady-State Cardio
Frequency:1–3x per week Exercises:jogs, cycling, swimming, hiking How to do it:work at a pace that keeps your heart rate between 120 and 150 beats per minute. You can wear a heart rate monitor or estimate as follows. Subtract your age from 220 to find your approximate maximum heart rate. Now place your index and middle fingers on the pulse in your neck and count for six seconds. Multiply that number by 10 to get your heart beats in a minute. Workout time:30–60 minutes
Before we get to the challenge let’s talk about why jumping rope deserves a slot in your training regimen.
Why You Should Jump Rope
Now you may be wondering why jump rope?
You could be doing a million different types of functional exercise, so why throw jump rope in the mix?
One word. Efficiency.
The number one resource we are all trying to get more of –TIME– is directly linked to your workouts. With a 30 minute jump ropeHIITworkout you can expect to burn somewherebetween 300 – 450 calories or more depending on your weight, throughout the course of a day.
125 – pound person = 300 calories 155 – pound person = 375 calories 185 – pound person = 450 calories
That’s the equivalent amount of calories to a massive double bacon cheeseburger, or 15 Oreos, or 16 donut holes, or¦ you get where we’re going with this.
Do a jump rope workout and you can do a little binge eating.
Just kidding (mostly.)
Anyhow, it’s true that jump rope is also a sport, but in our case we are treating it more like a tool.
In addition to being an incredibly efficient tool here are a list of the benefits you can expect to experience when starting to implement jump rope exercises into yourfitnessprogram.
Benefits of a Jump Rope Workout
Efficient– Not going to beat a dead horse here, but to reiterate the point made above – the better you get at skipping rope – the more calories you burn in less time.
Portable– You can throw it in your bag whenever you leave the house and grab a workout anytime no matter where you are in the world. That means no more gym membership (unless you want one.)
Total body– Jumping rope activates every part of your body from head to toe. From your shoulders down to your calves you will experience the burn…we promise.
Low risk of injury– Compared to most forms of exercise jumping rope is extremely safe. You are hopping an inch or two off the ground at most if your form is correct, so the risk of injury is relatively low.
Fun– The beauty of the jump rope is that you can always learn new tricks and improve your skillset. There is no plateauing unless you choose to do so. This always keeps your workouts interesting and engaging. It’s like we always say at Jump Rope Dudes – if it’s not fun, it’s not sustainable.
Cool– Let’s face it. Those dudes who can whip a jump rope around like a ninja straight up look cool. The more you practice – the better you get – the cooler you feel.
Easy to get started– All you need to get started is a jump rope and the 4-week challenge we posted for you at the end of this article!
Improved agility– If you are an athlete looking to improve your agility and footwork then jump rope is perfect for you. There is a reason why the best fighters in the world include jump rope exercises in their training regimen.
Improveendurance– Beyond the fat burning effects discussed above, you can expect to experience a significant improvement in your endurance as well. All without leaving the driveway or parking lot outside your home.
How to Pick Your Jump Rope
Durability– The beauty of skipping rope is the freedom that comes along with it. You don’t want to be caged into working out inside, so make sure you pick up an all surface rope that is durable for both indoor and outdoor use.
Specifically we would recommend either a steel or PVC cable rope. For the handles you’re going to want a ball bearing system to extend the life of the rope as well.
Sized correctly– Make sure you are picking up a rope that is sized correctly for you. If you stand on the rope with one foot and bring both handles up towards your body, the bottom of the handle should be just below your armpit. Another good rule of thumb is that the rope should be 3 feet taller than however tall you are.
Picking a rope for your goal– Pick a rope optimized for your goals. If you want to work on your agility make sure you pick up an agility rope (lightweight rope.)
The agility rope will definitely burn a ton of calories as well, so if you are looking for agility plus fat loss that’s a safe option as well.
Alright, so you know why you should be jumping rope, you know all about the benefits and you know how to pick a rope. The next step is picking up a rope and beginning to add jumping to your current regimen.
To get you started in a big way over the next 4 weeks we are giving you some of our most entertaining and effective workouts to try out. You only have 3 of these HIIT jump rope workouts a week, so you can throw these on strictly cardio days or stack them on your normal routine.
Day 1 is linked up below. Get after it!
4 Week Jump Rope Workout Challenge
Week 1 Day 1
Week 1 Day 2
Week 1 Day 3
Week 2 Day 1
Week 2 Day 2
Week 2 Day 3
Week 3 Day 1
Week 3 Day 2
Week 3 Day 3
Week 4 Day 1
Week 4 Day 2
Week 4 Day 3
]]> https://www.onnit.com/blogs/the-edge/become-a-jump-rope-juggernaut-with-this-complete-4-week-workout-plan2025-07-10T10:55:18-05:002025-08-15T08:16:54-05:00Become a Jump Rope Juggernaut with this Complete 4 Week Workout PlanJeremy GottliebAnyone who’s ever struggled to gain muscle lives with a deep-seated fear that if they make the wrong move with either training or nutrition, everything they’ve worked hard for will evaporate. In no aspect offitnessis this more obvious than the world of conditioning.
Formerly skinny guys like me tend to fear that too much conditioning will inevitably cause their powerful body to wither from that of a high-performance beast to an emaciated marathoner. As a result, they skip conditioning entirely – leading to higher body fat, compromised health markers, and a greater propensity for injury.
As bad as that sounds, most of these trainees would sooner die than walk around smaller, weaker, and less masculine.
I understand the mindset. I was a scrawny runt terrified of losing muscle and power. While these fears aren’t completely unfounded, the horrors of conditioning eroding muscle tissue are overblown.
Luckily, there are certain types of cardio that do the opposite: they build athleticism while shredding fat and preserving your precious muscle.
Conditioning workoutswith “hardcore” equipment like sleds and battleropesare currently enjoying the spotlight, but there’s one old school tool doesn’t get the attention it rightly deserves:thejumprope.
While you might not immediately assume the jump rope could be as sexy or badass as sprints or sled work, the fact is, it’s been an indispensable tool for everyone from prize-fighters to football players to fitness models.
These days, however, the jump rope seems to have fallen a bit out of favor, and has become an extremely under-utilized training implement. That ends here. It’s time to re-think the jump rope because it truly is the ultimate low impact training tool for accelerated fat loss, increased athleticism, and unreal conditioning.
Jump Rope Benefits
The reasons to pull out the old speed rope and start skipping Rocky-style are legion. Here are few of the main ones.
Jumping Rope is an Ideal Warm-Up
Firstly, let’s just establish that warming up is far more important than most believe. In addition to having all sorts of hormonal benefits, the fact is raisingcoretemperate and increasingblood flowis great for both mind and muscle. It helps create the rightmentaland physiological conditions for a great workout.
There really is no better warm-up tool before intense training than a simple jump rope. Skipping rope before Plyometrics, sprints, and explosive lifts fires up the nervous system, increases core/muscular temperature, and conditions the tissues of the lower body for explosive activity.
Explosiveness isn’t in your bag of tricks? No worries. For most gym rats, skippin’ rope will improve coordination and athleticism in five minutes before your workout.
The Jump Rope Poses Minimal Risk for Injury
Jumping rope is a low-risk tool for two reasons. Firstly, jumping rope is a self-limiting exercise: to jump rope without failing, you must stay in an aligned, joint stacked position while moving – forcing your trunk to stay engaged and resilient under the load of movement.
If you miss, mess up, welt your calves or triceps, or catch a toe, the exercise ends. All of this makes it extremely unlikely to over-do it; and, even better, nearly impossible to incur injury.
Compare this to something like sprinting. Naturally, I’m a huge fan of sprints, agility drills, and movement skills, but they’re just that — learned movement skills.
Performing any coordinative skill under excess fatigue runs the risk of engraining a poor movement pattern and subsequent injury. (In other words, sprinting while exhausted is a great way to snap yo’ shit up.)
Sprints are a great exercise, of course, and not inherently “bad” or dangerous. There’s a skill component that requires mechanics and practice before piling on tons of volume – which can be a slow process, especially if you want to get lean in a hurry. With regard to its accessibility, the jump rope is just a superior choice to condition the body for higher impact movement training without a high risk of injury.
Secondly, jumping rope is a low-impact movement, despite a high number of foot strikes. Here’s why this is important for us formerly skinny guys: unlike many other repetitive impact exercises, the lower impact does not create a hyper-catabolic environment — so you can use it get shredded without worrying about dropping lean bodymass.
Jumping Rope Builds an Important Movement Foundation
Jumping rope develops speed, agility, and a coordination foundation for sports. Sprinting and high velocity movements are great — they build great levels of conditioning, improve athleticism, preserve muscle, and shred fat.
Problem is, most guys haven’t sprinted in ages and those who have sprinted leave much to be desired with efficiency and technique. Keep in mind: high-speed movements like sprints (or anything that requires directional change) create massive stress on the joints, ligaments, and tendons.
You wouldn’t jump directly into near-maximal lifting would you? No; it would be irresponsible to jump into high impact sprints and/or change of direction work without first practicing and conditioning those tissues for impact.
All of which is to say that the jump rope is exceptionally effective in terms of both developing proper patterning and acute movement prep. Rather than being the guy who pops his hammy playing flag football, use the jump rope as a warm-up and conditioning tool to prepare the body for rapid movement.
The Jump Rope is Well-Suited to Power Development
When combined with weight training, jumping rope is a viable method to developing explosive and reactive power. Additionally, jumping rope requires minimal equipment or space and has a non-existent learning curve, making it a simple tool for power development.
Jumping Rope Leads to Increased Athleticism
Building on the above two points, jumping rope is an excellent way to develop the individual qualities that make up coordinative athletic movement — what we typically call, “athleticism.”
Hitting the weights hard and eating well is important, but true athleticism requires coordination, not just brute strength. Everyone loves being big, strong, and fast, but they’re useless without technique and the ability to consistently express those physical qualities on demand.
Jumping rope not only allows you to develop these qualities individually, but also trains your body to seamlessly integrate them in concert with one another. How does this help you? Simple: spending a few minutes a week with a jump rope will help you avoid being the dude who gets juked by some goon during a pick-up game.
The Jump Rope is Amazing for Interval/Conditioning Work
Despite being low-impact, jumping rope is a great conditioning tool. Rapidarmmovement, maintaining a rigid core, and quick feet all combine to send your heart rate sky-high.
Better yet, it’s a great way to condition frequently without undue stress on your joints, hormones, and nervous system.
On Selecting a Rope
“Okay dude, I get it, the jump rope is pretty bad ass. Now what?”
Here’s where you can run into a major snag in most gyms — there are no decent jump ropes. Those plastic pieces of crap tied in knots and thrown in the corner are worthless. Instead, you need a quality rope. So you should probably just buy your own.
Like anything else, you get what you pay for. If you get a high quality rope and take care of it, it’ll last for a long while. If you buy a piece of crap for 10 bucks, you’ll be replacing it constantly.
Beyond quality, the most important attribute of any given rope is its length. A rope that’s too short won’t allow you proper clearance; one that’s too long will have too much slack and you won’t be able to bring it around quickly enough. In either case, your training will be compromised, and you’ll be frustrated as hell.
The rule of thumb for length is that the jump rope should measure from the bottom of the foot, just past the armpit when bent in half.
That isn’t your only option, of course: a solid leather rope with a bit of weight to it will be more than adequate for your needs, and for all of the workouts you’ll find in this article. You just won’t have the same level of adjustability.
Either way, grab yourself a quality rope, and toss it in the ol’ gym bag, so you’ve always got it hand.
Sample Jump Rope Uses
For Warming-Up
Take 5 minutes or set a number of jumps (200) as your goal before moving onto the rest of your dynamic warm-up. Jumping rope primes the nervous system, increases core and muscular temperature, and conditions the tissues of the lower body for explosive activity.
It shouldn’t be exhausting, but enough to get your heart racing, calves bumpin’, and mind ready for the workout ahead.
Simple skips are best:
Using the Jump Rope for Calf Training
If your legs are dwarfed by those of a Flamingo, you’re not alone. And jumping rope will help. High volume, high frequency, and high loading are three obvious ways to speed up muscular development of any muscle group.
As mentioned previously, calves are conditioned to a lot of volume from everyday tasks like walking; so regular hops over the rope aren’t the best use of your time. Instead, incorporate the jump rope as a warm-up tool and then add in single leg countdown skips for greater muscular tension and growth.
Wanna super charge it? Combine this with a dedicated calf specialization program and you’ll start carving an impressive pair of calves, stat.
Single Leg Countdown Skips
Start with 10 hops on your right leg, perform them all in a row and move directly to 10 hops on your left. If you miss, just pick up where you left off and continue all the way to 1. Start with two sets and add one set each week for the next six weeks.
Jump Rope Conditioning
The jump rope allows you to get creative as a conditioning tool. Because it’s low impact with low stress on the joints, it’s a fantastic addition to density training circuits as a back-end exercise.
The neural demands are light enough that it won’t overly fatigue the nervous system and hinder training results with big-bang exercises like deadlifts.
As a stand alone conditioning implement, Double Unders and the Runnin’ Man are my two go-to conditioning drills with each being performed twice per week with at least 48 hours between workouts.
Here’s how they break down:
Double Unders
Just like it sounds – whip the jump rope two times in a row with one singular jump. Work up to sets of 10 and use a lighter rope. Rest 30-60 seconds and continue for 10-15 minutes or until your lungs and calves explode, your choice.
Runnin’ Man
Just as it sounds, run in place while skipping the rope. Not only will this improve your coordination, it’s a deceptively tough conditioning workout. Go for time and work up to 10-15 minutes of continuous “running.”
The impact is far less than your traditional steady state cardio or plodding along on the treadmill.
Jumping Rope for Active Recovery
Take 10 minutes; throw on some jams, and go to work with any of the above workouts. Even working at higher intensities won’t be enough to hinder your recovery unless you’re very deconditioned.
Stick with single skips, get in a light sweat, and finish off with some mobility work. Don’t make it complicated, just get it done.
The following is a Complete Jump Rope Workout Program written by Dan Witmer, the Jump Rope Dude, fromJump Rope Dudes.
Jump Rope Workout Program
I put together a 4-week jump rope and bodyweight challenge to get you on track to making exercise more fun and your body leaner. Each week the workouts get progressively more difficult, so make sure to start with the beginner workouts in Week 1 and move up to advanced – only if you are capable.
The workouts are progressive in nature, so whether you are a beginner or advanced, you are going to want to start on week 1. The workouts are set up in such a way that, in most cases, you’ll alternate a jump rope exercise with a bodyweight exercise.
The program asks you to perform 3 days a week of training with the jump rope and your bodyweight. This leaves you 4 days to play with as far as programming goes.
If you are a beginner, I would suggest a light recovery or rest day until your work capacity increases. If you are advanced, you could use these 3 days as your recovery/work capacity days in between your hard training/weight lifting days.
After the fourth week, take an off-week to allow the body to recover, then repeat the program again.
Week 1: Day 1
Week 1: Day 2
Week 1: Day 3
Week 2: Day 1
Week 2: Day 2
Week 2: Day 2
Week 3: Day 1
Week 3: Day 2
Week 3: Day 3
Week 4: Day 1
Week 4: Day 2
Week 4: Day 3
Advance Your Training with Onnit Academy On Demand
When your 4 weeks of the Jump Rope Juggernaut Plan are over, you need to sign up forOnnit Academy On Demand! If you enjoy the knowledge, experience, and programming of The Onnit Academy…it is now available On Demand.
With Onnit Academy On Demand, you can access the world’s greatest fitness professionals anytime, anywhere, for one low monthly price. Whether you’re a professional trainer, a fitness enthusiast, or just looking for a new routine, we’ve got you covered.
The program contains 2 different video channel packs, The Master Coaches Channel Pack, and The Legends of HQ Channel Pack.
Each of these packs gives you access to 6 top fitness professionals offering their own unique 4 week training programs targeted towards specific goals and techniques. Every 4 weeks, these trainers will introduce a new 4 week program expanding your library and allowing you even more fitness programming options.
]]> https://www.onnit.com/blogs/the-edge/new-year-s-resolution-series-12-week-fat-loss-workout-plan-for-new-year2025-07-10T10:55:17-05:002025-08-15T12:38:44-05:00New Year’s Resolution Series: 12-Week Fat Loss Workout Plan for 2025Jeremy GottliebBefore you begin reading this, let’s get one thing straight: This is NOT your average New Year’s weight-loss workout program. We’re not interested in simply getting youabsand leaving it at that. Onnit is aboutTotal HumanOptimization—not training hard just to “tone up” a bit, only to fall off the wagon in six weeks or so (as you know you’ve done in the past).
Conventional physique programs thatfocussolely on building your muscles and “blasting your abs” only take you so far. Sooner or later your back hurts, your knees ache, you plateau on your exercises, and you wonder what all your hard work is for.
And then what happens? You quit. Time passes, you feel guilty, and you tell yourself you’ll start again in the New Year and give it all you have.
Well, it’s 2021, and it’s high time you stopped making the same mistake.
You CAN have abs, and athleticism, and greater overall health andfitness—without spending considerably more time at the gym—by taking an optimized approach.
Our approach.
Take on our 12-Week Fat Loss Workout Plan, and you’ll not only get in the best shape of your life but know how to keep that shape for the rest of your life.
Who Is This Fat Loss Workout Plan For?
The former athlete looking to get back into fitness, or men and women who have been working diligently for months (or years) but are disappointed with their results. These workouts consist primarily of body-weight exercises, but don’t read that as “easy.” Even an experienced and especially strong lifter will be humbled by them.
What This Fat Loss Workout Plan Will Do For You
You know the conventional approach to getting ripped all too well. Hit one or two body parts at a time, do three sets of 10 reps, isolate the muscles, blah blah blah.
We don’t mean to knock those methods and they certainly have their place, but we feel they present a very one-dimensional view of training, and they limit the potential of what your body can do and even how it can look.
Have you noticed how guys who blast their chests tend to end up with bad posture? How lots of bench pressing hurts your shoulders and crunches make your lower back sore? And it’s probably occurred to you that spending a whole day training yourarmsmeans you’ll need to spend another on your back, another on your legs, another on your deltoids¦ It gets awfully time-consuming, and what good is having a great body if you never have time to do anything else with it?
We say: scrap all that. Start training your body like the integrated system that it is rather than a disjointed collection of parts, and you’ll see better, faster results without side effects.
1. Improved Mobility
First, you need to work to offset the muscle imbalances and limited range of motion you’re no doubt suffering from (perhaps without even realizing it) due to living in the modern world. Only then will you be able to get the best results—from our program or any.
Onnit’s workouts don’t begin with the “first exercise.” The days of doing a few shoulder circles, cracking your knuckles, and loading up the barbell right away in your workout are over. Today, smart coaches know the value of doing a thorough joint mobility warmup first. Each session, we ask that you take five minutes to do a series of mobility drills including neck glides, Egyptians, and lateral hip rooting (shown below). It’s designed to help correct the problems that result from sitting in front of a computer screen, driving in a car, and other activities that tighten the hips and weaken the upper back andcore.
This warmup will prepare you to perform the exercises in the main workout more efficiently. It will improve your ranges of motion, and help to prevent injury when you start loading up heavy weights and blasting through circuits—don’t skip it.
2. Strength, Muscle, and Fat Loss
Second, we want you to work the whole body each session, which burns more calories and activates more muscle than body-part splits (much of it in your core). This will automatically have you training each muscle group more frequently. The more often you can train a muscle the faster it will grow, provided you can recover from the previous session. Short, intense, frequent workouts allow you to train hard, recover well, and make gains fast.
The workouts feature a strength superset, which serves as your “meat and potatoes” training—the work that will give you the majority of your results by challenging your muscles with heavy loads that tax your whole body. It’s worth noting that we’ve built some mobility in here as well: we opted for theRomanian deadliftbecause it’s safer for the lower back than the conventional version, and teaches you to hinge at the hips properly—a fundamental movement skill. This is paired with the dumbbell pullover, which opens up the lats while sparing the elbows, which are often irritated by chinup exercises.
In Workout B, you’ll focus on hanging from a bar in the bottom of a pullup position. Simply holding on and letting your own body weight stretch you is enough grip and core training to qualify as serious strength work, and you’ll see what it does for your ability to do full range pullups down the road.
After the strength superset, you’ll hit a conditioning circuit, in which you’ll perform a series of body-weight exercises that will burn calories and force you to stabilize your body in ways that you can’t while lifting weights. You’ll do as many rounds as you can in 20 minutes one week and Tabata intervals the next. It puts conventional cardio to shame.
3. Better Gains Long-Term
Lastly, you’ll use a decompression circuit (“cool down”) to end each session. This consists of static and dynamic stretches (downward dog, hip flexor stretch) that pull the tension out of your muscles to promote recovery and further improve mobility. As with the warmup, it only takes five minutes, and will help to re-acclimate your body to life outside the gym, and keep you healthy and fit to train for as long as you choose to.
Directions
The program goes for 12 weeks. The workouts for Part 1—Weeks 1–4—appear here (come back in February for Part 2). While the exercises for the first four weeks remain the same, the way in which you perform them will change slightly on a weekly basis. See the “notes” on each week at the bottom of the page.
Perform each workout (Workout A and B) twice per week. An ideal schedule would be to do A on Monday, B on Tuesday, rest Wednesday, do A again Thursday and B Friday. Perform some kind of light recreational activity (walking, biking, swimming, sports, etc.) the remaining days of the week. Repeat the cycle for four weeks.
Begin each workout with the prescribed mobility warmup, and then do the strength superset, conditioning circuit, and decompression.
Each workout should take 45 minutes or less.
For a nutrition plan to accompany the workouts,CLICK HERE.
Fat Loss Workout A
Mobility Warmup
Perform 5 reps of each exercise (on each side, where appropriate) in sequence. Repeat the series for 3 total rounds.
A. Forward/Backward Neck Glide
Stand tall with soft knees and tuck your tailbone slightly so your hips are level with the floor. Think “proud chest,” drawing your shoulder blades back and down. Brace your core and place your hands on your belly to draw awareness to any movement in your torso during the drill (there shouldn’t be any), and slowly extend your neck straight forward. Avoid tilting your head up or down—move it forward as if it were sliding on a straight path. Go as far forward as you can and then retract your head straight back until you feel you’re making a double chin.
B. Double Backward Shoulder Roll
From the same tall standing position described above, allow your arms to hang at your sides and begin rolling your shoulders backward. Make big circles, moving only at the shoulders, drawing them back, down, forward, and up again. Move your shoulders as far as you can in each direction.
C. Egyptian
Raise your arms out 90 degrees, actively reaching them apart as far as you can. Rotate purely at the right shoulder, twisting yourarmso your palm faces behind you. Allow your head and torso to rotate to the left as you twist. Unwind your right arm and repeat on the opposite side.
D. Lateral Hip Root
Stand with feet between hip and shoulder-width apart and tilt your pelvis backward. Keeping a “proud chest,” drive your hips back to one side, allowing your knees to bend as needed. Bend as far as you can, reaching your arms out straight for balance. Squeeze your glutes and tuck your pelvis back under as you come back to standing and repeat on the other side.
E. Hacky Sack
Bend one knee 90 degrees and raise that leg up so your thigh is parallel to the floor. Keep your balance and rotate your lower leg in toward the midline of your body as far as you can. Reverse the motion and rotate the leg outward as far as possible.
Strength Superset
Complete one set of 1A and then 1B before resting.
1A.Romanian Deadlift Sets:4 Reps:8 Rest:0 sec.
Place a loaded barbell on a power rack or mats so that it’s at about mid-thigh level. Grasp the bar with a shoulder-width grip and pull the bar out of the rack so it hangs at arm’s length in front of you. Step back a few feet to clear the rack and stand with feet between hip and shoulder width apart.
Imagine screwing your feet into the floor—twist them out and apart—but not to the point where they actually move. Just activate the muscles on the sides of your hips and feel the tension you’ve created in your lower body. Take a deep breath into your belly and draw your shoulder blades back and down (think of Superman pulling his jacket open to reveal the “S” on his chest). Tilt your hips back.
Begin lowering your torso toward the floor, pushing your hips back as far as you can until you feel a stretch in yourhamstrings. Allow your knees to bend as needed. You should feel your weight on your heels.
Keep your spine long from your head to your pelvis. As you bend, keep the bar pulled into your legs the entire time, firing the muscles in your back and keeping a “proud chest” position.
When you’ve gone as far as you can safely, squeeze your glutes to come back up to standing.
1B.Dumbbell Pullover Sets:4 Reps:10 Rest:120 sec.
Hold a dumbbell by one of its bells with both hands and lie back on a bench, suspending the weight over your chest. Take a deep breath and begin lowering the weight behind your head while keeping your elbows straight.
When you feel a stretch in your lats, pull the weight back up to the starting position using your back muscles.
Conditioning Circuit
Perform the following exercises back to back for 20 minutes. Do not rest in between exercises; work at your own pace. Complete as many rounds (exercises 1A–1D) as possible without stopping and record the number you complete. Try to beat this number in Week 3.
Stand with your feet between hip and shoulder-width apart and toes turned out slightly. Look straight ahead, take a deep breath, and screw your feet into the floor as you did in the Romanian deadlift.
Drop down as if sitting in a low chair, spreading your knees apart as you descend. Go as low as you feel comfortable while keeping a long spine from your head to your pelvis—your head, back, and hips should form a straight line and your torso should be very vertical. Your knees should line up with your big toes. Drive through the middle of your feet to stand back up.
1B.Pushup Reps:10
Place your hands on the floor at shoulder-width apart and extend your legs behind you in a straight line. Your feet should be about hip-width apart. Breathe into your belly and brace your core. Pull your shoulder blades down and together.
Think about twisting your hands into the floor to create tension in your shoulders. Begin lowering your body toward the floor by pulling yourself down with your upper back. Stop when your chest is about an inch above the floor and press back up, continuing to push until your shoulder blades are spread wide apart.
1C.Bicycle Crunch Reps:10 (each side)
Lie on your back on the floor and clasp your hands behind your head. Extend your legs in front of you. Crunch your torso off the floor and twist to your left while simultaneously raising your left knee to your chest until your knee and elbow meet. Lower your torso and leg and repeat on the opposite side. You’ll look like you’re pedaling a bicycle. Each twist is one rep.
Get into pushup position and draw your right knee up to the outside of your elbow, pulling the leg inward while driving the arm out so they touch each other firmly. Drive it back and bring the other knee up. Alternate in a steady rhythm (each knee drive is one rep). Keep your core engaged and resist any rotation at the shoulders or hips. Fight to keep your “proud chest” position—try not to let your upper back round forward excessively.
Decompression
Perform each exercise for 60 seconds (30 seconds per side where appropriate).
A. Standing Forward Fold
From the tall, “proud chest” position, bend your hips back and reach behind your ankles. Pull your legs toward you with your arms while simultaneously trying to extend your hips. Keep the tension and feel your lower back open up.
B. Kneeling Hip Flexor Stretch
Kneel on the floor in a lunge position and stack your head and spine directly over your hips. Allow your front knee to drive forward but maintain your upper-body position. You should feel the stretch in the front of your trailing leg. As your hip opens, allow your knee to drift further forward and your hips to stretch more deeply.
C. Kneeling Inverted Pushup Hold
Get on all fours and rest the backs of your hands on the floor directly underneath your shoulders. Keep a “proud chest” position with your spine and hips aligned as you straighten your elbows to feel a stretch on your wrist extensors (in the forearm). Turn yourbicepsto face forward and hold the position.
D. Downward Facing Dog
Get into a bear crawl position with hands on the floor at shoulder-width apart. Push your feet and hands into the floor to raise your hips into the air. Allow your knees to bend as neeed to keep your head, spine, and hips aligned. Hold the position while actively driving your hands into the floor.
E. Floor Scorpion
Lie on your chest on the floor and spread your arms out 90 degrees. Bend your left leg and drive it up off the floor and over behind your right arm. Plant it flat on the floor and drive it actively into the floor so you feel a stretch in your hips. Allow your shoulder to come up as you turn but try to drive it back down.
Note that the way in which this workout is done changes slightly week to week. Above is what you should do for Week 1. See the “notes” on the bottom of the page for instructions on Weeks 2–4.
Fat Loss Workout B
Mobility Warmup
Repeat the warmup from Workout A.
Strength Superset
Complete one set of 1A and then 1B before resting.
1A.One-Arm Dumbbell Row Sets:4 Reps:8 (each side) Rest:0 sec.
Hold a dumbbell in one hand and rest the opposite hand and knee on a bench. Think “proud chest,” drawing your shoulder blades down and together, and row the weight to your side until your upper arm is in line with your torso. Complete your reps and repeat on the opposite side.
1B.Pull-up Bar Hang Sets:4 Reps:Hold as long as possible Rest:120 sec.
Grasp a pullup bar with hands outside shoulder width and palms facing away from you. Draw your shoulder blades down and try to pull them together. Pull your ribs down. Think about keeping your head, spine and hips aligned and making your spine as long as possible. Hang from the bar as long as you can.
Conditioning Circuit
Perform the following exercises back to back for 20 minutes. Do not rest in between exercises; work at your own pace. Complete as many rounds (exercises 1A–1D) as possible without stopping and record the number you complete. Try to beat this number in Week 3.
1A.Split Squat Reps:10 (each side)
Lunge forward with one foot so your feet are staggered. Keeping your torso upright, lower your body until your rear knee nearly touches the floor. Come back up. Complete all your reps on one leg and then switch legs and repeat.
1B.Twist And Sit Reps:10 (each side)
Get into a bear crawl position—on the balls of your feet with your knees under your hips and hands under your shoulders. Rotate your body to the right, pivoting on your right foot and turning until your left hip can touch the floor—hold for a moment and feel the stretch. Reverse the motion and repeat on the opposite side. Keep your shoulders square to the floor the whole time.
1C.V-Up Reps:20
Lie on your back on the floor and raise both hands behind your head. Extend your legs. Take a deep breath and brace your abs. Sit up all the way, raising your legs simultaneously. Your body should form a V shape at the top.
Sit on the floor with hips and knees bent 90 degrees and feet flat. Twist your torso to place your left elbow inside your right thigh and rest your right arm on the floor behind you. Think “proud chest” and take a deep breath. Brace your core.
Drive through your heels and bridge your hips up until your body forms a straight line from your head to your knees. As you rise, reach your left arm to the ceiling. Reverse the motion and repeat on the other side. Both sides equals one rep.
Decompression
Repeat the cool down from Workout A.
Note that the way in which this workout is done changes slightly week to week. Above is what you should do for Week 1. See the “notes” below for instructions on Weeks 2–4.
Week 1 Notes – Set Your Pace:
Don’t compete with yourself too hard this week. Your main goal is to determine what loads to use and make sure your form is precise. If you have to reduce the weight you’re using between sets, so be it. Keep a log, recording the weights you use and how the workouts feel. In a few weeks, you’ll be able to look back and see how far you’ve come.
On the conditioning circuit, try to find a comfortable pace that allows you to keep moving for the full 20 minutes. If you need to take breaks because your muscles are fatigued, take note of which body parts are fatiguing faster than others. If it’s your lungs that need the break, slow down and focus on breathing between each rep of every exercise. You’re welcome to perform your reps with a bit more time in between them. Each rep should be done with crisp technique. You will be able to pick up the pace each week.
Week 2 Notes – Compress The Workload:
Now that you’ve found the appropriate weights to use for your strength exercises, aim to get the same amount of work done with them in less time.
The rest period at the end of the superset now drops to 90 seconds.
This can have a significant effect on how you feel in the last few sets, so make sure not to increase the loads you’re using until you’re sure you can complete all the prescribed reps for them while respecting the rest time.
The format of the conditioning circuit changes too.You’ll now perform each exercise not for reps but for time. You’ll work for 20 seconds and then take 10 seconds off (you may know this as the “Tabata Protocol”)and repeat for 8 total sets before moving on to the next exercise. Note that, technically, this is not a circuit anymore but straight sets. For example, you’ll dosquatsfor 20 seconds, then rest 10, and repeat for 8 sets. Then you’ll go on to do pushups, bicycle crunches, and mountain climbers in the same fashion. Rest one minute between exercises.
This change-up will increase theendurancedemands on your muscles dramatically, so be sure to do your reps at a conservative pace. Make note of the reps you can do each set for each exercise. Afterward, add the lowest score of all your sets for each movement. This is the number you want to beat the next time.
Week 3 Notes – Turn Up The Volume:
This week returns to the format used in Week 1.
The strength supersets will continue to be done with 90 seconds rest but the number of sets will increase.Do 5 sets each for the pair.
One set may not sound like much but it represents a 25% increase in workload. It should feel substantially different than last week even if you use the same weights.
The conditioning circuit returns to reps instead of work and rest intervals, and you’ll complete as many rounds as possible in 20 minutes again. Try to beat the number you recorded in Week 1.
Week 4 Notes – Test Yourself:
Reduce the rest for the strength superset to 60 sec. Perform the conditioning work as a Tabata again and try to increase your score by one rep on every exercise.
]]> https://www.onnit.com/blogs/the-edge/the-best-medicine-ball-workouts-and-exercises-for-getting-fit2025-07-10T10:55:17-05:002025-08-15T08:59:25-05:00The Best Medicine Ball Workouts and Exercises for Getting FitJeremy GottliebMedicine balls aren’t just one of the most versatile tools in the gym, they’re also perhaps the oldest, long predating even the idea of a gym itself. Med balls have been part of strength andfitnessculture for thousands of years, dating back to when the famed ancient Greek physician Hippocrates allegedly had his patients toss stuffed animal skins for “medicinal” purposes.
Everyone from PE students to elite athletes can safely use a weighted ball to get a variety of training effects, including power, strength, and stability, and the medicine ball can let you move and express force in ways that aren’t practical or even possible with dumbbells,kettlebells, or any other implement. It’s also great for taking your training outside on a warm day (always a nice change from a dank, dark, and musty gym). Here’s what you need to know to get in great shape using medicine balls, including a sample fat-burning and conditioning workout from an Onnit Master Trainer.
Benefits of Using a Medicine Ball in Your Workout
The medicine balls you’ll find in most gyms range from just a few pounds to around 20, so, clearly, trying to use one to build maximum strength would be chasing the wrong ball. But that doesn’t mean med ball training isn’t bad ass. It’s easy for a beginner to see the limited loading potential of the medicine ball as a drawback, but it’s really an asset. “Medicine balls are best for developing power along with strength,” says Juan Leija, General Manager of Onnit Gym in Austin, TX. That is,they help train you to explode, so you can use the muscle strength you build with other types of equipmentin a way that translates to better athletic and real-world performance.
As with practically any other type of ball, the medicine ball is designed to be thrown. And just as you can’t throw a big, heavy rock very fast or far, a modestly-weighted medicine ball is going to let you generate a lot more power than a heavy dumbbell/barbell/kettlebellwill (and yeah, it will also land more softly and safely, too). But if medicine balls are so great for power development, then what are the Olympic lifts—power cleans and snatches—good for?
Clean and snatch variants can certainly build power, but they’re difficult to learn and are risky to perform—especially for older exercisers, or those who don’t have a background in them. Trying to do explosive exercises with a barbell also doesn’t let you produce the maximum amount of force,because you must decelerate the bar at the end of the range of motion (otherwise, it will fly out of your hands).You literally have to put the brakes on. Throwing a med ball, on the other hand, allows you to let go—of the ball, and the braking mechanism that limits your power.
Furthermore, the medicine ball lets you express power in different movement paths than you have access to with Olympic lifts. Specifically, you can take advantage of rotation, which conventional lifting practically ignores.
“If someone is starting off with med ball training, I like having them do med ball slams,” says Leija, lifting the ball overhead and then smashing it into the ground with a downward throw. “I also have clients do some kind of rotational work—maybe a rotating punching motion, or tossing the ball into a wall that you’re not going to make a hole in.” Exercises like this can help develop better throwing and punching power, if you’re an athlete or martial artist, but Leija says they’re also a great choice for anyone to use near the start of a workout to prepare the central nervous system (CNS). Explosive movements sharpen the CNS’ ability to recruit muscle fibers, and they can actually help you feel more alert and focused for the session ahead.Try two to three sets of three to five reps after you’ve warmed up,and before you do any full-body or upper-body lifting.
The flip side to developing explosiveness is the ability to absorb and redirect force, an important skill for any athlete. In other words, medicine balls can train your body to dish it out, but they can also train you to take it. Throw the ball to a partner and have him/her throw it back to you (or throw it against a wall so it bounces back) and catch it. From there, you can toss the ball back, in another direction, or slam it down. If this sounds similar to how you move during a basketball or football game, you’re starting to see how med balls can improve your athleticism.
Sometimes you don’t even have to lift a medicine ball at all to get some use out of it. It can act as an unstable surface that you balance on. Doing pushups with one or both hands on a ball (or balls) can make your rotator cuff muscles work harder, helping to strengthen your shoulders and prevent injury. You can put your heels on one or more balls and do glute bridges orhamstringcurls to build stability in the hips andcore.
“Medicine balls are great for exploring movement,” says Leija. Unlike machines, which choose your path of movement for you,medicine balls lifts—throws, chopping motions, rotations, etc.—let you move in big, arcing, three-dimensional rangesthat your body is free to explore safely. There’s virtually no free-weight exercise that you wouldn’t risk injury on if your form slips a little bit, but thanks to the light weight, breaking form on medicine ball exercises isn’t especially dangerous. In fact, it can even be advantageous. “No lift is ever going to be perfect,” says Leija. “Every med ball rep you do is going to be a little different—just like when you pick up a box off the ground, it’s never perfectly balanced.” Medicine ball training prepares your body for the asymmetries and instabilities of real-world activity, so, Leija says, “it gives you a functional kind of fitness training.”
Do Medicine Balls Help you Lose Weight?
Busting out a well-designed med ball circuit two to three times a week (scroll down for an example), or working some athletic medicine ball exercises into your program can help you shed some body fat, but don’t count on this medicine being the only prescription you need to be healthy. Any kind of exercise regimen has to go hand-in-hand with dietary changes if you want to get leaner.
“The problem with simply using exercise to lose weight is that even the longest, sweatiest workouts only burn a few hundred calories,” explains nutritionist, powerlifter, and competitive kickboxer Paul Salter, RD (thepaulsalter.com). “If sustainable long-term fat-loss is your goal, then eating less—and eating better—is the only way to make it happen.”
What Muscles are Used with Medicine Balls?
The most popular medicine ball movements all place great demands on the muscles of the core, including not only the rectus abdominis, or “six-pack” muscle, but also the obliques and the deep core muscles like the transversus abdominis. Not sure where these muscles are? Do some rotational movements like side tosses, punch-throws, or simply tossing around a med ball with a partner, and you’ll feel them the next day.
But another upside to medicine ball training is thatit demands that a wide range of muscles work together, and that makes you a more coordinated, more powerful athlete overall.An overhead medicine ball slam, for instance, uses not only the muscles of the core, but also the hips, lats, shoulders, and even the calves andarms—all in a movement that takes about a second to perform.
In the case of movements where you hold a medicine ball in front of your torso, like cleans, punches,squats, wall balls, or lateral lunges, the postural muscles of the upper back will also get a sneakily hard workout just from keeping you upright while in a range of positions. This is especially true of exercises done with heavier medicine balls, such as cleans that simulate picking up an Atlas stone (a strongman exercise).
Medicine Ball Exercises
The following moves are Leija’s picks for trainees that are new to medicine ball work. They can be performed for reps, or time (for instance, do as many reps as you can in a minute). If you want to maximize power output, choose a 5–12-pound ball and keep your reps under 10 tofocuson moving the ball as fast as possible. Rest as needed between sets to ensure recovery. To get more of a calorie-burning,endurance-boosting effect, string some exercises together as a circuit and perform them for higher reps.
The slam is a full-body expression of power unlike anything else you’re allowed to do in a commercial gym, and it can work equally well as a CNS-priming warmup, an explosive power-boosting drill, or part of a conditioning circuit. (Just watch that rebound so you don’t catch a ball to the grill. It happens more often than you think.)
“The slam is actually a great way to work on hip hinge mechanics as well,” Leija says. “A lot of people think it’s all in the arms, but the power comes from the hips. Make sure that core is engaged, get your hips back, and generate power from there.”
Directions
Step 1.Stand with feet shoulder-width apart and hold the medicine ball with both hands in front of your chest.
Step 2.Raise the ball overhead, bending the elbows as you come up. Keep your ribs pulled down and your pelvis level with the floor by bracing yourabs. You may come up on your toes as you reach to gather momentum.
Step 3.Explosively reverse the movement, bending your hips back while keeping your spine long. Slam the ball into the floor between your feet, and catch it on the rebound. Use the momentum of the ball rising to begin the next rep.
Tip:throw the ball like you mean it, with as much force as possible. “One of my favorite cues is to slam the ball like someone pissed you off,” Leija says. “For some reason, that always works.”
2. Medicine Ball Russian Twist
Twisting exercises train rotation, a much neglected movement pattern that’s essential for power development and overall stability. They can be awkward to perform with most other training implements, but the medicine ball makes them feel as natural as passing a basketball.
Directions
Step 1.Sit on the floor and hold the medicine ball between your hands in front of your chest. Raise your torso and legs into a low V shape, keeping the knees bent and heels slightly off the floor.
Step 2.Twist your torso from side to side, tapping the ball to the floor on each side. Keep your eyes pointed forward, and squeeze the ball between your hands throughout the motion.
Tip:You can bend your arms more to make the exercise less challenging, and extend them fully to make it harder. “And try to keep your feet from moving all over the place,” says Leija. “That will help keep the core engaged.”
3. Medicine Ball Pushup
The addition of a ball can make an already excellent strength exercise even better. Your chest, tris, and abs will all work harder, and, as an added bonus, you may find that gripping the ball is easier on your wrists than doing pushups on the floor. The conventional pushup position shoves the wrists back into extension, which can lead to pain and injury.
Directions
Step 1.Place your hands in a neutral (palms facing in) position on the top half of the medicine ball. Point your fingers toward the ground and grip the ball hard. Extend your legs behind you and set your feet between hip and shoulder width. Tuck your pelvis slightly and brace your core, so your body forms a long, straight line, from your head to your heels.
Step 2.Lower your body until your chest touches the ball. Try to squeeze the ball throughout each rep to limit instability and maximize tension on the chest muscles.
Advanced variation: Medicine Ball Alternating Pushup
Placing one hand on the ball for pushups increases the stability challenge, and helps you identify which side is weaker. This is a smart “level 2” to step up to when regular pushups start feeling easy. It can also work as a step toward mastering the one-armpushup.
Directions
Step 1.Place one hand on top of the medicine ball and the other on the floor approximately shoulder-width away from the ball. Set your feet at about shoulder-width and get into a pushup position.
Step 2.Perform a pushup, lowering your torso until your chest is about level with the ball. As you press back up, switch hands on the ball and step your feet laterally to the other side of the ball.
Step 3.Perform another pushup on the other side of the ball.
Tip:Don’t attempt plyo pushups too soon. “Lots of people try to do explosive pushup variations using a med ball right away, but their regular pushups are kinda iffy,” Leija says. “I like to make sure they own the pushup on top of the ball before we progress to anything more complicated, like moving side to side.”
4. Medicine Ball Clean
We already explained why a light medicine ball is a great training tool, but a heavy one can be as well. Some medicine balls (such as theProSourceFit Tread Slam Ball, shown here) weigh between 50 and 200 pounds or more to help simulatestrongman trainingand present a harder challenge for grip strength and conditioning. The closer the ball’s weight gets to triple digits, the more you have to hug the ball to control it, so doing cleans with a heavy ball is an awesome full-body exercise.
But no matter the weight you use, lifting a ball from the floor to shoulder level places immense demands on the hips, grip, core, and upper back. After you’ve cleaned the ball, you can press it, carry it, or toss it back down and clean it again—all movements Leija says he has used to great effect with athletes.
Directions
Step 1.Place the med ball on the floor and stand behind it with your feet just outside shoulder width. Turn your toes out slightly.
Step 2.Hinge your hips back, keeping your spine as neutral as possible, and grasp the bottom half of the ball.
Step 3.Keeping your spine long and your lower back flat, use your legs and hips to power the ball off the floor and up to your chest. If it is a light ball, you can clean it to chest level in a single motion. A heavier ball may require you to rest it on your legs momentarily, reposition your hands, and hug it to lift it, or, you can lift it a few inches, and re-grip it in mid air, as Leija does here. Once you’ve got the ball up, drop it back to the floor between your feet.
Tip:“Picking up a ball from the ground requires kind of a squatty deadlift motion,” says Leija, “so think of it like a hinge: really engage the core, and drive power through the floor using your hips. Then, just get the ball up!”
5. Medicine Ball Skater Lunge
Lateral jumps are a staple movement in Leija’s training arsenal, he says, and he always likes to start athletes off with an unweighted version. But once they can do it properly, Leija likes to add a medicine ball to the movement, held in front of the chest.
The ball not only adds extra resistance, it intensifies the need for stability and reaction time. Skater lunges are excellent for athletes who have to corner or change directions quickly in their sport, but they can help anyone learn to control his/her body in motion, as well as coordinate multiple muscle groups in multiple planes of motion at once.
Directions
Step 1.Hold a medicine ball in front of your chest with feet around shoulder width. Lift one leg and hop to that side, landing farther than shoulder-width away. Let the medicine ball cross your body, and allow your rear leg to drift behind your front leg. Make the landing soft.
Step 2.Use the rebound effect to help you spring back to the other leg. You should look like an ice skater pushing off his/her leg to propel forward.
Tip:“Don’t keep the ball too close to your body,” Leija says. “Hold it out in front of you with your arms somewhat extended.” Not only will this make both the core and the postural muscles of the upper back work harder, it will also allow you tosquatslightly deeper into the working leg and rebound more powerfully.
6. Medicine Ball Burpee Slam
This is one case where the weighted version of a movement is actually better and safer than the more popular bodyweight version. The reason is one that’s clear to anyone who has ever winced while watching an exhausted group class gut out burpees when they were running on fumes.
“That pushup position can get pretty shady for a lot of people,” says Leija. Not only does form degrade with fatigue, leading to sloppy, ineffective pushups at the bottom of each burpee, but repeatedly jumping the legs back and landing hard on the wrists is asking for injury.The squat form people typically use to lower themselves close to the floor is no picnic either.Most folks will round their lower backs, setting up a low-back injury.
“With the ball, you don’t have to go all the way to the ground,” says Leija. “You have something that keeps you a little higher.” The range of motion may be shorter, but the exercise is much easier on the joints—even when you’re smoked and having trouble keeping form. The med ball burpee slam is also just a great way to keep it spicy in the gym. “It makes people feel good that they can do something that looks cool,” says Leija, “but is also pretty effective.”
Directions
Step 1.Place the medicine ball on the floor and stand behind it with feet shoulder width. Squat down and squeeze the sides of the ball while youjumpyour feet out behind you and land in the top position of a pushup.
Step 2.Perform a pushup on the ball, and then jump your feet back up to the sides of the ball. In a single motion, lift the ball overhead while keeping a long spine and flat back, and then slam it to the floor. That’s one rep.
Tip:Don’t come crashing down onto that ball, or you might find yourself facedown on it! “When people are coming down, they have to really focus,” Leija says. “They’re like, ’Oh, I’ve got to land on that ball and make sure I control it before I drop down to my chest.’”
Full-Body Medicine Ball Workout
Perform this workout one to three times per week, either at the start or end of your regular workout, or on a separate day that you want to spend focusing on power and conditioning. (Do not perform it two days in a row.) Alternate sets of the clean and pushup, resting as needed between sets until all sets are completed.
1. Medicine Ball Slam
Sets:1 Reps:5–7
2A. Medicine Ball Clean
Sets:3–5 Reps:3–8 reps
2B. Medicine Ball Pushup
Sets:3–5 Reps:10–12
EMOM Circuit
Finish the workout with the following circuit. Start a timer and begin the Russian twist at 00:00. Do the prescribed reps on each side, and then rest for as much time as is left before the start of the next minute (01:00).
Go on to the burpee slam and perform it the same way, resting until the timer is at 02:00. Then go on to the skater lunge, and rest until 03:00.
]]> https://www.onnit.com/blogs/the-edge/how-to-do-the-kettlebell-windmill-exercise-like-a-pro2025-07-10T10:55:17-05:002025-08-15T09:06:57-05:00How To Do The Kettlebell Windmill Exercise Like A ProJeremy GottliebGoogle old-time strongmen and you’ll see one image come up again and again: A man in his underwear (or sometimes just a fig leaf) with a handlebar mustache hoisting a massivekettlebell(or barbell) overhead with one hand while his torso is bent almost 90 degrees to the side. It looks like the weight is so heavy it’s practically folding him in half, but the man clearly has control over it. That exercise is called thekettlebell windmill, and it’s not only a great show of strength and athleticism, it’s an awesome way to improve shoulder function and rehab your lower back—with or without a fig leaf.
Unlike barbells with globes on each end or gladiator boots, the windmill hasn’t been lost to history. Modern kettlebell practitioners still regard it as a cornerstone exercise due to its diverse benefits and applications. To understand the windmill, you have to first study up on the basic hip hinge movement.
A hip hinge is a fundamental movement pattern and lays the foundation for all the body’s major power moves. Keeping a long spine from your head to your tailbone,you bend your hips back until your glutes andhamstringsare stretched—this prepares them to shorten explosively, and when they do, you canjump, run, shoot, hit, or otherwise burst forward with tremendous power. (Picture any deadlift variation, aglute bridge, or a basic athletic “ready” position—they all feature a hip hinge of various degrees.)
Mastering the hinge also trains your body to use the strength and mobility of your hips to support your weight when you bend, as opposed to letting your lower back take the brunt of it, and that helps protect the back from injury.
A kettlebell windmill starts with a hip hinge,but rather than bend your hips straight back, you’ll bend them about 45 degrees to one side.This intensifies the stretch on your posterior muscles, one side at a time, while preparing you to move in the frontal (side to side) and transverse (rotational) planes as well as front to back—a boon to virtually any athlete, as sports require multidirectional movement.
On top of the hip hinge, you have to maintain the lockout position of an overhead press to complete a kettlebell windmill.Holding yourarmoverhead with a heavy weight in hand makes for a great challengewhen you begin to arc your body down into the hip hinge, and the combination strengthens everything from the shoulder through thecoreand hips.
Step 1.Hold a kettlebell with your left hand at shoulder level. Stand with your feet between hip and shoulder-width, and turn your feet 45 degrees to the right.
Step 2.Keeping your knees locked straight, kick your left hip out and back about 45 degrees, pressing the kettlebell overhead as you do so. Your spine should stay long and straight from your head to your tailbone.
You should now feel your left leg supporting the majority of your weight. Your shoulder should also be drawn down—don’t shrug as you press. There should be a significant gap between your head and your arm when the weight is overhead.
Step 3.Stand up straight. NOW you’re ready to really begin the windmill.Keep your eyes on the kettlebell throughout the movement.Kick your hip out again and begin hinging, pushing your hips back at that 45-degree angle as far as you can while maintaining that long spine position.
Drive your knuckles up toward the ceiling as you lower your torso down.STOP packing your shoulder down and let it move.Thinking about the movement as punching the ceiling will help create space in the shoulder joint that allows the rotation that lets you complete the movement safely.
Step 4.Slide your right hand down your right leg so it acts as a guardrail while you hinge. Lower your body as far as you can without losing your straight spine position—aim to touch the floor with your fingers (but if you’re new to windmills, don’t expect to be able to do this right away).
Step 5.To stand up straight again, drive up through your fist, imagining there’s a cord tied to it and it’s pulling you up.
Note that the windmill may be too hard to do with your knees locked. You may also have trouble keeping your arm overhead or achieving any significant range of motion.This is perfectly normal if you’re new to rotational training, so don’t be discouraged.Check out the Kettlebell Windmill Variations section below for alternatives that will help you build up to doing the classic windmill.
The kettlebell windmill is a strength program, rehab clinic, and anti-aging treatment all rolled into one. Here are the key selling points.
Lateral strength and mobility
“We lose lateral movement capacity as we age,” says Shane Heins, Onnit’s Director ofFitnessEducation. That is, our ability to move side to side declines, largely due to lack of use. Even if you’re a young buck, you may already notice that it’s harder for you to bend and twist and shuffle your feet laterally than it was when you were a school-age kid, and you have much less control over those movements than you do bending and flexing front and back. “Loss of this range leads to pain in the shoulder, low back, hips, and knees,” says Heins, because, when your movement is limited, some joints and muscles take on more load than they’re supposed to in picking up the slack for the parts that don’t move so well. Know someone who suffers from sciatica? They probably don’t move very well side to side.
Think about it like this: if your body can’t give an inch laterally, it’s going to have to work that much harder moving front to back, and that increases the risk for injury. Say you’re playing football and an opponent tackles you.Do you think you can absorb the hit better if your body can roll with the impact, or if you have to take it straight on because you’re too stiff to go with the flow?
As you’ll see when you practice it, the kettlebell windmill stretches the crap out of your sides, hips, core, and leg muscles, restoring some of the range that may be slipping away from you. With that restoration comes a greater capacity to move and express strength with movement.
Increased rotation
When you begin to open up your ability to move laterally, you improve your capacity for rotation as well. Proper twisting and turning generates power just as hip hinging does, so it promotes athletic performance, and it also takes pressure off the spine.
Better shoulder function
The shoulders have the most mobile joints in the body, but they’re also the most unstable. Balancing a kettlebell overhead while you contort your body underneath it requires your rotator cuff muscles to brace your shoulder hard to keep your arm in a safe position. As you develop stability, you’ll reduce your risk of shoulder injury, and establish a more solid foundation for strong overhead and chest pressing of any kind.
Slow the aging process
We’re not exaggerating. “As we age,” says Heins, “loss of access to overhead range of motion is one of the primary sources of ongoing decline.” Because we don’t play sports as often and gradually reduce our activity levels, we do less and less overhead reaching, “and not being able to reach overhead minimizes how often we extend our spine back and flex it laterally.” It’s a chain reaction that leads to less movement overall, and that in turn leads to a less active lifestyle and all the risks associated with a lack of activity (i.e., early death!).
The windmill, then, is pretty much an anti-aging hack, maintaining the skill of full shoulder flexion as well as hip hinging and lateral movement so that you remain mobile in 360 degrees, no matter how many years go by and where your fitness journey takes you.
What Muscles Do I Use When Doing Kettlebell Windmills?
It’s also not an exaggeration to say that the kettlebell windmill works darn near every muscle you own. Even your neck muscles must work in a stabilizing capacity. Here’s a list of the big (and some small) movers that you can count on to get trained by windmills.
Deltoids (shoulders)
Rotator cuff
Trapezius (upper back)
Rhomboids (middle back)
Lats (the big muscles on the sides of your back)
Triceps
Forearms
Core (obliques in particular, the muscles on the sides of yourabs)
The kettlebell windmill can be very challenging when you’re not used to hinging your hips at a funny angle. You probably won’t have the range of motion to do a full, strict windmill at first, but that’s fine. Some slight modifications will allow you to do the basic movement safely and still get most of the benefits. If the classic windmill isn’t working for you, start experimenting with these variations.
Do the windmill as directed above but allow both knees to bend as you kick your hip out. This will reduce the stretch on your side and give you more range of motion. As you come up, lock your knees out again.
Do the windmill as directed above but start by moving your arm away from your body (about 90 degrees, rather than straight in front of your torso). Now kick the hip out and—with straight knees or bent—begin to hinge while keeping the weight held strong.
The key here is to aim tokeep the kettlebell at the SAME HEIGHT as it was when you were standing with itat shoulder level. It’s your body that moves—not the bell. Bend your hips andfocuson getting under the kettlebell, rather than lifting it above you. Once your elbow is locked out, stand up straight. Many people can’t press overhead without compromising form, and the bent-arm windmill trains you to ease into an overhead position with good body mechanics.
Kettlebell Windmill To A Block
It’s important to standardize your range of motion on every rep you do. If you cut some reps short and go deeper on others, it’s very hard to know if you’re really progressing on the exercise. By placing a yoga block, bench, or mat on the floor at the lowest elevation you can reach with your free hand, you get feedback on your depth. Every time your fingers touch the surface, you’ll know you hit the optimal range of motion that’s available to you right now.
Don’t use the block to rest your hand. Just touch it at the bottom of each rep (while keeping your eyes on the kettlebell overhead). When you hit depth, feel free to adjust your hip and shoulder position if you need so the exercise feels right.
Half-Kneeling Kettlebell Windmill
If you have a lot of trouble controlling the kettlebell overhead or getting your hips to hinge, regress the windmill to a half-kneeling position.
Step 1.Kneel on the floor on one knee and bend both knees 90 degrees (basically, the bottom of a lunge). Turn the toes on your front foot in a few degrees, and turn your rear leg (the lower leg) about 90 degrees inward.
Step 2.Now kick your hip out and perform the windmill, reaching for the floor. The range of motion is much shorter, so you should be able to feel a good stretch in your hips and place your palm on the floor without much difficulty. When you’ve mastered this, go back to the variation with a block, and then move up to the bent-knee or bent-arm options before you try the full-range windmill again.
While that Google search we mentioned in the beginning will bring up pictures of strongmen using gargantuan loads on windmills, we don’t recommend pushing yourself that hard to start out (trust us: those guys didn’t either). The windmill is all about technique, so use a weight that’slight enough to allow you to perform several sets of 5–8 repsto start with, but is also heavy enough to give you feedback on your shoulder and hip position. In other words, you should use enough load to make you work and balance and get into the deepest range of motion you can comfortably control, but not go so heavy that you’re straining to get through the set. Heins says that, for men with little strength training or kettlebell experience, that probably means a kettlebell that’s 8–12 kilograms; 6–8kg for women.
More experienced men, however, may be able to handle 12–16 kilos, while lady veterans might take on 8–12 kilos.
Step 1.Stand with your feet hip-width apart. Bend your hips back at a 45-degree angle while raising yourarmsin front of you. Keep your feet flat on the floor and try to push into your hips enough that you really feel a stretch in the outer corner of your glute. The end position will look like you’re sitting on a high stool; you should have a soft bend in both knees.
Step 2.Extend your hips and row your arms back, as if pulling something toward you. That’s one rep. Repeat on the opposite side.
Step 1.Get on your hands and knees and sit back on your butt. Reach your arms out at a 45-degree angle to your left side—your right should be a little in front of your left.
Step 2.Keeping your elbow straight, roll your right arm so your weight is resting on the knife-edge of your hand, and sit your hips back as far as you can (do it gently) while you rotate your torso to the left. You’ll feel a deep stretch in your lat and arm. That’s one rep. Complete your reps on that side, and then switch sides and repeat.
Step 1.Extend your arms out to your sides 90 degrees with palms facing up. Shrug your right shoulder and turn your palm over, twisting your arm as if you were wringing out a towel. Add to the rotation by reaching and twisting the opposite direction with your other arm.
Step 2.Reverse the motion and repeat on the opposite shoulder. Over time, add more rotation by twisting your torso in the direction of the arm you’re working and actively driving your arms apart so that you feel a stretch between your shoulder blades.
]]> https://www.onnit.com/blogs/the-edge/hydrocore-bag-training-for-an-unshakeable-body2025-07-10T10:55:17-05:002025-08-15T08:48:44-05:00HydroCore Bag Training For An Unshakeable BodyJeremy GottliebBruce Lee famously likened a well-rounded martial artist to water. “Water can flow or it can crash,” he said. “Be water, my friend.”
If you want to build a stable, strong, and explosive body, the same advice applies, although perhaps a little more literally.The HydroCore Bagharnesses the power of water for a variety of training effects that you can’t get from conventional gym tools.
What Is The HydroCore Bag?
The HydroCore Bag is a training implement invented by Maurizio Tangari, a trainer toMMA fighters, military personnel, and celebrities. It was inspired by a similar tool, the Bulgarian Bag®, which is an evolution of a traditional training method used by old-time Eastern European wrestlers—carrying small farm animals across the back of the shoulders to develop functional strength, stability, andendurance.
Thankfully, in the wake of advancing technology—and animal cruelty laws—there’s no need to tote squirming livestock anymore. The HydroCore bag is here. A plastic bladder in the shape of a yoke—the harness that attaches to oxen and other animals—the HydroCore bag is loaded with water (while the Bulgarian Bag used sand®). When you lift it to perform any number of exercises (some of which are shown below), the water sloshes around in the bag. This creates an effect known as water dynamics. Controlling the movement of the water in the bag, rather than it controlling you, trains various athletic qualities.
What Are The Benefits of HydroCore Bag Training?
The HydroCore Bag is a formidable addition to anyone’s training arsenal, especially if you’re an athlete or martial artist. Here’s a rundown of what the bag can do.
Builds Rock-Solid Stability
As the water moves around inside the bag, it’s going to threaten any position you put your body in. To maintain control of the bag, your body alignment, and your exercise form, you’ll have to be hyper-aware of all three, and brace all your movements hard. As a result, you’ll develop tremendous stability and balance. “The bag forcescoreengagement without having to think about it,” says Tangari. “If I’m training you, I don’t have to constantly remind you to keep your core tight.” If it isn’t, you’ll feel yourself losing control during the set, which leads us to point number two.
Improves Exercise Technique
Performing exercises properly is the only way to progress on them indefinitely and stay injury-free. The HydroCore Bag all but ensures you use good technique on any movement you perform, because if you don’t, you’ll recognize it pretty fast. Performing dynamic moves like the pendulum are virtually impossible to do if your form is off, so you’ll be able to identify your mistakes and correct them immediately. In the pendulum, for instance, in which you swing the bag laterally, you’ll learn to move with the momentum of the water. If your timing isn’t right, the bag will be much harder to control. When you’ve got it down, the movement will flow, and you’ll know your form is good.
Better technique on bag exercises will also translate to better technique in other lifts you do, as your body awareness and stability improve.
“For any bag training you do,” says Tangari, “start by trying to prevent the water from sloshing.” Keeping the bag “quiet” will force you to move more deliberately and intentionally, maximizing stability. As you get more accustomed to how bag training feels, you can purposely shake the bag as you perform your lifts to create more perturbation that activates even more stabilizer muscles.
Boosts Strength and Explosiveness
The HydroCore Bag can be used for a wide range of movements, but it lends itself best to dynamic, explosive exercises like clean, snatch, and swing variations. The advantage to performing these kinds of moves with the bag versus a barbell is the offset load provided by the water and the bag’s shape. Rather than accelerate and absorb the force of a perfectly balanced implement (like a barbell), you have to accommodate the constant shifting of the water in the bag.This makes training a little more real-world and applicable to sports like football, MMA, and wrestling, where you have to overcome the opposing forces of a live, resisting adversary.
The bag is also durable enough that you can throw it—perfect for wrestlers or other grapplers who need to suplex an opponent from time to time. Training to produce force quickly without having to decelerate it at the end of the range of motion (as you do with a barbell clean, snatch, jerk, etc.) allows you to maximize power development. In other words, when you throw the bag, you don’t have to slow it down like you do when training barbell lifts. Toss it as hard as you can and let it go. You wouldn’t slow down when expressing power on the field or the mat, so why limit your potential by training that way?
“The HydroCore bag will move faster around your body than any other implement,” says Tangari, including sandbags,kettlebells, or asteel mace. So the challenge it presents your muscles in starting and overcoming inertia is unique.
In addition to power, most athletes need greater grip strength and holding onto the bag while it’s moving and shaking provides a serious test. The Bulgarian Bag® was a pioneering tool for grip development, but we think the HydroCore is even better. Ball stoppers on the ends of the handles prevent slippage and increase safety, making the HydroCore easier to handle for people who are new to dynamic bag training. For variability in grip, there are also handles around the center of the bag on the front. You can hold the bag in several different positions and orientations to customize the intensity of your workout.
Light-Weight and Easy To Transport
The HydroCore bag makes for a highly portable, all-in-one gym, so it’s perfect for people who travel frequently and can’t find time or places to train on the road. When empty, it’s virtually weightless, and easily folds into a suitcase. To fill it, you need only a bathtub faucet, garden hose, swimming pool, or ocean/lake/stream. “Ten pounds of water is enough for most people to start,” says Tangari, which only fills the bag about one-quarter full. “More than that sacrifices the instability factor,” and makes it more like lifting a heavysandbag. (However, if you choose to, and your strength allows it, the bag can be filled to provide 30 pounds of resistance.)
Because the bag provides such a good workout with minimal loading, a man and woman can use the same weight and both can get in a great session; beginners can work out alongside advanced trainees. Tangari often takes his clients to the beach, fills up the bag in the ocean, and trains a group right there on the sand.
It’s Fun!
Training with the HydroCore doesn’t feel like lifting weights or doing cardio. It feels like you’re playing with a toy. You can work your muscles and your heart without thinking about it too hard.Focuson controlling and/or moving with the water, and workouts will seem like a game.
Sample HydroCore Bag Workouts
The following workouts will give you a taste of what HydroCore Bag training is like. Start with one of the beginner routines if you’ve never worked out with the HydroCore Bag, a Bulgarian Bag®, or a sandbag before. If you’re more experienced with bag training, skip ahead to the advanced bag workout. Fill the bag ¼ full for the beginner routine, and ½ full for the advanced.
Beginner Bag Workout, Option A
Perform each exercise in sequence. For each move, perform reps for 20 seconds and then rest 10 seconds. That’s one round. Repeat for 3–5 rounds.
1. Lunge With Twist
Step 1.Hold the front of the bag in front of your chest with your hands up through the rubber handles. Try to keep the bag parallel to the floor throughout the exercise.
Step 2.Take a big step forward and lower your body into a lunge—your rear knee should end up just above the floor and the thigh of the lunging leg should be parallel to the floor.
Step 3.As soon as your foot touches down, smoothly twist your body in the direction of your front leg. Stabilize the bag, and keep your torso upright. Step back to the starting position. Repeat on the opposite leg.
2. Pushup On Bag
Step 1.Place the bag on the floor with the horn ends pointing toward you. Get into pushup position with your hands on the bag and brace your body.
Step 2.Keeping your head, spine, and pelvis in a straight line, lower your body until your chest touches the bag, and then press back up.
3. Bent-over Row
Step 1.Hold the bag by the sides witharmsextended, and bend your hips back while keeping your head, spine, and pelvis in a straight line. Your torso should end up nearly parallel to the floor.
Step 2.Row the bag to your belly explosively, drawing your shoulder blades down and together as you pull. The row will cause the water to slosh around inside the bag—stabilize it, and keep your balance.
Beginner Bag Workout, Option B
Perform each exercise in sequence. For each move, perform reps for 20 seconds and then rest 10 seconds. That’s one round. Repeat for 3–5 rounds.
Step 1.Hold the bag in front of your chest and stand with feet between hip and shoulder-width apart.
Step 2.Sit back and squat down as deeply as you can while keeping your head, spine, and pelvis in a straight line. Squeeze your glutes as you come back up to standing.
Step 3.Press the bag overhead to lockout while keeping your ribs down and core engaged.
2. Suitcase Row
Step 1.Stand on a box or bench to create some distance between you and the floor. Hold the bag by one of the rubber handles and bend your hips back as described in the bent-over row above.
Step 2.Row the bag to your side explosively, controlling the sloshing of the water. Don’t let your torso twist or bend to either side. Perform reps for 10 seconds and then switch sides and repeat.
Advanced Bag Workout
Perform each exercise in sequence. For each move, perform reps for 45 seconds and then rest 10 seconds. That’s one round. Repeat for 3–5 rounds. If you get fatigued, slow your pace, but don’t end the set before time is up.
1. Halo
Step 1.Hold the bag by its sides and make circles over and around your head. Alternate directions. Keep your ribs drawn down and your core engaged, and avoid bending or twisting your torso.
2. Pendulum Swing
Step 1.Stand with feet shoulder-width apart and hold the bag by the rope handles. Pivot on your right foot as you swing the bag laterally to your left. Duck your torso under slightly as you twist so that the bag wraps around your upper back.
Step 2.Reverse the direction and swing the bag to the other side.
]]> https://www.onnit.com/blogs/the-edge/how-to-do-the-dead-bug-exercise-like-an-expert2025-07-10T10:55:16-05:002025-08-15T09:12:06-05:00How To Do The Dead Bug Exercise Like An ExpertJeremy GottliebThe dead bug exercise strengthens yourcorewith a movement that’s as functional as can be, preparing you for the rigors of sports and everyday life while protecting your lower back. Here’s how to do it right, along with its many progressions and regressions.
Key Takeaways
1. The dead bug strengthens the core while your limbs are moving.This helps teach you to breathe while in motion.
2. To do the dead bug properly, you must keep your lower back against the floor.
3. You can progress the dead bug to harder variationswhere you tap your hands and feet against the floor, and extend yourarmsand legs.
4. The dead bug trains the deep core muscles,as well as the rectus abdominis, obliques, lower back, diaphragm, pelvic floor, and hip flexors.
The dead bug exercise has you lying on the floor and holding your arms and legs above your body, eventually progressing to where you move your limbs while you maintain a stable, neutral pelvis. (Yes, it kind of makes you look likea beetle that’s in its death throes, belly up on the floor.)As you raise anarm, or leg, or both, your lower back wants to peel off the floor. If you can keep it locked down, you’ll maintain a healthy spine and pelvic position—the same kind you ideally want when you’re running, lifting, playing, etc.
Dead bugs strengthen your core muscles, prehabbing the lower back to help prevent injury. They also teach you to breathe while maintaining a core brace, which is essential for staying stable and performing well in lifting and sports.
The term “dead bug” can apply to several variations of the same basic exercise. We’ll walk you through all of them so you can find the level that’s appropriate for you and aim to progress to the next one accordingly.
Basic Dead Bug
The simplest type of dead bug has you just learning to keep your core braced with the pelvis in neutral (perpendicular to your spine). All you have to do is lie still on your back with your knees elevated and your elbows over your shoulders¦ but don’t underestimate the challenge here. If your lower back buckles from the floor or your knees drift above your hips, you’re breaking form.
Practice holding this position with your full attention.
Step 1.Lie on your back on the floor and bend your knees so your feet lie flat. Tuck your chin so your head is neutral. Flatten out your lower back against the floor by tucking your tailbone under. You’ll feel your core muscles activate and your pelvis will be neutral—90 degrees to your spine. Place your hands flat on the floor so you have extra stability.
Step 2.Brace your core and raise one foot off the floor at a time so your hips and knees are bent 90 degrees. (Your knees should end up directly over your hips.) Now raise your arms off the floor, so they’re directly over your shoulders, and bend your elbows 90 degrees. Try to hold this position for 30 seconds, or as long as you can.
“People usually start to hold their breath when they’re being challenged in this position,” says Shane Heins, Onnit’s Director ofFitnessEducation, “but you should be able to stay in this position while being able to breathe and talk and stay mostly relaxed. Think ’relaxed but activated.’”
When you’ve got the dead bug hold down, you can begin to integrate movement at the legs and arms. It may look a little like you’re running on your back (or crawling upside down), and that isn’t far from the truth. If you can keep your pelvis and spine neutral while your arms and legs move, you’ll be a more efficient mover in general.
Dead Bug Progression 1 (Dead Bug With Heel and Finger Tap)
Step 1.Start in the basic dead bug position explained above (on your back, arms and legs bent).
Step 2.Keeping your low back on the floor, slowly reach one arm behind your head while you bring the opposite side leg toward the floor. Keep the bend in both your elbow and the knee, and gently tap the floor with your hand and foot.
Step 3.Return to the starting position, and repeat on the opposite sides. That’s one rep.
“Be careful not to crunch yourabsat the top,” says Heins. “You’re just tapping and coming back to center with your elbows over your shoulders and your knees over your hips.” Do the movement slowly to start, but as you get more comfortable, you can speed up the tempo. This will create a little more instability for you to control.
The next level up is to lengthen the levers you’re working with—i.e. extend your arm and leg so that you have to control them at their full lengths. This will be challenging for almost anybody, including experienced athletes, so take it slow.
Step 1.Begin extending your arm and opposite leg straight. Don’t let them rest on the floor, but get both limbs straight enough so that they just hover above the floor. DON’T LOSE YOUR LOW BACK POSITION! If you feel like your back wants to arch, stop the range of motion before it does and work in the range you have only. As you get stronger you’ll be able to extend your limbs straighter.
“Be very mindful of your breathing here,” says Heins, as it will get more difficult to keep your core activated while breathing under the duress of this challenging movement. Teach yourself to “breathe behind the brace,” expanding your abdomen on the inhale but without losing the tension in your abs.
Dead Bug Progression 3 (Dead Bug With Arm and Leg Extended)
Now you can try keeping your arm and leg straight the whole time.
Step 1.Start with your arms and legs extended over your shoulders and hips, respectively. Your knees don’t have to be locked out, but they should be nearly straight. Begin extending your limbs.
“Just holding your arms and legs straight can be tiring,” says Heins, “and, this time, you won’t have a gradual extension of the limbs.” There’s little room for error here, so take it slow and strict. “Keep a long spine and don’t forget to breathe.”
If you have any trouble with any of the variations, says Heins, work on moving just one limb at a time. That is,get used to your arm tapping behind your head, and then your foot, before working the two together;do a few reps of reaching the arm back before you extend the leg, and so on. Another trick: “rest one foot on the floor for stability,” says Heins.
The dead bug involves all the ab muscles, including the rectus abdominis (the muscle that shows up as a six pack if you’re lean enough), the obliques (the muscles on the sides of your abs that are primarily responsible for twisting your torso), and the transversus abdominis (a deep core muscle that protects the spine). The spinal erectors on the back side of your abdomen will work, too, to stabilize you.
Because it also trains breathing mechanics, the dead bug recruits numerous other muscles you can’t see from the outside and therefore may not think about, such as the diaphragm, pelvic floor, and hip flexors.It’s not a movement that will have a direct impact on how your physique looks shirtless, but it will improve your ability to train an endless variety of other movementsthat do make you look muscular and lean, so think of the dead bug as a wise investment.
If you’re interested, here’s anab workoutthat will contribute to the way your abs appear on the outside.
Perform the following movements to prepare your hips and spine for effective dead bugging, courtesy of Heins. Perform 3 rounds of 5–10 reps for each movement.
Step 1.Get on all fours and push your body back so you’re practically sitting on your heels with your arms extended overhead (a child’s pose from yoga).
Step 2.Pull yourself forward again, pushing your pelvis forward and extending your spine to come up into an updog pose. Drive your shoulders down away from your ears. That’s one rep.
Step 1.Get on all fours and then take your knees further behind your hips, as if you were going to do a pushup on your knees.
Step 2.Step your left leg forward and plant it outside your left arm. Extend your spine as much as you can so your chest faces forward and your back is relatively flat.
Step 3.Now press your right arm into the floor as you twist your torso to the left and reach your left arm overhead. You can use your left hand on your left knee for assistance if needed.
Step 1.Lie on your back on the floor, bend your knees, and rest your feet flat and in line with your hips. Place your hands on top of your lower belly and the upper edge of your pubic bone.
Step 2.Keeping your butt on the floor, tilt your pelvis under and back down again. Use your hands for feedback, feeling your pelvis move and your core muscles contract.
Step 3.Move your pelvis side to side, raising your right hip bone and then tilting it back down to raise the left. Drive through your knees to move the hips. This will also help prevent unwanted movement at the legs.
Step 4.Now combine all four motions so you’re moving your pelvis in a smooth, circular motion like hands around a clock. Think about getting it to touch 3, 6, 9, and 12 on a clock face. Make one full revolution, and then repeat in the opposite direction. That’s one rep.
Try anothercore warmup,this one from Coach Francheska Martinez, before a full-body workout.
The dead bug can be used before, during, or after your normal workouts, or really at any other time of the day.Heins suggests using it as an activation drill, doing the variation that’s appropriate for you after you’ve done some warmup/mobility work.“The dead bug can help warm up and ready your core muscles for the harder training to come in your session,” he says. Heins suggests doing 3 sets of 30 seconds (holds or reps).
You can also do the dead bug between sets of your lighter, less stressful exercises—rows, pushups, and lunges, for instance. Do a set, then knock out a set of dead bugs for some extra core work, and repeat.Heins cautions not to do dead bugs between sets of very core-intensive exercises, however, because you don’t want to fatigue your ab musclesfor lifts that rely on them strongly. In other words, don’t do dead bugs between sets of heavy overhead presses, deadlifts, or backsquats. You may find that you can’t train them as heavy or get as many reps if your core is pooped.
If you want to start your day with some core work, either to get it out of the way or to increase your overall volume, dead bugs are safe to do first thing in the morning. By the same token, you can do them at night before bed too. “Do reps for 15–30 seconds and three to five rounds,” says Heins.
]]> https://www.onnit.com/blogs/the-edge/at-home-abs-get-a-six-pack-in-your-living-room2025-07-10T10:55:15-05:002025-08-15T09:29:55-05:00At-Home Abs: Get A Six-Pack in Your Living RoomJeremy GottliebOK, so you probably laughed at the title of this article. “I get a six pack in my living room every night,” you say. “I just walk to my fridge, pull out my beer, and bring it back to the couch to watch Netflix.” Obviously, that particular six-pack is easy to procure. The one between your pelvis and your ribs, however, takes a little more work to firm up—but it doesn’t necessarily take much more time. We’ve got two great workouts that can help you do it, and each takes just a few minutes. Designed by Onnit Gym’s Director ofFitnessProgramming, Juan Leija (@juanniton Instagram), both routines can be done at home—one requires no equipment at all, and the other uses just a light medicine ball.
(P.S.: If you really are drinking a six-pack nightly, you won’t see definition in yourabsno matter what workout you do.You need to cut caloriesand sugar from your diet to lose body fat… and maybe seek counseling?)
Bodyweight Ab Burner
Leija says you can do this routine at the start of a workout for other muscle groups (if you want to prioritize your abs), at the end of a workout (as a high-intensity finisher), or on a separate day entirely. All you need is some floor space. It takes six minutes (or less) to complete.
Directions:Set a timer for 6 minutes and start the clock the moment you begin the first exercise. Perform the exercises as a circuit, completing one set of each in sequence. Perform the first exercise for 30 seconds total, and then do the others for 20 seconds each. Do not rest between exercises, and rest as little as possible after the last one. Repeat for 3 total rounds, or until the 6 minutes are up.
1 Straight-ArmPlank/Knees to Elbows/Mountain Climber
Reps:Work for 30 sec.
Step 1.Get into pushup position with your hands shoulder-width apart and legs extended behind you. Tuck your pelvis slightly so it’s perpendicular to your spine, and brace yourcore. Your body should form a straight line from your head to your feet. Hold the position 10 seconds.
Step 2.Raise one knee at a time out 45 degrees and up to your elbow. Take it back, maintaining your tight core, and keep your hips and shoulders square to the floor. Continue for 10 seconds.
Step 3.Finally, perform mountain climbers, alternating knees straight up to yourchest and back. Go for 10 seconds.
2 Full Situp
Reps:Work for 20 sec.
Step 1.Lie on your back on the floor with your feet flat and knees bent 90 degrees. Raise yourarmsbehind your head.
Step 2.Sit up all the way and hug your knees at the top.
3 Bicycle Crunch
Reps:Work for 20 sec.
Step 1.Lie on your back and place your hands at the sides of your head. Extend one leg in front of you and tuck the other near your chest.
Step 2.Twist your shoulders, bending the straight leg and extending the tucked leg until your opposite elbow and knee touch. Alternate sides; it should look as if you’re pedaling a bicycle.
4 Russian Twist
Reps:Work for 20 sec.
Step 1.Sit on the floor and extend your legs in front of you with a slight bend in your knees. Raise your feet off the floor to put tension on your abs.
Step 2.Twist your torso side to side, touching the floor next to your hip with both hands.
5 Hollow-Body Hold
Reps:Work for 20 sec.
Step 1.Lie on your back and raise your arms overhead. Tuck your pelvis so that your lower back flattens into the floor. Brace your core.
Step 2.Extend your legs, and raise them off the floor. Hold the position with arms and legs straight, maintaining your flat back position.
Medicine-Ball Ab Workout
A medicine ball allows you to add weight to your ab training in a form that’s easier to grip and handle than a dumbbell or weight plate. It also allows you totrain the core for power, as in the rotational slam exercise, where you twist your torso and throw the ball into the floor.This kind of training prepares your core to produce and absorb force the way it needs to when you’re playing sports.
Directions:Do this workout at the start of one of your regular sessions—it should take no more than 6 minutes to complete. Perform the exercises as a circuit, completing one set of each in sequence. Perform 10 reps for each movement. Do not rest between exercises, and then rest 30–60 seconds after the last one. Repeat for 2 total rounds.
1 Med-Ball Butterfly Situp
Step 1.Hold a medicine ball with both hands overhead, and lie on your back on the floor. Bend your knees, bringing the soles of your feet together.
Step 2. Sit up all the way, bringing the ball down in front of your chest and touching your toes with it.
2 Med-Ball Leg Lift
Step 1.Lie on your back and hold the ball overhead. Extend your legs in front of you.
Step 2.Raise your legs up and your hips off the floor while using the ball as a counterbalance. Flex your abs at the top.
3 Table-Top Medicine-Ball Retrieve
Step 1.Lie on your back and hold the ball overhead. Raise your legs 90 degrees and then bend your knees to 90. Flatten your lower back into the floor and brace your core.
Step 2.Sit up and pull the ball from overhead to in front of your chest. Place the ball on the shelf provided by your shins, and lower your torso back down.
Step 3.Sit up again, and retrieve the ball from your legs, lowering back down again. Each situp is one rep.
4 Rotational Slam
Step 1.Kneel on the floor and hold the ball in front of your chest. Tuck your pelvis so it’s parallel to the floor, and brace your core.
Step 2.Raise the ball overhead and rotate to one side. Slam the ball into the floor and catch it on the rebound. Twist to the other side and repeat. Each slam is one rep. Perform 5 reps on each side (10 total).


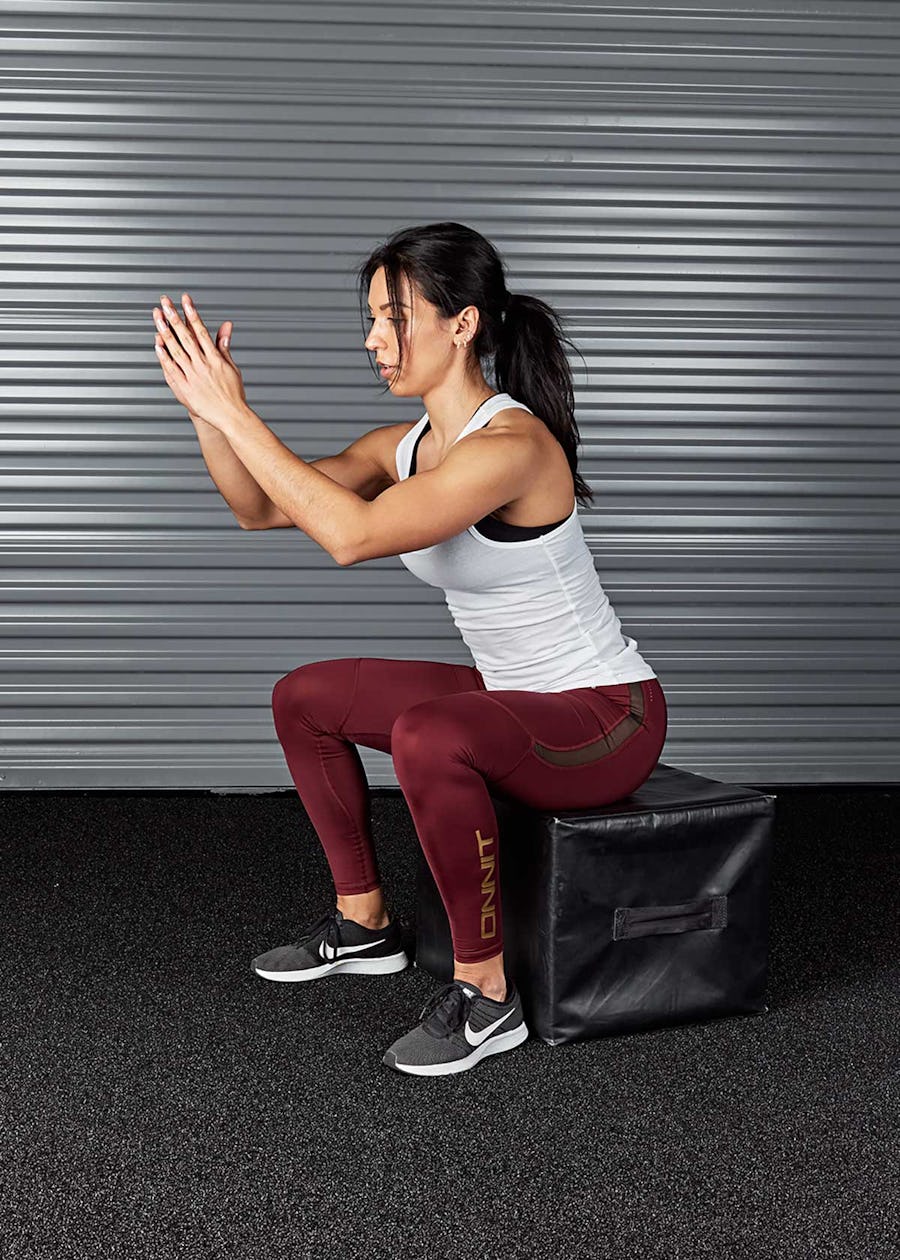
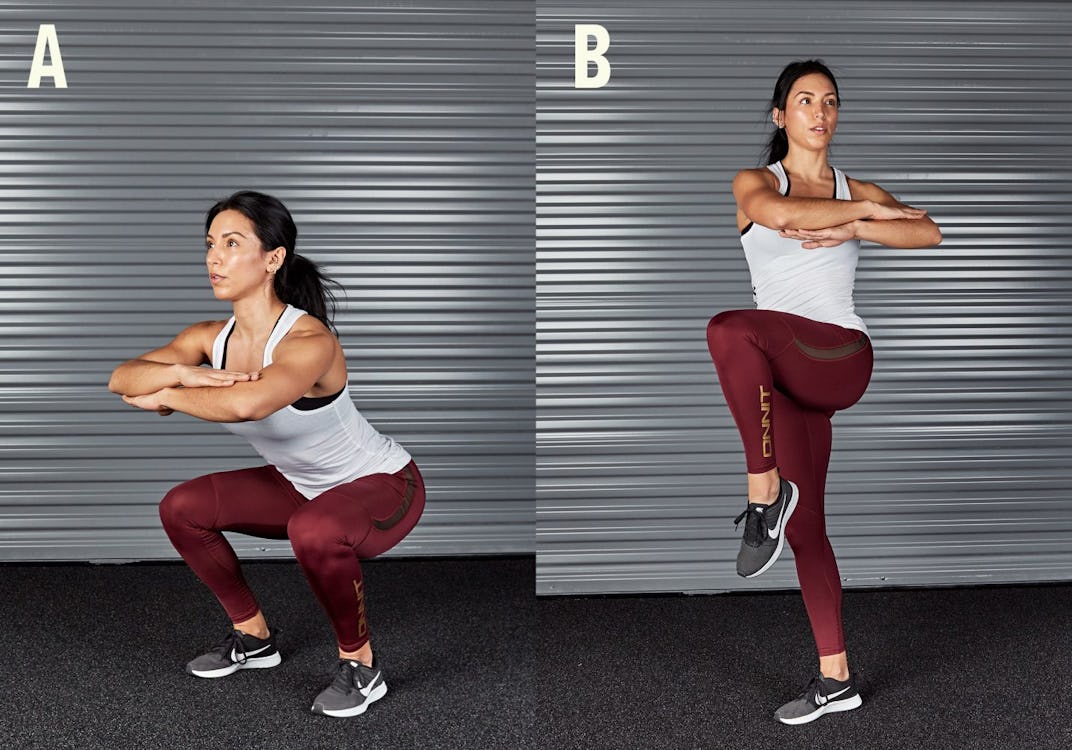
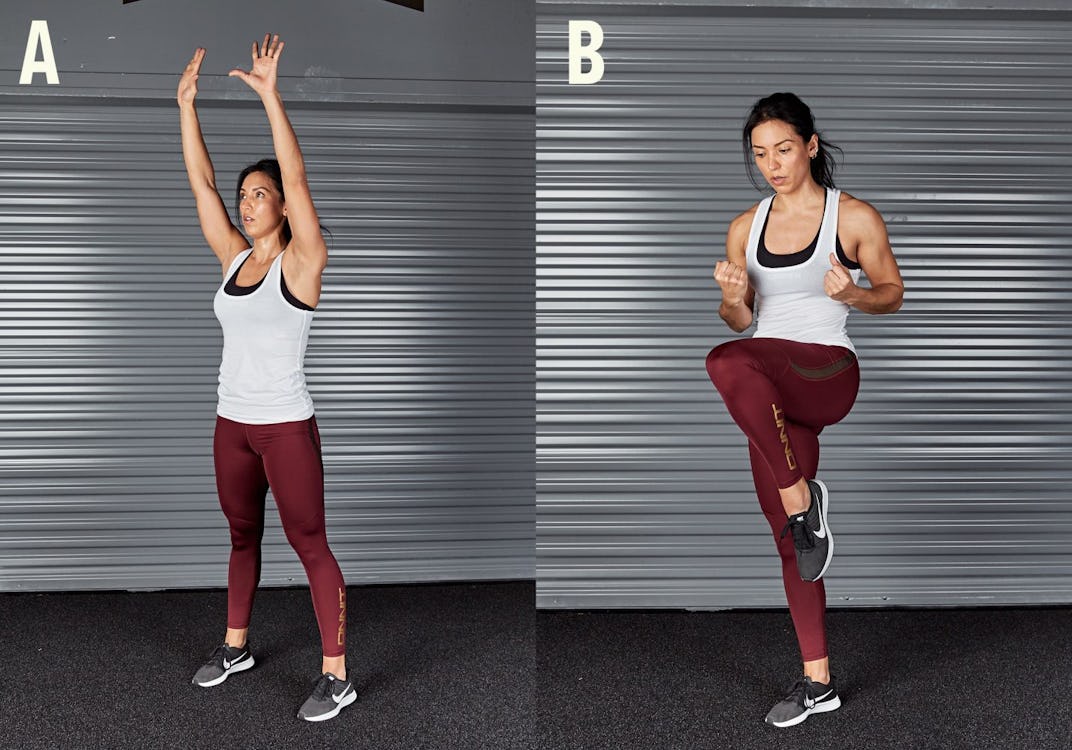

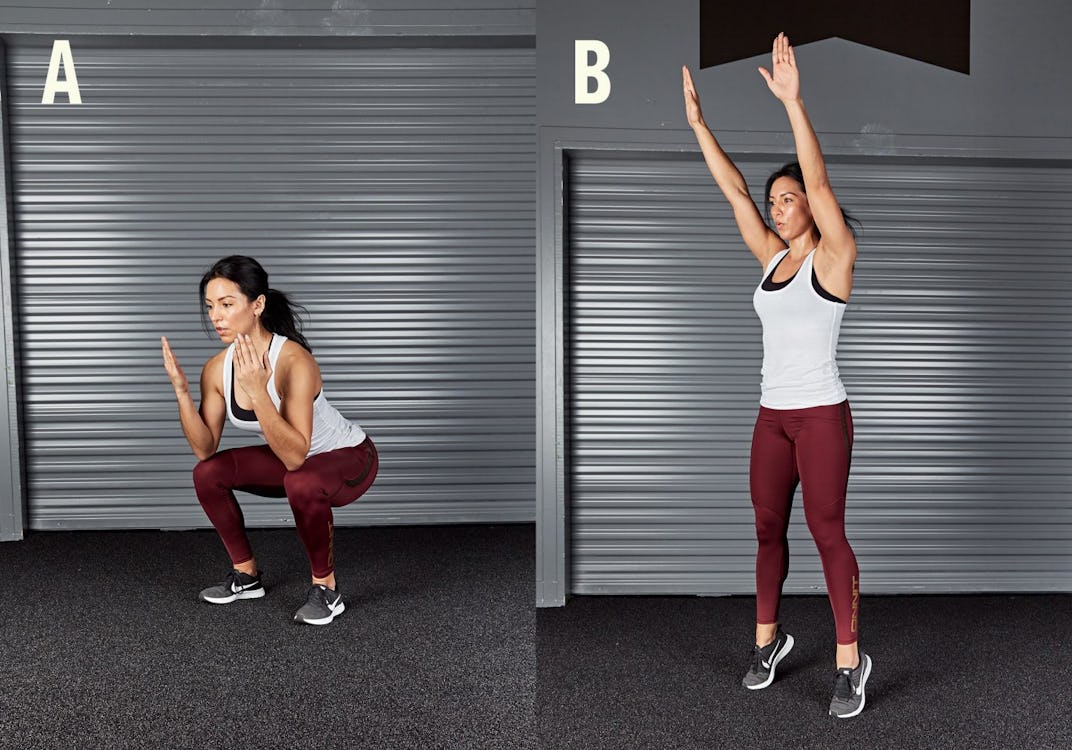

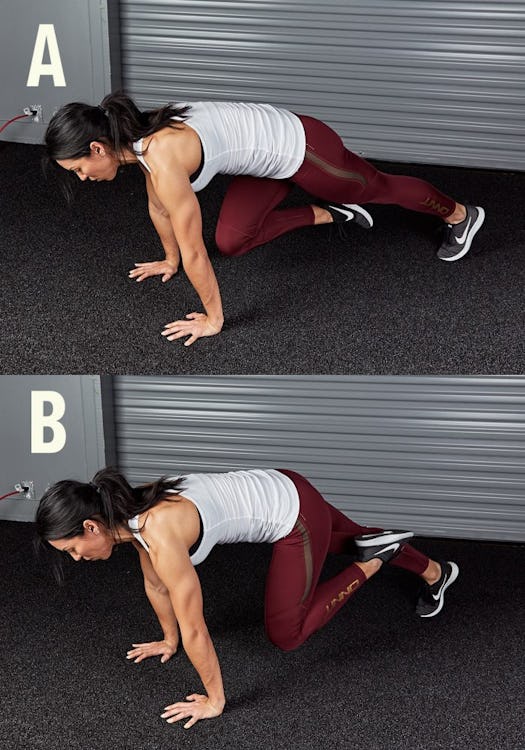
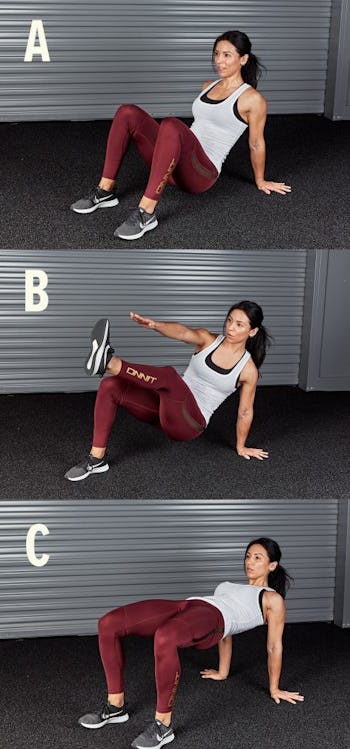

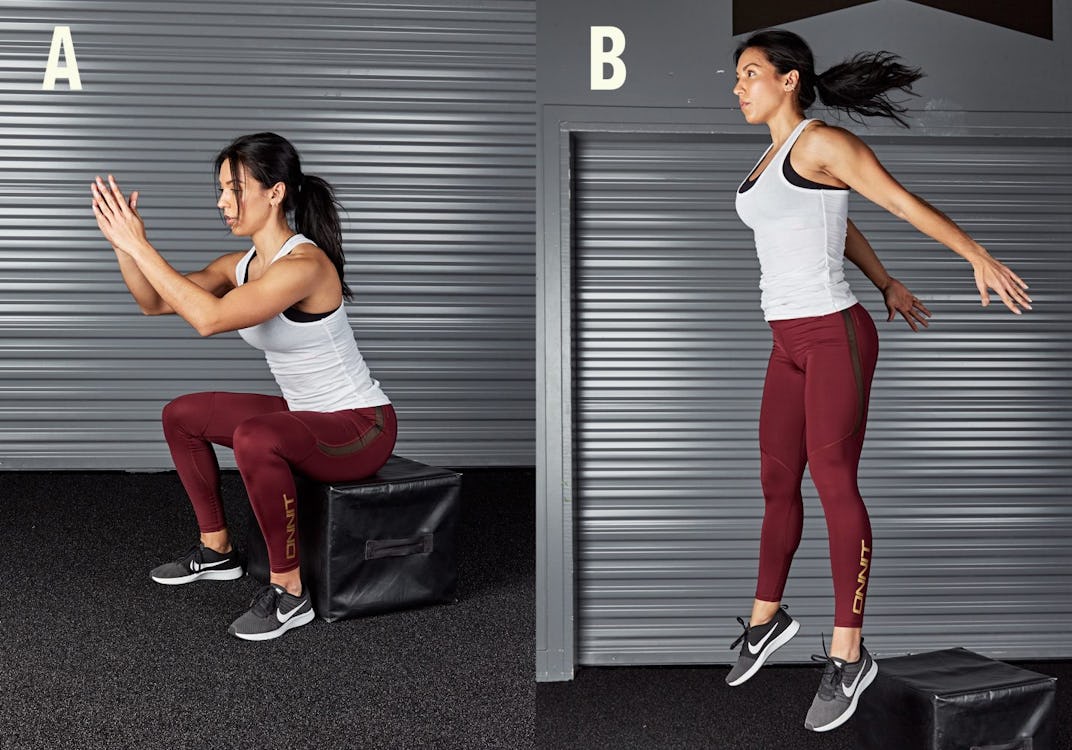
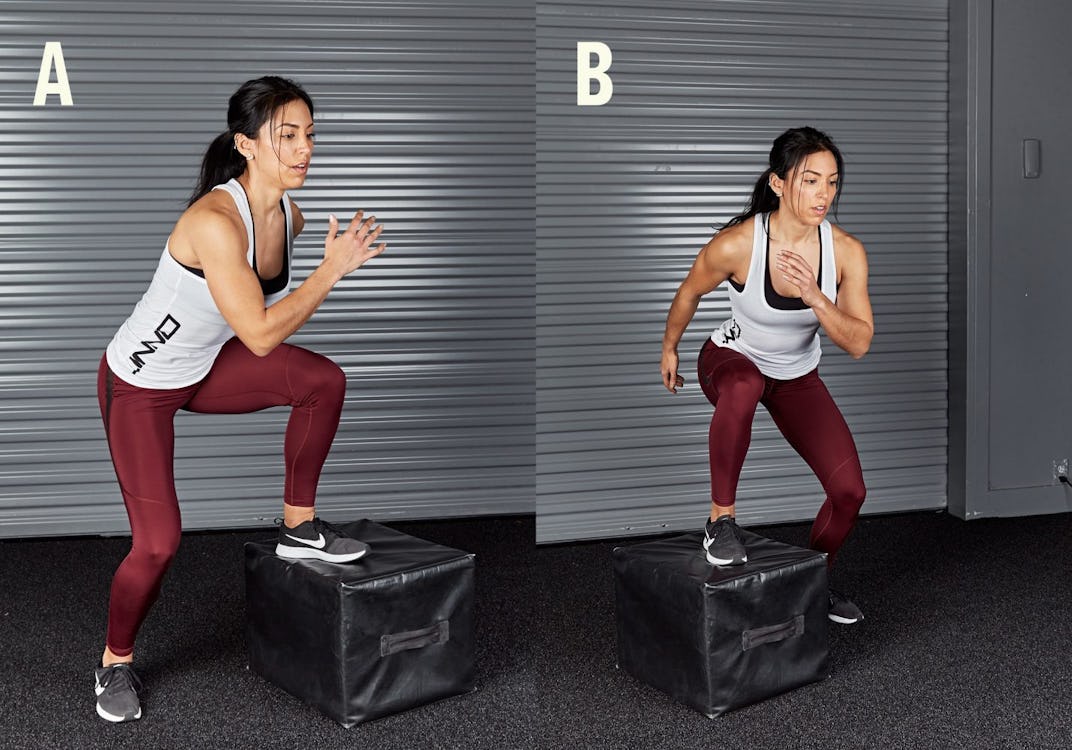

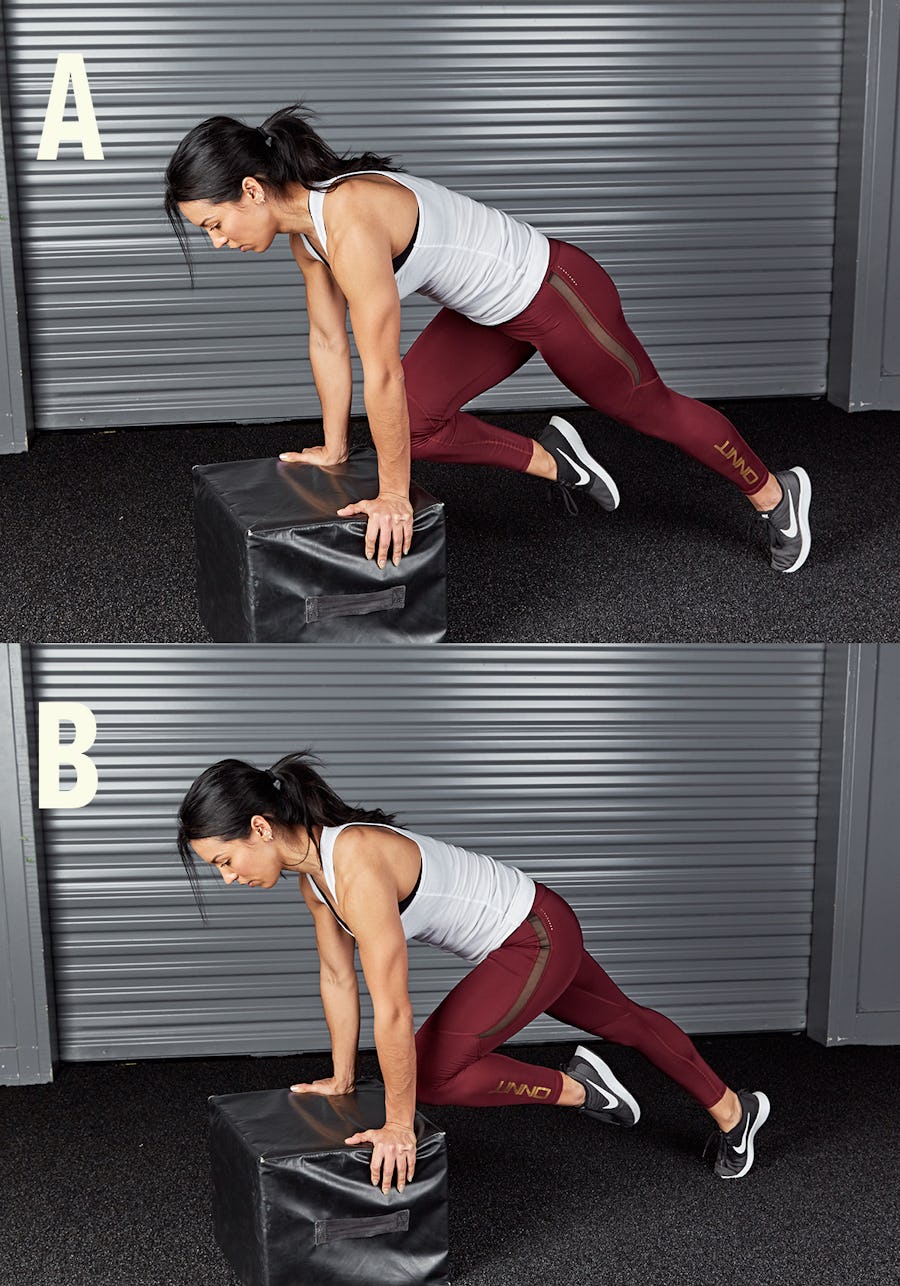

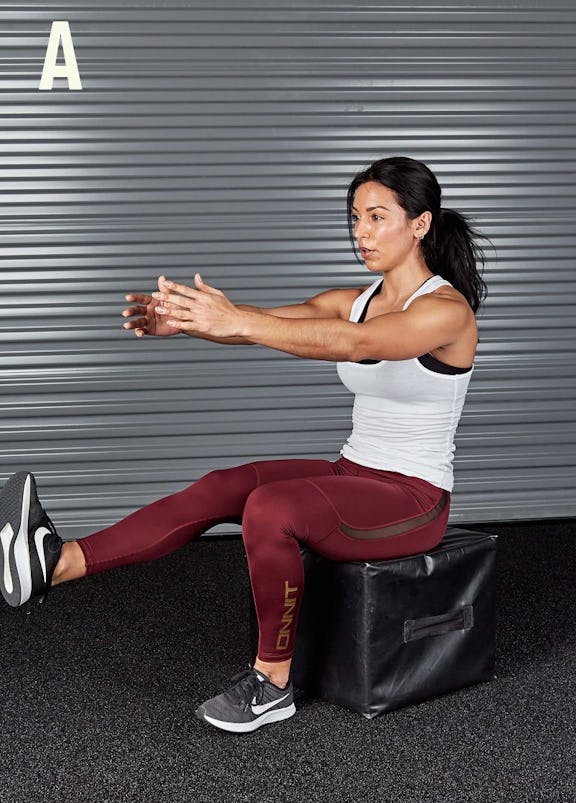
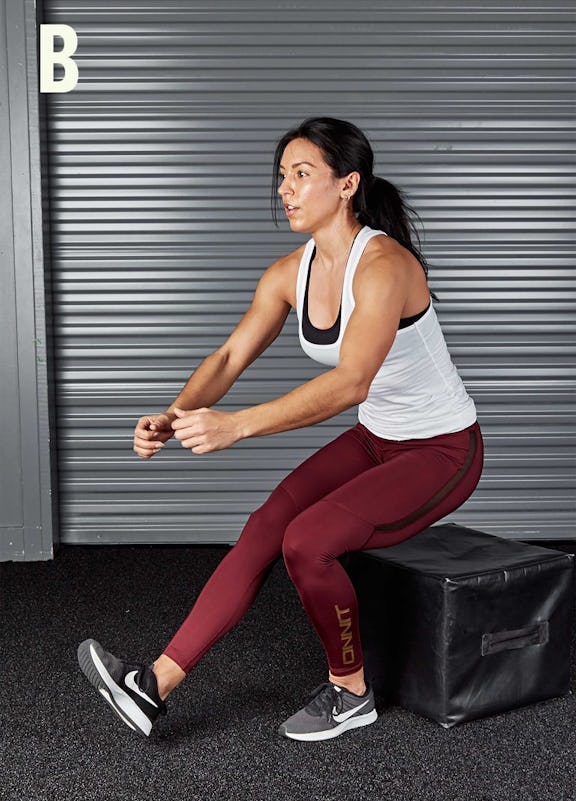
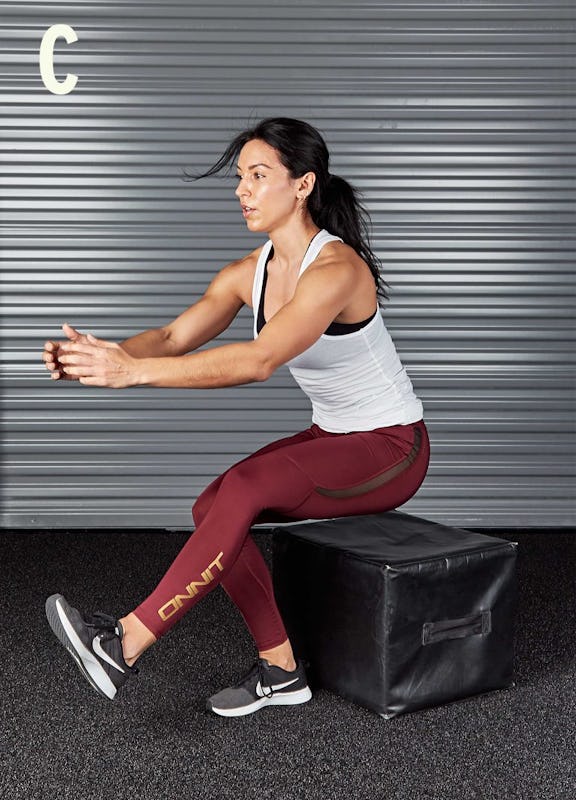

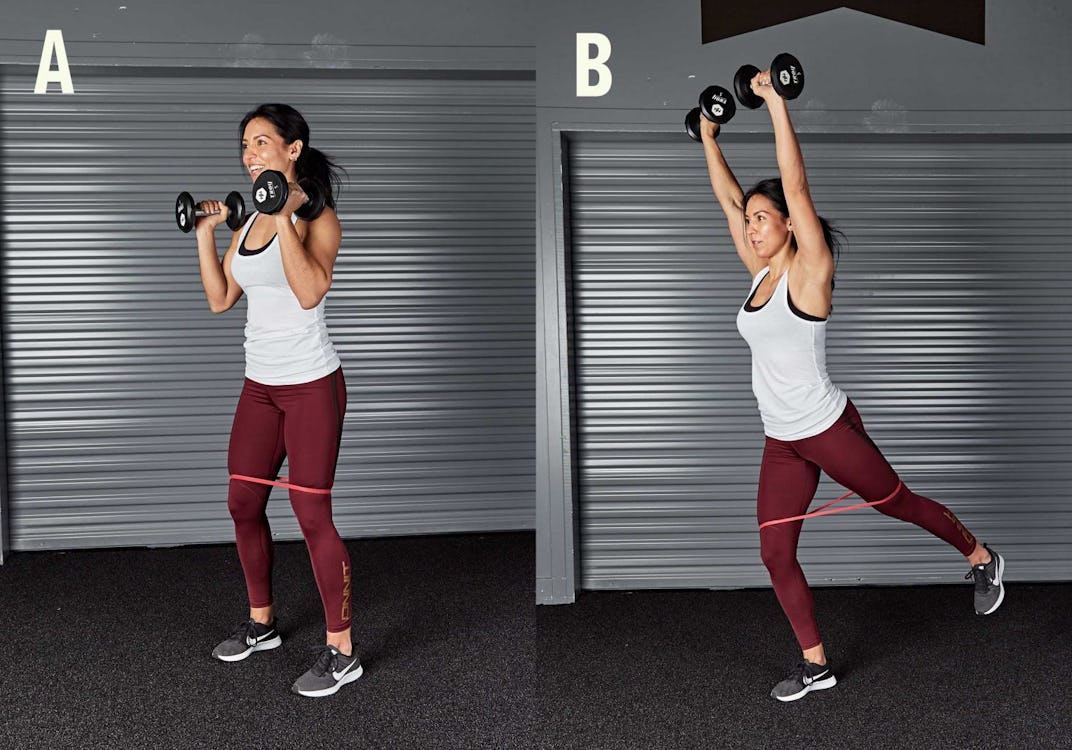
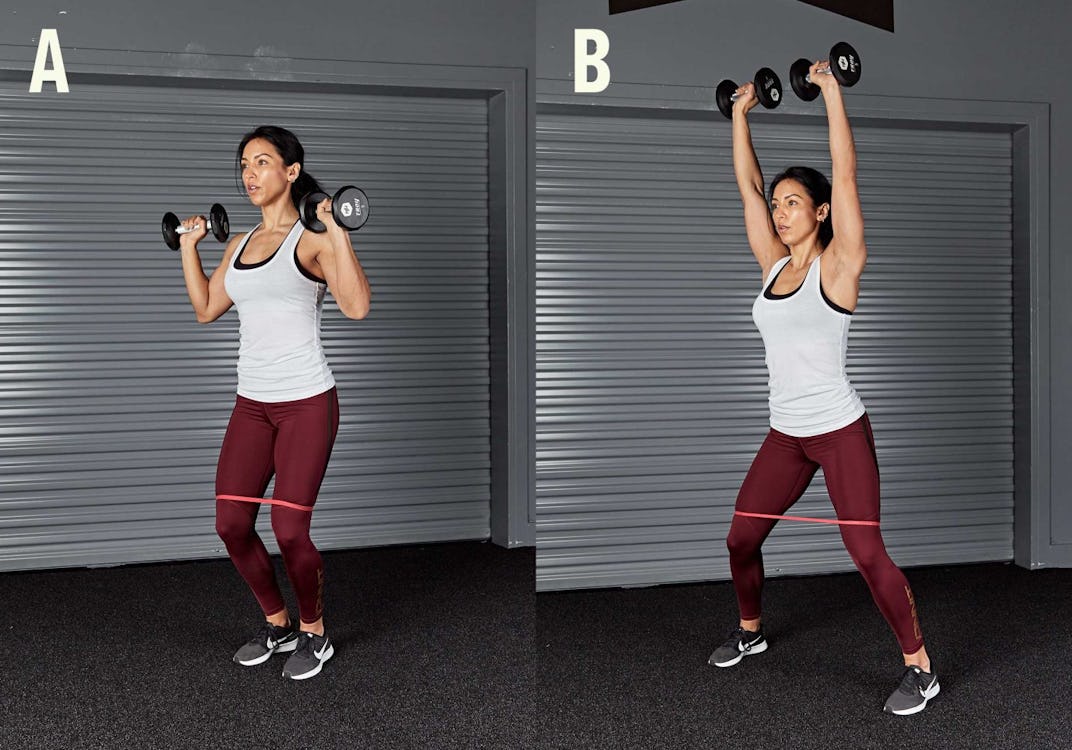
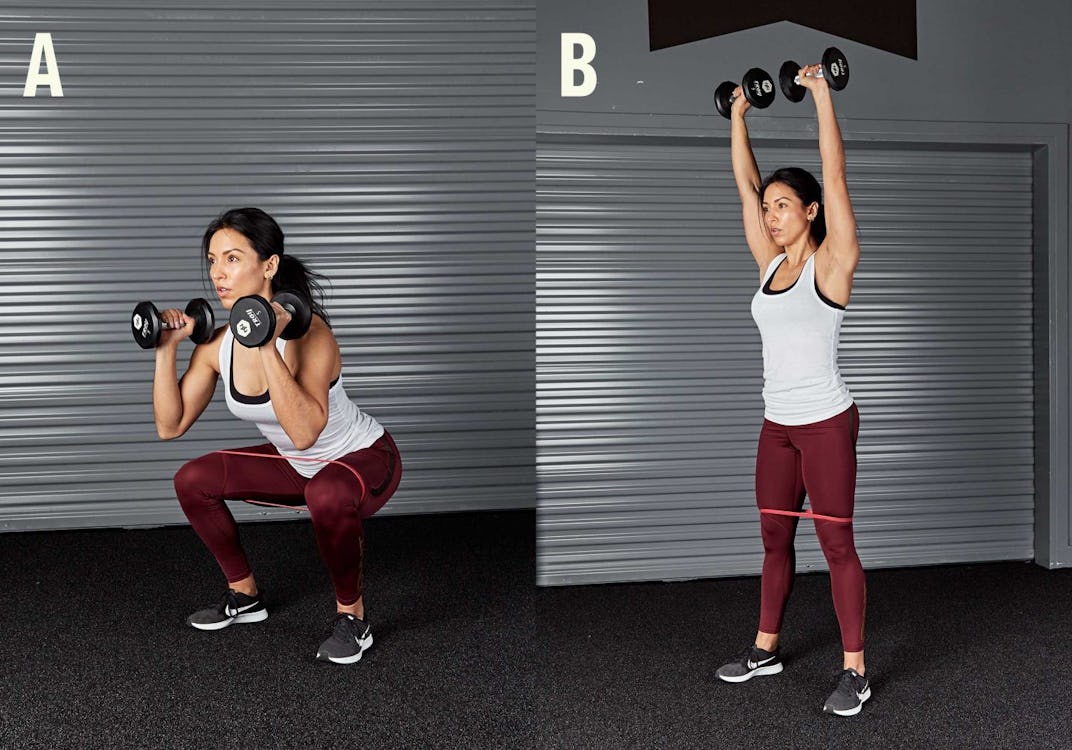


 b Workout


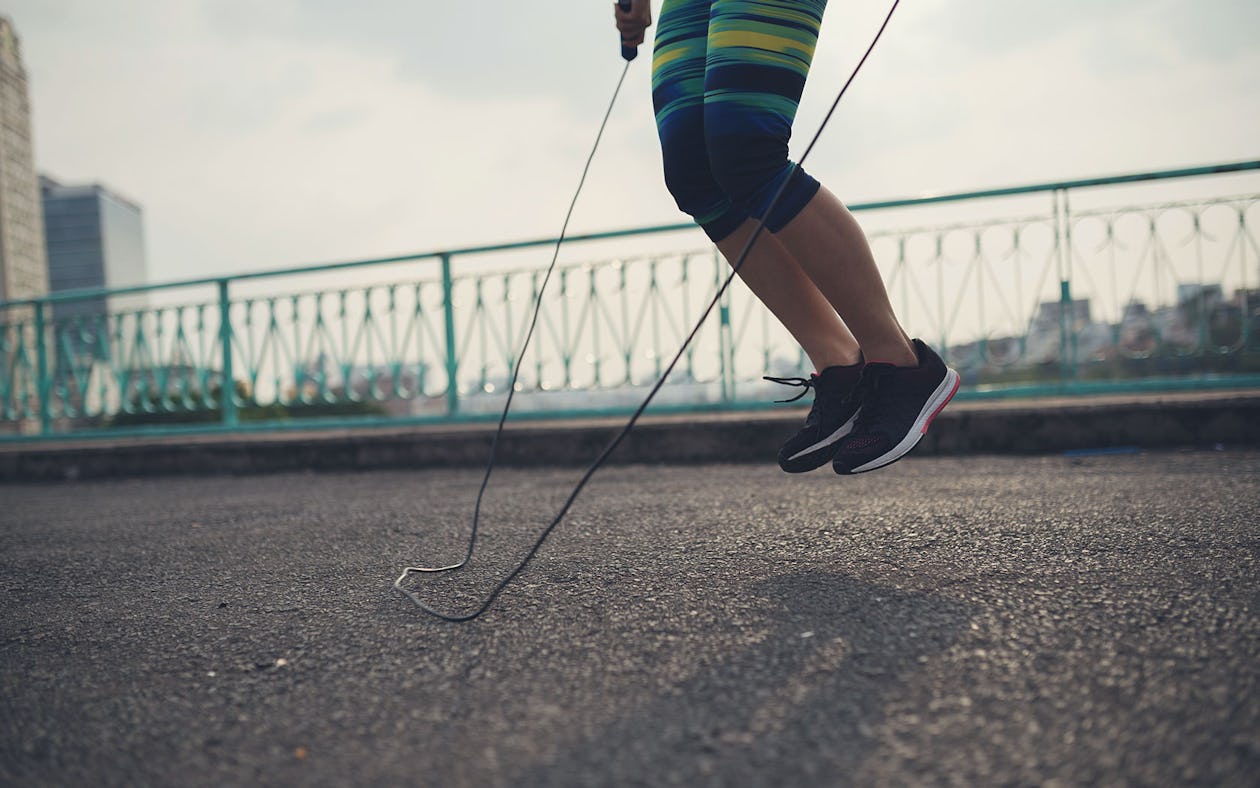
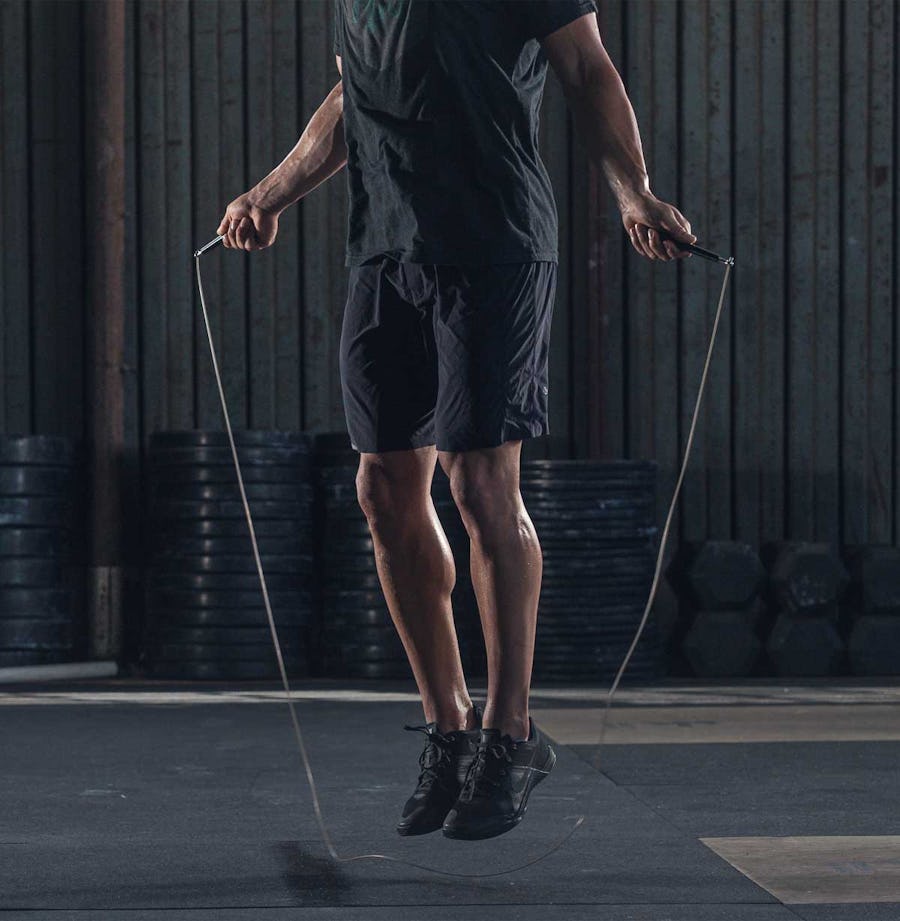
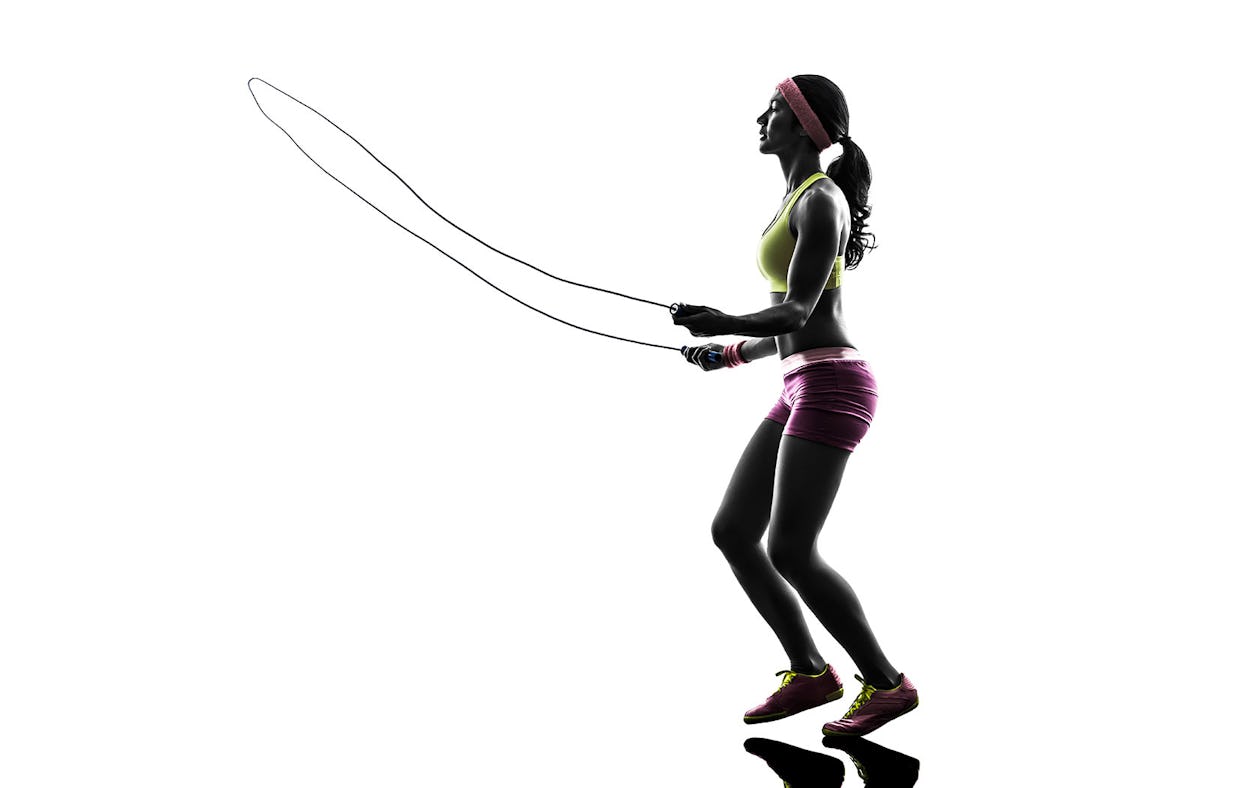
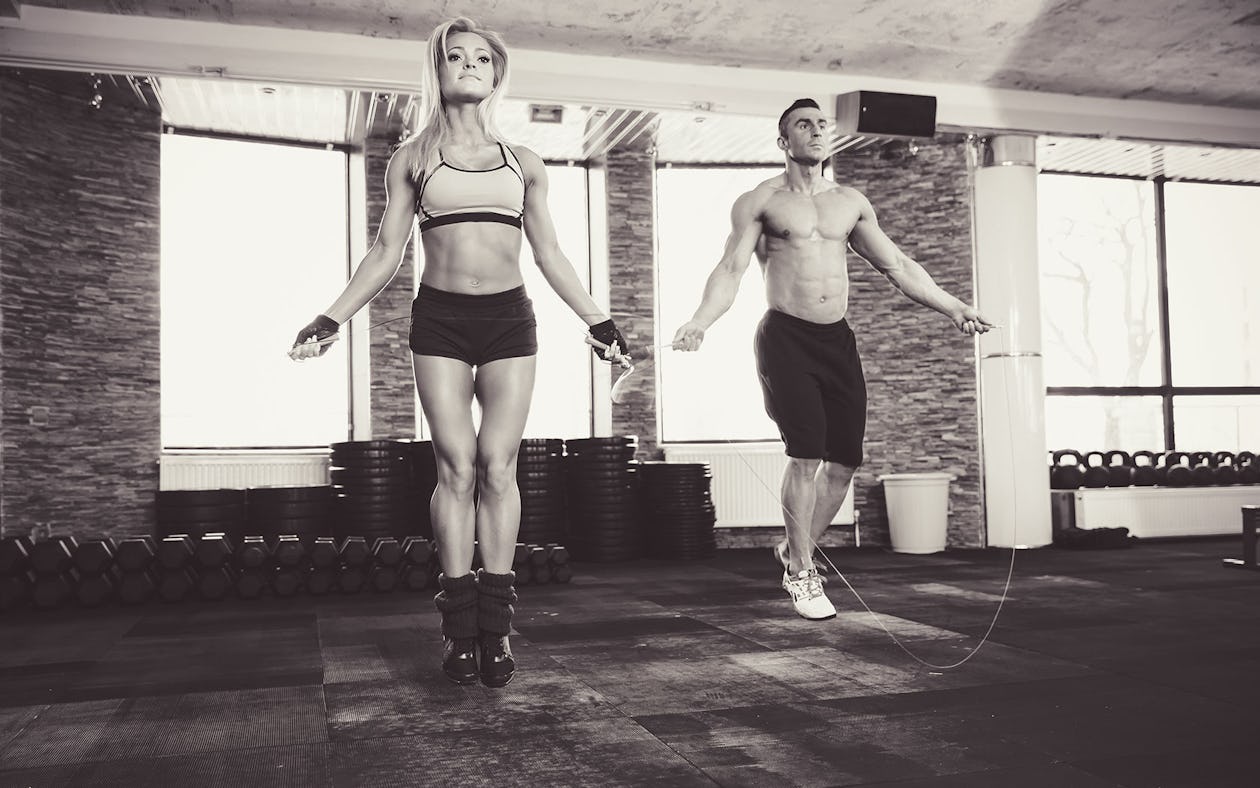
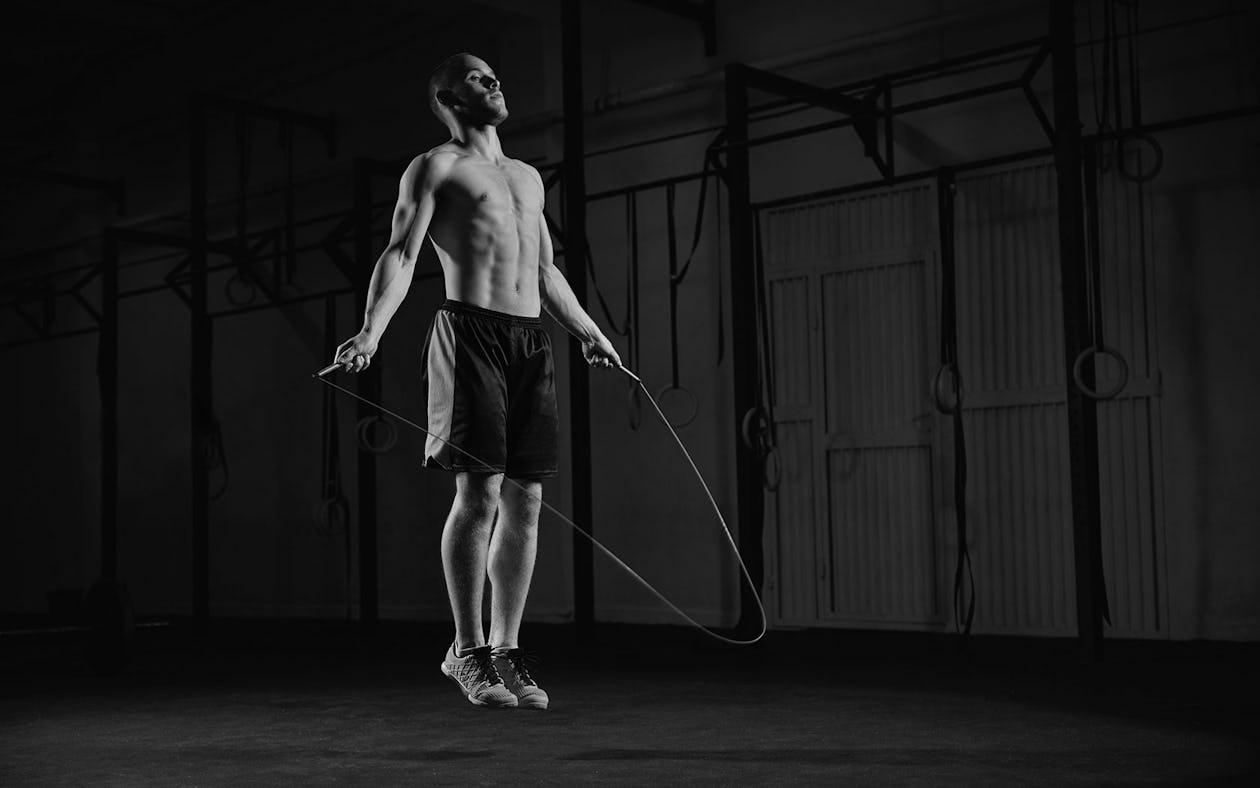

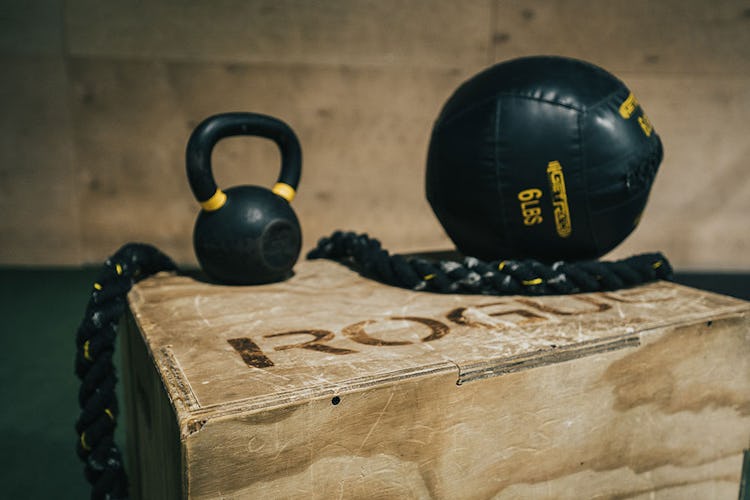

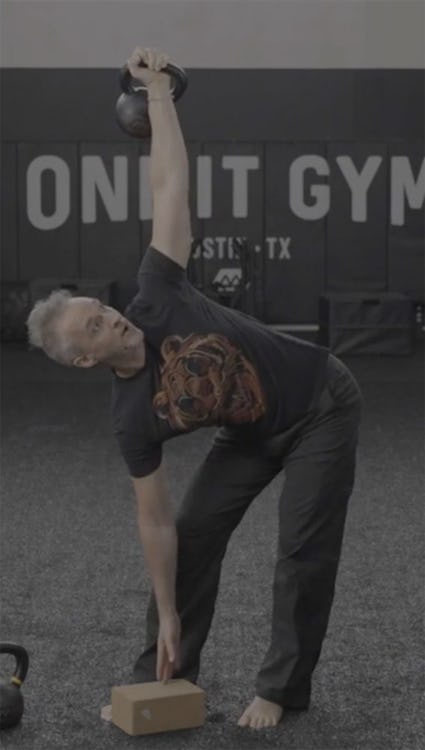
 u were wringing out a towel. Add to the rotation by reaching and twisting the opposite direction with your other arm.