https://www.onnit.com/blogs/the-edge.atomOnnit - The Edge2025-07-15T17:22:41-05:00Onnithttps://www.onnit.com/blogs/the-edge/2-week-mma-fighter-boxer-diet-plan2025-07-10T10:55:25-05:002025-08-08T16:10:56-05:002-Week MMA Fighter & Boxer Diet PlanJeremy GottliebDo you have a fight coming up and you need to drop weight? Nutritionist and trainer Lauren Brooks will show you how to quickly shed pounds with this two week MMA and boxing diet plan.
I would like to begin by saying thatI don’t recommend that anyone should follow this way of eating for more than two weeks. As an athlete, you will not continue to see results with this kind of extreme eating.
These dietary suggestions are mainly forMMA fightersand boxers that need to drop 10-15 pounds in order to make weight. I don’t ever suggest that you should wait until the last minute to drop a bunch of weight because it’s not always safe and the weight can easily come right back.
People will, however, try anything, even when they know the dangers. Trust me, I’ve heard it all. Some people have told me that they essentially starved themselves for two weeks, some just drank lemon water with cayenne pepper, while others only ate protein.
All of these can be very dangerous. I would never design a nutrition program like that for anyone because it is not a lifestyle, it’s a temporary way to lose weight that will spare as much muscle as possible.
The reality is, when you go on an extreme diet and lose weight quickly, you will lose muscle along with the fat.
While you are dropping weight quickly, you will need to cut down on your training significantly, otherwise this will not work. When you drastically reduce your calorie intake, your training can suffer since you won’t be properly fueled for grueling workouts.
Use this time to train lightly while focusing on the easiest way to shed the weight. Keep in mind that the first few pounds that come off will most likely be water weight; the rest will be fat and some muscle.
For the next two weeks,focusmost of your meals on high-quality, lean protein such as fish, chicken, turkey, eggs, or Greek yogurt. Because you need to reduce calories, you will need to go for the lower fat items.
Rather than 3 whole eggs, take out at least 2 of the yolks in order to lower the calorie content. Since MMA fighters, along with most people, live on the go and don’t always have time to cook, protein powders are allowed but should only be used right before or after a workout session.
Stock Up On Lots Of Vegetables
Reaching for the higher fiber content vegetables will allow you to feel fuller and more satisfied for a longer period of time. Always having vegetables on hand is an amazing way to keep your hunger at bay between meals.
For this plan, you will want to make sure that you are not stocking up on the starchy vegetables, but focusing more on eating the highly fibrous ones; i.e. cucumbers, spinach, celery, red peppers, asparagus, broccoli, zucchini and cabbage.
A few other things to keep in mind:
You will want to make sure to eat a small amount of fat. You can take a fish oil or a DHA supplement throughout this period. In the sample meal plan, I will include some natural, healthy fat sources that won’t hinder your weight loss.
Fat will be the one thing that you really want to measure out on this program. When eating lots of salads, it’s very easy to pile on the oils which can cause weight gain.
It’s important to measure portions throughout your two-week diet.
Water is Also Going to be Essential For You
When reducing your carbohydrates to this low amount, you will lose a lot of water as well as important electrolytes. Drinking clean water on a regular basis is mandatory.
You can add fresh squeezed lemon or just a touch of pink salt to each liter in order to add back themagnesiumyou are losing. You can add some pink salt (lightly) to your vegetables as well, but not too much.
I am a huge fan of fruit because they contain so many vitamins andminerals. For this particular diet, however, you will not be eating them very often. Fruit will primarily be your sugar source right before and/or after a workout. THAT WILL BE IT!
If you feel that you are going to fall off the wagon and develop a crazy sweet tooth, then I suggest that you eat apples, pears, and bananas as opposed to ice cream or cookies, but remember this is for only two weeks. Suck it up and you will get your reward during or after your event.
Depending on your starting weight and how much you have to lose, you can tailor these ideas so that they fit your specific goals. If you are a very large male, then you may need much more than what I’ve written down here.
On the other hand, if you are a tiny female, then you may need only half as much. Here is a sample day with a scheduled morning workout.
The Fighter Diet Plan
Wake Up 16oz Water with Lemon
Breakfast (Pre-Workout) Green Protein Smoothie 1-2 cups Spinach, 1 banana, 1 serving ofGrass Fed Whey,Sprouted BrownRiceorPea protein powder, blended with ice and water) 1 teaspoon of Fish Oil taken separately (or 2 capsules ofkrill oil)
Post Workout Organic Plain Nonfat Greek Yogurt 2 Tbs of Chopped Walnuts 1/2 cup Organic Blueberries
Lunch Large Green Salad made up of 1 cup Baby Romaine, 1 cup of Spinach, 1 cup of Cabbage topped with Cucumbers, Tomatoes, Mushrooms Protein can be mixed in. 1 Can of Wild River Tuna. Just tossed with vinegar, mustard, green onions and celery. Dressing for salad can be LIGHTLY tossed with Olive Oil, lemon, and vinegar.
Snack 1-2 Red Peppers and 1 Sliced Cucumber 3 Hard Boiled eggs with 1 yolk
Dinner 1 bunch of Grilled Asparagus and Zucchini lightly tossed in Olive Oil and Himalayan Pink Salt 3-4 oz of Organic Chicken or Turkey grilled, baked, or slow cooked. 1/2 cup Organic Low Sodium black beans topped with Pico De Gallo
Evening Snack (Only if hungry) 2oz of Organic Chicken or Turkey Sliced cucumbers and celery
Keep in mind that you can get as creative as you’d like with this program. Always remember to drink fresh water throughout the day. If you end up doing a very hard workout while on this diet, then you might want to sip on coconut water.
Stick to the main concept of low starchy carbohydrates, lots of vegetables, and lean proteins, along with some fruit and small amounts of healthy fat, and you will see amazing results. If you do try this program, I’d love to hear how it goes for you.
If you’re reading this right now, you are someone who wants to take their training to the next level and find the most efficient ways to reach your optimal fitnessgoals.
As an MMA conditioning coach I understand that combat fighters are some of the best conditioned athletes in the world. The intensity of fights are non-stop and one mistake can lead to defeat.
As important as skill training is, if you don’ t have the strength and conditioning to utilize your skills, then you are useless.
Developing peak overall physical condition is the ultimate goal while training for power, explosiveness, strength, speed, agility and muscularendurance.
You don’t need to be an MMA athlete to gain the benefits from these workouts. This type of training has become popular with fitness enthusiasts who want to improve their VO2 max, strength, power, and agility while burning fat and building lean muscle.
What Are Metabolic Conditioning (MetCon) Workouts?
Metabolic conditioning workouts use exercises that burn lots of calories during your workout and keep the body burning calories after your workout ends. They usually involve the entire body, short periods of rest and are designed to push the limits of your body to build strength and endurance while getting toned. The workouts below are some of the toughest and most challenging exercise plans on the planet, which means you, will improve your overall conditioning fast.
My metcon workouts are a mixture of burpee variations with strength, plyometric,coreandabsmovements. Each circuit consists of 10 exercises; five are burpee variations and the other five are strength exercises.
Each metabolic conditioning workout is full body and will target the following movements:
âKettlebellor Compound Strength Movement â Abs or Core â Lunge orSquat â Push or Pull â Press
The burpee variations will also consist of these movement as well, making metabolic conditioning the ultimate workout.
The metabolic circuits consist of power training, plyometrics, strength and conditioning, cardio, muscular endurance and core development.
These metabolic circuits will help you improve your overall fitness – using your Bodyweight,Kettlebells, Dumbbells, Barbells, Medicine Balls, Stability Balls, Resistance Bands, Sandbags and other fitness equipment to jack up your metabolism, burn body fat and improve your overall work capacity.
The bi-product is usually a strong, lean and ripped body.
Finally metabolic circuits will test you mentally and push you to your physical limits. Be prepared for battle andDO NOT QUIT!
Metabolic Conditioning Workout Instructions
Perform as many reps as possible of each exercise for 60 seconds followed by a 15 seconds rest one after the other with no rest in between.
âRestfor 2 minutes and repeat for 3 Full Rounds. âWorkout Time= 41 minutes.
Warm up before and stretch after this workout.
1. MMA Metabolic Conditioning Workout
Exercise List
1.Side-to-SideKettlebell Swings 2.Alternating Single Leg Burpees 3.Alternating Abs Bicycle Kicks 4.Plyo Push Up Burpees 5.Zercher Forward Lunges 6.Dumbbell Burpees 7.Barbell High Pulls 8.Speed Climber Burpees 9.Dumbbell Punches 10.Burpees
2. MetCon Exercises for Strength and Conditioning
Exercise List
1.Heavy Kettlebell High Pull Swings 2.Burpee Sprawls 3.Rotational Mountain Climbers 4.Side-to-Side Slalom Burpees 5.Dumbbell Side to Side Lunges 6.Double Burpees (2 Push Ups and 2 PrisonerJumpSquats) 7. Stability Ball Roll Ups 8.Grasshopper Burpees 9.Ground and Pound – Alternating Dumbbell Rows 10.Burpee Speed Thrusters
1.Dumbbell Deadlift Curls 2.Slalom Burpees 3.Abs V-Ups 4.Double Knee Tap Burpees 5.Dumbbell Step Ups 6.Double Push Up Burpees 7.Hand to Hand KB Depth Rows 8.Quad Thrust Burpees 9.Alternating Side to Side Lateral Raises 10.Alternating Kick Thru Toe Touch Burpees
4. MetCon Workout for BJJ and Grapplers – Submit to Nothing
Exercise List
1.DB Clean And Press 2.Burpee Kick Thrus 3.Alternating Knee Hip Thrusts 4.Rotating Burpees 5.Goblet Lunge 6.Bunny Hop Sprawls 7.Inverted Rows 8.Rolling Burpees 9.SandBagShouldering Side To Side Cleans 10.Burpee Thrusters Speed
DB Deadlift and Curl 2.Pull Up Burpees 3.Bench/Floor In and Outs 4.Everest Climber Burpees 5.Alternating Barbell Lunges 6.Double Burpee Thrusters with Jump 7.Alternating DB Chest Press 8.Burpee Plank Raises (Bridges) 9.DB Front Raise 10.6 Count Burpees – (Burpee – Push Up – Jump)
]]> https://www.onnit.com/blogs/the-edge/train-like-a-modern-wwe-champion-official-seth-rollins-workout2025-07-10T10:55:24-05:002025-08-15T07:40:58-05:00Train Like A Modern WWE Champion: Official Seth Rollins WorkoutJeremy Gottlieb This isn’t your stock 3 x 12 bodybuilding split photocopied out of your latest muscle mag. This is the actual Seth Rollins workout he uses when training for the WWE. Try it out for a week and see if you can keep up with the champ.
Official Seth Rollins Workout
Dynamic Warmup
1. JUMPING JACKS x 10 REPS 2. GATE SWING X 10 REPS 3. POGO HOP X 10 REPS 4. SEAL JACK X 10 REPS 5. BODYWEIGHTSQUATX 10 REPS 6. SIDE LUNGE X 10 REPS (EACH SIDE) 7. LUNGE AND ROTATE X 10 REPS (EACH SIDE) 8. REVERSE LUNGE AND REACH OVER TOP X 5 REPS (EACH SIDE) 9. CARIOCA X 10 YDS 10. LIZARD CRAWL X 10 (EACH SIDE) 11. SKIPPING FORWARD X 10 YDS 12. SKIPPING BACKWARDS X 10 YDS 13. FRANKENSTEIN WALKS X 10 YDS 14. FRANKENSTEIN SKIPS X 10 YDS 15. INCHWORM X 5-10 16. HIP SWING X 10 (EACH LEG)
]]> https://www.onnit.com/blogs/the-edge/the-tim-kennedy-workout2025-07-10T10:55:22-05:002025-08-15T08:28:30-05:00The Tim Kennedy WorkoutJeremy GottliebFans can argue day and night about who the toughest fighter is in the UFC—who’s the baddest, or who’s the most dangerous. But if you had to pick the fighter you’d most want to have your back walking down a dark alley, it’s not up for discussion: it’s Tim Kennedy.
And if you had to attach a superlative to him, he may be the fittest. The UFC middleweight is a Special Forces sniper and Green Beret who weathered tours of duty in Afghanistan and Iraq. He walks around at 220 pounds and trains three times daily.
Kennedy starts with a strength and conditioning session in the morning followed by sparring in the afternoon and jiu-jitsu in the evening. Below is an abbreviated example of the kind of metabolic conditioning workout he does.
The Tim Kennedy Workout
Warmup
Workouts begin with mobility drills to warm up, including hip circles, fire hydrants, and runner’s lunges.
Ladder Drills
Place an agility ladder on the floor and run the length of it. Do one pass by putting one foot in each box. On the second time through, put both feet in each box. Repeat both drills moving laterally in each direction. (Kennedy does 10 varieties of ladder drills in all.)
Cone Drills
Place 4 cones on the floor in a straight line 10 meters apart. Sprint to one, lateral shuffle to the next, then crossover step to the third and backpedal to the fourth. Reverse the order going back and repeat for 5 rounds.
Pullup Ladder
Perform 1 rep and drop from the bar. Then do 2 reps, 3, and so on up to 6 reps. Then work back down to 1. Repeat for 3 sets.
Rooney Complex
Load a barbell with 95–135 pounds and perform the following lifts in sequence: deadlift, bentover row, hang clean,front squat, push press, back squat, and pushups on the bar. Complete 6 reps for each lift and do 4 rounds total. Add 10 pounds each set. End every set with a 45-second sprint.
Perform a burpee holding a medicine ball. When you come up to standing, pick up the ball, reach overhead, and then slam it into the floor and catch it on the rebound. Now perform a box jump holding the ball. That’s one rep. Do 4 sets of 10.
Rower
Row for 500 meters as fast as you can and then rest for as long as it took to row. Repeat for 400 meters, and so on down to 100.
Decompression
Perform stretches and yoga poses (plank, downward dog) to promote recovery.
Kennedy takes a bevy of supplements to aid his performance and recovery. These includeMCT oil,Total Strength+ Performance pre-workout formula, Shroomtech Sport,Total Human,grass-fed whey protein, Powerfood Active, and Oatmega Protein Bars.
]]> https://www.onnit.com/blogs/the-edge/top-10-core-exercises-for-mma-fighters2025-07-10T10:55:22-05:002025-08-15T07:53:32-05:00Top 10 Core Exercises for MMA FightersJeremy Gottlieb
Coredevelopment is an essential physical attribute for any MMA, martial artist, combat, or sports athlete. Dedicated fighters understand its importance in increasing explosive power, improving overall strength, maximizing mobility, reducing stress on the body, and minimizing your injuries.
The unfortunate thing is that core training is often overlooked by most combat athletes or they minimize core training to basic plank exercises. If you want to achieve superiorfitnessand improve overall athletic performance then you need to prioritize exercises designed specifically to build a stable core into your strength and conditioning program.
In this article we will look at what the core is, its function, and benefits to combat fighters and athletes using the best bodyweight core exercises that you can introduce into your workouts immediately.
What is the Core?
The core is a collection of muscles, which stabilize, rotate and move the spine. Close to the spine and deep inside the abdomen is the inner core, which is composed of the diaphragm, pelvic floor, multifidi, deep cervical flexors, and transverse abdominis. These strange-sounding muscles engage first during movement or breathing to protect the spine.
The outer core muscles are also responsible for stabilizing and protecting the spine, and include the lats, spinal erectors, glutes complex, and hip flexors. The anterior muscles (abdominals) are the most well known members of the outer-core assembly.
The Function of Core Exercises for MMA Fighters
The core works as one unit, stiffening to protect the body and to transfer force from our lower body to our upper body during athletic movements. The core is also the most important factor for transferring explosive power. When your core muscles are weak, then your nervous system puts a HALT to any explosive movement as a protective mechanism to support the spine.
This means if you are throwing a strike or a kick, your energy will not make it into your strike. Also, when you have insufficient core stability, it will set you up for injury and limit your mobility.
If your core is strong when your fist lands, the force of your strike will transfer through your opponent. Generating a knockout punch, thanks to the strength of a stable core. The force generated from the legs and through the core during a Judo throw, is one example of this.
A strong and stable core also allows the body to function as an integrated unit and compete the throw with force. If the core is weak, the bridge will collapse and the extremities will, in turn, be weak.
A Muay Thai clinch is another move where core stability is vital. Your goal being to deliver knees, elbows, and throws to keep your opponent in check. You need to develop your core stabilization strength to better take advantage of this position.
Having good rotational and anti-rotational core strength is important as well. Let’s take grappling for example, when your opponent wants to pass your guard by throwing your legs to the side, if you have good core strength, it can help you repulse the guard pass.
Rotational strength will also help with striking when you rotate from your hips and shoulder to add extra speed. A Strong Core Improves Athletic Performance.
The muscles of the trunk and torso stabilize the spine from the pelvis to the neck and shoulder, they allow the transfer of power to thearmsand legs. All powerful movements originate from the center of the body out, and never from the limbs alone. You need to develop a stable spine defore any powerful, rapid muscle contractions can occur in the extremities.
Basically, every athletic movement that a combat athlete needs to perform needs the use of a strong core.
Core Exercises that Improve Athletic Performance
Now that you understand the importance of developing a strong core, let’s take a look at the type of exercises that will help you to achieve this. I am going to show you the top bodyweight core exercises so you can see that you don’t need any fancy pieces of equipment or weights to achieve a rock solid core.
Anti-Flexion and Core Stability Exercises
The goal of anti-flexion exercises is to resist flexion or bending through the lumbar spine. The key when performing these movements, however, is to keep your low back neutral and squeeze your glutes at the midpoint of the movement. Exercises likePlanksand Back Extensions can help.
Anti-Extension Core Exercises
The goal of anti-extension exercises is to resist extension through the lumbar spine. You must keep the spine neutral and do not allow your lumbar spine to overextend. Exercises such as theAb Wheel, Stability Ball, and Bodyweight Roll Outs are good examples.
Anti-Lateral Flexion Core Exercises
The goal of anti-lateral flexion actually is to resist lateral flexion, or side bending, through the lumbar spine. The key is to lock your spine into place and not move it.Using exercises likeSide Planks, Farmers Walks, or just holding a dumbbell in one hand for time without allowing side bending is great.
Anti-Rotation – Rotational
With anti-rotation exercises, the goal is to resist rotation through the core and lumbarspine. The key here is to lock the core down and not allow any rotation through the core and lumbar spine. Exercises like the Pallof press or Anti-Rotation bag holds are great exercises. For rotational exercises the goal is to rotate through the thoracic spine. These movements can help with general mobility and striking power. Exercises like Medicine Ball Throws, Band Rotations or Tight Rotations are great.
Hip Flexion
Hip flexion exercises need to be done with a neutral spine, without rounding the lower back. The goal of these exercises is to keep your core and low back in a neutral position, while simultaneously flexing your hips. Performing exercises like Jackknifes on a stability ball and Hanging Leg Raises can help.
What Are the Best Bodyweight Core Exercises?
Core exercises are most effective when they engage many muscles throughout the torso that cross several joints and work together to coordinate stability.
Core muscles need to work as a unit, contract at the same time, across different joints in order to stabilize the spine. Some of the best core exercises are simple bodyweight exercises.
Not everyone has access to equipment that many core exercises and movements are used with. But you can get incredible results from just using your bodyweight and the right core exercises to develop strength and stability. Start all exercises with your bodyweight and then progress to resistance, advanced, or unconventional exercises.
Check the 10 Best Bodyweight Core Exercises for Athletes and non-athletes a like. If you want to develop a solid core structure to help improve performance, increase power, and develop overall strength, then start implementing this exercises into your weekly training.
Bodyweight Hand Walk Outs - Anti-Extension Exercise
Push Up Plank Alternating Shoulder Touch - Anti-Flexion and Core Stability Exercises
Short Back Bridge – Core Stability and Hip Flexion
Tight Rotations - Anti-Rotation – Rotational
Bird Dog Variations - Anti-Lateral Flexion Exercises
Side Bridge or Side Plank - Anti-Lateral Flexion Exercises
Plank Bodysaw– Anti Extension
Dead bugs – Anti Extension
Hip Thrusts – Hip Flexion
Hanging Leg Raises - Hip Flexion
So now you have an understanding of how important core training is to your overall athletic performance as a combat athlete, start dedicating core training session into your overall strength and conditioning program.
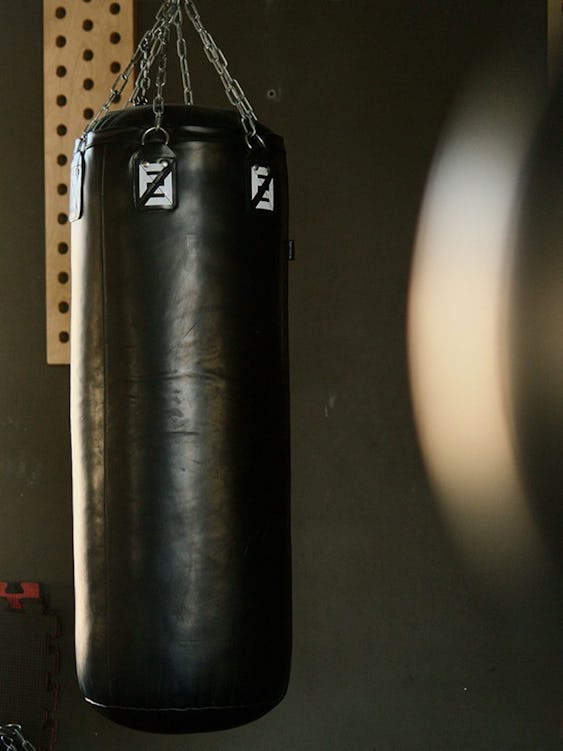
]]> https://www.onnit.com/blogs/the-edge/heavy-and-punching-bag-workouts-the-expert-s-guide2025-07-10T10:55:18-05:002025-08-15T08:39:32-05:00Heavy and Punching Bag Workouts: The Expert’s GuideJeremy GottliebMost people don’t get excited about running on a treadmill or pedaling a stationary bike, but almost everyone likes the idea of wailing on a heavy bag for a workout. Boxing/martial arts training speaks to a primal instinct we all have (that is, the instinct to kick ass), so, in addition to packing a punch conditioning-wise, it’s fun to do. If you’re the type who loathes conventional cardio, it’s time you learned how to lace up the gloves to knock out body fat.
Apart from beating boredom, bag training offers some functional, athletic advantages that more mainstream modes of cardio don’t. “On a treadmill, bike, or rowing machine, there’s a consistent cadence, and your breathing is rhythmic,” says Onnit Pro Team managerAndrew Craig, who’s also a veteran of the UFC’s middleweight division.“But when you train with a heavy bag, your inhalations and exhalations are rapid and varied.”This makes them similar to how you would breathe in a fight, and most other stop-and-go, anaerobic activities. Assuming your striking technique is good, you’ll generate power that starts from your feet, and is then released with the twist of your torso. “The rotation required to throw a punch or kick works just about every muscle in your body. You move through multiple planes of motion in ways you wouldn’t with any other training tool.”
In this article, you’ll learn all about how to train with a punching bag, including the best bag to get and the right gear to go with it, and you’ll discover two punching bag programs that you can use for full-body workouts that get you lean and conditioned. It’s the baddest cardio on the planet!
What’s the Difference Between a Heavy Bag and a Punching Bag?
First, let’s clear up a small but significant matter of terminology. Many people refer to heavy and punching bags interchangeably, as if they’re one and the same. However, a heavy bag is just one type of punching bag.
“A regular heavy bag is usually four or five feet long, and is mainly used for punching,” says Craig. They often weigh between 30 and 200 pounds, and typically hang from the ceiling or another structure overhead. The heavy bag doesn’t move much when you strike it (hint: because it’s heavy).The classic heavy bag is a cylinder shape, but there are offshoot bags with different designs that offer distinct training advantages.“There’s abanana bag, which is longer—up to six feet—and often thinner,” says Craig. “Because of its shape, it’s easier to strike this one with your knees or elbows.”
There are also bags with contours that simulate an opponent’s body, making it easier to throw specific kinds of punches like uppercuts and body shots. However, unless you have a martial arts or boxing background, or you’re ready to invest in some expert coaching to learn good striking technique, Craig suggests restricting your workouts to throwing punches.“These other kinds of strikes are highly skilled movements, and you might hurt yourself if you don’t perform them properly.”
The term punching bag can encompass a variety of tools. The most prominent is probably the free-standing bag, which is basically a heavy bag that’s mounted to a base. They’re usually weighted down with sand or water, and can be rolled anywhere you want to place them, which makes them convenient to move and easy to set up in a home gym (especially if you can’t mount a heavy bag on your ceiling or wall).Free-standing bags usually spring back into place after you hit them, making them a good option to practice kicks on.Nevertheless, Craig isn’t a fan of bags mounted to a base because they can alter the footwork fundamentals needed to get in position to strike the target. These bags can slide and wobble on the floor when you hit them, changing your distance from and orientation to the bag throughout the workout. The dynamics of how they recoil can cause problems, particularly for a novice.
Speed bags are the small, ceiling-mounted, teardrop-shaped ones you’ve seen in videos of old-time boxers training (and all theRockymovies where Stallone makes them rattle so fast you wonder if they sped up the tape in the editing process).Speed bags are great for improving reaction time, boosting hand-eye coordination, and, as the name suggests, developing punching speed,but they aren’t meant to be hit hard, and you don’t use the same striking technique you do for power punches. As they’re really a specialized tool for dedicated boxers, Craig says not to bother with a speed bag until you’ve gotten a heavy bag and mastered the boxing basics.
What Heavy Bag is Right For Me?
Back in the day, any boxing gym worth its salt would only have leather heavy bags. Though there are a bevy of man-made materials available now that all promise greater durability, Craig thinks good ol’ animal hide is still the way to go for longevity, quality, and feel. Generally, you’ll want a heavy bag that’s equal to about half your bodyweight.So, if a brand has three different weights available—say 75, 100, and 125 pounds—most adults should go with the middle option.As long as the bag doesn’t swing or shake dramatically with every blow you land, it’s offering enough resistance to provide a good workout. Heavy bags range in price depending on the size and material (leather, while more durable, is costlier than vinyl), but you can expect to spend more than $100.
Most bags come pre-filled, but you can save considerable money by buying an empty one and stuffing it yourself. Take a pair of scissors to some of your old T-shirts and shove those rags into the bag. However, bags can also be filled with sand, water, textiles, and air.
Hitting a bag with bare fists or workout gloves is about as dangerous as walking up to Mike Tyson and telling him he talks funny. If you’re going to train like a boxer, you need to go all in, and that means investing in gloves. Again, Craig recommends leather. Store sold out? Then synthetic leather is a good backup option.Get a 12 or 14-ounce pair, which are usually sold separately from a bag.Punching bags are often bundled with 16-ounce gloves, but Craig says those are more suited for sparring in the ring, and the weight of them will make your forearms and hands fatigue quicker when you try to pound the bag with them.
Gloves don’t just fit over your naked hands. Your fists have to be wrapped first to help stabilize them and prevent injury.Craig recommends cloth hand wraps that are at least 180 inches long each(they come in packs of two). Two other styles—quick wraps and elastic wraps—are also popular, but many people don’t like how the elastic feels on their hands. The old-school cloth wraps also absorb more moisture, keeping your hands dryer and reducing the risk of painful chafing. The one exception is if you’re always pushed for time, and scheduling your workouts is a challenge. In this case, quick or elastic wraps can help you start your heavy bag session without having to individually bundle up each paw like an Egyptian mummy.
Need specific brand recommendations? Of course, there’sEverlast, probably the biggest name in boxing equipment. But Craig also likes the Muay Thai kickboxing favoriteFairtexto supply a bag, gloves, and wraps, withINFIGHTSTYLEandAction Pro Gearalso high on the list. Failing that, go with a classic boxing brand likeTITLEorRingside. If you can’t find the gear you need because every vendor is sold out, look on Craigslist, eBay, or, as sad as this is to say, a local gym that is going out of business. Check for wear and tear before you buy, and don’t feel bad about offering much less than what the seller is asking. Shrewd shoppers can pay as much as 50% less, and even get the stuff delivered free.People who sellfitnessequipment see it as clutter (and often heavy, dirty, cumbersome clutter at that), and they’re usually desperate to get rid of it.Just tell them you can pay in cash, and you’ll take the gear right away. Ultimately, you’re doing them a favor, and they know it.
How To Stretch Before Hitting The Bag
Use the following warmup routine from Andrew Craig to prepare your body for a punching bag workout.
Step 1.Step back with your right leg and lower your body into a lunge until your back knee is slightly above the floor and your front thigh is parallel to the floor.
Step 2.Pivot on your right foot as you turn your knee out and stay low, so that you end up in a sumo squat, facing 90 degrees to the right of where you started. Reverse the motion to return both feet to standing and facing front. Repeat on the opposite side.
2 Quick Feet Drill
Reps:20
Step 1.Stand just behind a line on the floor with your feet shoulder-width apart and a bend in your knees.
Step 2.Step your right foot just over the line, and then the left foot. Step the right foot back behind the line, followed by the left. Each step over the line and back is one rep. Move your feet fast, minimizing contact time with the floor.
3 Scorpion Pushup
Reps:4
Step 1.Get into pushup position with your hands shoulder-width apart. Tuck your pelvis slightly so that it’s perpendicular to the floor, and brace yourcoreand glutes.
Step 2.Lower your body until your chest is about an inch above the floor. As you go down, raise your left leg off the floor and reach it up and behind you, and twist it toward the floor on the opposite side. Continue until you can tap the floor with the bottom of your foot.
Step 3.Press your body back up, uncoiling it and returning the leg to the floor. Repeat the pushup, lifting the right leg. Each pushup is one rep.
4 Wall Suplex
Reps:2
Step 1.Stand in front of a wall, facing away from it, with feet slightly wider than shoulder width. Squat down halfway, and then extend your back, reaching overhead until you can touch the wall behind you with both hands.
Step 2.Drive your hands into the wall so it can support your weight, and brace your core. Walk your hands down the wall toward the floor as far as you can—if your lower back gets uncomfortable, stop.
Step 3.Walk your hands back up the wall and return to standing. That’s one rep.
5 V Up
Reps:10
Step 1.Lie on your back on the floor and extend yourarmsoverhead and behind you.
Step 2.Draw your arms forward in front of you while you perform a situp and simultaneously raise your legs. Your body should form a V shape at the top.
6 Quick Feet Drill
Reps:20
Repeat the quick feet drill from above.
7 Scorpion Pushup
Reps:4
Repeat the scorpion pushup.
8 Wall Suplex
Reps:2
Repeat the wall suplex.
9 V Up
Reps:10
Repeat the V up.
10 Switches
Reps:20
Step 1.Stand with your right leg in front of a line and your left behind it.
Step 2.Quickly switch your feet back and forth. Each switch is one rep.
Step 1.Hold the rope with hands at hip level and stand tall.
Step 2.Jump over the rope with both feet, landing on the balls of your feet. You can land with both feet at once, or one at a time. Mix up your jumping styles as you become more comfortable.
The Beginner’s Punching Bag Workout
If you’re brand new to bag training, try this routine from Craig. It uses only punches, so the risk of injury is low, even if your technique isn’t solid.
If you’re unclear how each punching technique should be performed, here’s a quick guide to some boxing basics.
Stance.Stand with your feet about shoulder-width apart and legs staggered. If you’re right-handed, your left leg will be in front, and you’ll jab with your left hand while your right is reserved for power shots. If you’re a southpaw, stand with your right foot in front. You should feel balanced in your stance, and your hands should be held at the sides of your chin. Your chin is tucked, and your elbows are near your sides. At the end of every punch, return your hand to your chin immediately.
Jab.This is your main weapon—a quick, short punch done with the lead hand. Throw your front hand straight out, turning your knuckles toward the ceiling as yourarmlocks out. Your knuckles should point up just as the punch snaps to completion. Typically, the jab is done while taking a small step forward.
Cross.A power punch thrown with the rear hand. Drive through your rear foot, pivoting on the ball of the foot to turn your hips as you throw it. Again, turn your knuckles as the arm extends.
Hook.This is a swinging punch that can be done with either hand. Bend your elbow 90 degrees, and bring your arm up until it’s parallel to the floor. Twist your body, pivoting your foot to deliver the punch. The palm can face down, or toward you.
Uppercut.Once you’ve set up an opponent with jabs and crosses, you can often finish him/her with an uppercut to the chin or body. The movement is almost the same as the hook, but the punch comes on an upward trajectory. Shift your weight to the side that will throw the punch, and then throw it upward with your palm facing you and elbow pointing down.
On every punch you throw, let the first two knuckles of your hand (the index and middle finger knuckles) deliver the blow.Landing with the smaller knuckles will injure your hands. Try to stay relaxed as you’re moving with your hands up, and exhale forcefully as you throw each punch. Move your head from side to side when you throw punches.
Directions:Perform 6 rounds as directed. All rounds are 3 minutes, followed by 1 minute of rest (so set a timer!). Before you begin, wrap your hands, and use them for the first round of shadow boxing. Then put your boxing gloves on and use them for the rest of the workout.
Round 1: Shadow Boxing
With your hand wraps on, move around while you throw punches. Try to stay light on your feet and cut angles so your body is never square to your target. (You don’t need the bag yet; just box against an imaginary opponent.) Throw jabs, crosses, hooks, and uppercuts, andfocuson your breathing while you warm up slowly.
Round 2:Build Drill on Bag
With your boxing gloves on, cycle through these four combinations on your heavy bag.
Jab
Jab, cross
Jab, cross, hook
Jab, cross, hook, cross
Jab, cross, hook
Jab, cross, hook, cross
– Take a second between each combo to address your stance and defense (hands up!). Don’t stay in one spot in front of the bag the whole round—move at angles, imagining the bag is an opponent you want to cut off from the rest of the ring.
– After the combinations, hit 20 quick, straight punches for speed, alternating hands, while standing right in front of the bag.
Straight Punches
– Now perform a burpee—squat down, shoot your legs back so you land in a pushup position, and then reverse the motion to stand back up.
– Repeat the combinations, straight punches, and burpee for the whole round. When there are 10 seconds left on the clock, fire off straight punches nonstop, alternating hands.
– When the round ends, do 5 burpees.
Round 3: Jab, Cross Combos
Cycle through the following combinations.
Jab, cross
Jab, jab, cross
Jab, jab, jab, cross
– The cross always comes hard, but the jabs can have different cadences behind them. In the example below, a short dash indicates a quicker combination, while a longer dash represents a slower combination with a longer pause between strikes. Experiment with all of them, and make up your own.
Jab-cross vs. jab—cross
Jab-jab-cross vs. jab—jab-cross
Jab-jab-jab-cross vs. jab-jab—jab-cross
– When there are 10 seconds left in the round, throw straight punches nonstop, alternating hands.
– When the round ends, do 5 burpees.
Round 4: Same-Side Hands
Alternate the following two combinations. You’ll do combo 1 with your rear hand and combo 2 with your lead hand.
Combo 1
Rear uppercut
Cross
Hook
Combo 2
Jab
Lead hook
Cross (this is the exception; use your rear hand to cross)
– When there are 10 seconds left in the round, throw straight punches nonstop, alternating hands.
– When the round ends, do 5 burpees.
Round 5: Slow to Fast, Fast to Slow
Throw 5 slow/soft punches on the bag with both hands and, immediately after the fifth punch, rip off 3 hard and fast punches.
– Without resetting, repeat the 5 slow punches and 3 fast punches. Continue for the duration of the round.
– When there are 10 seconds left, throw straight punches nonstop, alternating hands.
– When the round ends, do 5 burpees.
Round 6: 7-Second Drill
Stand close to the bag so you don’t have to step in for all your punches. For the first 7 seconds of the round, hit the bag as hard and fast as you can. Rest 7 seconds, and then repeat the drill till the end of the round.
– Keep your hands up even while you’re resting. Maintain a bend in your knees, and keep moving your head side to side.
– When there are 30 seconds left in the round, throw straight punches nonstop, alternating hands.
– When the round ends, do 5 burpees.
The Ultimate Heavy Bag Workout
This workout from Craig is for experienced strikers, and utilizes all weapons, meaning the hands, feet, elbows, and knees. Do not attempt it unless you’ve already had some instruction in kickboxing or Muay Thai.
Directions:Perform five rounds as directed. All rounds are 3 minutes, followed by 1 minute of rest.
Remember to practice defense and footwork. Don’t stand still between combinations. Keep your hands up, and use slips, rolls, and pulls (head movement) to evade counterattacks. Think about stepping out of range after every combo you throw. This will ensure you have to also step into your punches when initiating each combo.
Round 1: All Weapons
Work the following combinations for 30 seconds each.
All punching combos
All elbows
Skipping knees
Right kick
Left kick
Push kick
Elbows
Skipping Knee
Push Kick
– At the end of the round, throw a jab, cross, hook, cross with maximum power.
Round 2: Hook and Kick
Perform a lead hook, followed by a rear kick. Now throw a cross and then a switch kick. Let the switch kick land you in the opposite of the stance you started in.
Switch Kick
– Repeat the drill back and forth in both stances for the duration of the round.
– Vary your power output, and change the level of your kicks.
– At the end of the round, throw a jab, cross, hook, and cross with maximum power.
Round 3: Body Work
Cycle through the following combinations.
Combo 1
Jab to the head
Cross to the body
Hook to the head
Combo 2
Jab head
Cross head
Hook head
Hook body
Combo 3
Jab head
Cross head
Hook body
Hook head
Combo 4
Jab head
Jab body
Cross head
– At the end of the round, throw a jab, cross, hook, and cross with maximum power.
Round 4: Slip/Roll Drill
Jab, cross
Slip
Cross, hook
Slip
Hook, cross
Roll
– Repeat the combo, but replace the slips with rolls.
– At the end of the round, throw a jab, cross, hook, and cross with maximum power.
Round 5: 4 Series
Jab, rear kick
Jab, cross, switch kick
Jab, cross, hook, rear kick
Jab, cross, hook, cross, switch kick
– At the end of the round, throw a jab, cross, hook, and cross with maximum speed and power.
Circuit Training with Heavy Bags
A circuit is a series of exercises done back to back with little or no rest in between. Circuits get your heart rate up and keep it elevated, which improves conditioning, and they can burn a lot of calories in a short time. Perform the following circuit on the bag with your boxing gloves on.
Directions:Perform the first exercise for 30 seconds straight, and then rest 10 seconds. Then go on to the next exercise and do the same. Repeat until you’ve completed every exercise in the circuit, and then repeat the circuit for 5 total rounds.
1 Straight Punches
Hit the bag with a right-left-left-right combination with full power.
2 Kick Combinations
Alternate legs for the following kick combinations.
1 right kick
1 left kick
2 right kicks
2 left kicks
3 right kicks
3 left kicks
3 Alternating Jumping Lunge
Get into a lunge position and then explode upward, switching your legs in mid air and landing with the opposite leg in front. Immediately jump again and switch back. If you can jump high enough so that you have time to fire a knee strike at the top of the movement, do so.
4 Hooks On the Bag
Square yourself up to the bag and throw hooks in a right-left, left-right combination. Use full power—rip them!
5 Kick Combinations
Repeat the kick drills from #2.
6 Pushup with Shoulder Tap
Perform pushups, tapping your shoulder with the hand opposite to it at the top of each rep. So, do a pushup, and at the top, touch your left hand to your right shoulder. On the next rep, touch your right hand to your left shoulder.
For your cooldown, end each bag training session with three minutes of slow and smooth shadow boxing. Keep moving your feet, and consciously slow down your breathing.
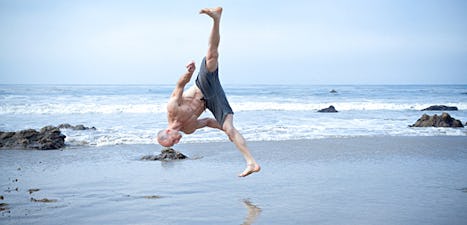
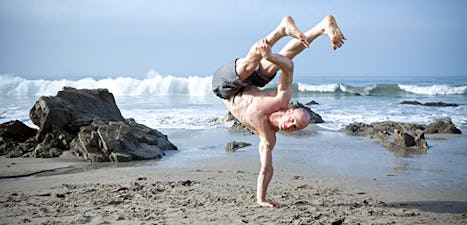
]]> https://www.onnit.com/blogs/the-edge/the-top-5-capoeira-moves-to-get-started2025-07-10T10:55:17-05:002025-08-15T09:20:29-05:00The Top 5 Capoeira Moves to Get StartedJeremy GottliebBefore getting to the main point of this article, I would like to identify two different groups that may want to get their foot in the door of the art of Capoeira.
The first group is the Capoeira enthusiasts, these are the ones that are passionate about the art and want to get started. The second is variousfitnessand movement practitioners who would like to enrich their world and experiment with different types of movement, perhaps to adopt a few tools to complete their own practice, or acquire tools, methods, and a different perspective for their instructional tool kit to use.
Both of these groups of people will be engaging in capoeira for different reasons, and their individual progress should be made different to efficiently accomplish their goals.
Why Learn Capoeira Moves?
Capoeira touches many fields of fitness, skill work, and movement quality that could be distilled for the purposes of the second group, without the actual practice of the Capoeira basics, which are required for becoming a legitimate practitioner of the art form and body language.
Qualities that can be found in the art are active flexibility, balance positions and transitions, strength and mobility of posterior kinetic chain, explosive strength, tactical movement, dexterity, agility, relative strength, body control, rhythm, interaction on many levels, and expression.
The art could be used to develops various types ofenduranceand coordination. There is a wide range of topics that could serve the interest of the general crowd. I will simplify the direction of this article and address the first group with reference to the second group as well.
Capoeira Moves #1: Ginga
First move that is usually practiced by the beginner Capoeira practitioner is the ‘Ginga.’ This move is a dynamic combination of partial rangeSquatand Lunge. For various purposes the movement can be wider and deeper or practiced in different ways. This move usually first challenges coordination. At that level, the rest of Capoeira movements are usually rather confusing. After a few sessions the ‘Ginga’ gets better understood and performed, at that point lots of the capoeira foot work is made easier as well.
Capoeira Moves #2: Spinning Kicks
The second thing to learn is the spinning kicks. Those are movements that help us move around inside the Capoeira circle, as well as create a fluid interaction with a partner. The most basic ones are:
Meia lua de frente
Meia lua de compas
Armada
Queixada
Capoeira Movement #3: Escapes
The third category of moves are the Escapes. Similar to boxing, we use dodges, to which we call escapes or in Portuguese: “Esquivas.” Escapes are what makes the capoeirista different then most other martial arts. A persons ability and quality of escaping could determine his Capoeira proficiency, and allow him to play an inside game, which is considered the more interesting form of interaction. While every Capoeira move could be a form of attack or escape, here are a few of the more basic escapes that are good to start with:
Capoeira Movement #4: Floor Transitioning
The forth category would be floor transitioning. From the most basic form of traveling the floor, allowing oneself to be at different places in relation to his or her partner, and the ability to move in all directions from any position. These qualities in the more advanced form could also serve as transitions between various acrobatics, keeping the momentum of moves, and translating them into further ones. At higher levels, the quality of the balance shifts between the four limbs increases, and the movement becomes more supple and fluid. Here are the basic floor transitions:
Capoeira Movement #5: Frontal Kicks
The last category is more efficient forms of attack, the frontal kicks. Those are harder to anticipate in a real fight situation, though it could cause a practitioner in the early stages to lose his flow, and use them in the context of eastern martial arts. It could be argued if these could be as important as learning take downs and counter take downs, but basically this is where the ‘bite’ should be encountered as to make the playful capoeira game more ‘real’.
Where are the Acrobatics?!?
You might notice that I haven’t included any acrobatics in these five categories; the reason is that acrobatics are considered one of the least important movements when teaching a Capoeirista to communicate with his/her body. They are never a requirement for anything in the art. They are a very exciting part of capoeira and could be an entire art by themselves, however, acrobatics are considered the least Capoeira has to contribute to a person. Acrobatics also tend to intimidate many beginner practitioners. Keep in mind that for the serious Capoeirista, learning the music is by far more important than acrobatics.
]]> https://www.onnit.com/blogs/the-edge/mma-fighter-nutrition-plan2025-07-10T10:55:16-05:002025-08-15T09:19:43-05:00MMA Fighter Nutrition PlanJeremy GottliebTake one look at an MMA fighter’s physique, and there’s no doubt these athletes put health at the top of their priority list. Which isn’t a surprise when you learn they usually train three times per day and have a thorough recovery protocol of cryotherapy, ice baths, andsleep.
When creating a nutrition program for these high-performance professional athletes, the most important factor is the quality of food. The mission is quite simple: We don’t count calories. We don’t count macronutrients. We count nutrients. A whole-food approach with afocuson nutrient density and variability.
Unlike Tom Brady’s diet, we do not shun nutritionally sound foods like mushrooms,coffee, and yogurt. Varying the types of food on a daily basis is key. For example, we included a variety of healthy fats from egg yolks toMCT oilto avocado to multiple animal fat sources.
This provided not only the necessary nutrients, but also the flexibility to not eat the same meal every day while feeling good, decreasing body fat, and (emotionally) enjoying the ride.
There are a variety of diet theories out there, but cutting out carbohydrates and sodium should never be considered for a professional athlete anytime during training camp.
Not consuming these essential elements will prevent a healthy water release, can cause mineral imbalances and can seriously impair energy levels and cognitive function.
Key players for any successful nutrition program is consistency, patience, dedication, and transparency with your nutritionist and self.
MMA Fight Diet Plan
Meal 1
â 1 tbsp. MCT oil orEmulsified MCT oil â 1 cup (dry measurement) gluten-free rolled oats or 1/2 steel-cut oats OR 1 large sweet potato OR sprouted grain tortilla equivalent to 50g carbs (~2 large) tortillas â 1 cup berries OR 1 whole orange/grapefruit/apple OR 1 small banana â 2-3 tsp. raw, unfiltered honey (optional) â 6 egg whites (approx. 1 cup liquid egg whites) â 4 whole eggs OR 2 whole eggs + 1 organic, uncured, nitrate-free chicken/turkey breakfast sausage (low sugar) â Vegetables of choice
Note
â For MCT oil: Mix or blend in coffee, drizzle on food after cooking, do not cook with this oil due to its low smoke point. â Measure your oats dry. Cook your oats with water and cinnamon, if desired. Up to ½ cup non-dairy, unsweetened milk is fine to add on oatmeal. Add fruit to oatmeal if desired. Drizzle with honey. â Saute vegetables (ex. spinach, peppers, onions, mushrooms, kale, etc.) in pan with a higher smoke point oil (like coconut or avocado). Add eggs & egg whites to pan, then scramble with vegetables. If you have bacon or sausage, feel free to saute with vegetable for more flavor â If having sweet potatoes, you can dice and make into a delicious breakfast hash with onion, brussel sprouts and/or root vegetables, etc.
Meal 2
â 7 oz. bison, 90/10 lean beef, wild game, salmon OR Chilean sea bass â 8 oz. red-skinned potato OR 1 cup of par-boiledriceor white rice â 2 cups vegetables (cooked and/or raw)
Meal 3
â 8 oz. chicken breast, turkey, any white fish (including canned tuna–look for wild tuna for a lower mercury content) â 5 oz. sweet potato + ½ cup black, kidney or garbanzo beans OR ½ cup of brown rice, wild rice, black rice, quinoa + ½ cup beans or lentils â â avocado OR 1 tbsp. Extra virgin olive oil (drizzle on after cooking) â ½ cup full-fat Greek or Skyr yogurt, plain â 2 cups vegetable
Note
Recipe Idea: Make a healthy chili in a slow-cooker! Use ground chicken/turkey + rice/quinoa/potato + canned crushed tomato + onion/carrot/celery + spices/herbs + beans + broth + top with avocado and full-fat plain yogurt (tastes just like sour cream)
Flex Shake (Within 30 Minutes After Your Workout)
â 1 cup non-dairy milk, unsweetened â 1 cup berries or mango/pineapple â 1 banana â ½ cup dry oats â 40-50g protein (whey protein isolateorvegan proteinpowder, 2 scoops) â 1-2 tbsp. cacao powder OR 2 tbsp. cacao nibs (formagnesium) â 1 tbsp. nut butter of choice â 2 tbsp. chia seeds â 2 cups spinach, optional *Blend with ice and enjoy.
â 8 oz. chicken breast, turkey breast, any white fish (including canned tuna) â 1 ½ cup quinoa, any type of rice or 8 oz. sweet potato/red-skin potato â ½ avocado â 2 tbsp. olive oil, unrefined olive oil (drizzle on after cooking or use as salad dressing) â 2 cups of green veggies (raw and/or cooked) â 2 tbsp. vinegar of choice OR fresh lemon (if having a salad)
Note
â 1 tbsp of following are OK for taste on salads: nuts, unsweetened dried cherries/cranberries, harder cheese like parmesan.
Flex Snack (have on hand when hungry or need a pick me up)
â¼ - ½ cup raw, unsalted nuts (walnuts, almonds, pecans, Brazil nuts etc) + 2 tbsp. goji berries or piece of unsweetened dried fruit OR â 1 Oatmega bar OR â 1 cup full-fat yogurt + 1 toast at Onnit Cafe
Extra Notes
Note: If you prefer 3 meals per day plus a shake, we can disperse “Meal 3” among the other 3 meals to make each individual meal larger by volume.
Morning Start:
â Always weigh yourself empty (no food, no water, no coffee) and dry (no clothes) for consistent monitoring. â Start your day (before eating) with 16 oz. room-temperature water with juice from ½ lemon. This is to help clear your GI tract, for the antioxidant capacity and has shown to increase the absorption for somemineralsfrom food. â Note:there is no scientific evidence for the alkaline-forming benefits of lemon water.
Before Bed:
â Drink serving of Natural Calm for magnesium.
Post-workout Hydration:
â Drink “Recover” from the Onnit Cafe (pure coconut water + 1 tbsp. coconut Emulsified MCT oil + 1 tsp. Himalayan salt) â Drink minimum 1 ½ gallon of water per day until you cut water weight. â Always use Himalayan salt & iodized salt. Alternate. Salt all meals until you cut water weight. â All spices and fresh herbs are fine and encouraged to flavor meals.
Approved Condiments:
â All-natural ketchup (no added sugars) â All mustards (no added sugars) â Avocado-oil based mayo (1 tbsp/ day) â All vinegars â Hot sauce â Natural (no sugar added) salsas (refrigerated aisle, not by chip section)
Recommended Probiotic-Rich Food:
â Consume at least 3-5x/week: Low-sugar kombucha tea (look for <4g sugar per serving), yogurt included in meal plan. â As much as possible: sauerkraut & kimchi (Add to eggs, meals, by the spoonfuls; I like the Smoky Kale Kraut by Wildbrine)
Recommended Daily Supplements:
â Total Human® (daily a.m. & p.m.) â TotalGUT HEALTH™ Pack (daily with largest meal of day) âShroom Tech® SPORT (3 prior to training) âTotal Strength+ Performance (2 scoops prior to training) âMCT oil(as directed above)
Recommended As-Needed Basis:
â VIRUTech® & Shroom Tech® IMMUNE for additional immune support when traveling (both in TPC for daily use) â Krill oil (if you aren’t consuming fish)
Things To Keep In Mind:
Organic produce, pasture-raised poultry, antibiotic-free & grass-fed red meat & dairy, and wild fish is always encouraged.
The nutritional profile of organic produce and conventional produce does not always differ. The degree of pesticides and herbicides used on produce differs as well. Check out the Environmental Working Group website (EWG.org) for an annually updated list of the “cleanest” and “dirtiest” produce.
Keep track of your energy levels throughout day AND while working out. We’ll review energy levels, current weight, libido to see if there’s anything we need to adjust in your nutrition plan as necessary.